Yes, you can replace the broken glass in a sliding patio door yourself, but it's a two-part job: sourcing the exact right glass unit and doing the physical swap safely. The glass in most sliding patio doors is a tempered insulating glass unit (IGU), meaning two panes bonded together with a sealed air or gas gap between them. You can't just cut a single pane to size at a hardware store. You need to measure the existing frame opening, order a matching IGU, then carefully pull the door panel, remove the broken glass, set the new unit in place with glazing tape and setting blocks, and reseal everything before reassembling. Done right, the whole job takes one focused day for a competent DIYer. Here's exactly how to do it.
Replace Broken Glass Sliding Patio Door: DIY Guide

Jamie Archer
16 Jun 2026
Safety first: assess the damage before touching anything
Tempered glass, which is required by building code (IBC Chapter 24) and safety standards like ANSI Z97.1 and CPSC 16 CFR Part 1201 in all sliding patio door applications, shatters into small, rounded pebble-like chunks rather than long knife-edged shards. That's by design and it's genuinely safer. But 'safer' doesn't mean 'safe to handle without protection.' Those small pieces are still sharp enough to cut through skin, and they scatter widely when a large pane fails. Before you do anything else, do this:
- Keep kids and pets out of the area until cleanup is fully complete — glass fragments travel farther than you'd expect
- Put on heavy leather work gloves (not thin latex), safety glasses, long sleeves, and closed-toe shoes before approaching the door
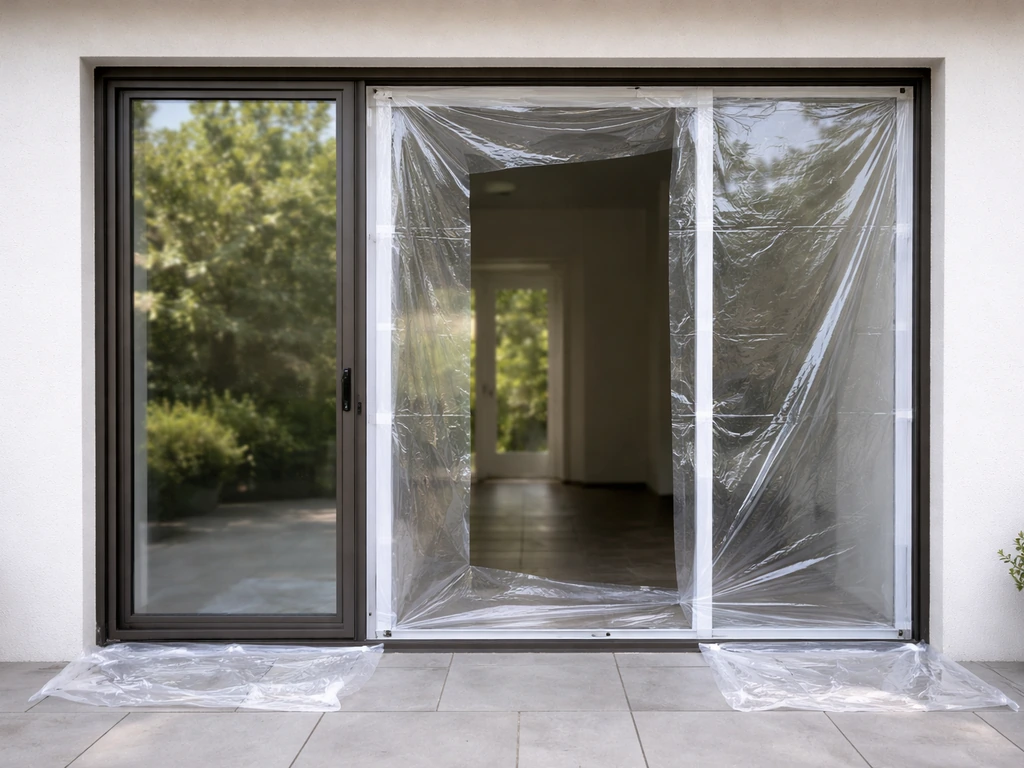
- Tape heavy plastic sheeting over the opening on the interior side to block wind and keep glass from spreading into the house
- Don't vacuum up larger chunks — use a broom, dustpan, and then a damp paper towel for fine fragments; vacuum last
- Check the glass label on any intact corner of the remaining pane — SGCC-certified safety glazing will be permanently marked with its type, thickness, and standard reference
Once the glass is contained, assess the damage beyond the glass itself. Look at the frame (the aluminum or vinyl sash that held the glass), the bottom track, and the rollers at the bottom of the door panel. If the door was hit hard enough to break the glass, it may have also bent the frame, damaged the rollers, or dented the track. Run your hand along the inside of the frame channel where the glass sits, any obvious bending, cracking, or warping in the frame changes the job significantly. A warped frame means you're not just replacing glass, you're potentially replacing the whole door panel or calling a pro. If the frame looks straight and undamaged, you're in good shape to proceed.
Find and order the right replacement glass
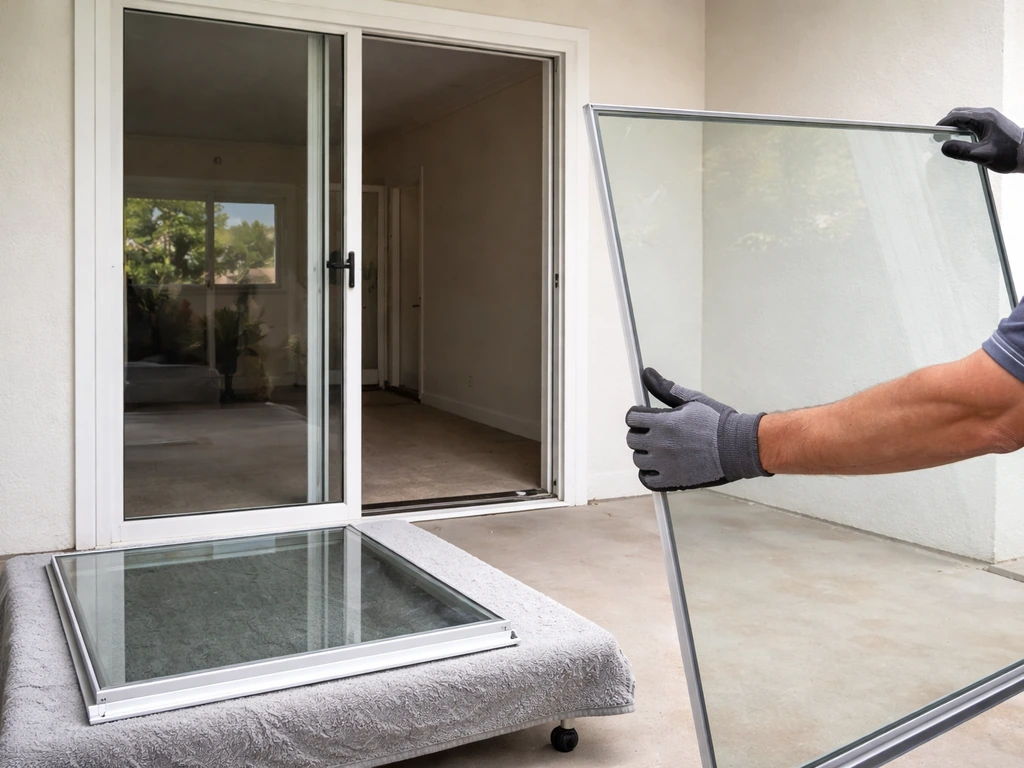
This is where most DIYers make a costly mistake, ordering the wrong unit. If you're dealing with broken patio door glass, make sure you order the correct sealed IGU, not the wrong single-pane type. The glass in a sliding patio door is almost always a sealed IGU, not a single pane. You cannot replace just one layer of a failed IGU; you need to replace the entire unit. Getting the measurements and specs right before ordering is everything.
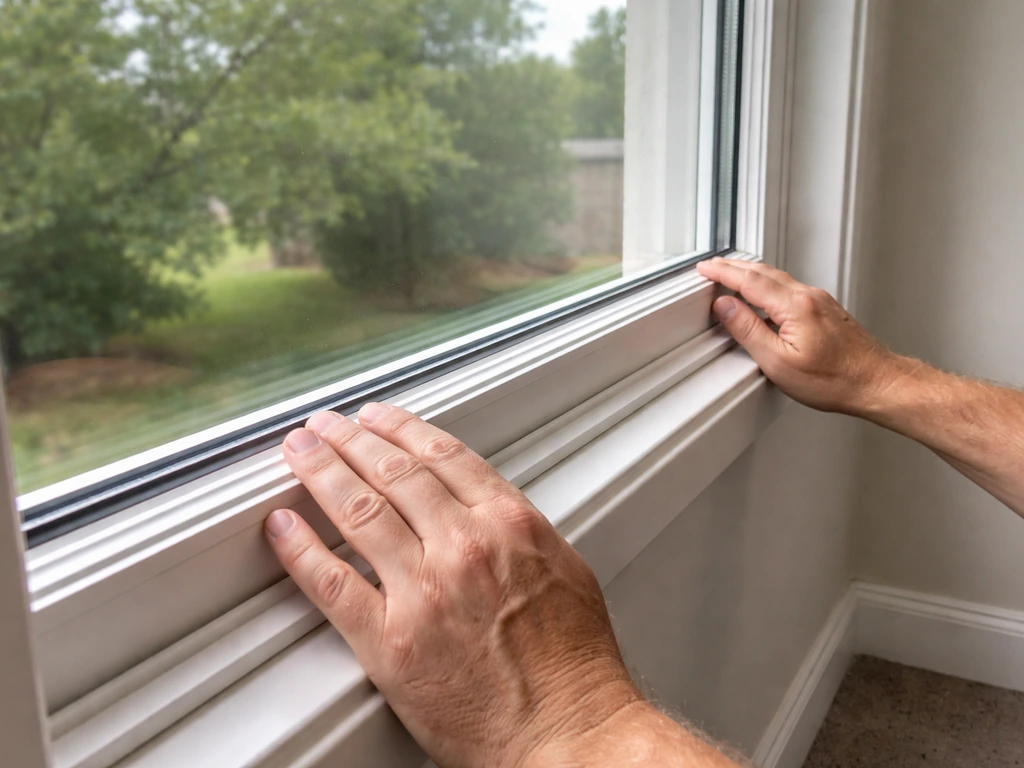
How to measure correctly
You need the dimensions of the glass unit itself, not the overall door frame. Once you've safely removed the broken glass (or if enough of the IGU edge is intact), measure the glass unit's width and height directly. Pella advises measuring the sliding patio door width and height across the door frame with a tape measure extended horizontally and vertically, then recording both dimensions when ordering a replacement measure the glass unit's width and height directly. If the glass is completely gone, measure the inside of the frame channel, the rabbet or glazing pocket, and subtract about 1/4 inch from each dimension to get the glass size (this leaves room for setting blocks and sealant). Measure in three places for both width and height (top, middle, bottom for width; left, center, right for height) and use the smallest measurement. Also measure the thickness of the existing IGU, standard sliding patio door glass is typically 5/8 inch (two 1/4-inch panes with a 1/8-inch spacer) or 1 inch for upgraded units, but this varies by door brand and age. Write all three numbers down: width, height, thickness.
Matching the glass specs
Beyond dimensions, you need to match the glass type. Check any remaining corner of the original glass for its permanent SGCC/ANSI marking, this tells you whether it's standard clear tempered, low-E coated, tinted, or argon-filled. Replacing a low-E IGU with plain clear glass will affect your energy bills noticeably and won't match the rest of the door system. If you can't read the original label, look up your door's model number (usually on a sticker on the frame or inside the track) on the manufacturer's website, Andersen, Pella, JELD-WEN, and most major brands publish glass specs by model. You also need to specify whether this is the sliding panel or the fixed panel, since some door configurations use different glass sizes for each.
Where to source the replacement IGU
- Door/window manufacturer directly: Many brands (Andersen, Pella, JELD-WEN) sell replacement IGUs for their door models — this guarantees a spec-matched unit but can take 2-4 weeks to ship
- Local glass shop: A commercial glass fabricator can cut a custom IGU to your measurements, often faster (1-5 business days) and at competitive prices — call ahead and bring your measurements and the original label photo
- Big-box stores: Home Depot and Lowe's carry some standard IGU sizes, but selection is limited and custom orders through their glass services still take time
- Online glass suppliers: Several online vendors (Glass Doctor, Dulles Glass, etc.) allow you to order custom-sized IGUs with specs including low-E coatings, tints, and gas fills
Budget $150-$400 for a standard clear tempered IGU in a common sliding door size, and $250-$600+ for a low-E or specialty coated unit. Pricing varies significantly by size, thickness, and coating. Have the glass shop or manufacturer confirm the specs in writing before they fabricate, a wrong-size custom IGU is non-returnable.
Remove the broken glass safely
Tools you'll need
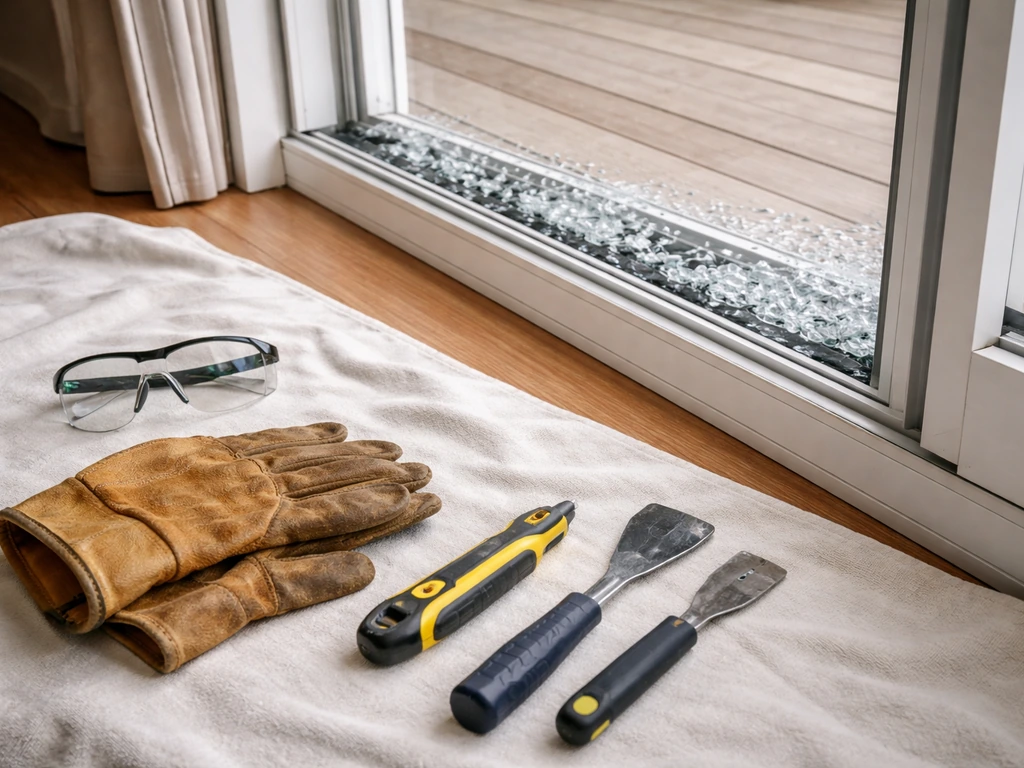
- Heavy leather work gloves and safety glasses (non-negotiable)
- Utility knife or box cutter
- Flathead and Phillips screwdrivers
- Pry bar or putty knife (plastic or wood preferred to avoid scratching the frame)
- Rubber mallet
- Heavy-duty contractor garbage bags
- Duct tape and plastic sheeting
- Shop vacuum
- Painter's tape or masking tape (for stabilizing cracked sections before removal)
Remove the door panel from the track
You'll almost certainly need to pull the entire sliding panel off the track to do this job properly. Most sliding patio door panels lift out: open the door fully, lift the panel straight up (the rollers retract into the bottom frame), then tilt the bottom toward you and lift out. Once the rollers retract and the panel lifts out, you can safely remove shattered glass from the patio door area before replacing the IGU how to remove shattered glass patio door. Some panels have a retainer clip or anti-lift pin at the top, check for a small screw-in tab in the upper track and remove it first. Set the panel on a pair of sawhorses or on a blanket on the floor. If the glass is still largely intact but cracked, tape a large X across both sides with duct tape before removing the panel, this holds the fragments together and makes handling much safer.
Remove the glazing beads and glass unit
Glazing beads are the thin strips of vinyl or aluminum that press against the glass around the perimeter of the frame, holding the IGU in place. They snap or screw into the frame. Start at a corner and use a flathead screwdriver or putty knife to gently pry one bead free, usually the vertical ones first, then horizontal. Work carefully; vinyl beads can crack if you lever too hard, and you'll want to reuse them if they're undamaged. Once all four beads are off, the glass unit should be loose. Cut any remaining sealant or glazing tape around the perimeter of the IGU with a utility knife. Lift the glass unit straight up and out, if it's in large pieces, use both hands and keep it nearly vertical as you move it to the garbage bag. For shattered glass, use a shop vacuum after clearing the large pieces by hand (gloved).
Clean out the glazing channel in the frame thoroughly. Remove all old glazing tape, dried sealant, and any glass fragments. A putty knife and a little mineral spirits on a rag handles old sealant well. The channel needs to be clean and dry before the new glass goes in, any debris can prevent a proper seal.
Install the new glass unit
Setting blocks and glazing tape
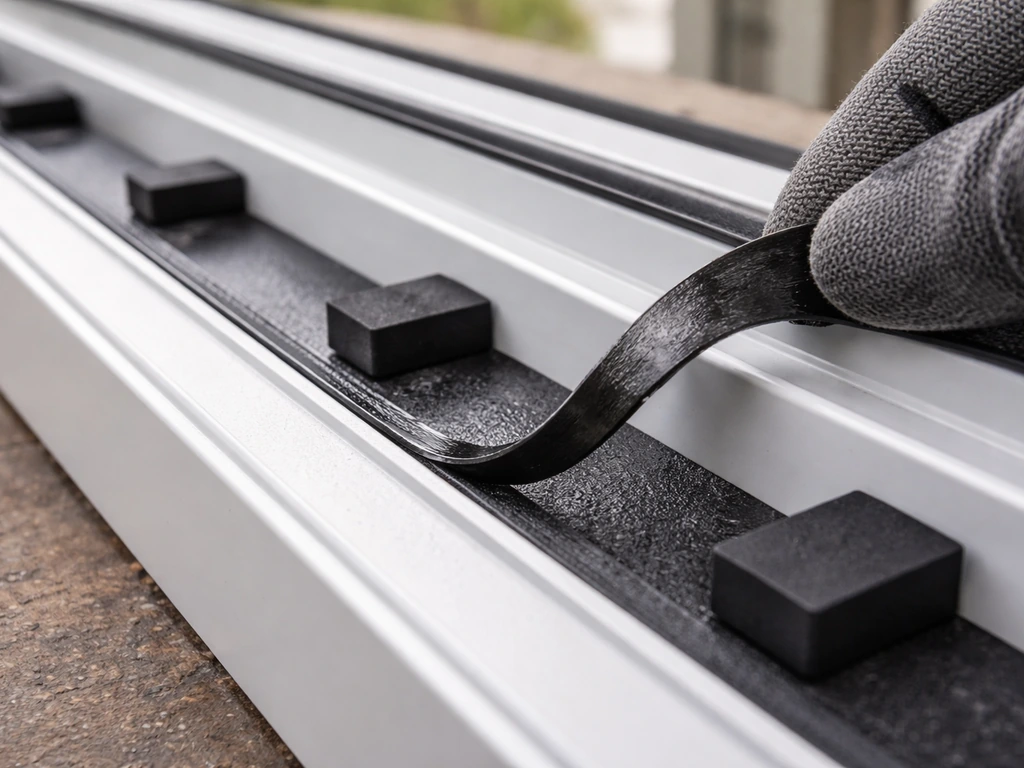
Before the new IGU goes in, you need setting blocks, small neoprene or EPDM blocks that sit in the bottom of the frame channel and support the weight of the glass so it doesn't rest directly on the frame. Most replacement IGUs come with setting blocks, or you can buy them at any glass shop. Place two blocks in the bottom channel, each positioned about one-quarter of the way in from each corner. This distributes the glass weight evenly and keeps the unit from shifting.
Glazing tape is the primary air and water seal between the glass and the frame. Run a continuous strip of glazing tape (typically 3/16 inch or 1/4 inch wide, matching the original) around all four sides of the glazing channel before setting the glass. Peel the backing starting at a top corner and press the tape firmly into the channel as you go. Don't stretch it, keep it flat and consistent. This is the method described in field glazing instructions from manufacturers like Reliabilt and MI Windows, and it's the right approach for vinyl and aluminum frame sliding doors.
Set the glass and reinstall the glazing beads
With a helper if possible, lift the new IGU and set it gently onto the setting blocks, pressing it into the glazing tape around the perimeter. As JELD-WEN's replacement instructions describe, press the glass firmly but evenly into the sealant, don't slam it in. The glass should sit centered in the frame opening with a small, even gap around all four edges. Check that it's resting on the setting blocks and not bridging any corner. Then reinstall the glazing beads in reverse order, horizontal pieces first, then vertical, snapping or screwing them back into place. Apply a thin bead of silicone sealant at the junction of the glazing bead and the glass on the exterior side for additional weatherproofing if the original had sealant there. Allow sealant to cure per the manufacturer's instructions (typically 24 hours) before heavy use.
Rehang the door and adjust for smooth rolling
With the new glass installed and the panel reassembled, it's time to rehang it on the track. Before you do, inspect the track and rollers, since you have everything apart anyway, this is the right time.
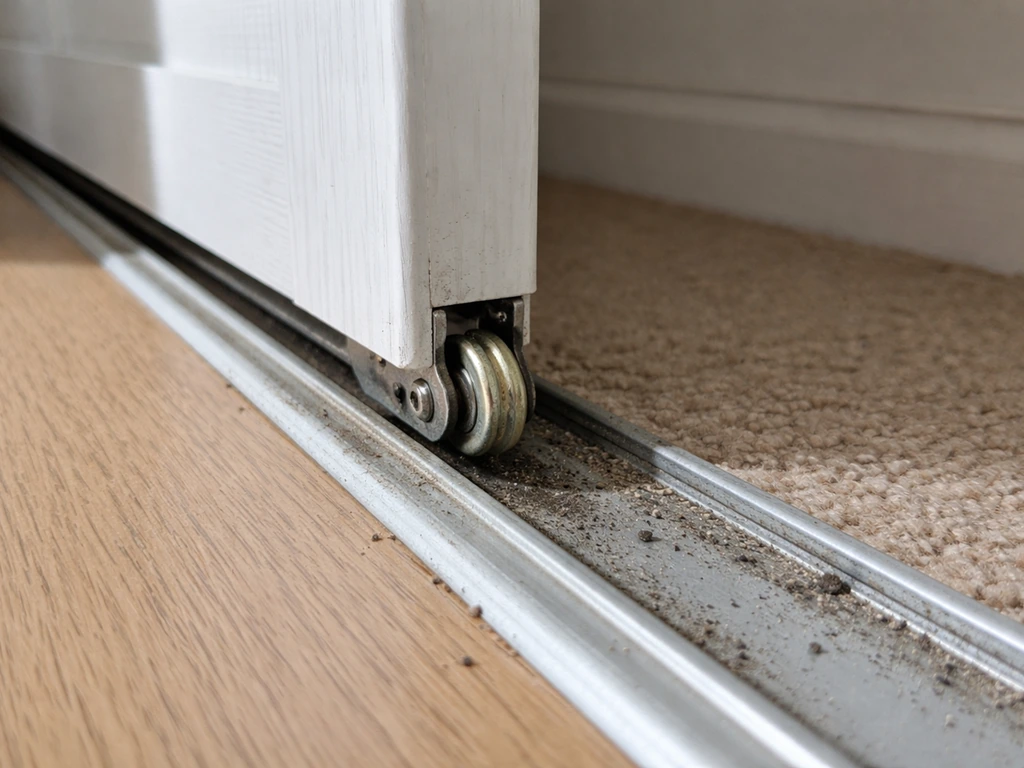
Clean and inspect the track
Vacuum the bottom track, then wipe it down with a damp cloth and a little mild dish soap. Look for dents, bends, or debris packed into the corners. A bent track from an impact that broke the glass is common, a small bend can sometimes be straightened with pliers and a block of wood, but a severely damaged track needs replacing before you rehang the door. Also check the rollers on the bottom of the door panel: spin each roller with your finger. They should turn freely and smoothly. Flat spots, wobbling, or a roller that won't spin at all means it's time to swap it out, replacement rollers are inexpensive ($10-$30 for a set) and available by door brand or by roller diameter/style.
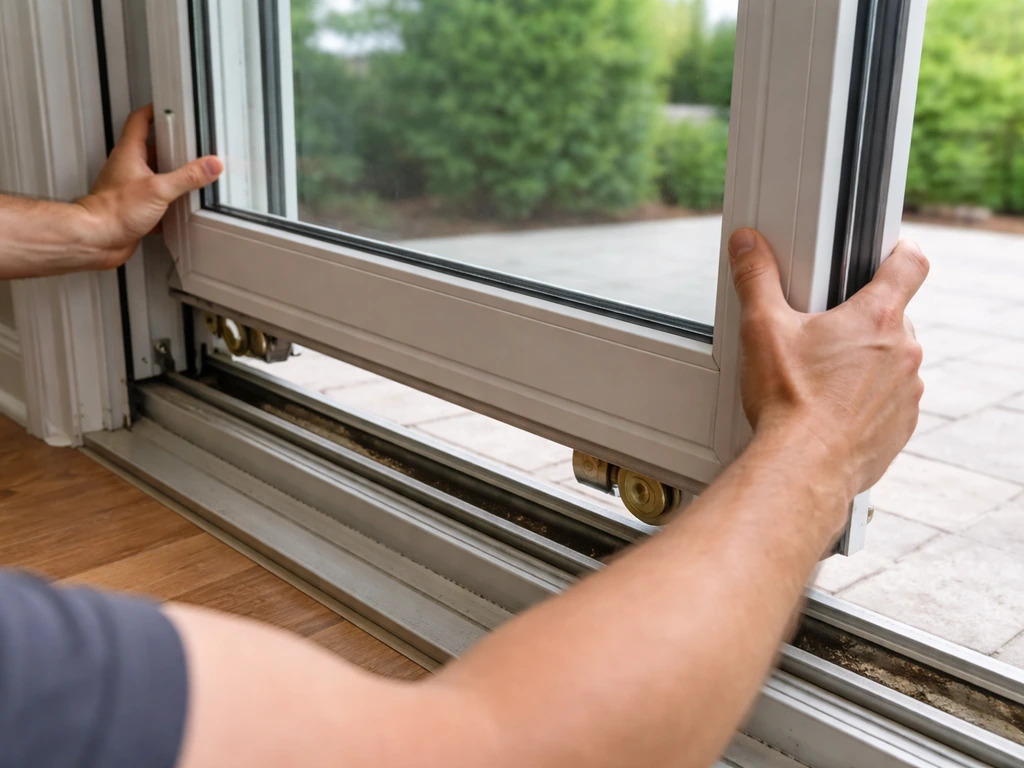
Reinstall and adjust the panel
Lift the panel back into the upper track first, then lower it onto the bottom track so the rollers sit in the channel. Reinstall any anti-lift pin or retainer clip. Now adjust the roller height: most sliding patio door panels have adjustment screws on the bottom of the frame, accessible through small holes or slots. Turn them clockwise to raise the door, counterclockwise to lower it. You want the door to sit level in the frame with even gaps top and bottom, and you want it to slide smoothly with moderate effort. The door should meet the strike jamb squarely and the latch should engage without forcing it. Make small adjustments, a quarter turn at a time, and test the slide and closure between each adjustment.
Check alignment by closing the door fully and looking at the gap between the door and the jamb. It should be even top to bottom (typically 3/16 to 1/4 inch). If it's wider at the top or bottom, adjust the corresponding roller up or down until it evens out. If the latch is slightly off and won't engage the strike plate, many strike plates can be shifted up or down slightly by loosening their mounting screws, moving them, and retightening.
Fix common issues that show up after glass replacement
A glass replacement often reveals (or causes) other problems. Here's how to handle the most common ones:
Drafts and air leaks
If you feel air coming through after reassembly, the most likely culprit is the weatherstripping on the door panel edges or the door sill seal. Check the pile weatherstripping (the fuzzy strips) along the sides and top of the door panel, if it's compressed, torn, or missing sections, replace it. It pulls out of its channel and new stock slides right in. Also run your hand around the perimeter of the newly installed glass on both sides while the wind is blowing, any cold air coming from the glass-to-frame joint means the glazing tape or bead sealant needs a touch-up with fresh silicone.
Water leaks
Water intrusion after glass replacement almost always comes from one of two places: the bottom sill (where the door meets the threshold) or the glass-to-frame seal. Make sure the weep holes in the bottom of the door frame are clear, these small slots allow water to drain out rather than build up inside the frame. Clear them with a toothpick or compressed air. If water is tracking in along the glass edges, the exterior glazing bead sealant may have gaps, re-apply silicone and tool it smooth.
Lock won't catch or is hard to turn
This is almost always an alignment issue. If the door isn't sitting perfectly level in the frame, the latch hook won't align with the strike plate opening. First try the roller adjustment described above. If the rollers are maxed out and you still can't get alignment, check whether the strike plate itself can be adjusted, most have a small range of up/down movement. If neither fixes it, the door panel may have a slight warp, which is a tougher problem discussed in the 'call a pro' section below.
Door feels heavy or drags
A sluggish door usually means either dirty/damaged rollers, a dirty or uneven track, or rollers that are set too low and dragging on the track floor. Clean the track thoroughly, replace any damaged rollers, and adjust the roller height until the door glides with light effort. A light coat of silicone spray lubricant (not WD-40, which attracts dirt) on the track helps significantly.
When to put down the tools and call a professional
Most glass replacements in sliding patio doors are genuinely DIY-able, but there are specific situations where calling a glazier or door contractor is the smarter call:
- The frame itself is bent, cracked, or warped — glass replacement alone won't fix it, and a warped frame will crack a new IGU
- The door is part of a multi-panel or custom configuration with nonstandard dimensions that no standard IGU supplier can match
- The original glass was structural or used specialty laminated glass (rare in residential, but some high-end patio doors use laminated safety glass instead of or in addition to tempered)
- The break was caused by a structural movement event (house settling, foundation shift) — replacing the glass without addressing the cause will just break the new pane too
- The door is under an active manufacturer warranty — DIY glass replacement can void it; call the manufacturer first
- You discover mold, rot (in wood-framed doors), or significant water damage in the frame during removal
When you do call a pro, here's what to ask: Request a glazier or door contractor with experience in residential sliding patio doors specifically, not just window glass. Ask whether they'll replace the entire IGU or attempt to re-seal a failed unit (re-sealing is a temporary fix, insist on a full IGU replacement). Confirm the replacement glass will be SGCC-certified tempered or laminated safety glass as required by code. Get the glass specs in writing (dimensions, thickness, coating, gas fill) before they order. And ask whether roller and track inspection is included, a good contractor will check both while the door is apart.
One more thing worth knowing: if the fixed panel's glass is broken rather than the sliding panel, the removal process is slightly different, the fixed panel is typically held in place by the door frame itself and may require partial frame disassembly to access. The glass removal and installation process is similar, but getting the panel out requires more steps. Similarly, if you're dealing with scratched rather than shattered glass, that's a different repair entirely with its own approach. If you are dealing with scratches on a glass patio door instead of cracks from impact, the repair steps are different from an IGU replacement scratched rather than shattered glass. And if the glass is completely gone and you need to remove shattered fragments from a frame that's still installed in the wall, there are specific techniques for handling that safely before you can even begin measuring for a replacement.
Bottom line: if the frame is sound and you can get accurate measurements, replacing a broken sliding patio door glass is a satisfying DIY project that saves you several hundred dollars in labor. Take your time on the measurement and ordering step, be methodical about safety during removal, and don't skip the roller and track inspection while you have the door apart. A door that slides smoothly and locks cleanly at the end of the day is entirely achievable.
FAQ
Can I replace just one broken pane inside an insulated sliding patio door glass unit?
It usually cannot, because the insulated unit uses two panes bonded with a sealed spacer and desiccant, once that seal fails or the IGU breaks you must replace the entire sealed unit. As a quick check, look at the edge of the glass unit, if you see a factory spacer line or any permanent labeling for an IGU, plan on full IGU replacement rather than single-pane cutting.
What measurements should I use, the frame opening or the glass unit size?
Measure the glass unit, not the frame opening. If you only measure the overall door frame, you can end up ordering an IGU that is too large and forces the beads or tape to bow, which leads to leaks and hard sliding. Use the inside glazing pocket (rabbet) measurement strategy, then subtract a small allowance as described in the article so the IGU clears correctly with setting blocks and sealant.
How do I know whether glass replacement is enough or I need to replace the whole door panel?
Not always. If the break is confined to the sliding panel glass and the frame looks straight, DIY replacement is usually fine. If you notice dents at the bottom track, cracked frame corners, severe waviness when you sight along the track, or rollers that wobble or have flat spots, it is safer to replace rollers or possibly the whole panel, because a warped frame can prevent proper sealing even with a perfect IGU.
What happens if I accidentally order the wrong type of glass, like clear instead of low-E?
If the IGU is low-E or tinted, a different coating can cause uneven thermal performance and visible color mismatch. The practical move is to match the permanent corner etching or spec label (often includes coating type and sometimes gas fill details), or use the door brand and model number to order the same coated unit. If you are unsure, ask the supplier to confirm the exact coating category before fabrication.
What should I do if the sliding panel will not come off the track?
If the door does not lift out cleanly, do not force it. Some units require removing an anti-lift pin or retainer tab in the upper track, and others have different roller styles. Check for an adjustment or access screw in the track area first, and only proceed once you confirm the roller fully retracts and the panel clears the guide channel.
Can I reuse the glazing beads and weatherstripping when replacing the IGU?
Yes, if the glazing beads or weatherstripping are damaged. Vinyl beads can crack when pried, and a cracked bead will not compress evenly, leaving gaps. Before ordering parts, take a photo of the bead profile and count whether the beads snap or screw, then replace only the components that are broken or deformed, while reusing pieces that are intact.
What sealant should I use around the new IGU, and can I substitute any silicone?
A silicone sealant mismatch can be a problem. Use the sealant type and placement that matches the original, typically a thin exterior bead at the glass-to-bead junction if that was present. If you replace interior sealants incorrectly, you can trap moisture in the frame or reduce adhesion to the bead material, so it is worth checking the door manual or asking the glass supplier what sealant system they expect.
If I still get drafts or leaks after replacing the glass, what is the first thing to check?
Not typically. If you feel air gaps or water leaks after installation, the most common fix is correcting seal continuity and alignment, not just adding more caulk. Confirm the bottom sill weep paths are clear, check that the glazing tape is continuous without stretch or skips, and verify the door is level so the latch and strike align and the panel edges compress the weatherstripping evenly.
What is the right way to adjust roller height and latch alignment after reinstalling the panel?
The latch should engage without forcing the door, but the “best” roller adjustment is the one that yields even reveal gaps top to bottom and smooth travel at both ends. Make small changes, then retest, also confirm the rollers sit in the track grooves without rubbing. If you run roller adjustments to the limit and gaps still do not align, the strike plate adjustment range may not be enough, and the panel could be warped.
Is it necessary to remove every trace of old glazing tape and sealant from the frame channel?
Do it carefully, because cutting old sealant or tape fragments can leave debris that prevents the new seal from bonding. Vacuum and wipe until the channel is clean and dry, then do a final check for embedded grit by running a gloved finger along the perimeter. If you used mineral spirits for cleanup, let everything fully dry before installing the tape and IGU.
What safety precautions should I take beyond gloves when replacing broken sliding patio door glass?
Safety glass handling is more than gloves. Keep children and pets away, use eye protection, and contain fragments before you lift any panel, because the pebble-like tempered pieces still bounce and can cut. Also consider wearing long sleeves, and use a shop vacuum with a proper filter after clearing large pieces to remove the smaller dust-like fragments.
Next Article
Patio Door Glass Broken: Safety, Diagnosis, Replacement Steps
Learn safety steps, diagnose the broken patio door glass, stabilize, and replace the pane with correct measurements and