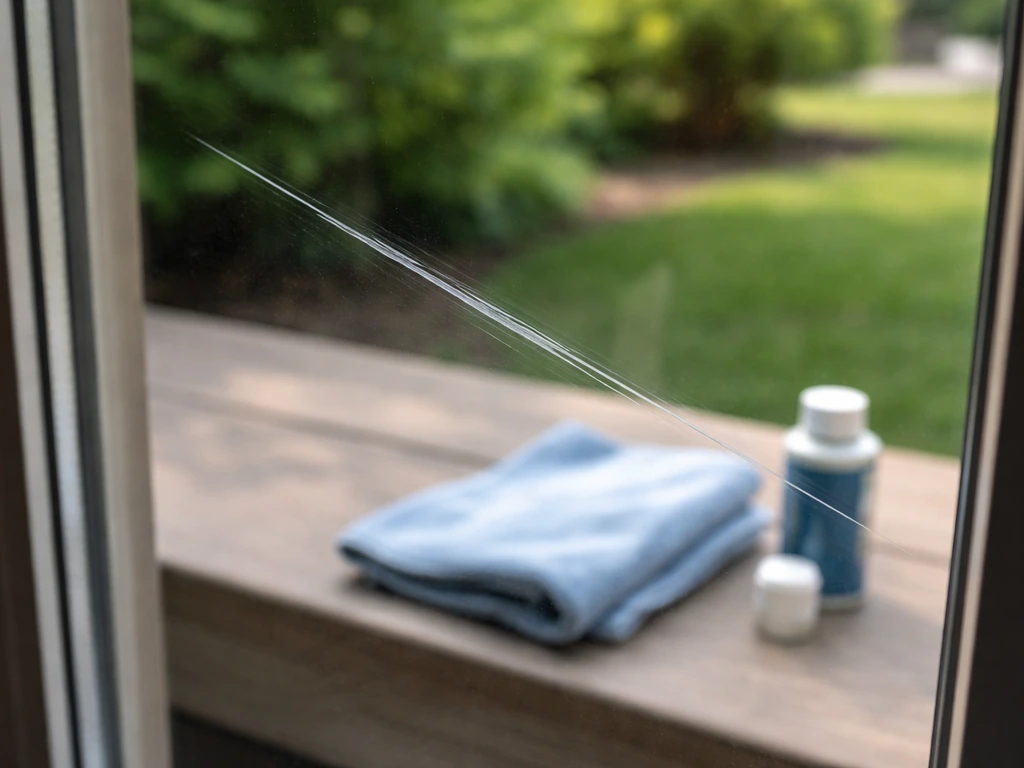
You can safely remove shattered patio door glass yourself in most cases. The process comes down to three options depending on how badly the door is damaged: clear loose glass from the frame in place, lift the sash out of the track and work on it horizontally, or pull the entire door unit when the frame itself is compromised. Whichever route you take, the job starts with the right protective gear and ends with a temporary weatherproofing cover while you order replacement glass or a new sash. Plan on one to three hours for the removal and cleanup alone. For detailed step-by-step guidance and troubleshooting, see patio door glass broken.
How to Remove Shattered Glass Patio Door: Safe DIY Guide

Jamie Archer
18 Jul 2026
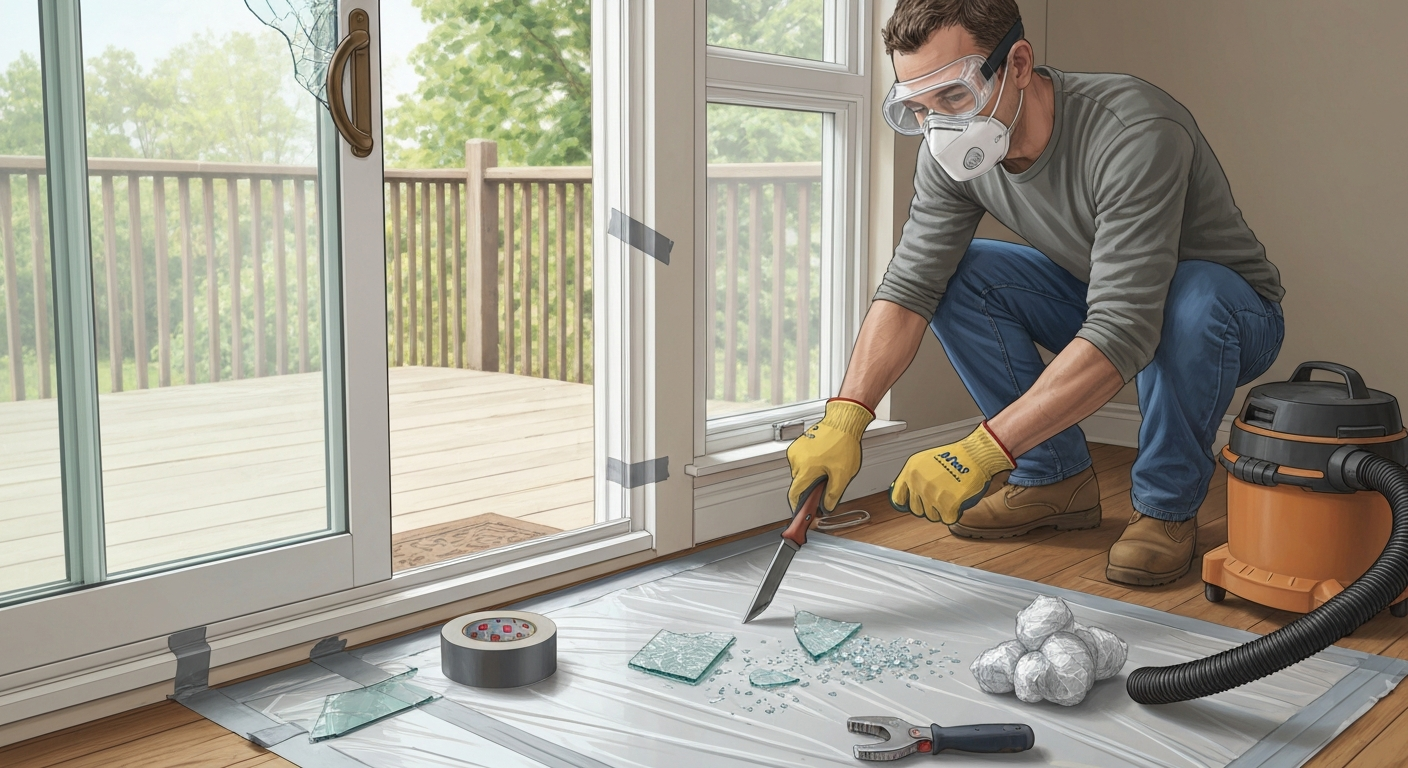
Safety first: what to wear and why it matters
Broken glass cuts fast and without much warning. OSHA is explicit that you should never pick up broken glass with bare hands, and that rule applies whether you are dealing with a few large shards or a tempered door that has turned into a pile of small cubes. Before you touch anything, get the right PPE on.
- Safety glasses or goggles rated to ANSI/ISEA Z87.1 for impact protection. Standard sunglasses do not qualify.
- Cut-resistant gloves rated A4 or higher under ANSI/ISEA 105. A4 gives solid protection while still allowing enough grip to handle frame pieces. Go to A6 or A7 if you are dealing with large laminated shards.
- Long sleeves and long pants. Tempered glass cubes roll and bounce; they end up on surfaces you did not expect.
- Closed-toe, thick-soled shoes. Work boots are ideal. Never flip-flops or sneakers.
- A dust mask or N95 if you are working in a tight space with poor ventilation, particularly when sweeping fine glass dust from an IGU failure.
Keep children and pets completely out of the work area. Tape off doorways to adjoining rooms if you are working inside. The CPSC recommends treating any safety-glazing failure as a hazardous-materials situation until cleanup is fully complete.
Tools and materials you will need
Get everything staged before you start. Running back to the garage mid-job with glass all over the floor is how accidents happen.
- Heavy-duty work gloves (cut-resistant A4 or higher)
- ANSI Z87.1-rated safety glasses or goggles
- Stiff-bristle broom and dustpan
- Shop vacuum with a fine-dust filter (not a household vacuum)
- Duct tape or masking tape
- Painter's plastic sheeting (6 mil, at least 10 x 12 ft)
- Cardboard sheets for wrapping large shards
- Heavy-duty contractor trash bags (3 mil minimum)
- Flathead and Phillips screwdrivers
- Putty knife or stiff-blade glazing knife
- Utility knife with fresh blades
- Pry bar (small, 12-inch)
- Rubber mallet
- Tape measure and notepad
- Marker or grease pencil
- Plywood or foam board for temporary cover (cut to opening size)
- Plastic sheeting and tape for weatherproofing
Identify your glass type before you do anything else
The type of glass in your patio door changes how it breaks, how dangerous the cleanup is, and what you need to order as a replacement. Getting this wrong means ordering the wrong unit or underestimating the hazard.
| Glass Type | How It Breaks | Key Hazard | Replacement Unit |
|---|---|---|---|
| Single-pane annealed | Large, irregular shards with sharp edges | High laceration risk from big pieces | Single lite cut to size |
| Tempered (safety glass) | Shatters into small cuboidal pebbles | Lower laceration risk but many tiny pieces; spontaneous breakage possible from nickel-sulfide inclusions | Tempered lite to spec (ASTM C1048); cannot be cut after tempering |
| Laminated | Cracks but stays adhered to interlayer (PVB or SGP); rarely falls out completely | Sticky, heavy sheets; interlayer can trap edge fragments | Laminated lite matched to original spec |
| Insulated Glass Unit (IGU) | Either pane can fail; fogging or condensation between panes signals seal failure even without visible breakage | Double-pane weight; spacer and seal debris | Full IGU matched to thickness, spacer width, and gas fill (ASTM E2190) |
To identify your glass, look at the corner of the door for an etched or sandblasted manufacturer's mark. Tempered glass is almost always stamped with a safety glazing mark (SGCC or similar) in a corner. If the stamp is gone or the glass has already shattered, check your original paperwork or the door manufacturer's data plate on the frame. Most patio doors built after the early 1970s use tempered glass in compliance with safety glazing codes. Older doors and some decorative inserts may still have annealed glass.
Choosing the right removal method
There are three approaches, and you should pick the least invasive one that your situation allows. Starting with the most complex method just because the glass is badly broken creates more work and more risk.
- Remove glass from the frame in place: the frame and sash are undamaged, the glass is shattered but contained by glazing tape or a stop. This is the safest and most common scenario for tempered and laminated doors.
- Lift out the sash and remove the glass on a flat surface: the sash (the movable panel) is intact but the glass needs to come out cleanly. Laying the sash horizontal reduces the risk of remaining fragments falling loose during removal.
- Remove the entire door unit: the frame or sill is damaged, the door cannot slide or lift out normally, or you are replacing the whole door assembly. This is the most labor-intensive option and often requires a second person.
Use option 1 if the sash frame rails and stiles are intact and most of the glass is still held in place by glazing tape or gasket. Use option 2 if the glass is completely gone or so loose that removing it in-place would mean fighting gravity the whole time. Use option 3 if the frame is bent, the door will not slide at all, or you have already decided to replace the full unit because of age or additional damage to the rollers, hardware, or weather seals.
Set up your work area before breaking anything loose
Containment done right saves you an hour of cleanup. Lay a 6-mil plastic sheet on the floor extending at least four feet in every direction from the door. If you are working from the interior, tape another sheet across the interior doorway to keep glass dust out of your living space. If you are working from outside, cover any planters, furniture, or decking within six feet.
Cut your contractor trash bags open and lay them flat to use as secondary containment for large pieces. Have a second person available if the glass is still mostly in the frame and could fall as a unit when you remove the last bead or gasket. Use duct tape to pre-tape any large areas of cracked glass that have not yet fallen. A grid of tape across a cracked pane does not make it safe, but it does reduce the number of loose fragments flying when you begin removing the glazing stops.
Step-by-step: removing shattered glass from the frame in place
This method works best for tempered glass that has broken into small pieces and is largely held in the frame by glazing tape, a rubber gasket, or a snap-in stop bead. It is also the right approach for laminated glass where the interlayer is keeping fragments together.
- Put on all PPE before touching the door. Confirm the door is in the closed position and will not swing or slide.
- Apply duct tape in a crosshatch pattern over any cracked sections still in the frame to reduce loose shard scatter when you open up the glazing.
- Locate the glazing stops or beads. On most vinyl and aluminum patio door sashes, these are snap-in plastic or aluminum strips that run along the inside perimeter of the glass. Insert a flathead screwdriver or putty knife into the corner joint and pop the stop out, working around the perimeter. On older wood-frame doors, the stops may be nailed in and will need to be pried off carefully.
- Once the stop is removed, the glass should be exposed. If a rubber gasket is in place, carefully slice it with a utility knife to free the glass from the frame channel.
- For tempered glass: the small cubes will begin falling into your containment plastic. Use a stiff putty knife to scrape the frame channel clean of glass pebbles, working top-to-bottom on the sides and then along the sill. Use tongs or a gloved hand to pick up larger clusters. Never use bare hands.
- For laminated glass: the interlayer will hold the sheet together. Score around the perimeter with a utility knife to cut the PVB or SGP interlayer free from the glazing tape, then carefully peel the entire sheet away from the frame as a unit, keeping it vertical until it is over your containment plastic.
- Vacuum the frame channel with the shop vac to remove fine glass dust and small fragments. Run a gloved finger (carefully) along the channel to check for remaining shards that can block the new glass from seating correctly.
- Wrap large pieces in cardboard or lay them flat on the opened contractor bags. Do not stack uncovered shards.
Cleaning up after in-place removal
Sweep the containment plastic into a pile and fold it inward so glass stays inside. Transfer glass into double-bagged contractor bags. Do not compress bags with your hands or feet; sharp pieces can punch through multiple layers of plastic. Label the bags clearly as broken glass before disposal. Check the OSHA guidance on this point: compressing glass-filled bags is one of the most common causes of lacerations during cleanup.
Step-by-step: lifting out the sash for glass removal
Removing the sash gets the glass off the frame and down to a horizontal work surface, which makes cleanup safer and gives you better access to the glazing channel. Most standard sliding patio door sashes weigh between 50 and 100 pounds, so plan for a helper.
- Slide the door panel to the center of the opening, roughly 10 to 12 inches from either jamb, so you have clearance to tilt it without hitting the frame.
- Locate the roller adjustment screws on the bottom rail of the sash. On most vinyl and aluminum doors (JELD-WEN, Milgard, Crestline, and similar manufacturers), these are Phillips or flathead screws accessible through slots in the bottom rail, near each corner. Turn them counterclockwise to retract the rollers up into the sash frame, which lowers the panel onto the sill track and removes tension.
- Check for an anti-lift pin or security bar. Many newer patio doors have an anti-lift device at the top of the sash or in the head track. Look for a small set screw or plastic tab in the head track; remove or retract it before trying to lift the panel.
- With a helper on the opposite side of the door, grip the sash firmly at the top corners and lift it straight up into the head track. The head track on most doors has enough clearance to accept the full top rail when the rollers are retracted.
- Once the top rail is seated in the head track, tilt the bottom of the sash toward you and lift it out of the sill track. Lower it gently onto the plastic sheet you laid on the floor.
- Lay the sash flat on sawhorses or two padded workbenches. Do not let it rest on the glass side.
- With the sash horizontal, follow the same in-place glass removal steps above: pop the glazing stops, remove the glass, and vacuum the channel clean.
While you have the sash off the door, this is a good time to inspect the rollers. If they are worn, cracked, or flat-spotted, replace them before reinstalling. A smooth roller on a clean track makes reinstallation far easier than fighting a stiff panel back into place.
Step-by-step: removing the entire patio door
Go this route when the frame is bent, the sash cannot be lifted out normally, the door is being fully replaced, or the damage is severe enough that you want to inspect the rough opening and the sill for water intrusion. This is a two-person job, and it is worth doing right rather than rushing.
- Remove any interior trim or casing around the door frame using a pry bar and a flat putty knife to protect the drywall. Work slowly; you may need these trim pieces if you are reinstalling a new door in the same rough opening.
- Locate the fasteners securing the door frame to the rough framing. On most doors, these are screws or nails driven through the jambs and sometimes through the sill and head. Remove all accessible fasteners.
- If exterior trim or brick mold is caulked and nailed in place, score the caulk line with a utility knife and pry the trim off carefully.
- Check for shims between the door frame and the rough framing at the hinge locations and sill corners. Note their position and thickness in case you are reinstalling a door in the same opening.
- With one person on each side of the door, grip the frame at the head and lift slightly while the second person guides the bottom of the frame off the sill. Patio door frames are aluminum or vinyl and flex; do not torque them aggressively or you may bow the frame and make installation of a replacement harder.
- Tilt the door unit out of the opening and lower it to a horizontal position on the plastic sheeting. If the glass is already shattered and partially missing, tape the remaining pieces before moving the unit.
- Remove glass from the sash using the steps described above. If you are discarding the entire door unit, you can leave the glass in the sash and take the whole assembly to a recycling facility.
- Inspect the rough opening sill for rot or water damage before installing any replacement unit.
Before removing the entire door, check your local permit requirements. Many jurisdictions treat a glass-only swap inside an existing frame as minor maintenance that does not require a permit. A full sash replacement or new door unit, especially if it changes the energy performance of the building envelope, may require a permit under local IRC or energy code rules. The City of Broomfield, for example, explicitly distinguishes between in-kind glass replacement and energy-code-altering door replacements when it comes to permit requirements. See the City of Broomfield, Window, Door & Skylight Installation/Replacement guidance (permits & IRC/energy references) for local permit distinctions and the applicable IRC/energy-code references City of Broomfield — Window, Door & Skylight Installation/Replacement guidance (permits & IRC/energy references). Check with your local building department before you start.
Disposing of and recycling broken glass
Tempered glass cannot go in standard curbside recycling bins because its thermal treatment changes the chemistry of the glass in ways that disrupt the recycling furnace. Your local household hazardous waste facility or glass recycler may accept it, but call ahead. For standard annealed glass, many municipal recycling programs accept it if it is wrapped and labeled. Laminated glass (with its PVB or SGP interlayer) is accepted by specialized recyclers but is rarely taken at standard facilities. When in doubt, double-bag the glass in contractor bags, label the bags clearly as broken glass or sharp material, and dispose of them in your general trash. Never put unwrapped glass in a bin where someone will reach in without being warned.
Temporary security and weatherproofing
An empty patio door opening is a security and weather problem. Even if you plan to have replacement glass installed in a day or two, you need to close the opening properly. The fastest approach is a sheet of 3/4-inch plywood cut to fit the opening, screwed into the door frame jambs from the inside. This is secure against entry and handles wind and rain reasonably well.
If you need a faster or lighter temporary solution, tape 6-mil plastic sheeting across the outside of the frame using contractor-grade tape. This handles rain but offers no security. For any window or door opening that will be uncovered overnight, the plywood approach is worth the extra hour of work. Add a bead of weatherstrip tape between the plywood edge and the door jamb to keep drafts and insects out.
Measuring for replacement glass or a new sash
Once the frame is clean, measure the daylight opening (the clear opening inside the frame channel) in at least three places: top, middle, and bottom for width, and left, center, and right for height. Use the smallest measurement in each direction. For a replacement glass lite, the glass size is typically the daylight opening minus 1/4 inch on each side to allow for setting blocks and glazing tape. Write down the exact dimensions in millimeters if you can; glass suppliers work in metric.
For an IGU replacement, you also need the overall unit thickness. ASTM E2190, Standard Specification for Insulating Glass Unit Performance and Evaluation is the consensus standard for qualifying IGU performance, covering fogging, seal durability, and desiccant behavior ASTM E2190 — Standard Specification for Insulating Glass Unit Performance and Evaluation. Measure the depth of the glazing channel and subtract the combined thickness of the front and back glazing tape or gasket. The remaining space is the unit thickness you need to specify. IGU units are also specified by spacer width (the air gap between panes) and whether the original had argon gas fill. If your door had argon-filled low-E glass, match it for energy performance.
Tempered glass cannot be cut or drilled after the tempering process (ASTM C1048). This means you cannot order a slightly oversized piece and trim it to fit. Your measurements need to be accurate before you order. Many glass suppliers will ask for a copy of your measurements and the manufacturer name from the door data plate to confirm compatibility before cutting a tempered or IGU replacement.
Common mistakes that make this job harder
- Skipping roller retraction before trying to lift the sash. This is the number one reason sash removal gets forced and frames get bent.
- Forgetting the anti-lift security tab in the head track. If the sash will not lift out after the rollers are retracted, look for this first.
- Using a household vacuum on glass. Fine glass dust damages household vac motors and filters. Always use a shop vac.
- Ordering replacement glass by the frame outside dimension instead of the daylight opening. The glass needs to be smaller than the frame opening, not the same size.
- Assuming all patio door glass is tempered. Older doors, decorative inserts, and some builder-grade units from before the 1980s may have annealed glass, which is far more dangerous to handle.
- Disposing of bagged glass without labeling it. This creates a serious injury risk for anyone handling the trash.
When to call a professional
Most homeowners can handle the removal side of this job without professional help. The cases where you should call a glazier or door contractor are: the door frame is structurally bent or the rough opening has water damage that needs repair before reinstallation; you have a large laminated IGU (60 inches or taller) where the weight and fragility of the unit makes DIY removal genuinely risky without specialized equipment; the door is a French-style patio door with a fixed sash that requires specialized stop removal; or you suspect the breakage was caused by frame racking from foundation movement, in which case replacing the glass without fixing the underlying cause will just break the replacement too.
If you are comfortable with the removal but want a professional to handle the glass installation, that is a completely reasonable split. Many glaziers will install customer-supplied glass, which can save money if you order directly from a glass supplier. Just confirm the glazier's warranty position on customer-supplied materials before you commit.
What to do after the glass is out
With the frame clean and temporarily sealed, you have a few decisions to make. If the sash frame itself is in good shape and you know the glass type and dimensions, ordering a replacement lite or IGU and reinstalling it yourself is a realistic next step. If you only need to address surface damage, see our guide on how to fix scratches on glass patio door for buffing and polishing techniques. For step-by-step instructions on how to replace broken glass in a sliding patio door, see replace broken glass sliding patio door. For detailed guidance on safely handling and securing broken patio door glass, see our full guide on broken patio door glass. For step-by-step instructions on replacing the glass itself, see our guide on how to replace glass in patio door. If the sash is warped, the corners are cracked, or the rollers are shot, replacing the whole sash panel is often more cost-effective than sourcing and fitting new glass into a compromised frame. And if the door is more than 20 years old and showing its age in the weatherstripping, locks, and track, a full door replacement might actually be the better long-term spend.
Before you make that call, inspect the rollers and track carefully while you have the sash off or the frame accessible. Check the lock hardware and the weatherstripping condition. The glass replacement is the main event, but it is also a natural opportunity to address any other issues that would require pulling the door apart again in another year.
FAQ
What personal protective equipment (PPE) do I need before removing shattered patio-door glass?
Wear ANSI Z87.1-rated impact safety goggles or a full-face shield, cut-resistant gloves (ANSI/ISEA 105 rated A4–A6 for handling shards), long sleeves and pants, closed-toe shoes or steel-toe boots, and a dust mask if dust is present. Use heavy-duty leather or puncture-resistant work gloves for moving large pieces and disposable nitrile gloves for final cleanup if desired.
What tools and materials should I have ready?
PPE (above); broom, stiff-bristled push broom, dustpan, shop vacuum with a HEPA or fine-particle filter and floor attachment, blunt-ended tongs or pliers, heavy canvas or leather work gloves, cardboard/plywood sheets, painter's tape or duct tape, thick contractor garbage bags or rigid bins, masking film or poly sheeting, 3M safety tape or foil tape, putty knife, screwdriver set, socket set, pry bar, assistance from a helper, and materials to temporarily seal (plywood, foam board, or clear plastic and tape).
What are the safest sequence options for removing shattered glass from a sliding patio door?
Work from safest to most invasive: 1) Remove loose glass fragments from the frame while the sash stays in place (preferred if sash is intact). 2) Remove the operable sash/panel (lower risk of cutting yourself by lifting whole sash out of the frame, follow manufacturer roller-retraction steps). 3) Remove the entire door/frame assembly (most work and likely a pro job). Choose the least-destructive option that gives secure access and minimizes fragment handling.
How do I remove glass fragments from the frame without lifting the sash?
Shut and lock the door if possible to stabilize. Tape a grid of wide duct or painter's tape over exposed glass to keep shards in place. Put on PPE. Use tongs or pliers to pick large fragments and place them on cardboard. Work from top to bottom, loosening fragments and allowing them to fall onto a prepared cardboard sheet or into a rigid container lined with tape. Finish with a broom and dustpan, then vacuum thoroughly. Do not use bare hands.
How do I safely remove the sliding sash/panel to extract broken glass?
Consult the manufacturer guide (JELD‑WEN, Milgard, Crestline) for model-specific steps. General method: open panel to access roller adjustment screws, retract rollers to lower tension, lift the panel up into the head track to free the bottom from the sill, then tilt and lift out with two people—panels are heavy. Rest the sash on a padded surface. Remove glazing stops or pocket gaskets and extract glass fragments with tongs into a container. Keep tape over remaining shards to contain them.
How should I remove laminated, tempered, single-pane, and insulated (IGU) glass differently?
Tempered glass shatters into small cubes—expect lots of small pieces; contain more dust and clean thoroughly. Laminated glass often stays adhered to the interlayer—remove larger bonded sections; the interlayer may stay in the frame so pry stops carefully. IGUs (insulated units) are heavier and sealed; if one lite is broken you may remove the whole sash or replace the entire IGU—do not attempt to disassemble sealed units in the field. Single-pane glass behaves like standard annealed glass—larger sharp shards; handle large pieces with extreme care. For tempered and IGU units, order exact replacement sizes and specifications.
Next Article
How to Fix Scratches on Glass Patio Doors Step by Step
Step-by-step DIY guide to fix glass patio door scratches, choose the right method by depth, and finish with safe afterca