Most scratches on a glass patio door can be improved with a cerium oxide polishing compound and a little patience. Whether you can fully remove a scratch depends almost entirely on how deep it is. Light surface scuffs and haze respond well to DIY polishing. Scratches your fingernail catches on are a different story, and honest guidance means telling you upfront: those usually point toward glass replacement, not a polishing session.
How to Fix Scratches on Glass Patio Doors Step by Step

Jamie Archer
27 Jun 2026
Assess the scratch before you do anything else
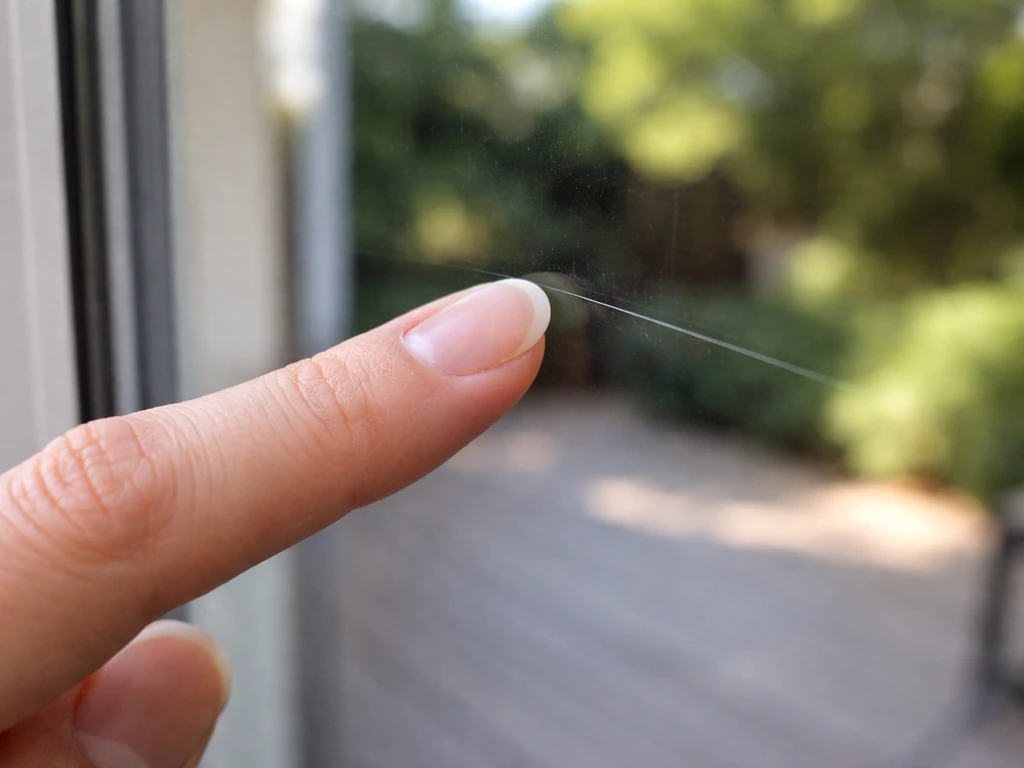
The single most important step is figuring out what you're actually dealing with. Run a clean fingernail slowly across the scratch. If it glides over without catching, you have a surface-level scuff or light scratch, and that's genuinely fixable with DIY methods. If your nail drops into the scratch or catches distinctly, the damage goes deeper into the glass, and polishing will reduce its appearance at best but won't make it disappear.
Also look at where the scratch is and what kind of glass you have. Patio door glass is almost always tempered, and many modern units are insulated glazing units (IGUs) with two sealed panes. Polishing only works on the outer surface. If you see fogging, streaks, or damage that appears to be between the panes, that's a sealed-unit failure, and no amount of surface polishing will help. If the damage is between the sealed panes of an IGU, repair usually means re-sealing or replacing the IGU, as discussed in a Reddit HomeImprovement thread blank" rel="noopener noreferrer">damage that appears to be between the panes. That's a replacement job. Similarly, if the scratch runs near the edge of the glass or toward a corner, leave it alone. Edge damage on tempered glass is a structural concern.
One more check: does your patio door have a low-e coating? Low-e glass has a microscopically thin metallic coating applied directly to the surface. Polishing with any abrasive, including cerium oxide, can damage or remove that coating permanently. If you're not sure, call the manufacturer with your door's model number before you start. If you know it's low-e, weigh the tradeoff carefully before proceeding.
| What you observe | Likely severity | DIY outcome |
|---|---|---|
| Scratch only visible at certain angles, nail glides over it | Surface scuff / light scratch | Good candidate for polishing |
| Clearly visible line, nail barely catches | Moderate scratch | Partial improvement likely; full removal uncertain |
| Nail catches and drops into the groove | Deep scratch | Polishing won't fix it; consider replacement |
| White or frosted appearance around the scratch | Pitting or micro-fractures | Beyond DIY polishing; replacement is the better path |
| Damage appears between the panes or glass is foggy | Sealed IGU failure | Not a surface issue; IGU or panel replacement needed |
| Scratch at or near the glass edge | Edge damage | Do not attempt DIY; consult a professional |
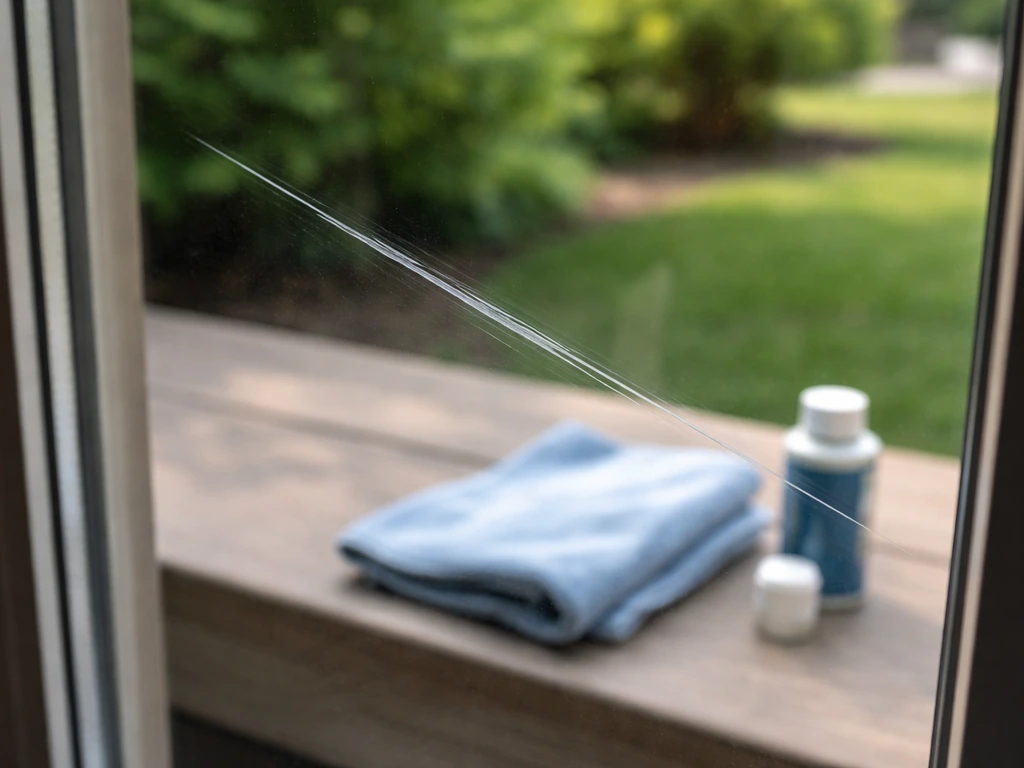
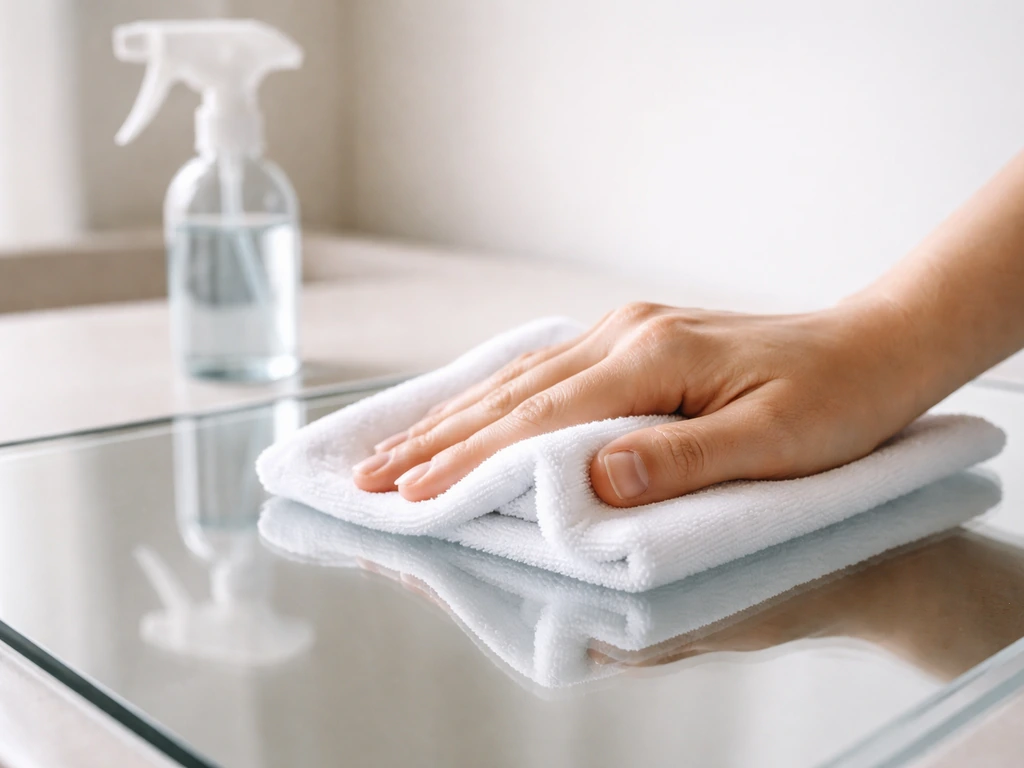
Clean the glass properly before you touch the scratch
Skipping the cleaning step is how people accidentally make things worse. Any grit, dust, or debris sitting on the glass surface will get dragged across it the moment you start polishing, creating new scratches. Clean glass also lets you see the actual damage clearly, rather than squinting through smears and water spots.
- Rinse the glass surface with plain water to knock off loose dirt and grit.
- Wash with a few drops of dish soap mixed in warm water. Use a clean microfiber cloth, not a sponge that might have trapped debris.
- Rinse thoroughly, then wipe dry with a fresh microfiber cloth.
- Do a final wipe with a 70% isopropyl alcohol solution (70% IPA, 30% water) applied to a clean cloth. This removes residual oils and prepares the glass for polishing compound adhesion.
- Let the glass dry completely before you start the repair.
Once it's clean and dry, inspect the scratch again in good light, ideally with sunlight hitting the glass at an angle. You may find what looked like a deep gouge is actually surface haze or mineral etching, which is much easier to deal with. Cleaning alone sometimes clears up mild water-spot etching that was mistaken for a scratch.
DIY scratch removal: matching the method to the depth
Light scratches and surface haze
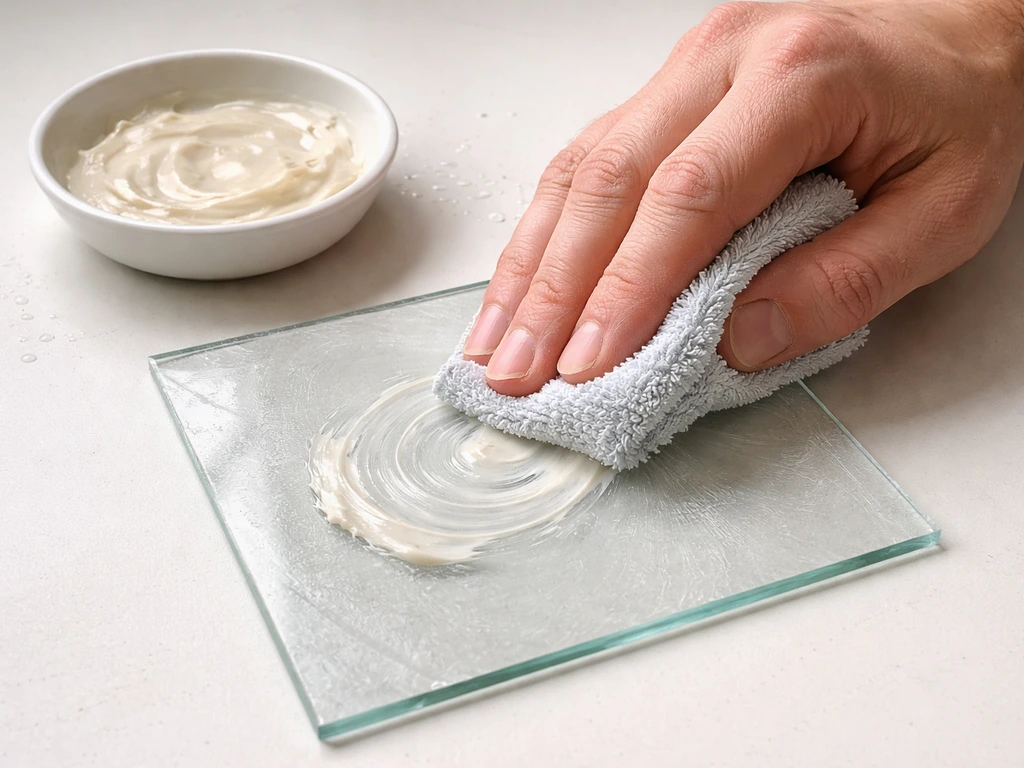
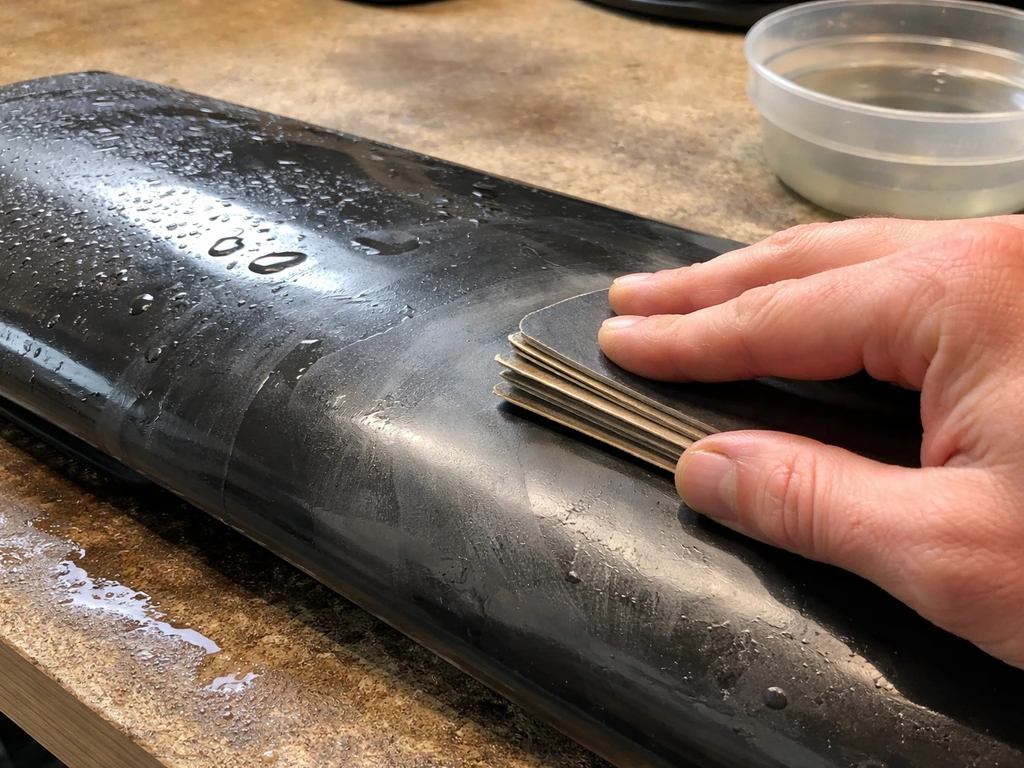
For scratches that don't catch a fingernail, cerium oxide is the go-to. It's a mild abrasive polishing compound used widely for glass restoration, and it's genuinely effective on hairline scratches, surface scuffs, and hard-water mineral etching. You can find it at glass supply stores and some hardware stores, or order it online. Some commercial scratch-removal kits already include it pre-mixed.
Here's how to apply it correctly:
- Mix cerium oxide powder with water to form a thick paste, roughly the consistency of toothpaste. Don't make it too watery. Excess water dilutes the compound and reduces its effectiveness.
- Apply a small amount of paste to a clean felt pad, polishing cloth, or foam applicator pad. You don't need a lot.
- Work in small sections, about 6 inches square. Apply the pad to the scratch with light, consistent pressure and move in circular overlapping motions.
- Keep the pad slightly damp as you work. If the compound dries out too fast, add a tiny bit of water. If it looks soupy, you've added too much.
- After 2 to 3 minutes of working the area, wipe off the residue with a clean damp microfiber cloth.
- Inspect the scratch in angled light. Repeat the process if improvement is visible but not complete. Most light scratches respond after 2 to 4 passes.
The wipe-and-inspect loop matters. Don't just keep polishing without checking progress. If you're seeing steady improvement, keep going. If after four or five passes the scratch looks exactly the same, it's deeper than it appeared and you've reached the limit of what polishing can do.
For a power-assisted approach, a variable-speed drill or rotary tool with a felt polishing wheel attachment speeds up the process considerably. Keep speed low to moderate and keep the pad moving constantly. Holding it in one spot generates heat that can stress the glass.
Moderate scratches: wet sanding before polishing
If the scratch is more visible but your nail only barely catches it, you can attempt a wet-sanding sequence before switching to cerium oxide. This is more aggressive and carries more risk, so only go this route if you've already tried cerium oxide and gotten partial but not complete improvement.
The sequence involves working through progressively finer grits, wet, to level the glass around the scratch before polishing out the haze left behind. A starting point would be 600-grit wet-dry sandpaper (used wet) to reduce the scratch, then 1200-grit, then 3000-grit, finishing with cerium oxide compound to restore clarity. Always wet-sand with plenty of water to lubricate the surface. Use flat, even pressure and keep the paper flat against the glass. After each grit, wipe clean and check before moving to the next.
Be realistic here: wet sanding creates a large frosted area around the scratch that has to be polished back to clarity. If you don't complete the full sequence through to the polishing stage, the glass will look worse than when you started. Only attempt this if you're willing to finish the whole process.
When to stop and consider replacement instead
Some scratches simply can't be polished out, and continuing to try will waste your time and potentially damage coatings without improving the glass. If the glass is actually shattered, or the damage is beyond scratch repair, you may need to remove and replace the patio door glass instead of trying to polish it out. Here are the clear stop signs:
- Your fingernail clearly catches and drops into the scratch groove. Cerium oxide won't touch deep gouges, and this is confirmed by the compound's own instructions.
- The damaged area shows pitting, a white or frosted appearance, or micro-fracturing around the scratch. Pitting means the glass surface itself has been compromised below the level that polishing addresses.
- The scratch is near the edge of the glass panel. Edge damage on tempered glass can compromise structural integrity. Don't grind or sand near edges.
- After multiple polishing passes, you see zero improvement. The scratch is too deep for surface-level methods.
- The glass has a low-e or other surface coating and the scratch is within that coating. Polishing will remove the coating around the scratch, creating a visibly different patch.
- The damage is between the panes of a double-pane IGU. That's a sealed-unit problem, not a surface one.
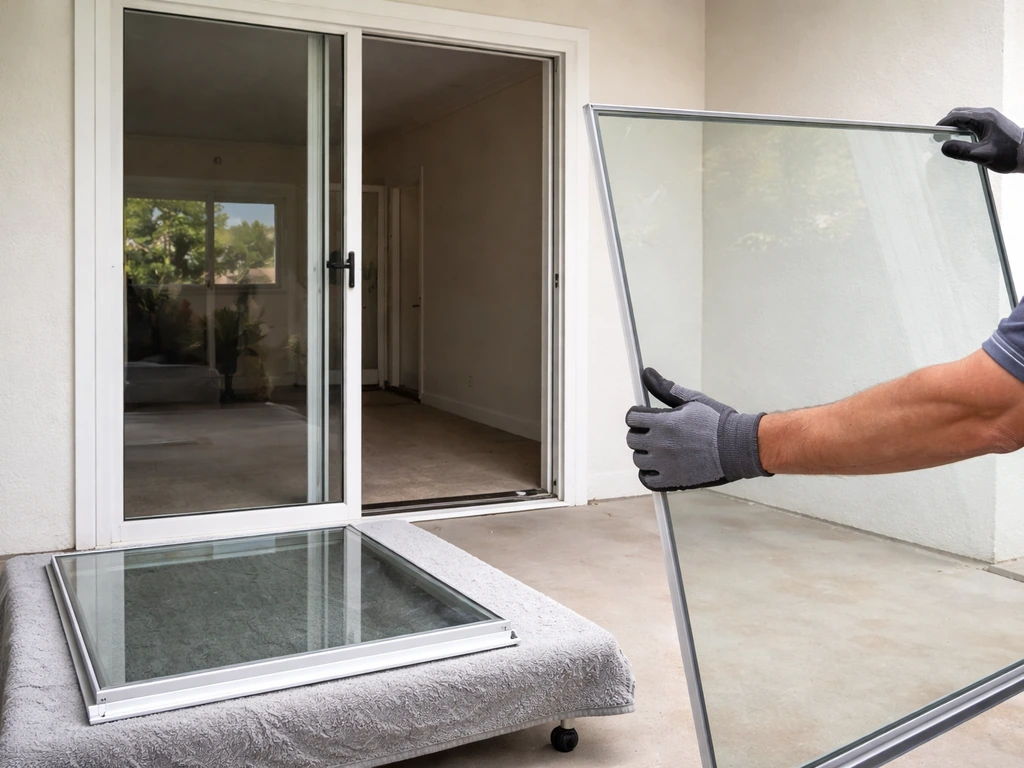
In these cases, the practical answer is glass replacement. If you have a broken patio door glass panel, the safest path is usually professional assessment and replacement rather than trying to polish damage out. Depending on your door's construction, this might mean replacing just the glass panel within the existing frame, or replacing the full sealed IGU. If you're not sure how your door is built or whether the glass is tempered, a glass shop can assess it quickly and give you a replacement quote. It's often less expensive than people expect, especially if the frame and hardware are still in good shape.
If you're looking into what replacement actually involves, topics like how to replace the glass in a patio door or dealing with a broken patio door panel are worth reading alongside this guide to understand the full scope of that path.
After the repair: finishing up and keeping it scratch-free
Final clean and polish
Once you're satisfied with the repair, do a thorough final clean. Wipe off all cerium oxide residue with a damp microfiber cloth, then follow up with a standard glass cleaner and a dry microfiber cloth. Check the repair in different lighting, including direct sunlight and indoor lighting at night. Polished areas sometimes look different under varying light conditions, and you want to confirm the result before calling it done.
Preventing new scratches
Most patio door glass scratches come from a few predictable sources: abrasive cleaning tools, debris caught in the door track getting dragged along the glass as the door moves, or outdoor furniture and equipment bumping against the panel. If the patio door glass is broken instead of just scratched, replacement or professional repair is usually the safest option Most patio door glass scratches. Here's how to avoid repeating the problem:
- Always clean patio door glass with a clean microfiber cloth, never paper towels (which can be abrasive) or dirty rags that might contain grit.
- Clean the door track regularly. Grit and debris in the track gets picked up and dragged against the glass edge every time the door slides. A clean track is one of the easiest ways to prevent edge scratches.
- Rinse the glass with plain water before wiping to flush loose particles off the surface before you apply any cloth pressure.
- Keep outdoor furniture, grills, and potted plants at least a foot from the glass panel. Wind and movement cause more contact than people expect.
- If you have pets, especially large dogs, consider a transparent protective film on the lower section of the glass. It's much easier to replace a film than to polish or replace glass.
One last thing: after polishing, the repaired area may feel slightly different to the touch than the surrounding glass because the micro-surface texture has been altered. That's normal. What you're checking for is optical clarity in normal use, and for most light scratches treated correctly with cerium oxide, you'll see a genuine improvement that makes the scratch far less noticeable, if not invisible.
FAQ
Can I use toothpaste, baking soda, or a scratch-removal paste to fix a glass patio door scratch?
It depends, but generally avoid toothpaste and baking-soda rubbers. Many have uneven abrasives and binding agents that can leave haze or micro-scratches. If you do want an alternative, stick to cerium oxide (or a dedicated glass restoration kit) because the abrasive size and behavior are more predictable for glass.
How do I tell if my patio door glass has low-e coating before polishing?
The safest way is to find the door brand and model number and ask the manufacturer whether the outer pane is low-e. If you can’t find the info, look for labeling on the door spacer or by contacting the installer, since low-e is often on the surface you will be polishing (and it can be permanently damaged).
What grit should I start with if I try wet-sanding before cerium oxide?
If your nail barely catches but the scratch is still visible, start with 600-grit wet-dry sandpaper as a first attempt, then move to 1200-grit and 3000-grit only if you still see uneven haze. Don’t jump straight to fine grits, because the deeper groove may not level out and you will be polishing haze instead of the scratch area.
How can I avoid creating new scratches while polishing?
Clean and dry the glass thoroughly, then wipe with fresh microfiber right before you start. Also keep checking the pad or felt wheel, because grit trapped in it will grind across the surface. If you drop the pad on the track or floor, rinse it and replace it if it’s visibly contaminated.
Should I remove the door from its track before polishing the glass?
It often helps but it’s not required for surface scratches. If the glass is still in the frame, just protect the surrounding surfaces from polish residue and keep the door from moving so debris in the track cannot re-contact the glass during your work.
How long should I keep polishing before I conclude it can’t be removed?
Do a wipe-and-inspect loop and reassess frequently. If after about four to five polishing passes the scratch appearance does not change at all, stop and assume the damage is deeper or a different kind of defect than a surface scuff.
Will polishing work on scratches that look like they are inside the insulated glass unit?
Usually no. If you see fogging, streaky cloudiness that seems trapped between panes, or the scratch pattern appears positioned between the sealed layers, that points to a sealed-unit failure. In that case, polishing the outer surface will not restore clarity.
Is it safe to use a power drill or rotary tool on patio door glass?
It can be, but keep speed low to moderate and keep the pad moving constantly. Heat is the main risk, and overheating can stress tempered glass or increase haze. If you can, use a variable-speed setup and practice on a less noticeable spot first.
What should I do if the scratch area still looks cloudy after using cerium oxide?
Cloudiness can come from incomplete residue removal or from leveling issues if you wet-sanded. Wipe the area with a damp microfiber to remove polish residue, then inspect again in different lighting. If it’s still visibly frosted, you may need a higher-fineness approach, but stop if you suspect you are grinding through coatings.
Can I polish scratches on textured, patterned, or frosted patio door glass?
Avoid assuming the method transfers. Textured or patterned finishes can hide or amplify defects, and abrasives may alter the appearance of the pattern. If the surface is decorative film or coating, polishing can remove or damage it, so confirm the glass type before proceeding.
Does polishing affect the glass warranty or affect how the glass is later replaced?
It can. Polishing can damage low-e coatings, and it can also change the surface micro-texture even when it improves optical clarity. If replacement is likely, it may be better to contact a glass shop first so they can assess the panel before you modify it.
How do I remove the last haze after sanding and polishing?
After your final cerium oxide step, wipe with a damp microfiber to lift residue, then use a standard glass cleaner and a dry microfiber cloth. Recheck in direct sunlight and at night under indoor lighting, because some haze only becomes obvious under angled light.
What are the red flags that mean I should replace the glass instead of polishing?
Replace or get a professional assessment if the glass is shattered, the damage is at or near the edges or corners (structural risk on tempered glass), or if the scratch catches deeply. Also stop if defects appear to be between sealed panes, since polishing won’t fix sealed-unit failures.
How can I prevent the scratch from coming back or worsening?
Reduce the usual sources: avoid abrasive cleaners on the exterior, keep debris out of the door track so it does not get dragged across the glass, and make sure furniture or equipment is not stored in a way that bumps the panel. After polishing, the area may feel slightly different, that’s normal, but continued contact from track grit will keep re-scoring it.
Next Article
Replace Broken Glass Sliding Patio Door: DIY Guide
Step-by-step DIY to replace broken glass in a sliding patio door, align tracks, fix rollers, and seal drafts.