You can replace broken patio door glass yourself if your door uses glazing beads to hold the glass in place. The process involves safely clearing the broken glass, ordering the correct insulated glass unit (IGU) matched to your door's exact dimensions and glass type, then removing the beads, swapping the glass, and resealing everything so the door rolls smoothly, locks properly, and stays weathertight. If your glass is pressed directly into a solid frame with no glazing beads visible, that job is better handed to a pro. Here's how to work through the whole thing from start to finish.
Broken Patio Door Glass: DIY Replacement Steps Today

Jamie Archer
5 Jun 2026
First: Make the area safe right now
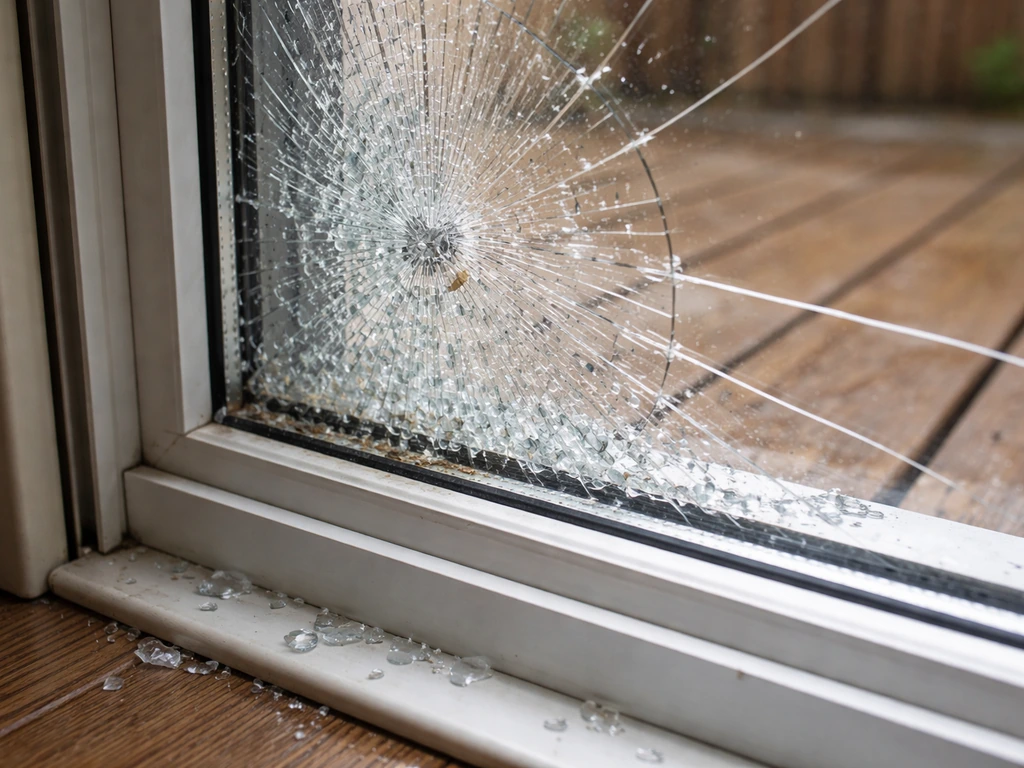
Before you do anything else, put on thick work gloves and safety glasses. Patio doors almost always use tempered glass, which shatters into hundreds of small cubes instead of long sharp shards, but those cubes are still dangerous and they scatter everywhere. If you have laminated safety glass (it looks like the pieces stay somewhat bonded together rather than falling apart), the interlayer holds things together a bit more, but you still need PPE.
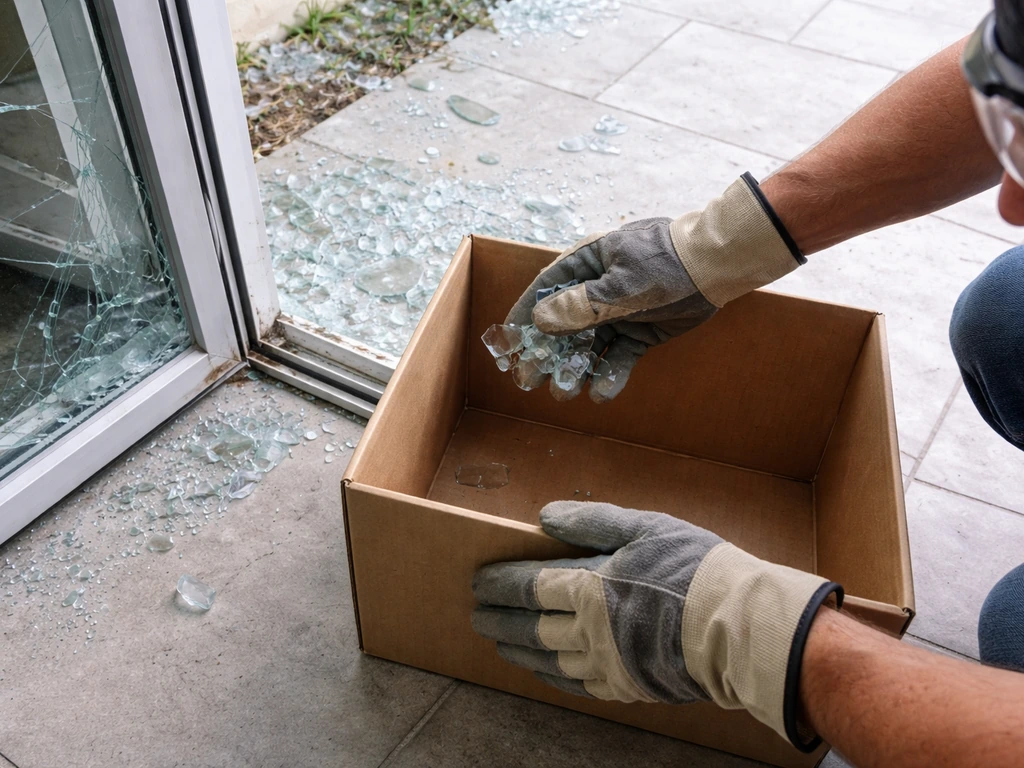
Start by picking up the larger pieces by hand and placing them in a heavy cardboard box, not a plastic bag that can tear. If the panel is fully shattered, follow these cleanup steps closely so you can remove every fragment safely before you measure for the replacement glass larger pieces. Then use a shop vacuum with a fine-dust filter to pull up the smaller fragments from the track, floor, and surrounding area. A regular vacuum can spread glass dust, so the shop vac matters here. Check the track channel carefully since glass cubes love to hide in there.
Once the glass is cleared, you need to close off the opening. Treat the broken glass as both a safety hazard and a security concern by covering and blocking the opening quickly, and avoid climbing or unsafe positions to inspect or tape it Once the glass is cleared, you need to close off the opening.. Tape heavy plastic sheeting over the entire frame opening, sizing it larger than the hole so it overlaps the frame by several inches on all sides. For the lower portion of the door, add a piece of plywood or cardboard as a solid barrier, especially if you have kids or pets. This combination handles both weather and casual security while you source the replacement glass. If you can't get the new glass for several days, have a glazier do a proper board-up. A plastic sheet held with tape won't cut it for an extended period.
Figure out exactly what you have before ordering anything
This is the step people rush and then regret. Ordering the wrong glass means a second wait and possibly a restocking fee. Take your time here.
Sliding door or hinged patio door?
Most patio doors are sliding glass doors with a panel that rolls along a track. If you are dealing with a broken glass sliding patio door, the same glazing bead checks and measurements will help you order the right replacement sliding patio doors. Some are hinged French-style patio doors. The glass replacement process is similar in concept but different in disassembly. This guide focuses primarily on sliding patio doors since they're the most common, but the glass identification and ordering steps apply to both.
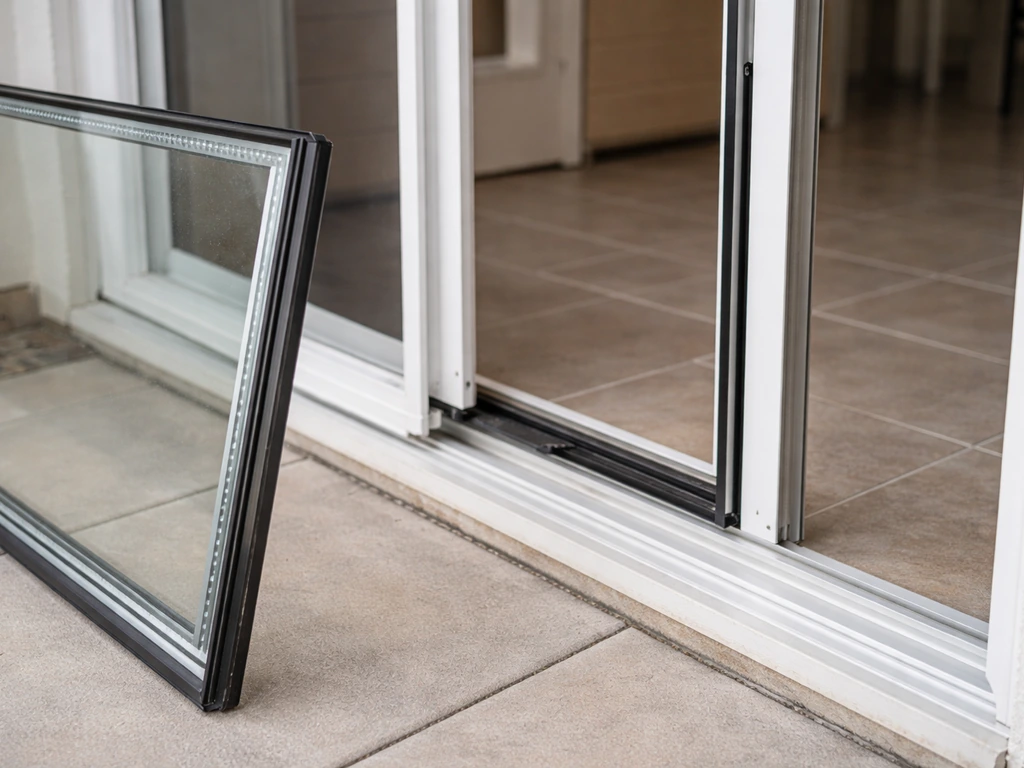
Glazing bead system or solid frame?
Look at the edge of the glass where it meets the door frame. If you see a separate strip of material running along the glass edge that appears to snap or clip into place, that's a glazing bead (sometimes called a glazing retainer). This is the DIY-friendly system. If the glass appears to be seated deep into a channel with no visible separate strip, the glass may be pressed directly into the frame and is much harder to replace without disassembling the entire panel. Angi notes that if there’s no glazing bead and the glass is seated deep in the frame, it often requires more disassembly, increasing DIY risk. In that case, honestly, call a glass shop.
Single pane or insulated glass unit (IGU)?
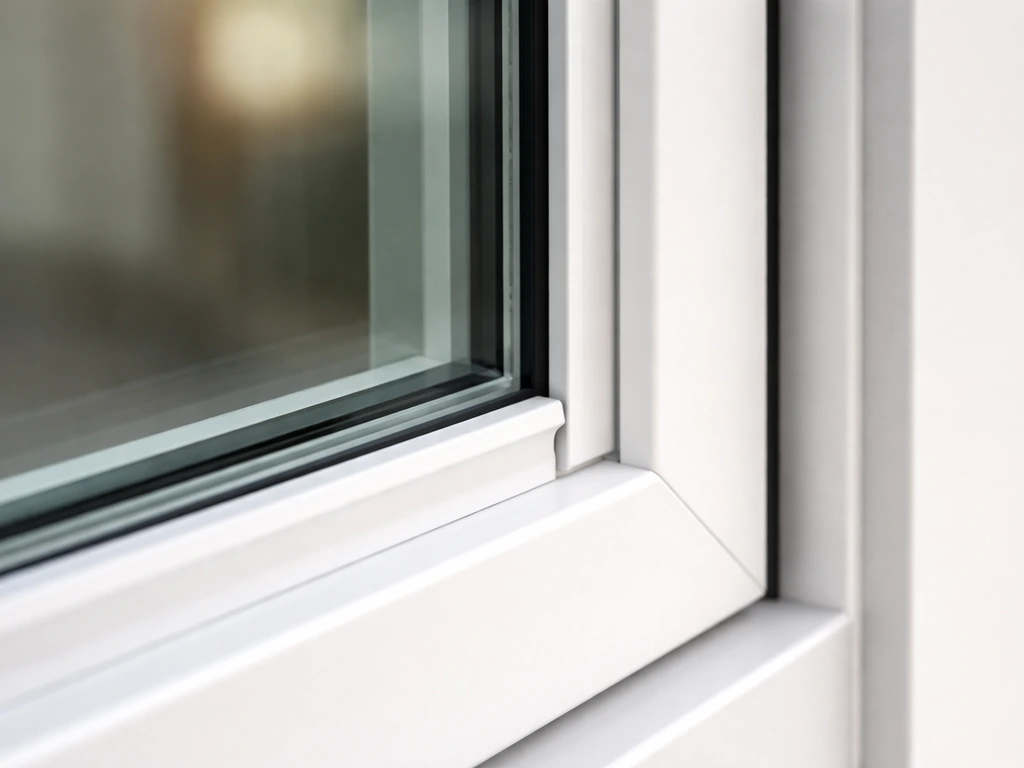
Look at the edge of the remaining glass or the broken frame. If you see a metal spacer bar between two panes of glass at the edge, you have an IGU (insulated glass unit), which is a sealed double-pane unit with argon or krypton gas trapped between the lites. This is what most patio doors built after the mid-1990s use. You need to replace the entire sealed unit, not just one pane. Trying to replace only one pane of an IGU defeats the whole purpose and won't fit back into the frame correctly.
Find the glass ID code
On an IGU, look for a production or identification code printed on the spacer bar at the edge of the glass, or sometimes etched directly onto the glass surface near a corner. It's typically 12 to 15 digits and tells the manufacturer exactly what glass configuration was used. If you can find this code on any intact portion of the door (or on the stationary panel if your door has one), it makes ordering a replacement significantly easier. Doors made before 1996 or custom-size units may not have a code, in which case you'll order by measured dimensions and specifications.
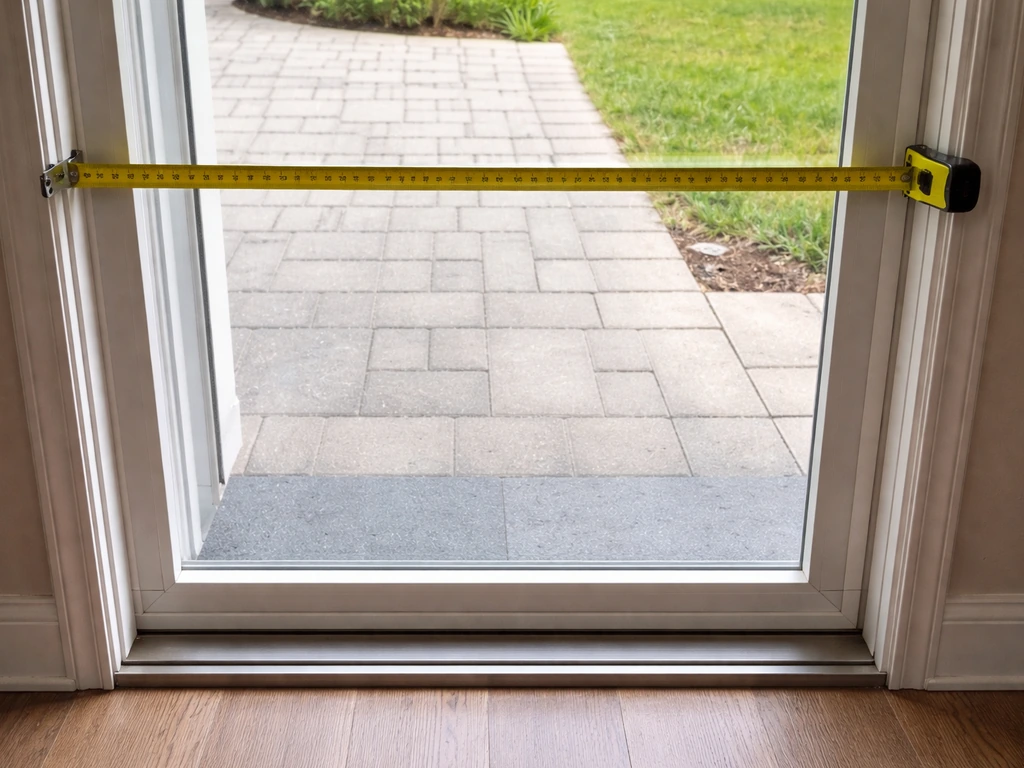
Measure carefully
Measure the glass opening in the door frame (the daylight opening) in at least three places for both width and height, since frames aren't always perfectly square. Also measure the thickness of the existing glass unit if any intact piece remains. Standard IGU thickness for patio doors is commonly 5/8 inch or 1 inch, but confirm yours. Write everything down before calling a glass supplier.
Tools, materials, and parts to have ready before you start
- Heavy leather or cut-resistant work gloves
- Safety glasses or goggles
- Shop vacuum with fine-dust filter
- Heavy cardboard box for glass disposal
- Putty knife or stiff-blade utility knife
- Flathead screwdriver and pry tool (for glazing beads)
- Rubber mallet
- Tape measure
- Pencil or marker
- Setting blocks (rubber, sized to match your door's glass thickness, typically 1/8-inch or 1/4-inch)
- Replacement glazing beads or retainers (often reusable if undamaged; confirm with supplier)
- Glazing sealant or glazing tape compatible with your door system
- Heavy plastic sheeting and duct tape (for temporary cover while you wait for glass)
- Replacement IGU matched to your exact measurements and glass code
- Painter's tape
- Clean rags or lint-free cloths
- Isopropyl alcohol for frame cleaning
Order your replacement IGU from a local glass shop rather than a big-box store if you can. Local glaziers can cut to exact size, confirm the glass type, and often turn around orders faster. Expect 3 to 7 business days for a standard IGU. Custom sizes or specific coatings (low-e, tempered, specific tint) can take longer.
How to replace the broken patio door glass: step by step
These steps assume a sliding patio door with a glazing bead system. Work slowly. This isn't a rush job.
- Slide the door panel to an open position and lift it off the track, or work on it in place if it's the stationary panel. For the sliding panel: lift up on the panel while pulling the bottom toward you. Have a helper if the panel is heavy (most full-size patio door panels weigh 50 to 80 pounds or more). Lay the panel flat across sawhorses if at all possible — it's much easier to work on horizontally and safer against shattering any remaining fragments.
- Support the glass panel before touching the glazing beads. If any glass remains in the frame, tape a few strips of painter's tape across it to hold fragments together while you work. This is especially important if the break is partial.
- Cut the old glazing sealant. Run your utility knife along the edge where the sealant meets the glass and frame. Work carefully and don't gouge the frame. You're just releasing the bond, not digging into anything.
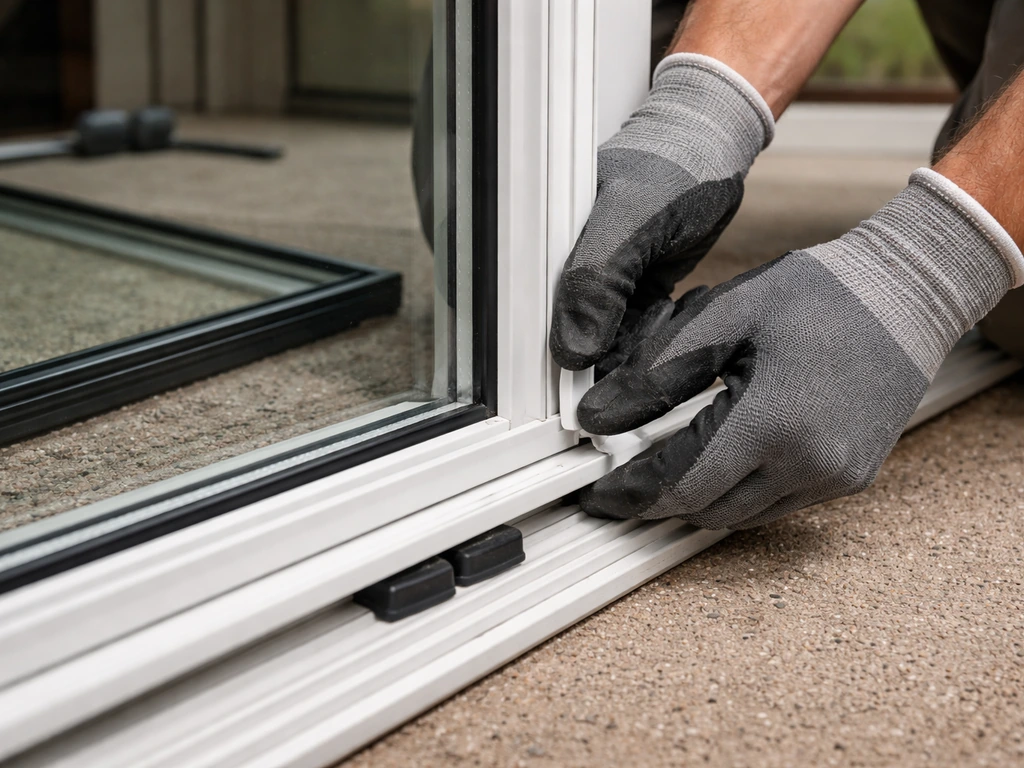
- Remove the glazing beads. Use a flathead screwdriver or dedicated pry tool to pop the glazing bead away from the frame, starting at a corner. Work around the perimeter. Most glazing beads snap in and come out with moderate pressure. Set them aside — if they're undamaged, you may be able to reuse them. If they're cracked or bent, replace them.
- Remove the broken glass. With beads out and the panel supported, the glass unit should be loose. Lift it straight out. If it's stuck, use a putty knife to gently pry along the edge. Don't force it — work around the perimeter gradually. Place the broken unit directly into your cardboard disposal box.
- Remove the old setting blocks and spacers from the bottom rail. These are small rubber blocks that the glass sits on (so it's not resting directly on the aluminum frame). Note their position — specifically, they should be positioned to either side of any weep holes in the bottom rail, never directly over them. Set them aside or replace with new ones.
- Clean the frame channel thoroughly. Use a putty knife to scrape away any old sealant residue, then wipe the channel down with isopropyl alcohol on a clean rag. The new IGU needs to seat against a clean surface for a proper seal.
- Place new setting blocks on the bottom rail. Position them roughly one quarter of the way in from each side of the glass width, and confirm they are not sitting over any weep holes. The weep holes are small drainage slots in the bottom rail — blocking them will trap water and cause leaks.
- Set the new IGU into the frame. With a helper, lift the new glass unit and lower it carefully into the frame opening, resting it on the setting blocks. Make sure it's centered in the opening with consistent gap on all sides. Do not force it. If it doesn't drop in cleanly, check your measurements and confirm the glass dimensions are correct before proceeding.
- Apply glazing sealant or glazing tape to the frame channel if your door's system requires it. Check your door's original installation method — some systems use glazing tape applied to the frame before the glass goes in, others apply sealant after. Follow the method your door originally used.
- Snap the glazing beads back into place. Start at one corner and work around the perimeter, pressing firmly until each section seats. You should hear or feel it click in. Don't use excessive force — if a bead won't seat, check that the glass is positioned correctly first.
- Apply any finish sealant bead at the glass-to-bead junction if required by your door system, and tool it smooth. Wipe away excess with a damp cloth immediately.
Sealing, alignment, and weatherproofing checks
Before you reinstall the panel into the track and call it done, run through these checks with the panel still on the sawhorses if possible.
- Glass seating: Look at all four edges and confirm the IGU is sitting evenly on the setting blocks with consistent reveal around the perimeter. Uneven seating causes rocking and can crack a new pane over time.
- Glazing bead contact: All beads should be fully seated with no gaps. Press along the length of each bead and listen for any sections that flex without clicking home.
- Weep holes clear: Look along the bottom rail exterior and confirm none of the weep hole slots are covered by sealant, setting blocks, or glazing material. These holes are how condensation and any water intrusion drain out.
- Sealant coverage: Any sealant you applied should be continuous with no gaps. A gap in the sealant line is a future leak point.
- Panel weight and flex: The glass shouldn't rattle or shift when you press the center of the pane gently. Any movement means the beads aren't fully seated or the glass isn't resting solidly on the setting blocks.
Once the panel is reinstalled in the track, check the rollout and operation. The door should slide smoothly without dragging or wobbling. If it drags, the rollers may need adjustment (the adjustment screws are typically at the bottom corners of the sliding panel). The door should also sit flush with the stationary panel when closed, with the lock engaging cleanly. If the lock striker isn't aligning, adjust the door height via the roller screws until the lock lines up. Finally, run your hand along the perimeter of the closed door on a windy day, you shouldn't feel air movement. If you do, check the weatherstripping along the frame and the door's contact with the seals.
When to stop and call a pro instead
This project is genuinely DIY-able for most homeowners if the door has a glazing bead system and you're comfortable with basic home repair. But there are situations where calling a glass shop or door installer is the smarter call.
| Situation | What it means | Recommendation |
|---|---|---|
| No glazing beads visible | Glass is pressed directly into a solid frame; requires full panel disassembly | Call a glazier or door installer |
| Frame is bent or damaged | A new IGU won't seat or seal correctly in a warped frame | Pro repair or frame replacement needed |
| Measurements don't add up | If the opening isn't square or you can't confirm glass thickness, wrong order is likely | Have a glazier measure and order for you |
| Persistent drafts after install | Glazing bead gaps, weatherstrip damage, or frame seal failure | Check beads first; if persists, call a pro |
| Door won't lock after reinstall | Frame shift or roller/locking rail misalignment beyond basic adjustment | Pro adjustment or hardware replacement |
| Glass needed urgently for security | Temporary DIY cover isn't enough for overnight security | Call a glazier for a professional board-up today |
| Specialty glass (impact-rated, tempered + laminated, specific coatings) | Wrong replacement glass is a code and safety violation | Let a pro source and install the correct unit |
If you're not sure whether your door has glazing beads, take a few clear photos of the glass edge and frame and send them to a local glass shop. Most will tell you within minutes whether it's a DIY candidate. The glass replacement itself is the straightforward part once you've correctly identified the door system and ordered the right unit. Getting those two things right is where the job is actually won or lost.
Related tasks worth knowing about as you work through this: if your door also has surface scratches elsewhere on the glass, that's a separate repair. And if you're dealing with a fully shattered panel where removing the remaining glass fragments from the frame is the main challenge before you can even measure, that cleanup and removal process has its own specific steps worth reviewing before you dive in.
FAQ
Is tempered glass always what’s in a patio door, and how can I confirm without a label?
Many sliding patio doors use tempered glass, but you can confirm by looking for a subtle “etched” mark on some lites or by checking the door’s paperwork, prior invoice, or the IGU code on the spacer. If you cannot verify type, order using the IGU spacer ID and thickness rather than guessing, since tempered, laminated, and heat-strengthened glass differ in fit and performance.
What should I do if a glazing bead won’t come off or breaks while I’m removing it?
If the bead resists, don’t pry aggressively in one spot. Work gradually around the perimeter and support the bead as you remove it so it doesn’t snap. If it breaks, you typically need to replace the retainer parts, because damaged beads can prevent the new glass from seating evenly and can reduce weathering.
Should I remove the entire door panel from the track before replacing the glass?
Usually you can remove the panel for better access and cleaner reassembly, but it’s not always required. If the rollers and height adjustment hardware are easy to reach and you have safe sawhorse setup, removing the panel often reduces the risk of misalignment and helps you verify smooth rollout during reinstallation.
What if I measured the opening and the replacement IGU is a tiny bit off?
A small mismatch usually means measurement error, not an IGU “close enough” situation. Recheck width and height at least three points and verify the glass thickness against what you ordered. If the IGU still doesn’t seat properly, stop and contact the glass shop, since forcing it can damage beads and may crack the new unit.
Can I replace just one pane instead of the full IGU if the double-pane glass is broken?
If there’s a sealed IGU spacer between two panes, you should replace the entire insulated unit. One-pane replacement generally won’t restore the seal, performance, and proper spacing, and it often won’t fit the frame or restore energy efficiency and moisture resistance.
How do I handle doors with no visible glazing beads?
If the glass looks pressed into a solid frame with no separate retainer strip, DIY replacement can become a full panel or frame disassembly job. In that scenario, the safer path is to have a glass shop evaluate it from the inside and outside, because they may need to remove the whole sash or replace components rather than just the glass.
What should I do if the IGU spacer code is missing, unreadable, or partly covered by residue?
Try cleaning only the printed areas on intact portions using a gentle glass-safe cleaner, then use good lighting and a straight-on photo to capture the digits. If the code still can’t be read, order by measured dimensions plus confirmed glass thickness and any visible coatings (like low-e). Expect more lead time when the shop can’t use a factory ID.
How can I tell the exact glass thickness I should order?
Use any intact edge portions to estimate thickness, then confirm by the existing IGU measurements from the spacer area if accessible. If you can’t measure directly, rely on the shop’s reading from the remaining unit code. Avoid assuming common thickness values, since some doors use nonstandard IGU builds.
Is it okay to use a tarp instead of plywood/cardboard for the temporary board-up?
Tarp alone is risky because it can flap, doesn’t create a rigid barrier, and may not hold up against weather or impact. The plywood or cardboard barrier at the lower portion is meant to stop casual contact and reduce pet or kid access, while the plastic sheeting covers weather exposure until the glass arrives.
How long can I leave the opening covered with tape and plastic before I need a pro?
Plastic sheeting taped over the frame is not meant for extended periods. If the replacement is delayed more than a few days, arrange a proper board-up through a glazier or installer, because wind, rain, and tape failure can lead to damage and safety issues.
Why does my door lock not engage after the new glass is installed?
Lock misalignment usually comes from door height or roller position, not the glass itself. Use the roller adjustment screws at the bottom corners to raise or lower the panel until the lock striker lines up with the receiver, then recheck that the door sits flush when closed.
How can I test for drafts correctly after replacement?
With the door fully closed, run your hand along the perimeter at multiple points. If you feel air movement on a breezy day, inspect weatherstripping contact and the glass seating inside the frame, since poor seating or a damaged bead can create small gaps.
Do I need to replace weatherstripping or seals when replacing broken patio door glass?
Not always, but you should inspect the seals while the panel is accessible. If the weatherstripping is compressed, torn, or brittle, replacing it can fix lingering drafts that the glass replacement alone might not resolve, especially around the meeting edges of the door.
Next Article
How to Replace Glass in a Patio Door Step by Step
Learn how to replace glass in a sliding patio door, choose the right unit or insert, and install safely without leaks.