If your patio door glass is broken, your first move is safety: keep everyone away from the area, don't try to clean up bare-handed, and don't touch cracked glass that's still sitting in the frame. Once the immediate danger is managed, you can figure out exactly what broke, patch it temporarily, and then decide whether this is a DIY fix or a job for a glass pro.
Patio Door Glass Broken: Safety, Diagnosis, Replacement Steps

Jamie Archer
6 Jun 2026
Do these things right now
Before you assess damage or grab tools, deal with the hazard. Broken patio door glass is a serious injury risk, especially tempered glass, which shatters into hundreds of small chunks rather than large shards. Here's the order of operations:
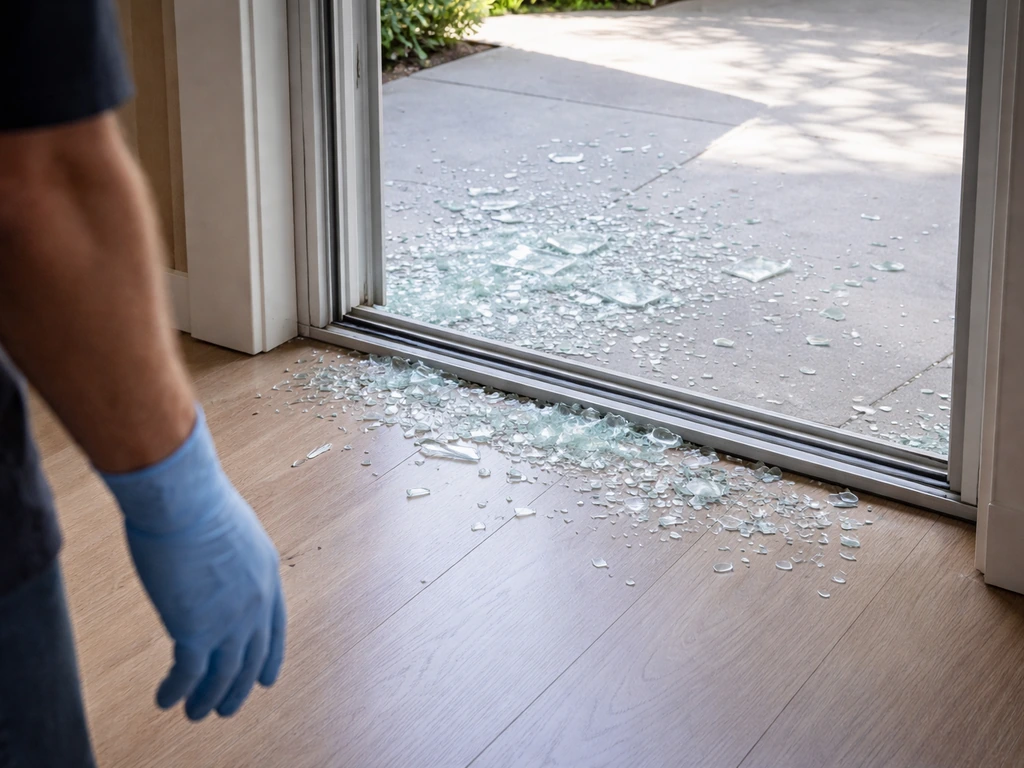
- Get children and pets out of the room immediately and keep them out until every visible fragment is cleaned up.
- Put on thick work gloves and safety glasses before you go anywhere near the glass. Never handle broken glass bare-handed, even small pieces.
- Do not use a broom or mop to clean up. Both spread tiny glass particles into carpet and grout lines where they're nearly impossible to remove. Use a damp paper towel to pick up small fragments, then a vacuum with a hose attachment.
- If glass is cracked but still seated in the frame, do not touch it or apply pressure. Cracked glass that looks intact can collapse without warning.
- Once large fragments are safely bagged (use a double layer of plastic bags), sweep the surrounding floor area with a flashlight at floor level to catch any pieces you missed.
After cleanup, your next job is to assess what broke and secure the opening. A broken patio door creates a weather gap and a security vulnerability at the same time, so you want a temporary fix in place within the same day if at all possible.
Figure out exactly what's broken
Not every patio door problem is just broken glass. Before you order a replacement panel or call a glazier, spend five minutes doing a proper inspection. This will save you from fixing the symptom while missing the actual cause.
The glass panel itself
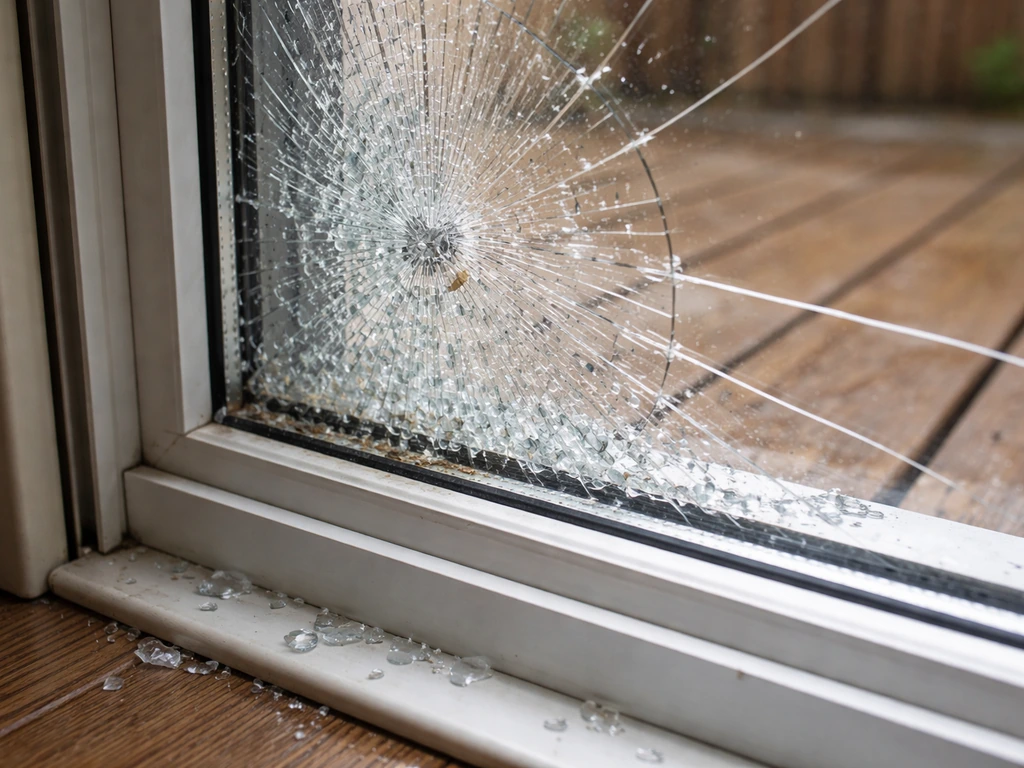
Look at the break pattern. Tempered glass (which is what safety codes require in patio door applications under ANSI Z97.
1 and CPSC 16 CFR 1201) shatters into small, roughly cube-shaped pieces rather than large jagged shards. Laminated glass, on the other hand, holds together after breakage because of a polyvinyl butyral interlayer between the panes, so it may look cracked but stay in one piece. Annealed (plain) glass breaks into sharp, dangerous shards and is not legal for patio door use in modern installations. Check the bottom corner of your glass for a permanent etched label.
This label is required by law on all safety glazing and will tell you the glass type, the ANSI/CPSC standard it meets, and the manufacturer. If there's no label, you may be dealing with older non-safety glass, which is another reason to bring in a pro.
Most modern patio doors use an insulated glass unit (IGU), which is two panes of glass separated by a spacer and sealed around the edges to trap a layer of air or argon gas. If only the outer pane is broken but the inner pane looks intact, you still have a compromised IGU because the seal is gone. If you see fogging, condensation, or a milky-white film between the panes on an otherwise unbroken door, that's a seal failure rather than a physical break, but it still needs replacement.
The frame and glazing bead
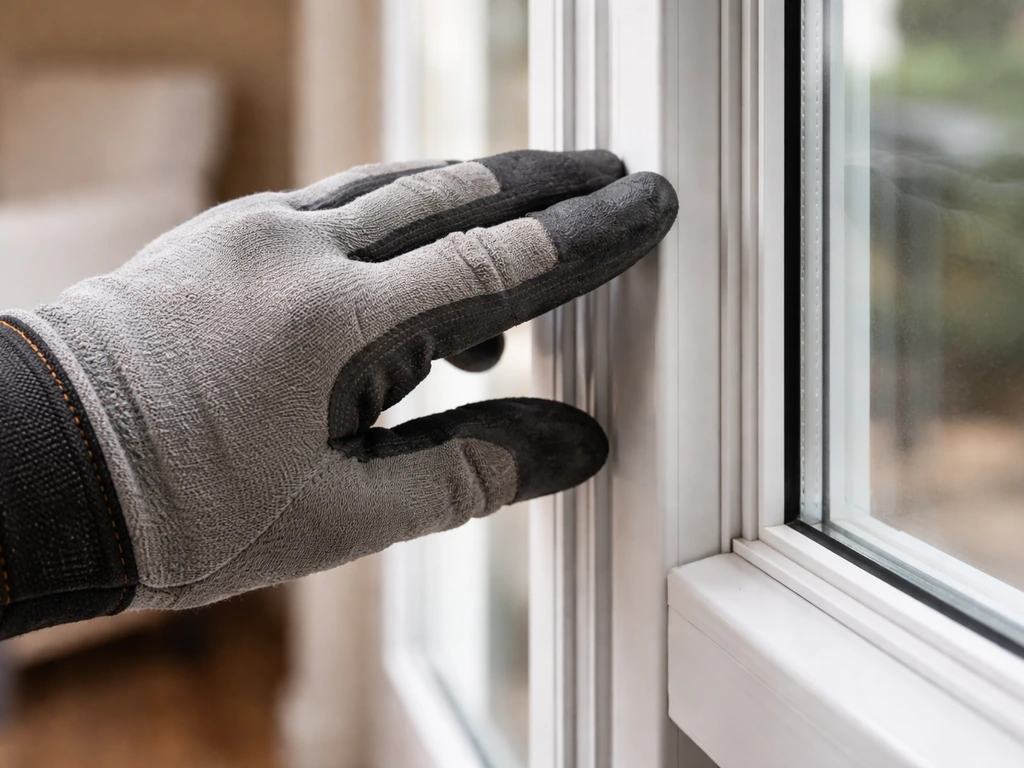
Run your hand along the door frame (with gloves on) and look for cracks, warping, or sections that feel soft or spongy. A damaged frame can cause glass to flex and break, and if the frame is compromised, replacing just the glass won't fix the underlying problem. Also look for the glazing bead, the plastic or rubber strip that runs around the perimeter of the glass panel and holds it in the frame. If the bead is cracked, missing, or pulled away from the frame, it may have contributed to the break and needs replacement along with the glass.
Rollers and track
Lift the sliding panel slightly and try rolling it back and forth. If it grinds, drags, or sits noticeably lower on one side than the other, the rollers are worn or the track is damaged. Misaligned rollers cause the door panel to sit unevenly in the frame, which puts uneven stress on the glass and can cause cracking over time. This is worth fixing when you do the glass repair, not after.
The lock and latch
Check that the lock still engages properly. If the door was forced open or took an impact, the lock mechanism or strike plate may be bent or misaligned. A door that won't lock is a security problem regardless of whether the glass is replaced, so note this during your assessment.
Temporary fixes to get through today
If you can't get a replacement glass unit installed today, you need to close off the opening against weather and intruders. Here are your options in order of how effective they are:
Plywood board-up
This is the most secure temporary fix. Cut a piece of 3/4-inch plywood slightly larger than the glass opening so it overlaps onto the surrounding frame by a couple of inches on each side. This overlap is what gives it holding strength. Screw it into the frame using wood screws, and add a bead of weatherstrip foam tape around the perimeter to cut drafts. If you don't have plywood, a solid-core interior door or a sheet of OSB will work in a pinch. A board-up like this is genuinely secure overnight and will hold through most weather.
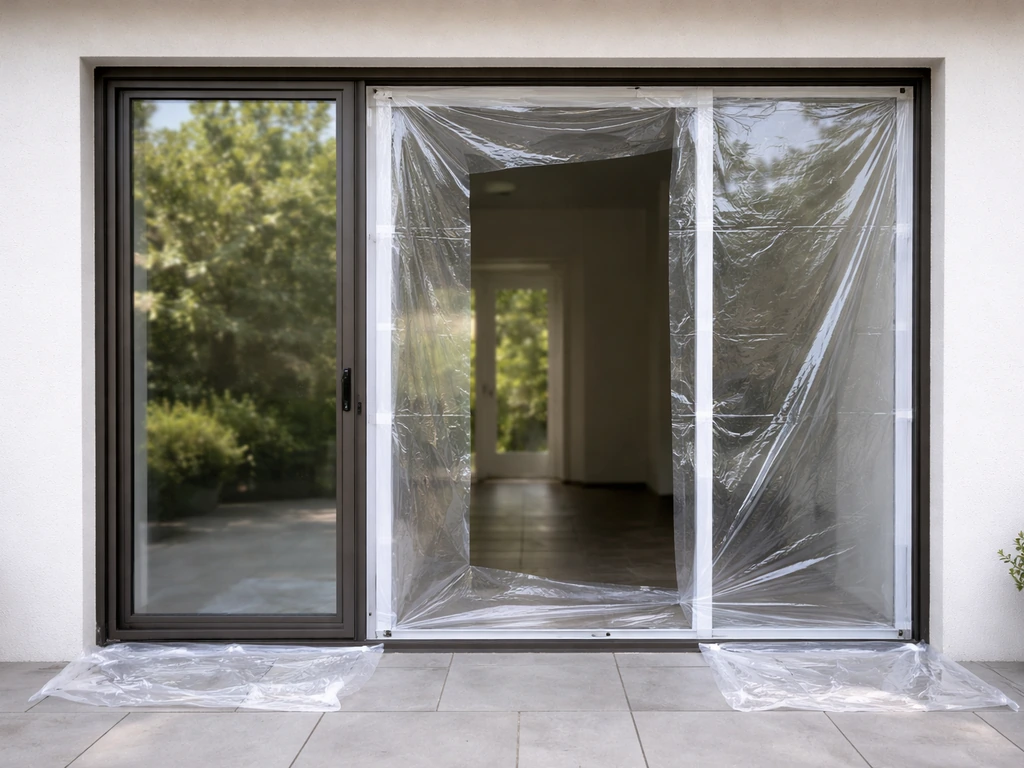
Heavy-duty plastic sheeting
If the glass is cracked but mostly intact (tempered glass that's shattered but still sitting in the frame, for example), you can staple or tape 6-mil poly sheeting over the interior of the opening as a short-term weather barrier. This won't stop anyone from getting in, but it keeps rain out and reduces drafts. Don't seal it completely airtight; leave a small overlap rather than taping every edge down flat, which allows the slight pressure equalization the opening needs without trapping moisture.
Keeping the door secure
Even with a board-up in place, reinforce security. Drop a cut-down wooden dowel or a security bar into the track so the door can't be slid open from outside. If your lock is damaged, add a hasp and padlock on the inside. Don't rely on the existing lock if the door or frame has been impacted.
How to replace broken patio door glass yourself
DIY glass replacement is realistic for patio doors that use accessible glazing beads, which is the case for most sliding glass doors made in the last 30 years. If you decide not to tackle the project yourself, use the steps in Replace broken glass sliding patio door to verify the right glass type and measurements before installation DIY glass replacement.
If your door has glass that's set directly into a solid frame with no visible bead, this is a harder job and you should skip ahead to the pro section. For everything else, here's how to do it. Here is a practical guide on how to replace glass in a patio door step by step, from removal to reseating the new panel how to replace glass in patio door.
Tools and materials you'll need
- Heavy work gloves and safety glasses (non-negotiable)
- Putty knife or small pry bar
- Utility knife
- Tape measure
- Pencil or marker
- Vacuum with hose attachment
- Replacement IGU or glass panel (measured and ordered in advance)
- Glazing bead (may come with the replacement unit or purchased separately)
- Clear silicone sealant or glazing compound
- Setting blocks (rubber, sized for your unit)
- Screwdriver set
Step 1: Remove the door panel
Slide the door to the center of the opening. Find the roller adjustment screws at the bottom of the panel (usually visible from the edge or covered by a small plastic cap). Turn them counterclockwise to lower the rollers and create clearance. Lift the panel up into the upper track, then swing the bottom out toward you. Some panels also have an anti-lift pin or security tab at the top of the frame that you'll need to remove first. Lay the panel flat on padded sawhorses or a clean section of floor.
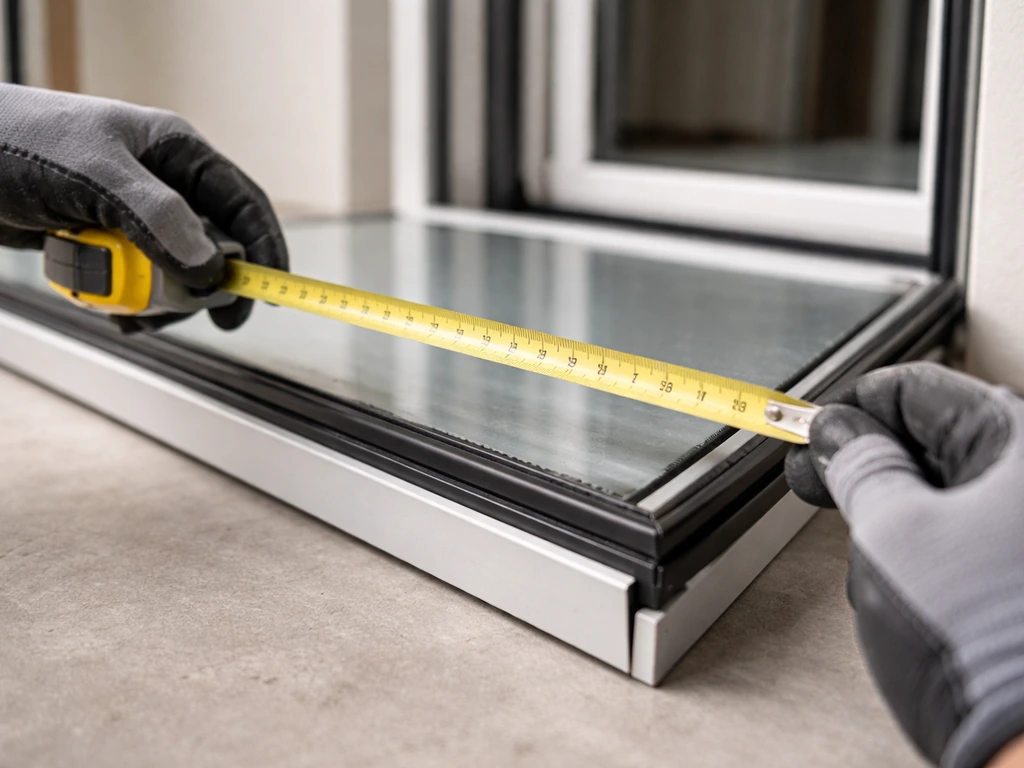
Step 2: Measure for your replacement glass
With the panel flat, measure the existing glass unit: height, width, and total thickness. For an IGU, thickness means the full measurement from the outside surface of one pane to the outside surface of the other pane. This spacer-to-spacer dimension matters because the replacement must fit the same frame rabbet depth. Write down all three measurements and double-check them before ordering. If the existing glass unit is still partially intact, measure from the outside frame of the IGU (the edge you can see), not from inside the frame.
Step 3: Remove the broken glass unit
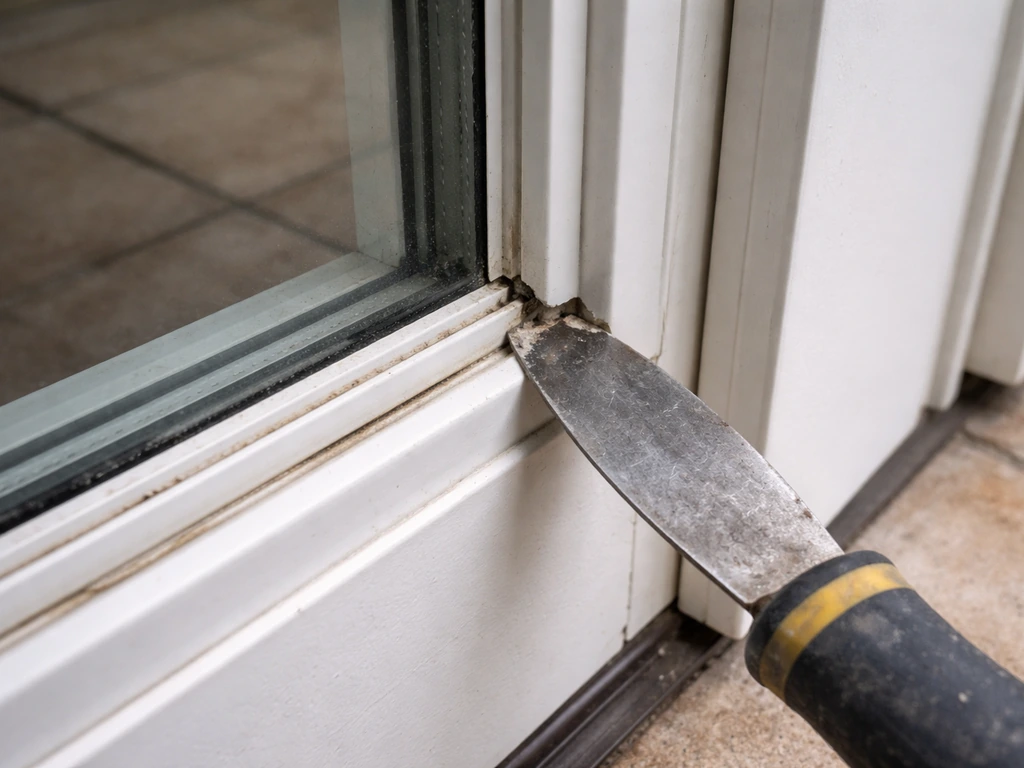
Use a putty knife to gently pry the glazing bead away from the frame, starting at a corner. Work around the perimeter, removing the bead in sections and setting it aside if it's reusable. Score any existing silicone or glazing compound along the glass edge with a utility knife. With the bead removed, the glass unit should lift free. Have a helper for this step; IGUs are heavy and awkward. Vacuum up any remaining glass fragments and wipe the frame channel clean before installing the new unit.
Step 4: Install the replacement unit
Place rubber setting blocks at the quarter points along the bottom of the frame channel. SCGMA notes that glazing blocks for IGU support should contact the full depth of the glazing, placed at quarter points (or minimum lengths), while maintaining minimum glass edge clearance and not restricting water drainage rubber setting blocks at the quarter points.
These support the full depth of the IGU and keep it from sitting directly on the frame, which would cause stress concentrations. Lower the new glass unit onto the setting blocks, centering it in the frame opening with equal clearance on all sides (typically 1/8 to 3/16 inch on each edge). Apply a controlled bead of clear silicone sealant around the perimeter where the glass meets the frame, then press the glazing bead back into place around all four sides.
Don't apply glass cleaner or solvent between the glass and bead, as some solvents can degrade the bead material.
Step 5: Reinstall the door panel and adjust
With the new glass installed and sealant set, lift the panel back into the upper track, swing the bottom in, and seat the rollers in the lower track. Turn the roller adjustment screws clockwise to raise the panel until it glides smoothly and sits level. Test the lock engagement and adjust if needed. Give the silicone 24 hours to cure before cleaning the glass.
When you should call a pro instead
DIY glass replacement is a reasonable project in many situations, but there are specific circumstances where calling a glazier or door specialist is the smarter call. Here's how to know which side you're on:
| Situation | DIY or Pro? | Why |
|---|---|---|
| Single pane in a beaded frame, clear measurements | DIY-friendly | Straightforward removal and reinstall with basic tools |
| Sealed IGU with fogging/condensation between panes | Pro recommended | IGU must be made to exact specs; field repair is not possible once seal fails |
| No glazing bead (glass set into solid frame) | Call a pro | Requires significant disassembly; easy to damage frame or mis-seat glass |
| Specialty glass (Low-E, tinted, obscure, laminated) | Pro recommended | Must match existing coating and thickness; difficult to source and verify correctly |
| Damaged or warped door frame | Call a pro | New glass in a warped frame will break again; frame must be addressed first |
| No safety glazing label found on existing glass | Call a pro | May indicate non-compliant original installation; pro can assess and advise |
| Door won't lock after the break | Call a pro (or locksmith) | Security gap; don't wait on this one |
On cost: a professional IGU replacement for a standard sliding patio door typically runs in the range of $100 to $300 per unit for the glass itself, with labor and travel on top of that. Specialty coatings, larger panels, or structural work push the cost higher. Get at least two quotes and make sure each glazier specifies the exact glass type (Low-E coating, argon fill, tempered) in their quote so you can compare apples to apples.
How to prevent this from happening again
Once the glass is fixed, a little maintenance goes a long way toward keeping your patio door in good shape and reducing stress on the new glass. Maintenance goes a long way, and learning how to fix scratches on glass patio door panels can help you keep your door looking clear and working smoothly maintenance goes a long way toward keeping your patio door in good shape.
Keep the rollers and track in good shape
Worn rollers are one of the most common causes of patio door glass stress. When a roller is damaged, the door sits unevenly in the frame, which transfers load to the glass every time the door is opened or closed. Clean the track a couple of times a year with a stiff brush and vacuum, then apply a silicone-based lubricant (not WD-40, which attracts dirt). If the door is grinding or dragging after lubrication, the rollers themselves likely need replacement, which is a low-cost fix that can dramatically extend the life of your glass.
Check the door alignment seasonally
Patio door frames shift slightly as seasons change and the house settles. Check the door's alignment every spring and fall: the gap between the door panel and the frame should be consistent from top to bottom on the latch side. If it's wider at the top or bottom, adjust the roller height screws to level the panel. A properly aligned door glides easily and seals evenly, which reduces both drafts and glass stress.
Upgrade your security hardware
If the break was caused by forced entry or impact, consider adding a secondary security bar in the track and replacing the factory lock with a mortise-style deadbolt designed for sliding doors. Anti-lift pins in the upper track prevent the door from being lifted out of the frame from outside. These upgrades cost very little and significantly raise the effort required to force the door.
Weatherproofing to protect the seal
The main enemy of an IGU seal is moisture intrusion, which starts at the edges. Inspect the exterior caulking around the door frame once a year and reapply silicone caulk anywhere you see gaps, cracking, or separation. Check that the weep holes at the bottom of the outer frame (the small slots that let water drain out of the track) are clear and unblocked. Keeping water away from the frame perimeter is the single best thing you can do to extend the life of your glass unit's seal.
FAQ
If only one pane of my patio door glass is broken, do I really have to replace the whole insulated glass unit?
Yes. Even if only the outer pane is shattered, the insulated glass unit (IGU) seal is typically compromised, which usually leads to fogging or moisture between panes. Treat it as an IGU replacement, not a single-pane swap.
What should I do if the patio door lock still works, but the latch seems loose after the glass break?
If the door still closes but the latch does not fully engage, do not “force it” with the cracked glass in place. Check for frame flex and bent strike plate alignment, then test lock engagement again after the new panel is installed and the silicone has cured.
How can I tell whether my patio door glass is just cracked, or the seal between panes has failed too?
If there is fogging, condensation, or a milky film between panes, that points to IGU seal failure. In most cases the replacement is the sealed unit, not resealing the edges in place, because the gap and spacer system are what must be restored.
Is it okay to completely seal the opening with plastic tape until the replacement glass arrives?
For safety, you can use 6-mil poly to cover the opening for weather control, but avoid fully taping every edge down airtight. Leaving a slight overlap helps pressure equalization, and you still need to keep intruders out using a dowel or security bar.
What if the replacement glass won’t seat smoothly in the frame after the bead removal?
If you remove glazing bead and find the glass unit bound up or the frame channel looks twisted, stop and get a pro. A distorted track or frame can cause the new IGU to stress-crack, even if the measurements look correct.
After cleaning, how do I make sure I did not leave glass fragments in the track or weep holes?
Wear cut-resistant gloves and use a shop vacuum, then inspect for small shards lodged in the track or weep area. Even tiny fragments can prevent rollers from rolling freely and can damage the bead or seal on the new unit.
When ordering replacement patio door glass, what measurement mistake causes the most fit problems?
Measure thickness by overall spacer-to-spacer glass unit dimensions, not just one pane. Also confirm you measure from the outside surfaces that match the frame rabbet depth, otherwise the new IGU can be the wrong fit and the seal bead may not press correctly.
Can I reuse the glazing bead if it comes out intact?
Yes, sometimes. If the glazing bead is reusable, keep it organized by side and corner, and do not reinstall a cracked bead. A bead that does not hold tension can let the IGU move and leads to uneven stress and future cracking.
Is there a way to prevent my new patio door glass from breaking the same way after an attempted break-in?
If the break was caused by an impact or forced entry, upgrades often matter as much as the glass. Add an anti-lift pin function if present, use a secondary security bar in the track, and consider a mortise-style deadbolt designed for sliding doors.
I lubricated the track and it still drags, should I re-lubricate or replace anything?
Don’t use WD-40 on sliding door tracks. Use a silicone-based lubricant and clean the track first, if it still grinds or drags after lubrication, plan on roller replacement rather than forcing the door closed.
How do I know whether the glass break was caused by roller misalignment versus something wrong with the frame?
Commonly, misaligned rollers or a warped frame. Check whether the panel gap is even from top to bottom on the latch side, then adjust roller height screws to level the door before curing time after installation.
What is the most secure temporary setup if I cannot replace the patio door glass the same day?
You can do a board-up overnight, but reinforce the security plan even with the weather cover. Use a dowel or cut-down security bar in the track and add an inside hasp with a padlock if the lock or strike plate is impacted.
Next Article
Broken Patio Door Glass: DIY Replacement Steps Today
Step-by-step guide to replace broken patio door glass safely, order the right IGU, and reseal for draft-free operation.