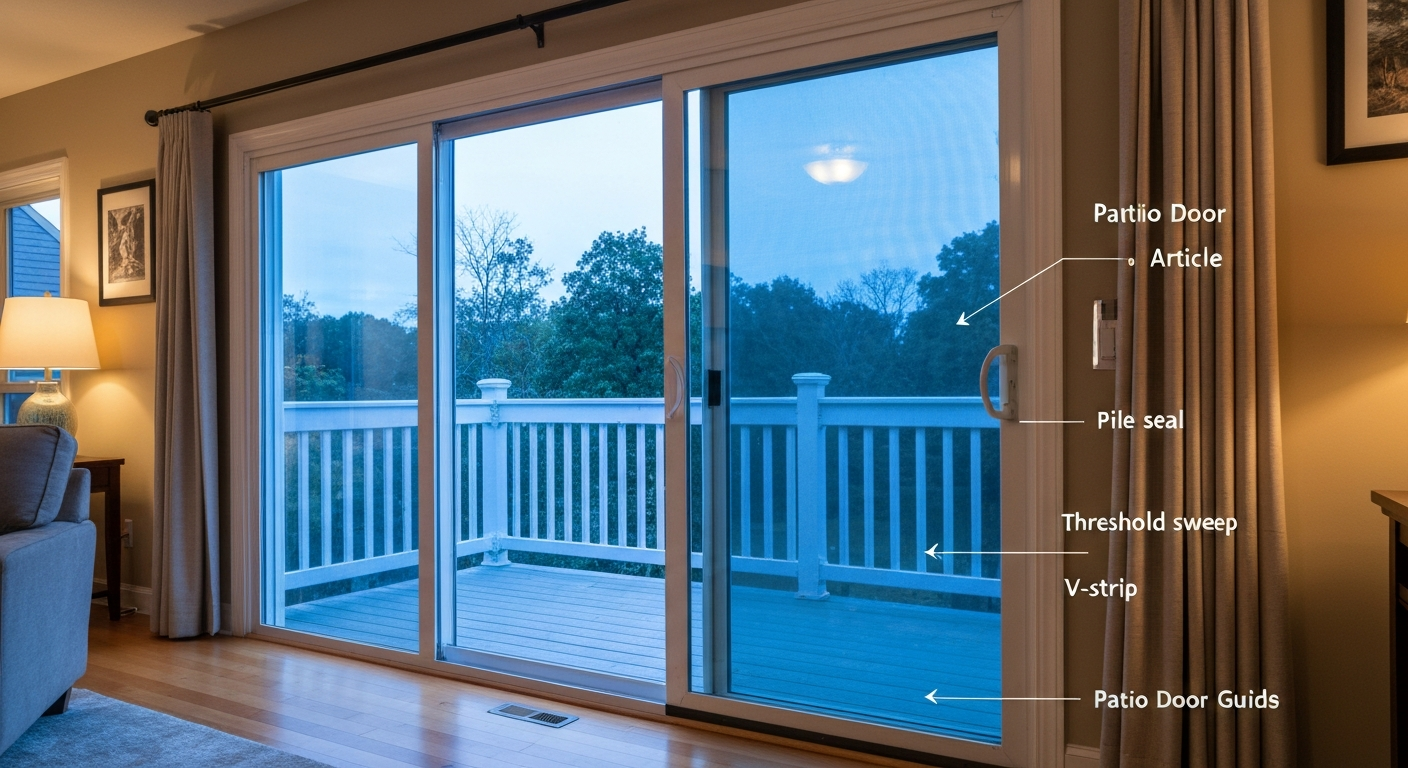
The fastest way to keep cold out of patio doors is to replace worn weatherstripping along the jambs and meeting rail, fit a proper door sweep at the bottom, and seal any gaps in the fixed frame with low-expansion foam and exterior caulk. Most of those fixes take under an hour, cost between $10 and $60 in materials, and make a noticeable difference within the same day. If the door is also drafty because the rollers are worn or the panel sits out of square, you'll need a mechanical fix too, but that is still a solid DIY job for most homeowners. For a step-by-step checklist on how to stop cold air from a patio door, see our dedicated guide.
How to Keep Cold Out of Patio Doors: DIY Fixes & When to Call a Pro

Jamie Archer
27 Jul 2026
Why patio doors let cold in
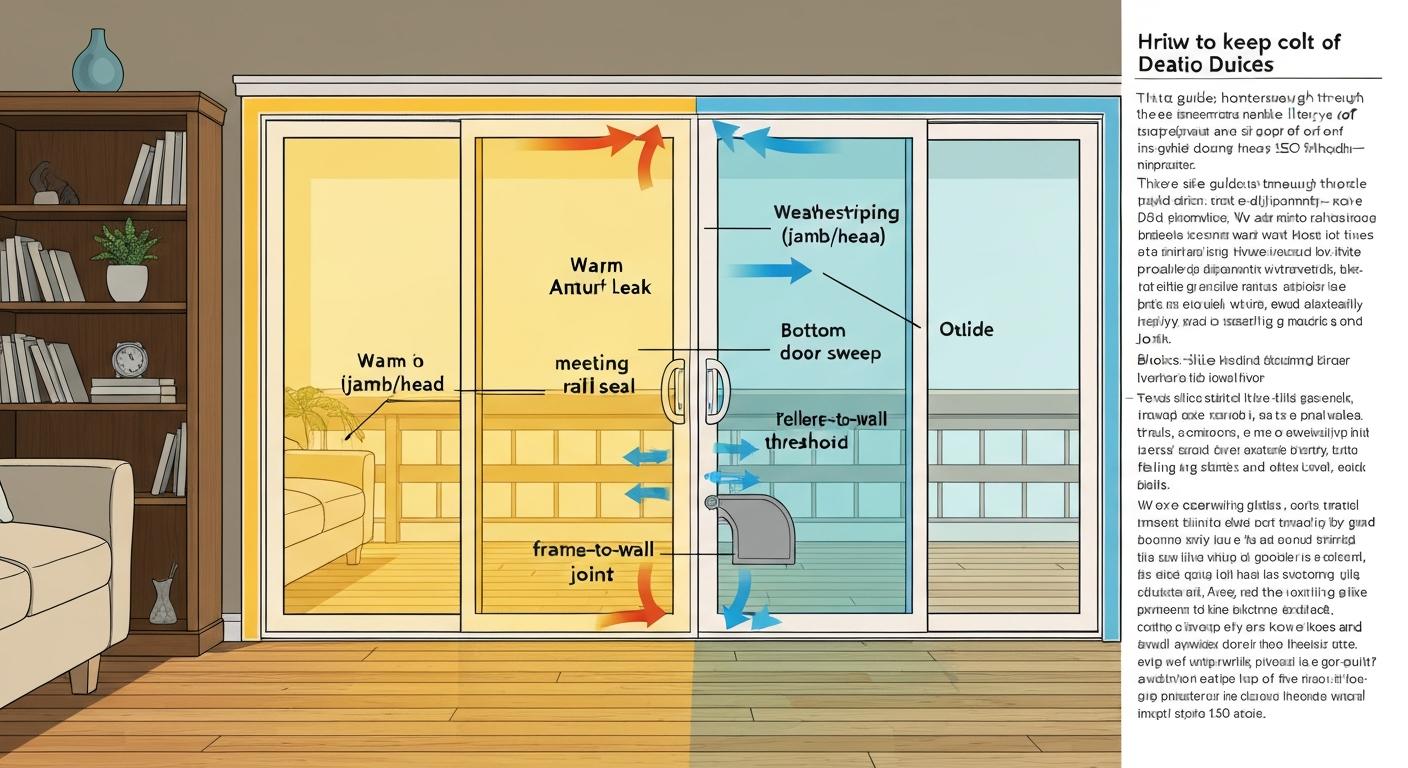
Sliding glass patio doors leak cold air in three main ways: worn or missing weatherstripping around the frame and meeting rail, a gap at the bottom of the panel, and air infiltration through the rough-opening joint between the door frame and the surrounding wall. Screen doors add a fourth route because their seals are lighter and degrade faster. Any of these can turn your living room into a wind tunnel the moment outdoor temperatures drop.
On older doors, the weatherstripping compresses over years of use and stops making full contact. On doors that are misaligned, even brand-new weatherstripping cannot bridge an uneven gap. And on many installations, the original caulking between the door frame and the wall has cracked or shrunk. This guide walks you through diagnosing exactly where your cold is coming from, then fixing it with the right material for the job.
Before you start: safety, measurements and prep
Before touching any seals or panels, take a few minutes to get organised. You will need a tape measure, a feeler gauge or a piece of paper, a utility knife, a screwdriver set, safety glasses, and work gloves. If you plan to remove the sliding panel for roller work, you will need a second person: tempered sliding door panels typically weigh 100 to 200 lb (45 to 90 kg) and are awkward to handle alone.
Check the glazing condition before you start sealing. If the sealed unit is fogged (condensation between the panes) or the glass is cracked, no amount of weatherstripping will solve your heat loss. Those conditions need a glass replacement or full door replacement, and they affect which repairs make financial sense. Note also whether your door is single or double glazed, because the insulating upgrade options differ.
Measure the gaps you find before buying materials. A feeler gauge or a folded strip of business card works well. Building science guidance treats a gap of about 1/8 in (3 mm) as the boundary between small and moderate leaks. Gaps below that threshold are usually handled with adhesive weatherstrip or caulk. Gaps between 1/8 in and 1/4 in (6 mm) often need backer rod plus sealant. Gaps at or above 1/4 in may indicate a structural or alignment issue that weatherstripping alone will not fix.
Diagnosing the problem: where is the cold coming from?
Visual inspection
Start with a simple walkround in daylight with the door fully closed. Stand inside in a darkened room and look for strips of light around the head (top), both side jambs, the meeting rail (where the fixed and moving panels meet), and the bottom of the door. Any visible light is a confirmed air gap. While you are looking, check for curtains or blinds moving on a still day, or listen for whistling when wind picks up. Mark each suspect area with a piece of tape.
Candle or smoke test
A candle, a stick of incense, or a smoke pencil gives you a quick dynamic test recommended by the U. The U.S. Department of Energy's blank" rel="noopener noreferrer">Consumer Guide to Air Sealing the Home (U.S. DOE) recommends using smoke, candle, or smoke‑pencil tests to locate air leaks around doors and windows. S. Department of Energy for home energy assessments. The U.S. Department of Energy recommends this smoke-test method in its Whole‑House Weatherization (U.S. Department of Energy) guidance. Close all other exterior openings, then run your heating fan to pressurise the room. Move the flame or smoke slowly along each edge of the closed door panel, staying about an inch from the surface. Where smoke deflects sharply toward or away from the door, you have an active air leak path. This works well for finding leaks at the meeting rail and along jambs where light alone would not show anything.
Gap measurement
Once you have identified the leak locations, measure them. Slide a feeler gauge or a folded piece of paper into the gap with the door closed. If it passes through with no resistance, you likely have a gap of 1/8 in or more. Record each measurement because it determines which weatherstripping profile or sealant you need. A gap that varies along its length (common on warped doors or worn thresholds) tells you to measure at multiple points.
Where cold enters: a location guide
| Location | Typical cause | Primary fix |
|---|---|---|
| Bottom of moving panel | Worn or missing door sweep | Replace door sweep or adjust threshold |
| Side jambs and head | Compressed or missing pile/foam weatherstrip | Replace weatherstripping (V-strip or pile) |
| Meeting rail (panel-to-panel) | Worn pile or rubber seal on rail | Replace meeting-rail pile seal |
| Frame-to-wall joint | Cracked caulk or missing foam fill | Backer rod plus exterior caulk or low-expansion foam |
| Glass perimeter (glazing bead) | Failed glazing compound or sealant | Re-seal with compatible silicone caulk |
| Bottom track area | Debris, bent track or missing gasket | Clean track, replace gasket strip if present |
Quick fixes you can do in under an hour
If you want a same-day improvement without a hardware store run, these temporary and semi-permanent fixes work well enough to bridge you to a full repair.
- Press adhesive foam tape into the jamb channel where old weatherstripping has flattened. It is not the most durable option (expect 1 to 3 years from open-cell foam), but it seals small gaps immediately and costs under $5 for a full door.
- Cut a length of self-adhesive V-strip and press it into the side jamb groove. V-strip is faster to fit than people expect and lasts significantly longer than foam tape.
- Roll a foam draft stopper or door snake against the bottom of the panel on the interior side. It looks rough but stops a surprising amount of cold air while you sort a proper door sweep.
- Run a bead of non-hardening window and glazing putty along any visible crack in the frame-to-wall joint on the interior side. This is temporary; follow up with proper exterior caulk when weather permits.
- Tape a strip of clear plastic sheeting (bubble wrap or shrink film) over the interior of the glass using double-sided tape. This creates a dead-air buffer and noticeably reduces radiant cold from single-glazed panels.
Targeted step-by-step repairs
Installing new weatherstripping on jambs and head
- Pull or scrape out the old weatherstripping completely. Use a flat scraper to remove adhesive residue and wipe the channel with isopropyl alcohol.
- Measure the height of each jamb and the width of the head. Cut your new material to length with scissors or snips, adding about 1/4 in to allow a slight compression fit at corners.
- For pile (brush) seals in a kerf channel: slide the pile fin into the channel groove with its backing fin leading, pressing it in until it clicks or seats flush.
- For adhesive V-strip on a flat surface: peel the backing 6 in at a time, press the V open side facing the door stop, and smooth firmly as you go to prevent air bubbles.
- For adhesive foam tape on irregular surfaces: cut to length, press with firm finger pressure for 30 seconds per section, then close the door and check resistance.
- Test by closing the door and running the paper-strip test at each location. There should be slight resistance when you pull the paper.
Fitting or replacing a door sweep
- Measure the width of the door panel from edge to edge. Most sliding door sweeps are sold in cut-to-length strips.
- Choose the sweep type: a surface-mounted blade sweep (vinyl or rubber) suits most residential sliding doors with a smooth threshold; a brush/pile sweep works better where the bottom of the panel passes over a low-profile track.
- Remove the old sweep by unscrewing the retaining screws or pulling out the adhesive strip. Clean the bottom edge of the door panel.
- Hold the new sweep in place with the blade or pile touching the threshold surface. Mark the screw holes, drill pilot holes if the door edge is aluminium, and fix with the supplied screws.
- Adjust height if your sweep type allows it: the sweep should compress lightly against the threshold when closed but not drag hard enough to lift or bow the panel.
- For very large clearance gaps (over 3/8 in), consider an adjustable or automatic drop seal instead of a standard sweep.
Adjusting or replacing the threshold
Many patio door thresholds have adjustable screws along their length that raise or lower the contact surface. If you can see daylight under the closed door and the sweep seems fine, try raising the threshold first. Insert a screwdriver into each adjustment screw (usually every 8 to 10 in along the threshold) and turn clockwise to raise. Raise in small increments and check that the panel still slides smoothly. Over-raising the threshold creates drag and can damage the rollers. If the threshold is cracked, compressed to nothing, or missing its vinyl insert, replace the insert strip (sold separately by most door hardware suppliers) before adjusting.
Applying V-strip, foam tape and silicone caulk
For the meeting rail (the vertical edge where the fixed and moving panels meet), pile/brush seal is usually the correct choice because it allows the panels to slide past each other without friction. For the jamb channel where the panel compresses into the frame, V-strip or bulb/tubular weatherstrip works well. For the outer perimeter where the door frame meets the wall, use exterior-grade silicone or polyurethane caulk. If there is an obvious void in the rough opening (visible behind the interior casing trim), fill it first with a low-expansion window-and-door foam spray, let it cure fully, then tool the exterior joint with caulk. Never use standard high-expansion foam in a door rough opening as it can bow the jamb and misalign the panel.
Mechanical repairs: rollers, tracks and locks
Adjusting rollers
If your door sits unevenly in the frame, creating a larger gap on one side of the bottom weatherstrip, the rollers are probably set at different heights. Most sliding door panels have adjustment screws accessible through holes at the bottom corners of the panel (sometimes behind a plastic cap). A Phillips head screwdriver is usually all you need. Turning the screw clockwise raises that corner of the panel; counter-clockwise lowers it. Adjust both sides in small increments and check the gap at the bottom weatherstrip after each adjustment. The goal is an even, consistent gap all the way across.
Replacing worn rollers
If adjusting the screws makes no difference, or if the rollers are visibly cracked or flat-spotted, they need replacing. This job requires removing the panel, which means recruiting a helper: glass panels typically weigh 100 to 200 lb. Tilt the panel inward at the top (most panels have a top guide that allows this), then lift it up and out of the bottom track. Lay it flat on padded saw-horses. The roller cartridges are held in by a single screw at each corner. Remove the old cartridges, bring one to a hardware supplier or photograph the brand/stamp to match the replacement, then reverse the process to reinstall. Adjust the new rollers before hanging the door, which makes the final height adjustment easier.
Cleaning and realigning the track
A dirty or partially blocked track forces the panel to ride unevenly, which gaps the bottom weatherstrip. Use a stiff nylon brush and a vacuum to clear the track channel, then wipe it down with a damp cloth. Lubricate with a dry silicone spray: do not use WD-40, petroleum grease, or anything oil-based, because these attract grit and make the problem worse within a season. If the track is visibly bent or the aluminium channel walls are damaged, that is a job for a professional. Bent or corroded tracks cannot be straightened reliably without risking panel misalignment.
Servicing or replacing the lock
A stiff or misaligned lock causes homeowners to leave the door slightly unlatched, which defeats any weatherstripping by holding the panel fractionally open. If the hook latch is not engaging the strike plate cleanly, first try the roller adjustment above: raising or lowering the panel often brings the latch into line with the strike. If the lock body itself is worn, spring-loaded latches are inexpensive to replace and most are held in by two screws accessible from the interior face. Match the backset measurement and hook style when ordering a replacement.
Insulating upgrades to cut heat loss further
Once you have sealed the air leaks, these upgrades target radiant and conductive heat loss through the glass itself.
Window insulating film
Low-e window film applied to the interior glass surface adds a thin layer of insulation and reduces radiant heat loss in winter. Shrink-film kits (applied with double-sided tape and a hair dryer) are even simpler and cost $15 to $30 for a standard patio door, though they are removed in spring. Permanent low-e films are more effective and last several years but require careful application on a dust-free surface.
Thermal curtains and cellular blinds
Heavy thermal or blackout curtains reduce the cold radiant feel of single-glazed patio doors significantly. Cellular (honeycomb) blinds are arguably better because their trapped-air cells act as a genuine insulating layer, and they still allow the door to be used. For best performance, mount curtain tracks as close to the ceiling as possible and use a pelmet or curtain box at the top to stop warm room air circulating behind the curtain and cooling against the glass.
Storm doors and secondary glazing
Adding a storm door in front of an existing patio door creates a buffer zone that significantly reduces both draughts and heat loss. This is more common in North America than the UK, but secondary glazing panels (interior storm panels that clip or press into the door frame) are a practical UK alternative. Both solutions add an air gap between two glazed surfaces, which is the same principle as a double-glazed unit. Expect a larger upfront cost ($150 to $600 depending on the product) but meaningful ongoing energy savings on single-glazed doors.
Screen and pest control: stopping flies and summer insects
A torn or poorly fitted screen door is the main route for flies and insects in warmer months, and a damaged screen seal can also let in draughts in cool weather. Check the screen mesh for holes by holding it up to light. Small tears up to about 1 in (25 mm) can be patched with a self-adhesive screen repair patch (under $5). Larger damage means re-meshing the frame, which is a straightforward DIY task: pop out the old spline with a flathead screwdriver, lay new mesh over the frame, press in new spline with a spline roller, and trim the excess with a utility knife.
The brush seals that run along the top and sides of the screen panel also keep insects out. These are the same pile weatherstrip used on the main sliding panel, and they are replaced in exactly the same way. If the screen panel itself is bent and no longer sits flush in its track, straightening the corners by hand or with pliers often restores a good seal. For persistent fly problems around an open patio door in summer, a magnetic fly-screen curtain is a low-cost and effective solution that does not require the screen panel to close fully every time. For step-by-step advice on how to stop flies coming in patio doors, see our dedicated guide with proven screening and sealing solutions.
Seasonal weatherproofing schedule
Autumn/fall winterising checklist
- Run the smoke or candle test on all patio door panels and record any new leaks.
- Check all weatherstripping by feel and paper-strip test. Replace any sections that have flattened or crumbled.
- Inspect the door sweep. Replace if the blade or brush has worn down.
- Test the threshold adjustment and raise if there is visible daylight under the closed door.
- Re-caulk any cracks in the exterior frame-to-wall joint.
- Lubricate the track with dry silicone spray.
- Install window insulating film or cellular blinds if not already in place.
- Check that the lock engages cleanly and the latch compresses the weatherstrip fully.
Spring and summer prep checklist
- Remove temporary shrink film if used over winter.
- Clean the track thoroughly with a nylon brush, vacuum, and damp cloth.
- Inspect and repair or replace the screen door mesh and pile seals.
- Re-lubricate the track and rollers with dry silicone spray.
- Check caulking after the freeze-thaw cycle and repair any new cracks.
- Test the door balance: it should roll smoothly with light pressure and stay where you leave it.
Energy savings and comfort gains: what to expect
Air sealing is consistently rated as one of the highest-return home energy improvements available. Even modest gap sealing around doors and windows can reduce heating and cooling costs noticeably. The comfort gain (ending that cold draught across the floor that you feel before temperatures on a thermostat shift) is often immediate and more obvious to occupants than the energy bill change. For a typical sliding patio door in a cold climate, replacing worn weatherstripping and fitting a proper sweep is a $30 to $70 materials investment that you will recover in a single heating season. Adding cellular blinds or secondary glazing brings a larger upfront cost but extends the benefit to radiant heat loss, which is especially relevant on single-glazed doors.
Materials, parts and tools: what to buy
| Item | Common size/spec | Typical cost (USD) | Notes |
|---|---|---|---|
| Pile/brush weatherstrip (kerf-in) | 7/16 in pile, sold by the foot or roll | $0.50–$1.50/ft | Match pile width to your door's kerf channel |
| Self-adhesive foam tape | 3/8 in x 3/16 in closed-cell | $5–$12 per roll | Short-to-medium term; cheap backup |
| Self-adhesive V-strip | 17 ft roll, vinyl or metal | $8–$18 | Good for side jambs; durable |
| Tubular/bulb weatherstrip | EPDM or silicone, 7/16 in OD | $8–$20 per roll | Best compression seal for larger gaps |
| Surface-mount door sweep | 36 in or 48 in blade/brush | $10–$30 | Cut to width; choose blade or brush by floor type |
| Adjustable threshold insert | Vinyl, sold by door width | $15–$40 | Replace worn insert before adjusting screws |
| Low-expansion window foam | 12 oz can | $7–$12 | Window-and-door specific; do not use standard foam |
| Exterior silicone/polyurethane caulk | 10 oz cartridge | $6–$15 | Paintable polyurethane for wood frames; silicone for aluminium |
| Backer rod (foam) | 3/8 in or 1/2 in diameter | $5–$10 per 20 ft | Use before caulking gaps over 1/4 in |
| Roller cartridges (pair) | Match door brand/width | $15–$50 per pair | Photograph existing roller before buying |
| Window insulating film kit | Standard patio door size | $15–$35 | Shrink or static-cling types available |
| Dry silicone spray lubricant | 11 oz can | $8–$14 | For track; avoid oil-based products |
| Screen repair mesh patch | Self-adhesive, various sizes | $3–$8 | For tears under ~2 in |
| Screen spline (replacement) | 0.140–0.175 in diameter | $3–$10 per roll | Match to frame channel width |
Time and cost estimates
| Task | DIY time | Material cost (USD) | Pro cost estimate (USD) |
|---|---|---|---|
| Replace weatherstripping (jambs + head) | 30–60 min | $15–$35 | $80–$150 labour + materials |
| Fit or replace door sweep | 20–40 min | $10–$30 | $60–$120 labour + materials |
| Adjust threshold screws | 10–20 min | $0 (or $15–$40 for new insert) | $50–$80 service call |
| Caulk frame-to-wall joint (exterior) | 30–60 min | $10–$20 | $80–$150 |
| Clean and lubricate track | 20–30 min | $8–$14 | $50–$80 service call |
| Adjust roller height | 20–40 min | $0 | $50–$80 service call |
| Replace roller cartridges | 1–3 hours (with helper) | $15–$50 parts | $150–$300 labour + parts |
| Apply window insulating film | 30–60 min | $15–$35 | N/A (DIY product) |
| Re-mesh screen panel | 45–90 min | $10–$25 | $60–$120 |
| Full weatherstrip + sweep + caulk (all at once) | 2–3 hours | $40–$80 | $200–$350 |
Maintenance checklist: keeping your door draught-free year-round
- Every 3 months: vacuum and wipe the bottom track; lubricate with dry silicone spray.
- Every 6 months: run the paper-strip test around all four sides and the meeting rail; replace any weatherstrip that no longer creates resistance.
- Every autumn: full seasonal check per the winterising list above.
- Every 1–2 years: inspect exterior caulk for cracking or shrinkage and re-apply where needed.
- Every 3–5 years: expect to replace foam tape weatherstripping; pile and V-strip typically last longer.
- Every 5–10 years or when stiff sliding is noticed: inspect rollers for wear and replace if flat-spotted or cracked.
Repair or replace? How to decide
Repairs make sense in almost every case where the door frame and glass are structurally sound, the panel slides without significant effort, and the glazing seal is intact. Replacing weatherstripping, sweeps, rollers and tracks on a 10 to 20 year old door routinely brings it back to near-new performance for well under $100 in materials. Replacement starts to make more sense when the frame is warped beyond what roller adjustment can correct, when the glazed unit is fogged (failed seal), when the glass is single-pane and energy performance is a priority, or when the total cost of all required repairs approaches 40 to 50 percent of the cost of a new door.
If the frame itself has rotted (timber frames), corroded through (aluminium in coastal areas), or shifted due to house settlement, no combination of weatherstripping will produce a draught-proof result. Those situations need a professional assessment and likely a full door replacement.
When to call a professional
Most of the fixes in this guide are genuine DIY territory. Call a pro when you encounter any of the following:
- The sliding panel cannot be safely lifted or handled by two people without specialist equipment (very large or heavy commercial-spec doors).
- You cannot identify a matching roller cartridge and the door is still in warranty.
- The track is visibly bent, corroded, or cracked and cannot be cleaned back to function.
- The door frame has rotted, cracked, or shifted out of plumb.
- The glazed unit is fogged, cracked, or delaminated.
- The door lock is damaged in a way that compromises home security.
- Re-caulking the exterior reveals a gap wide enough to see daylight into the wall cavity, which suggests a flashing failure or structural movement.
A competent joinery or door specialist can replace roller cartridges, re-hang panels, and replace tracks in a single visit. Full door replacement (frame, panel and all) typically runs $800 to $2,500 or more depending on size, glazing spec and whether structural work is needed around the rough opening.
Safety and security notes
Tempered glass is designed to shatter into small fragments rather than sharp shards, but it still requires care. Wear safety glasses and gloves any time you are working close to the glass edge or removing a panel. Never lean a panel against a wall unsupported; lay it flat on padded supports. For track and threshold work, keep the area clear of children and pets and make sure the panel cannot slide or tip unexpectedly.
Security is worth a separate mention: a sliding door that sits unevenly in its frame because of worn rollers or a loose lock is easier to lift out of the track from the outside. While you are fixing the draught, check that the anti-lift pins or security bar in the track are in place. If the hook latch or cylinder lock no longer engages firmly, replace it. A $20 replacement latch is cheap insurance.
Troubleshooting by symptom
| Symptom | Most likely cause | First action |
|---|---|---|
| Cold air along the bottom of the door | Worn sweep or gap at threshold | Replace door sweep; adjust threshold screws |
| Cold air between the two panels | Worn pile seal at meeting rail | Replace meeting-rail pile weatherstrip |
| Cold along side jambs | Compressed or missing weatherstrip | Replace V-strip or pile seal in jamb channel |
| Whistling or noise in wind | Large gap somewhere in seal; often meeting rail or jamb | Smoke test to locate; seal with correct weatherstrip |
| Cold near the floor only on one side | Panel riding unevenly due to uneven roller height | Adjust roller screws to level the panel |
| Door hard to slide | Dirty track, worn rollers, or over-tight threshold | Clean track; lubricate; adjust threshold down slightly |
| Lock does not engage fully | Panel height wrong, or latch worn | Adjust roller height first; replace latch if still misaligned |
| Condensation inside double-glazed unit | Failed glazing seal | Replace glazed unit or door panel; weatherstripping will not help |
| Flies getting in through screen | Torn mesh or worn pile seals on screen panel | Patch or re-mesh; replace screen pile weatherstrip |
Your quick action plan
Here is how to prioritise if you want to make progress today and schedule the bigger jobs for the weekend or next month.
Do today (under 30 minutes, no special tools)
- Do the smoke or candle test and mark every leak with tape.
- Measure the gaps you find with a ruler or feeler gauge.
- Press temporary foam tape over the worst gaps to stop immediate cold infiltration.
- Place a rolled towel or door snake at the bottom of the door if the sweep is missing.
- Check the track for debris and vacuum it clean.
This weekend (1 to 3 hours, basic tools)
- Buy and install the correct weatherstripping type for each location based on your gap measurements.
- Replace the door sweep if worn.
- Adjust roller height if the panel sits unevenly.
- Re-caulk the exterior frame-to-wall joint.
- Lubricate the track with dry silicone spray.
Schedule as a project
- Replace roller cartridges if adjustment made no difference (needs a helper and 2 to 3 hours).
- Install cellular blinds or a secondary glazing panel for radiant heat loss reduction.
- Repair or re-mesh the screen door before the next warm season.
- Consult a professional if frame damage, warped panels, or failed glazing seals are present.
More guides on this site
If your door is drafty because of a specific mechanical problem, the roller repair guide and lock repair and replacement sections on this site walk through those jobs in full detail. See our step-by-step how to fix drafty patio doors guide for full DIY instructions. The draught proofing and heat loss guides cover the energy side of the problem in more depth, including how to stop heat loss through the glass and frame specifically. See our guide on how to stop heat loss through patio door for specific fixes for heat loss through the glass and frame. For hands-on sealing steps and product recommendations, see our guide on how to draught proof patio doors. If flies and insects are your main concern heading into summer, there is dedicated coverage of screen door sealing and pest control measures. For doors that are about to be fitted rather than repaired, the patio door installation overview covers rough-opening prep, shimming and threshold setting from the start.
FAQ
What’s the quickest way to diagnose cold (a draught/draft) coming through a patio door?
Start with a visual inspection: look for light or gaps around the head, jambs, meeting rail and under the door, check for rattles/whistling and moving curtains. Next do a smoke/candle (or smoke‑pencil/incense) test with the house calm: move the smoke around the perimeter to spot leak paths. Measure suspicious gaps with a ruler or feeler gauge, or simply slide a folded piece of paper—if it moves easily you have airflow. Note locations on a simple checklist before you fix anything.
How do I classify gap sizes and choose treatments?
Use gap size as a rule of thumb: ≤1/8 in (≈3 mm) — small: use adhesive foam tape, caulk or weatherstrip; 1/8–1/4 in (≈3–6 mm) — moderate: use V‑strip, tubular/bulb seals or closed‑cell foam; ≥1/4 in (≈6 mm) — large: fill with backer‑rod + exterior caulk or low‑expansion window/door foam; gaps much larger or uneven may need structural repair or a replacement door. These thresholds guide DIY choices and when to call a pro.
What targeted weatherproofing fixes can I do myself?
Common DIY fixes: install adhesive foam tape or closed‑cell foam on stationary jambs for small gaps; fit V‑strip (metal or vinyl) on meeting rails and side jambs; install a door sweep (vinyl blade, brush/pile or neoprene) along the bottom; add tubular/bulb weatherstripping where compressive sealing is needed; apply exterior‑grade caulk around fixed frame seams; use backer‑rod + caulk for larger joints. Trim and fit materials to the measured gap and test movement after installation.
What mechanical repairs reduce drafts on sliding patio doors?
Mechanical fixes address fit and operation: clean tracks and remove debris; replace or adjust rollers (many rollers are accessible and adjustable at the door bottom—panels are heavy, use two people); realign or replace bent/worn tracks; repair or replace dysfunctional locks/keeps to ensure full engagement of meeting rails; tighten loose frame screws and adjust strike plates. After repairs, retest with a smoke test.
How do I adjust or replace rollers safely?
Remove the sliding panel per your door maker’s method (usually lift then tilt out; two people recommended). Support the glass on padded sawhorses, remove old roller cartridge and fit the replacement. Reinstall and adjust the roller set screws to raise/lower the panel so it rides smoothly but seals at the meeting rail. Wear gloves and eye protection—panes can weigh 100–200 lb (45–90 kg). If you can’t safely lift the panel or identify parts, call a pro.
Which insulating upgrades make the biggest difference?
High‑impact DIY upgrades: clear insulating window film (interior shrink film) for extra glazing insulation in winter; heavy thermal/blackout curtains or lined patio drapes for overnight and weekday savings; install an exterior or interior storm door if compatible; add magnetic or brush seals to screen doors to stop leakage through the screen perimeter. These reduce heat loss and are reversible.
Next Article
How to Draught Proof Patio Doors: DIY Steps, Seals & Costs
How to draught proof patio doors: step-by-step DIY fixes for seals, thresholds, sweeps, pests, costs & tools