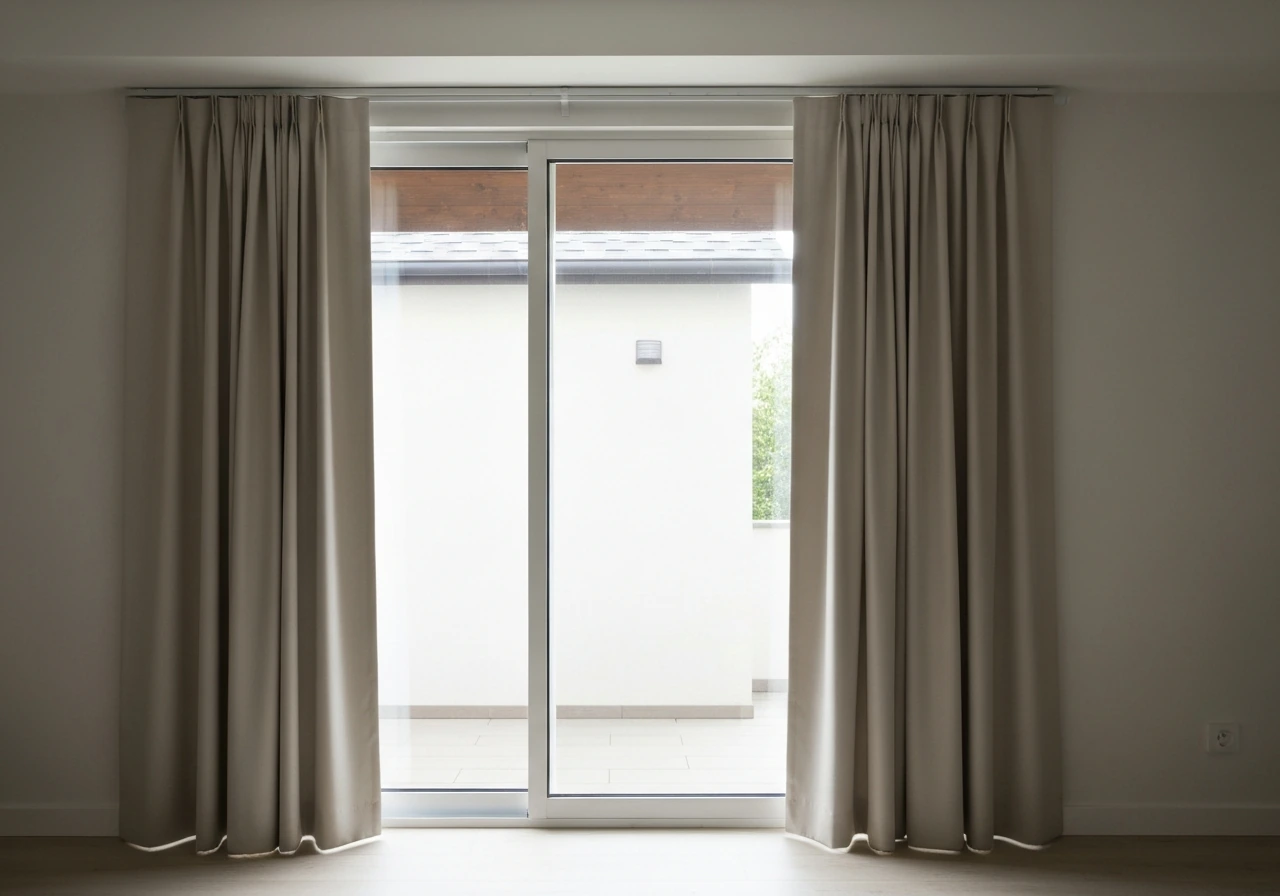
Installing a curtain rod over a patio door takes about 45 minutes to an hour if you measure carefully and use the right anchors for your wall type. Mount the brackets 4 to 6 inches above the door frame and extend the rod 6 to 12 inches past each side of the door opening so the panels stack fully off the glass when you slide the door open. Get those two dimensions right and the rest is straightforward drilling and hardware assembly.
How to Install Patio Door Curtain Rod: Step-by-Step Guide

Jamie Archer
7 Aug 2026
Who this guide is for and what you'll walk away with
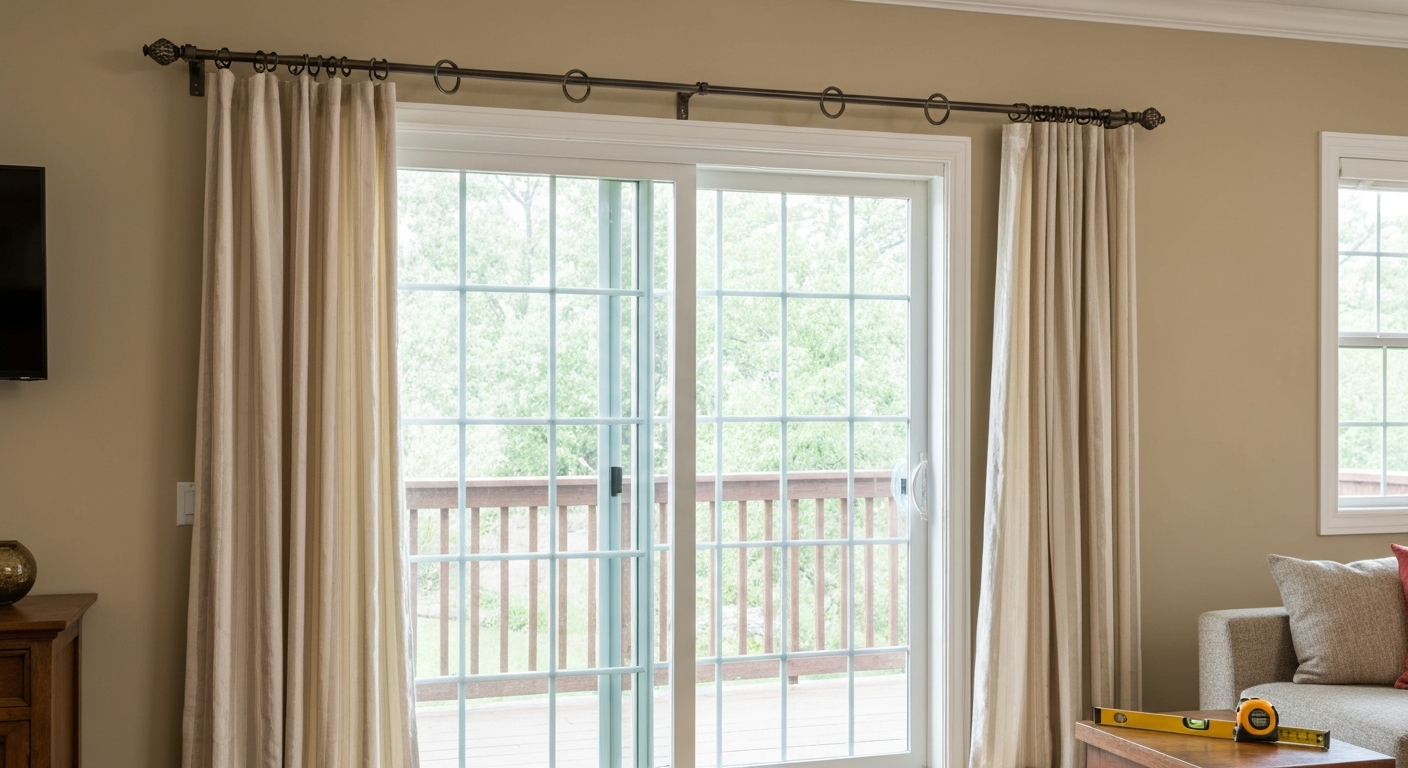
This guide is written for DIY homeowners who want to hang curtains over a sliding glass door and do it right the first time. Whether you're working with a standard 6-foot patio door or a wide 8-foot opening, and whether your walls are drywall over studs, masonry, or stucco, the steps here will get you to a level, secure install. By the end you'll know how to choose the right rod type, take accurate measurements, pick the correct fasteners for your wall, mount brackets at the right height and spacing, and hang panels that actually clear the door when it travels. I'll also cover what to do when things go sideways and when it's genuinely worth calling a pro instead of wrestling with a bad anchor situation.
Tools and materials you'll need before you start
Pull everything together before you pick up the drill. There's nothing more frustrating than stopping mid-install to run to the hardware store because you're missing a toggle bolt. Here's the complete list.
Tools
- Tape measure (25-foot steel, not a fabric tape)
- Electronic stud finder with AC wire detection
- Pencil and painter's tape for marking
- Level (24-inch is ideal; a 4-foot level is even better for long spans)
- Power drill with variable speed
- Drill bits: 3/32" for wood pilot holes, 3/16" or 1/4" for drywall anchors, Tapcon-specified masonry bit for concrete or stucco
- Phillips head and flathead screwdriver bits
- Hammer (for seating plastic anchors)
- Stud finder probe or thin exploratory nail to confirm stud location before large holes
- Safety glasses
Rod types for patio doors
- Extendable (telescoping) decorative rod: the most common choice; adjusts to fit spans from about 36 inches to 144 inches depending on model; suits single panels or paired panels with rings
- Traverse rod: has a cord or wand-driven carrier system so panels open and close without touching the fabric; one-way or two-way draw; best for formal setups or heavy panels
- Tension rod: tool-free, no drilling, fits inside the door frame jamb; rated for lightweight panels only (typically up to 20–22 lb depending on model); good for rentals or temporary installs
- Bypass or panel-track system: panels slide past each other on separate tracks; ideal for wide openings where you want panels to stack completely clear of the door glass
Bracket styles
- Standard wall-mount bracket: mounts to the wall face above the door frame; the most common type
- Ceiling-mount bracket: drops down from the ceiling; useful when wall space above the door is minimal or you want a floor-to-ceiling look
- Inside-frame (return) bracket: mounts inside the door jamb; only works with tension rods or very shallow decorative rods; limited by jamb depth
- Extension bracket: projects the rod further from the wall to clear door handles, locks, or protruding trim
Fasteners
- 1-5/8" or 2-1/2" coarse-thread wood screws for studs
- SNAPTOGGLE or SnapToggle heavy-duty hollow-wall toggle bolts for drywall where no stud is present
- Tapcon concrete screws (3/16" diameter minimum) with the manufacturer-specified masonry bit for concrete, block, or stucco
- Plastic expansion anchors only for very light tension rods; not recommended for standard wall-mount brackets
Choosing the right rod type for a patio door
Standard extendable decorative rods work well for most patio doors, but there are a few scenarios where you need something more specific. The sliding nature of the door itself is the key variable: your curtain panels need to stack completely off the glass when the door is open, which means you need enough rod length beyond the frame and enough bracket projection to clear the door handle and lock hardware.
A traverse rod is worth the extra cost if you plan to open and close curtains daily or if you're using heavy linen or velvet panels. The cord or wand mechanism means you never need to touch the fabric, which keeps it cleaner and reduces wear on the heading. Kirsch's Superfine and conventional traverse systems offer both one-way draw (all panels stack to one side) and two-way draw (panels split to each side), and both wall and ceiling mounting options. One-way draw is often the better choice over a sliding glass door because it stacks all the fabric to the non-door side, keeping the travel path completely clear.
Tension rods are the exception, not the rule. They're genuinely useful for lightweight sheers in a rental or if you cannot drill, but they're limited to light fabrics and they can slip if the jamb isn't perfectly parallel. For anything heavier than a sheer linen, go with a wall-mount or ceiling-mount rod on proper anchors.
Ceiling-mount rods make sense when the wall space above the door frame is too shallow (less than 4 inches to the ceiling) to position a bracket at the right height, or when you want a dramatic floor-to-ceiling curtain that makes the room feel taller. They do require that you hit ceiling joists or install solid blocking, so they add a step to the planning process.
Bypass and panel-track systems are the most practical solution for doors wider than 8 feet or for anyone who wants a clean modern look with large flat panels. Manufacturer installation manuals for traverse/panel‑track and bypass systems (see Rustica, Triple Bypass System Assembly Instructions) specify securing tracks to studs or a continuous header and explain that, when installed with correct blocking and hardware, panels can bypass or stack in a pocket to allow full door travel Rustica — Triple Bypass System Assembly Instructions (bypass/panel track installation, header/block recommendations). Each panel rides on its own track and slides past the others, so the stack-back is extremely efficient. These systems need secure attachment to studs or a continuous header board because the load is distributed across the full width.
Fastener and anchor guide by wall type
Getting the anchor right matters more here than on a standard window because patio door curtains tend to be long, heavy, and frequently moved. A curtain rod over a 6-foot sliding glass door can easily carry 15 to 30 pounds of fabric. That load multiplied by the lever arm of an extended bracket means a failed anchor will strip out the wall, sometimes taking drywall with it.
Wood studs
This is the ideal situation. Residential framing is typically 16 inches on center, sometimes 24 inches on center under advanced framing methods, so you should find studs within reach of most bracket positions over a standard door frame. Use a calibrated electronic stud finder and confirm the location with a small exploratory nail before drilling. Drive 1-5/8 inch or 2-1/2 inch coarse-thread wood screws directly into the stud, pre-drilling a 3/32 inch pilot hole to avoid splitting. No anchor needed.
Drywall without a stud
If your bracket position falls between studs, use a SNAPTOGGLE or SnapToggle heavy-duty toggle bolt rather than a plastic expansion anchor. Plastic anchors are not rated for the repeated lateral and downward load of a curtain rod bracket. SNAPTOGGLE toggles are designed for repeated removal and reuse and can handle the load reliably in 1/2 inch or 5/8 inch drywall. Drill the correct size hole per the manufacturer spec, insert the toggle, snap the collar, and drive the bolt. If you have two brackets falling between studs on a wide opening, it is worth adding a 1x4 or 1x6 pine backer board screwed into studs across the full span so all brackets hit solid wood.
Masonry, concrete, or stucco
Use Tapcon concrete screws for concrete block, poured concrete, or stucco over masonry. Tapcon requires the specific drill bit they supply or specify for each screw diameter: a 3/16 inch Tapcon uses a 5/32 inch carbide bit, and you drill at least 1/4 inch deeper than the screw's embedment length. Minimum embedment is 1 inch, but 1-3/4 inch is more reliable for bracket loads. Do not substitute a generic masonry bit because the thread engagement won't be right. Wear eye protection: masonry drilling throws chips. For stucco over a wood frame (common in the Southwest), drill through the stucco and into the framing behind it, then use wood screws if you hit solid wood, or Tapcons if it's a masonry substrate underneath.
How to measure for your patio door rod
Measuring accurately before you buy anything saves you a trip back to the store and prevents the most common mistake: a rod that's too short to let the panels stack off the glass. For step-by-step instructions on making and hanging curtains specifically for patio doors, see how to make patio door curtains. For a step-by-step walkthrough on how to hang patio door curtains, see our detailed guide on the topic. Take all three measurements below and write them down. For a step-by-step walkthrough on how to measure curtains for patio door, consult the dedicated measuring guide. For step-by-step measurements specific to sliding patio doors, see how to measure for a sliding patio door.
- Measure the door opening width: measure the clear glass width of the sliding door from inside edge to inside edge of the door frame. This is your baseline opening dimension, not the overall frame width.
- Measure the full door frame width: measure from the outer edge of the left door casing to the outer edge of the right door casing. This is where your rod's minimum coverage begins.
- Add side overhang: plan for 6 to 12 inches of rod extending past each side of the door frame. Six inches is the minimum to allow panels to stack back off the glass; 10 to 12 inches gives more complete stack-back and is worth it if you have wall space. Add your chosen overhang to both sides of the frame width measurement to get your minimum rod length.
- Measure mounting height: measure from the floor to the top of the door frame. Add 4 to 6 inches to find your bracket mounting height. If you're going ceiling mount or want a tall, airy look, measure from the floor to the ceiling instead and mount brackets 2 to 4 inches below the ceiling.
- Measure floor-to-bracket height: this is your curtain length reference. Subtract 1/2 inch from floor to bracket if you want panels to just clear the floor, or subtract nothing for a slight puddle effect. Add the rod diameter and any ring drop (typically 1 to 1-1/2 inches for rings with hooks) to determine the finished panel length you need to order or hem to.
- Check wall depth and bracket projection: hold a bracket up to the wall and confirm it projects far enough to clear the door handle, lock hardware, and any weather stripping or blinds that may already be installed. Most standard brackets project 2 to 3 inches from the wall; extension brackets reach 4 to 6 inches.
Measurement reference table
| Door Opening Width | Recommended Rod Length (with 8" overhang each side) | Curtain Panel Width Per Panel (2x fullness, 2 panels) | Curtain Panel Width Per Panel (2.5x fullness, 2 panels) | Typical Panel Length (floor-length, 96" ceiling) |
|---|---|---|---|---|
| 60" (5 ft / standard sliding) | 76" minimum (60" + 8" + 8") | 38" per panel | 47–48" per panel | 84" finished length |
| 72" (6 ft / common patio door) | 88" minimum | 44" per panel | 55" per panel | 84"–96" finished length |
| 84" (7 ft) | 100" minimum | 50" per panel | 63" per panel | 96" finished length |
| 96" (8 ft / wide sliding glass door) | 112" minimum | 56" per panel | 70" per panel | 96"–108" finished length |
| 120" (10 ft / large multi-panel) | 136" minimum (consider 12" overhang each side) | 68" per panel | 85" per panel | 96"–108" finished length |
These figures assume two panels (one stacking each side) and an 8-inch overhang. If you're using a one-way draw traverse rod with all panels stacking to one side, double the per-panel width and plan for that side to have enough wall space to absorb the full stack.
Curtain selection, panel count, and sizing
Patio door curtains need more fabric width than a standard window curtain because the opening is wider and because the panels need to stack completely off the glass when the door is open. Skimping on width is the most common mistake: a panel that looks full when closed will look skimpy and won't clear the door when you slide it open.
For most decorative rods with rings or rod-pocket panels, aim for 2 to 2.5 times the rod length in total fabric width. So for a rod spanning 88 inches, you want between 176 and 220 inches of total curtain width split across your panels. Two panels of 44 to 55 inches each gets you there. For a more formal, lush look with heavier fabric, 2.5 to 3 times fullness is appropriate but adds weight, which means you need solid anchoring and possibly a heavier-gauge rod.
Traverse rods using pleated or ripplefold panels follow slightly different math. Pleated panels are typically made to the finished heading width (not fullness multiplied), so confirm with your panel maker or retailer whether the listed width is the finished flat width or the rod coverage width. Bali and similar drapery systems specify this in their installation instructions.
Length is simpler. Measure from the top of the rod (or the bottom of the ring hook) to where you want the panel to end. Most homeowners choose floor-length panels that clear the floor by about 1/2 inch for a clean look. Add a 4-inch bottom hem allowance if you're making your own panels. If you're buying ready-made panels, the standard lengths are 84, 95, 96, and 108 inches measured from the top of the rod pocket or ring clip to the finished hem. Match that to your floor-to-rod measurement.
For fabric weight: lightweight sheers and linen blends work on any rod type. Medium-weight cotton, polyester-linen blends, and velvet require a heavier gauge rod (at least a 1-3/8 inch diameter steel or iron rod) and solid anchor points. Very heavy lined panels over a wide opening are the scenario where a traverse rod earns its price, because the carrier system distributes the load better than rings sliding on a decorative rod.
One practical note for sliding glass doors specifically: avoid fabrics that drag on the floor if the door is near a high-traffic path. Floor-grazing or pooling panels look beautiful in a formal dining room but are a trip hazard near an active patio door.
Step-by-step installation: wall-mount rod above the door
This is the most common install scenario: two end brackets plus one or more center supports mounted to the wall above the door frame. It works for extendable decorative rods, traverse rods, and bypass hardware.
- Mark the bracket height on both sides: measure up from the top of the door frame 4 to 6 inches (or your chosen height) on the left side and make a pencil mark. Repeat on the right side at the exact same measurement from the floor, not from the frame, in case the frame isn't perfectly level.
- Snap a chalk line or use your level to connect the two marks and verify they are level. This is the single most important step: a bracket that's 1/4 inch out of level will be obvious once panels are hanging.
- Mark bracket positions: from your left mark, measure outward 8 to 12 inches past the door frame edge and mark the center of your left bracket. Repeat on the right side. These positions should land on studs if your overhang lands near 16-inch stud spacing. Use your stud finder to check.
- If no stud is available at your bracket position, mark for toggle bolt installation. Do not proceed with plastic anchors for brackets that will carry full-length panels.
- Mark center support positions: for rods longer than 48 inches, add a center support bracket. Rod Desyne and most manufacturers specify supports no more than 48 inches apart to prevent sagging. For an 88-inch rod, one center support at the midpoint is sufficient. For a 112-inch rod, place two supports evenly spaced.
- Drill pilot holes: for wood studs, drill a 3/32-inch pilot hole at each bracket mark. For toggle bolt locations, drill the size specified for your toggle (typically 1/2 inch for SNAPTOGGLE). For masonry, use the Tapcon-specified carbide bit and drill at least 1/4 inch deeper than your intended embedment.
- Install anchors: tap plastic anchors in if using them for light rods; install toggle bolts per manufacturer instructions; drive Tapcon screws into masonry until snug but not overtightened.
- Attach end brackets: hold each bracket at its mark, align the screw holes, and drive screws in. Check each bracket with your level before fully tightening. For traverse systems, confirm bracket orientation matches the manufacturer's draw direction (Kirsch and similar systems specify left vs. right bracket orientation).
- Install center support brackets: these typically have a set screw or snap that holds the rod from below. Install them at their marked positions.
- Assemble the rod and hang it: if using an extendable rod, expand it to your measured rod length before hanging. Thread rings onto the rod if using ring-clip or eyelet panels. Set the rod into the end brackets and center supports, then close any snap covers or tighten any set screws.
- Hang curtain panels: clip rings to panels, space rings evenly across the panel width, and hang. Stand back and check for level and even drop before finalizing.
Ceiling-mount installation
Ceiling mounting follows the same logic but the brackets drop down from the ceiling rather than projecting out from the wall. The most important step is hitting ceiling joists. Joists run perpendicular to the long wall of most rooms, typically 16 inches on center. Use your stud finder on the ceiling the same way you'd use it on a wall. If your bracket positions don't land on joists, you need to either add a blocking board between two joists (a job that involves ceiling access) or shift your bracket positions to hit joists. Do not use plastic anchors in ceiling drywall for a loaded curtain rod: gravity will eventually pull them out.
Once you've confirmed joist locations, the install sequence is identical to wall mount: mark bracket positions, check level across all points, drill pilot holes, drive screws into joists, attach brackets, hang rod, hang panels. The one difference is that ceiling-mount brackets position the rod in front of the wall, which typically puts the rod 3 to 5 inches away from the wall surface. Confirm the rod clears the top of the door frame and any header hardware before you finalize the bracket position.
Tension rod install: inside the door jamb
Tension rods install without any drilling: expand the rod to 1 to 2 inches wider than the inside jamb measurement, compress it, set it inside the jamb, and release. The spring tension holds it against the jamb walls. Thread panels onto the rod before setting it in place. That's the entire install. The limitation is real: tension rods are only rated for lightweight panels (the Umbra Anywhere rod, for example, is designed for light panels and has limited load capacity depending on model), and they will slip if the jamb surfaces aren't clean and parallel. Wipe the jamb walls before installation and check the rod is level before hanging fabric. Retension every few months if it starts to creep.
Special considerations for sliding glass and screen doors
The unique challenge with patio doors compared to standard windows is that the door has to travel horizontally along its full width to open, and the curtain rod and panels must not interfere with that. A few things to check before you finalize your install.
- Bracket projection: the bracket must project far enough from the wall that the rod (and any rings or traverse carriers) clear the door handle, lock mechanism, and any door closer or security bar hardware. Hold a bracket up to the wall in position and physically check clearance before drilling.
- Stack-back zone: when panels are pushed open, the fabric stack must fit entirely within the non-door-travel zone. If your sliding panel travels to the right, all curtain fabric must clear the left half of the door opening so the right half is unobstructed. This is why 6 to 12 inches of rod overhang on each side is not optional: it's what gives the stacked fabric somewhere to live.
- Screen door clearance: if your patio door has both a glass panel and a screen door, the screen door often projects further outward than the glass. The rod bracket projection must clear the screen door track and handle too. Measure the full depth from the wall face to the furthest point of the screen door hardware before selecting brackets.
- Rod height and door frame top: the rod must sit high enough that the traverse carrier, ring, or rod-pocket hem clears the top of the door frame as the panel is pushed open. A rod mounted less than 3 inches above the frame can cause panels to catch on the frame edge when opened. Four to six inches above the frame is the reliable minimum.
- Avoid mounting into the door frame header: the door header carries structural load. Do not drill into the structural header above the door for curtain brackets. Mount into the wall above the header or use a ceiling mount instead.
Troubleshooting common problems
Rod is sagging in the middle
This almost always means the span between brackets is too long. The fix is adding a center support bracket. Per manufacturer guidance (Rod Desyne and others), brackets should be no more than 48 inches apart. For a rod over a wide patio door, plan one center support for spans of 60 to 96 inches, and two supports for spans over 96 inches. If the rod itself is too thin (lightweight aluminum versus steel), upgrading to a larger-diameter or steel rod also increases stiffness and load capacity.
Curtain panels are catching on the door frame or track
Either the rod isn't high enough above the frame, the bracket projection isn't deep enough to clear the track, or the panels are too long and dragging on the track hardware. Check all three. If the rod height is the issue, remount the brackets higher. If the bracket projection is too shallow, swap to extension brackets. If the hem length is too long, have the panels shortened.
Brackets pulled out of the wall
If brackets are pulling out, the anchors weren't adequate for the load. Strip out the old anchors, fill the holes with spackle, let them dry, and reinstall with proper hardware: toggle bolts for drywall, wood screws into studs, or Tapcons for masonry. If you keep missing studs, install a 1x4 backer board spanning between two confirmed studs and mount all brackets to the backer board.
Curtains aren't hanging level
The brackets are at different heights. Take the lower bracket down, re-measure its height from the floor (not from the door frame), mark the correct position, and remount. Always measure bracket height from the floor, not from the door frame or ceiling, because frames and ceilings are often not perfectly level.
Panels don't fully clear the glass when the door is open
The rod isn't extending far enough past the door frame. If you can't extend the existing rod further, replace it with a longer rod that gives you at least 8 to 10 inches of overhang on each side. Alternatively, reduce panel fullness: if you're at 3x fullness, dropping to 2x fullness reduces the stacked width significantly.
Maintenance and when to call a pro
Once installed, curtain rods need very little maintenance. Check bracket screws every 6 to 12 months and tighten any that have worked loose, especially if you have kids or pets who grab the curtains. Wipe the rod with a damp cloth seasonally to prevent dust buildup on the rod surface (which can cause rings and carriers to stick or squeak). For traverse rods, check the cord or wand mechanism once a year and lubricate the carrier track with a dry silicone spray if carriers feel stiff.
Call a pro when: you're drilling into an exterior masonry wall you're not certain about (some older buildings have hidden conduit or plumbing in exterior walls that isn't obvious from the interior); you discover the door frame itself is damaged or rotted and you need structural repair before any hardware can be mounted reliably; you're working with a heavy panel-track or bypass system over a very wide opening and the ceiling doesn't have accessible joists for mounting; or you find unexpected wiring behind the drywall when drilling. Hidden electrical is the one situation where stopping immediately and getting a pro involved is genuinely the right call.
Alternatives worth knowing about
If the rod-and-panel approach isn't right for your situation, vertical blinds and panel-track shades are the two most common alternatives. Vertical blinds mount directly to the door frame header using a head rail and don't require wall anchors at all, which makes them viable even when wall mounting is difficult. If you need specifics, see a short guide on how to measure for vertical blinds for patio door to ensure the head rail and panels fit and operate correctly. They also travel with the door travel direction, which makes them operationally tidy. The tradeoff is aesthetics: vertical blinds have a more utilitarian look that doesn't suit every interior style.
Panel-track shades (sometimes called panel blinds) sit in a category between vertical blinds and curtains. They use flat fabric panels on an overhead track, look clean and modern, and can be motorized for wide openings. If you're measuring for that system rather than a curtain rod, the measuring process differs from what's described here.
FAQ
What is a good search-friendly title and meta description for this article?
Title: How to Install a Patio Door Curtain Rod (Sliding Door) — Step-by-Step Guide Meta description: Install a patio door curtain rod safely and neatly. Tools, measurements, anchors, and step-by-step mounts for sliding doors. (≤160 characters)
What tools and materials do I need?
Tools: tape measure, pencil, level (48" recommended), stud finder (electronic), cordless drill with appropriate bits, screwdriver (Phillips/flat), masonry hammer drill and carbide bit (for concrete/masonry), 1/8"–1/4" drill bits for anchors, center punch, ladder, masking tape, helper for long rods. Materials: curtain rod (extendable, traverse/panel‑track, ceiling or wall mount), matching brackets and center support(s), curtain panels and rings/hangers, finials/end caps, screws and anchors (see fastener recommendations), felt pads for bracket backs (if needed). Fastener recommendations by wall type: - Wood/stud: #8 or #10 wood screws long enough to penetrate 1–1½" into stud (typically 2½" screws with bracket and drywall thickness). - Drywall (no stud): heavy‑duty toggle anchors (SNAPTOGGLE or metal toggle) or molly bolts rated for the load; use at least two toggles for long spans and add a center support. - Masonry/stucco/concrete: concrete screws (Tapcon) or sleeve/wedge anchors sized for recommended load; use proper hammer or rotary hammer with manufacturer pilot‑bit and embedment depth (Tapcon typically 1" min embedment). Load notes: check rod manufacturer weight limits; use additional brackets for spans over 48" or for heavy lined drapes.
How do I measure for rod length and curtain panel size? (Includes a small measurement table)
Measuring steps: 1. Measure the width of the sliding door glass or frame (inside edge to inside edge). 2. Add rod overhang for stack‑back so panels clear the door: minimum 6" each side; 8–12" preferred for fuller stack or thicker panels. 3. Rod length = door width + left overhang + right overhang. 4. Curtain panel width: multiply finished rod width by desired fullness (1.5× for light fullness, 2× for standard fullness, 2.5× for heavy pleats). Divide total width by number of panels. Measurement table (common examples): - Door width 72" + 6" overhang each side = rod 84" (72 + 12) - 2 panels, standard fullness (2×): required total fabric = 84" × 2 = 168" → each panel = 84" - Height: mount 4–6" above door top for clearance; measure from mounting point to desired hem (floor, sill, or puddle). Add hem allowances (1–3" depending on heading). Tips: For floor‑length curtains, measure to 1/2"–1" above floor; for breezy clearance over sliding doors, 1/2" above sill is common.
How do I choose the right rod type for a patio (sliding) door?
Rod types and when to use them: - Extendable decorative rods: good for light to medium panels; use when you want finials and traditional look. Add center support for spans >48". - Traverse rods: excellent for sliding doors; they allow one‑ or two‑way draw and smooth operation for heavier panels. - Panel‑track/bypass systems: ideal when you need panels to stack clear of door or bypass each other; recommended for wide patio doors and when you need minimal interference with door operation. - Tension rods: only for very lightweight sheers and rentals; not for heavy drapes or long spans as they have limited load capacity. - Ceiling‑mount rods/tracks: choose when wall space above door is limited or when you want the floor‑to‑ceiling look; ensure secure anchors into joists or use toggles rated for load. Material/diameter: heavier metal (steel) and larger diameters resist sagging and support heavier lined curtains; follow manufacturer span and support recommendations.
Step-by-step: How to install an outside (above) wall-mounted curtain rod over a patio door
1. Determine rod placement: typically 4–6" above the door frame; for taller visual effect, mount higher toward ceiling. Mark center and measure equal overhangs left/right (min 6"). 2. Locate studs with an electronic stud finder; mark stud centers. If no stud where bracket is needed, plan toggles or masonry anchors. 3. Mark bracket locations: usually both ends and a center support for rods over 48" or per manufacturer. Use level to ensure brackets are perfectly aligned. 4. Pre‑drill pilot holes sized for the screw/anchor. For studs, use a small pilot for wood screws. For drywall toggles, drill correct hole size per toggle instructions. For masonry, use hammer drill and proper carbide bit to depth (1/4" deeper than embedment). 5. Install anchors per manufacturer instructions (snap toggles set behind drywall; Tapcon screws driven into masonry). 6. Fasten brackets with screws; check for tight, gap‑free seating against wall (use felt pads if needed). 7. Place rod on brackets (or attach bracket plates first), insert center support, attach finials and rings, and hang panels. 8. Test curtain travel and door operation; adjust bracket height or offset if panels catch on the door or track.
Step-by-step: How to install a ceiling-mounted rod or track over a patio door
1. Choose track/rod rated for ceiling mount and confirm attachment points align with ceiling joists when possible; otherwise use heavy duty toggles. 2. Measure and mark track/rod centerline and end points; use a level and laser if available. 3. Locate joists with stud finder; where joists align, use wood screws into joist. For hollow ceilings/drywall, use SNAPTOGGLE or similar heavy toggles. 4. Pre‑drill holes and install anchors/joist screws. For long spans, install intermediate hooks or brackets for extra support. 5. Attach track/rod hardware to ceiling brackets according to manufacturer instructions, secure firmly. 6. Install carrier hooks/sliders and panels; ensure carriers clear any top door frame and allow full door movement. 7. Test by opening/closing panels and the door; adjust carrier positions or add stoppers as needed.
Next Article
How to Make Patio Door Curtains: Step-by-Step DIY Guide
Step-by-step DIY for patio door curtains: measure, choose fabric, sew panels, mount to slide smoothly, and reduce drafts