Hang patio door curtains by mounting a rod 4–6 inches above the door frame and extending it 6–10 inches beyond the frame on each side, so the panels stack off the glass when open and fully cover the door when closed. Use a drill-mounted rod for heavy panels or a tension/adhesive rod for lighter ones. The key challenge specific to patio doors is keeping fabric clear of the sliding door, the handle, and the track, all of which are in the curtain's path if you don't plan the projection and clearance correctly.
How to Hang Patio Door Curtains Step by Step DIY

Jamie Archer
22 May 2026
Measure and plan your curtain and rod placement
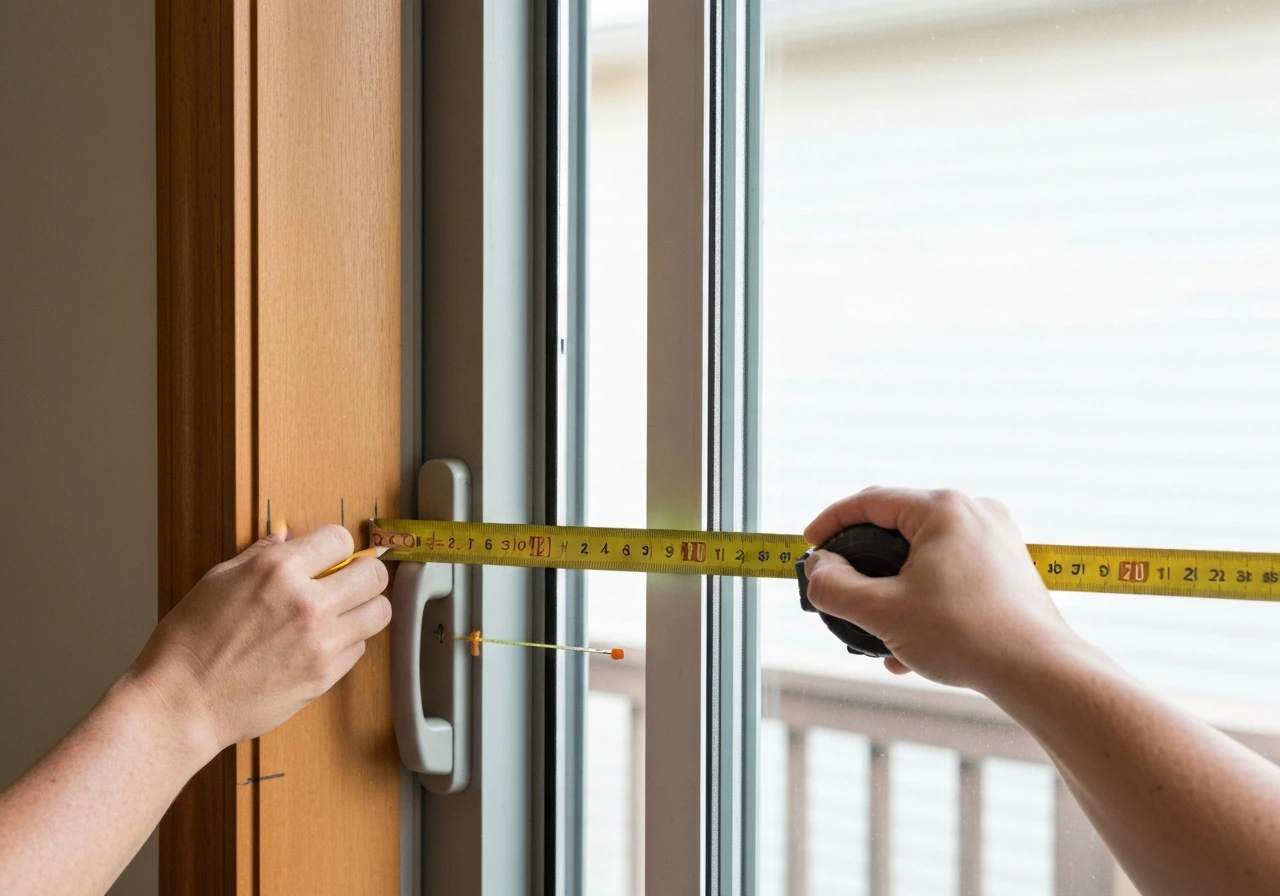
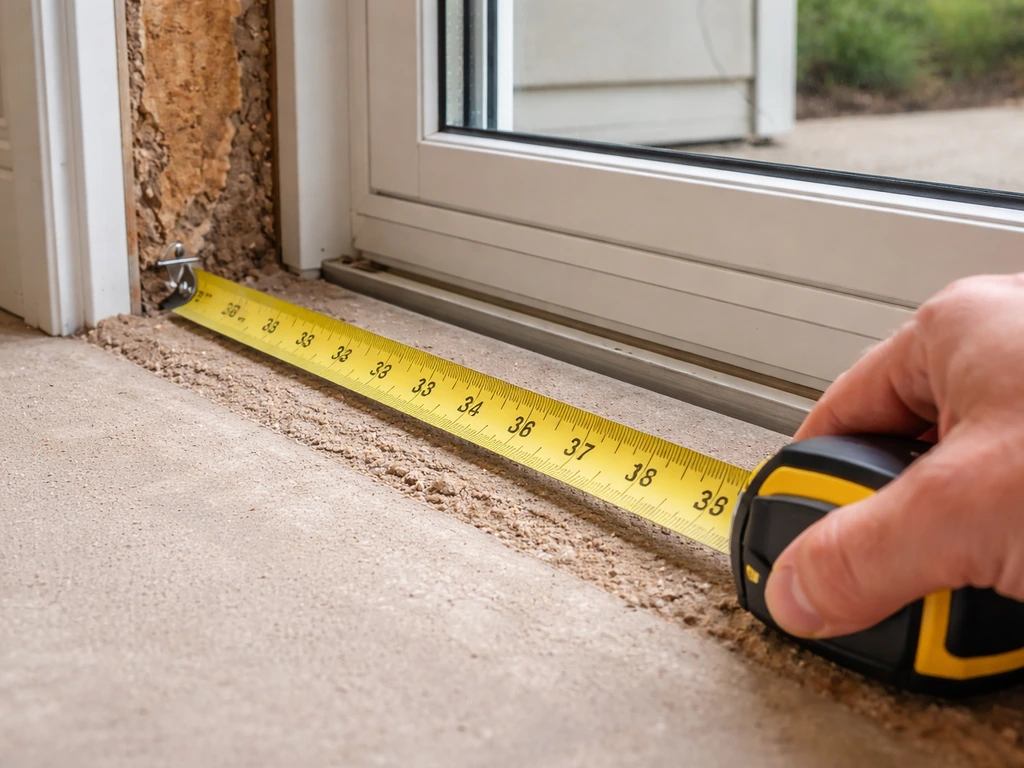
Before you buy anything, get three measurements: the door opening width, the door opening height, and how far the door handle projects from the frame. Use these same core measurements as your baseline when learning how to measure for a sliding patio door so the width, height, and clearance line up with your planned rod position. That last one trips people up constantly.
For width, measure the door trim edge-to-edge, then add 6–10 inches total (3–5 inches per side) to that number. This extra width is where your rod will extend, and it's what lets the panels slide fully off the glass when you open the door. If you skip this step, your curtains will always be partially blocking the door.
For height, decide where you want the rod to sit. The standard recommendation is 2–4 inches above the door trim. Going higher (up to the ceiling) makes the room feel taller and gives you more fabric drama, but for patio doors the more practical concern is getting the panel length right. Measure from your intended rod position down to the floor, then subtract 3/8 inch for a floor-length panel that just clears the floor without dragging. If you want a slight puddle, add 1–4 inches to that number instead.
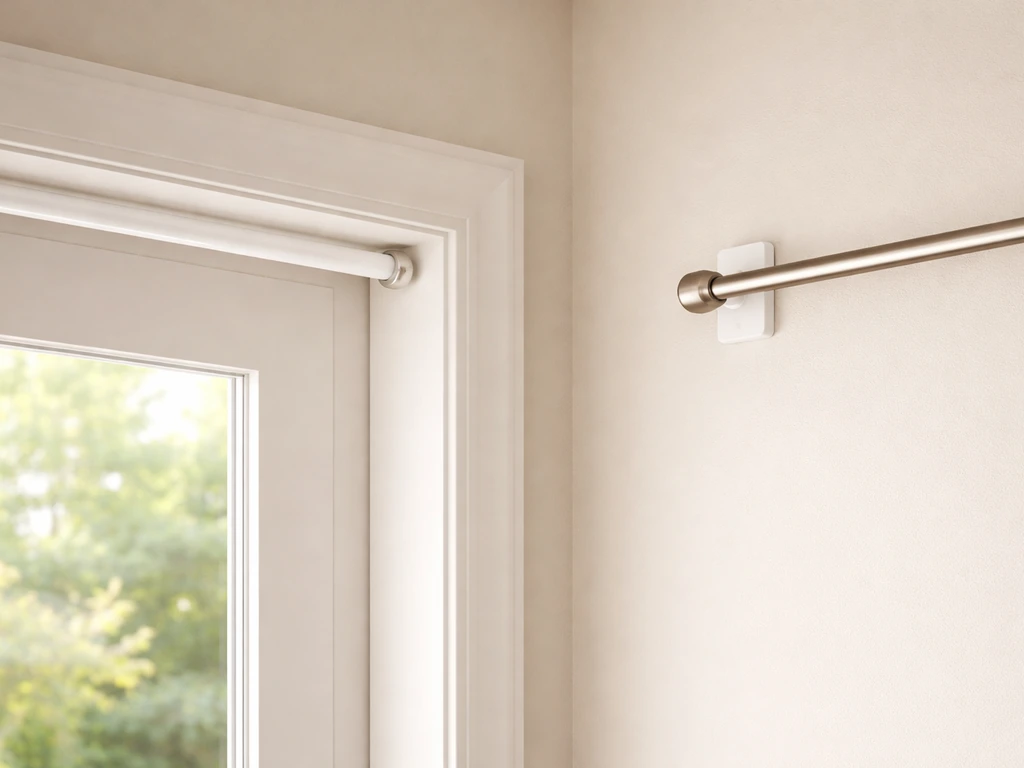
The handle check: hold a tape measure flat against the door frame at handle height and measure how far the handle sticks out. Your rod will need a bracket projection of at least 3–5 inches from the wall so the curtain fabric hangs in front of the handle without catching on it every time the door slides. Skipping this measurement is the single most common reason patio door curtains get torn or stuck.
Jot these numbers down before you shop: rod length (opening width plus 6–10 inches), rod mounting height above trim, rod projection from wall (at minimum 3–5 inches), and panel drop from rod to floor.
Choose your curtains and rod style
Panel width and fullness
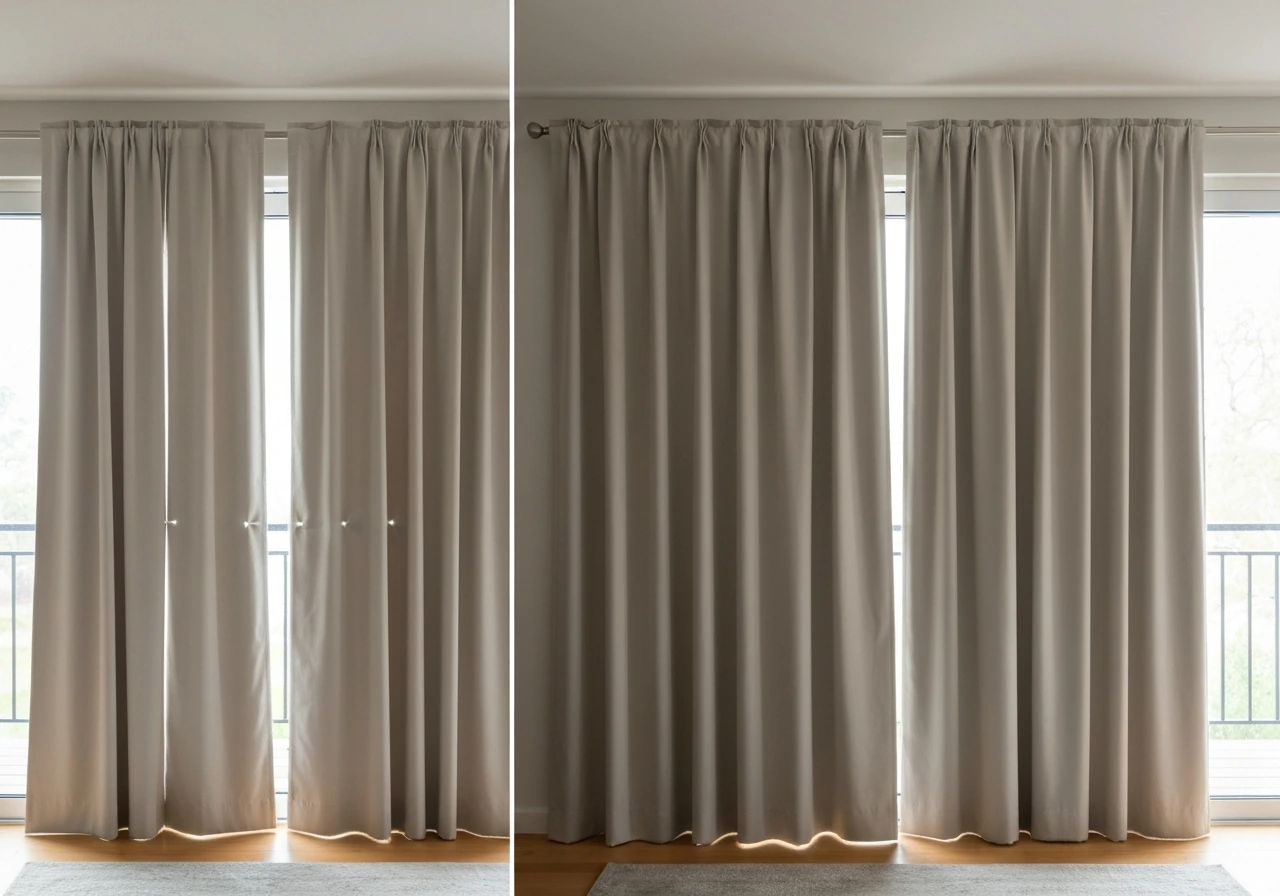
For patio doors, you almost always want two panels, one stacks to each side when the door is open. The total fabric width you need depends on how full you want the curtains to look when closed. Standard fullness is 2x the rod length (so a 90-inch rod needs 180 inches of fabric total, or two 90-inch-wide panels). For a more luxurious drape, go 2.5x for deluxe fullness or 3x for ultra fullness. Skimping on width is the main reason patio door curtains look thin and don't block light or drafts well when closed.
Panel length
For most patio doors, floor-length panels are the practical choice. They block drafts from the bottom of the door better than sill-length panels, and they look intentional. Aim for the panel to hover about 1/4 to 1/2 inch above the floor. If you're going for a casual look, a slight puddle (add 1–4 inches) works fine as long as you're not going to be whipping the curtains open and closed constantly, which would drag and wear out the hem quickly.
Rod type comparison
| Rod Type | Best For | Weight Limit | Requires Drilling | Notes |
|---|---|---|---|---|
| Standard curtain rod with brackets | Most patio doors, heavier panels | Varies by bracket/anchor (typically 20–50+ lbs) | Yes | Most secure; recommended for heavy blackout panels |
| Tension rod | Lightweight panels in smaller openings | 10–15 lbs (rubber-end models) | No | Works inside the door frame only; not ideal for wide outside-mount spans |
| Adhesive hook rod | Rentals, lightweight sheers | 5–7 lbs per hook | No | Check hook ratings carefully; not suited for heavy panels |
| Ceiling-mount track | Floor-to-ceiling panels, modern look | Varies by product | Yes (ceiling) | Great for drafts; hides hardware cleanly above the door |
For most sliding patio doors, a standard rod with wall-drilled brackets is the right call. Tension rods can work inside a door frame for lightweight sheers, but they're not reliable for an outside-mount setup that needs to span 80–100 inches without sagging. If you're renting or just can't drill, go with heavy-duty adhesive hooks rated for at least 5–7 lbs each and keep your panels light.
No-drill vs. drill mounting: installing the rod correctly
Drill mounting (recommended for most patio doors)
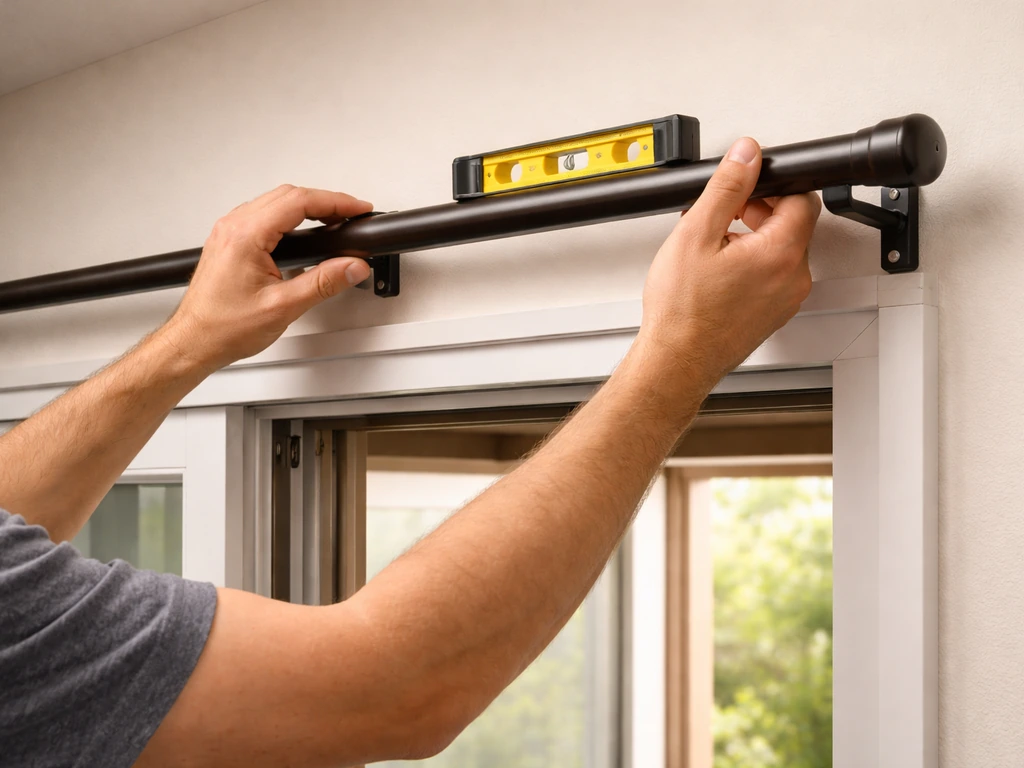
- Mark both bracket positions using your measurements. Hold one bracket against the wall at your planned height and mark the screw holes with a pencil.
- Use a level to confirm both bracket marks are at the same height before you drill anything. This is the step most people rush and later regret.
- If you're drilling into drywall with no stud, insert the provided wall anchors. For wood trim or studs, skip the anchor and pre-drill a 3/32-inch pilot hole to prevent splitting.
- Drill at 1/8-inch bit for anchor holes in drywall. Drive anchors flush, then screw in the brackets.
- For rods longer than 60 inches (which includes most patio door spans), add a center support bracket. Install it midway between the two end brackets. Without it, the rod will bow and the curtains will bunch toward the center.
- Snap or thread the rod into the brackets, then check the rod itself with a level before hanging anything.
No-drill mounting options
If you're going no-drill, the two realistic options for a patio door are tension rods (inside the frame) and adhesive hooks or Command-style strips on the wall. For adhesive, follow the product instructions exactly, surface prep and curing time matter a lot. Most adhesive hooks need 24–72 hours to reach full strength before you load them. Keep panels under the stated weight limit per hook, and plan for slightly lower weight limits if your walls get warm or humid (adhesive loses grip in heat). Once installed, give the rod a gentle tug before walking away. If it shifts, it'll fail under the weight of the curtains.
One practical note: adhesive brackets can be removed and replaced without permanent damage, which makes them genuinely useful for renters. Just don't expect them to hold heavy blackout panels on a wide patio door span.
How to hang the curtain panels
The method depends on the header type your panels have. Here's how each one works:
Grommet panels
Thread the rod through each grommet hole alternately, so the fabric folds in an S-shape along the rod. Grommets create a clean, modern pleat and slide easily, which makes them a good choice for patio doors you open and close frequently. For the smoothest glide, mount the rod brackets about 3.5 inches from the wall, this gives the grommets room to travel without rubbing against the wall or the bracket hardware.
Rod pocket panels
blank" rel="noopener noreferrer">Slide the rod through the pocket channel at the top of the panel. This is the classic shirred look. The downside for patio doors is that rod pocket panels don't slide as smoothly as grommets or rings, so if you're opening and closing your patio door multiple times a day, expect more wear and bunching over time. They work best as stationary panels framing the door or on lighter sheers.
Ring clip panels
Clip the rings onto the top edge of the panel fabric at even intervals (typically every 4–6 inches), then slide the rings onto the rod. Ring clips are the most versatile: they work with almost any fabric, they're easy to adjust, and they slide smoothly. This is often the best option for heavier panels on a patio door because you can redistribute the clips if the fabric starts pulling unevenly.
Whichever header type you use, hang both panels before you finalize anything. Step back and check that the tops are even across the rod and that each panel has roughly the same fabric distribution. Uneven hanging almost always comes down to the rod not being perfectly level, fix that first before adjusting the panels themselves.
Clearances and adjustments so the door slides smoothly
This is the section that's actually unique to patio doors versus regular windows. You have a moving door below your curtains, and if the fabric, hem, or rod hardware intrudes into that path, you'll have problems every time you use the door.
- Rod projection from wall: at minimum 3–5 inches. This keeps the fabric hanging in front of the handle, not around it. If your handle projects more than 3 inches from the frame, increase the bracket projection accordingly.
- Rod position above the door: at least 2 inches above the top of the door trim so the rod and brackets don't interfere with the door sliding open at the top.
- Side clearance: the rod should extend at least 3–5 inches past each side of the door frame. When you push the door fully open, the panel needs to stack completely off the glass onto the wall—if the rod isn't wide enough, the panel will obstruct the opening.
- Panel hem clearance: floor-length panels should not drag on the floor in the door's path. A 1/4 to 1/2 inch hover is the right call. Anything that touches the floor near the track can catch on the door frame or track cover.
- Screen door consideration: if you have a screen door as well as the main sliding door, check that fully-open panels don't overlap the screen door track or prevent the screen from sliding. You may need to adjust the panel stacking position or add a tiebacks closer to the wall.
Slide the door open and closed a few times with the curtains hanging before you consider the job done. Watch where the fabric falls when the door is at various positions, half open, fully open, fully closed. That test will reveal any interference you missed in the planning phase.
Troubleshooting common issues
Curtains hang unevenly or one side droops
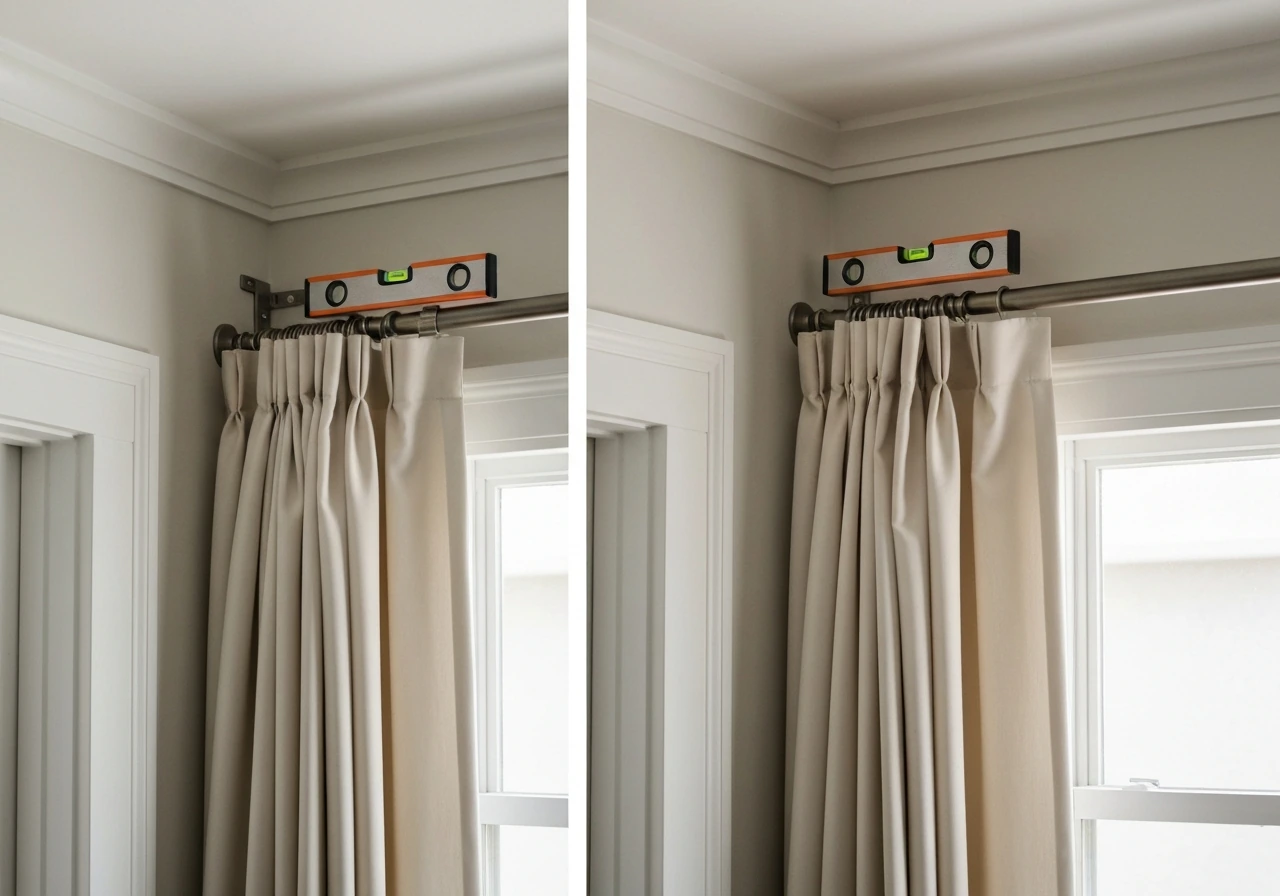
Almost always a leveling problem with the brackets. Take a level to the rod and re-check. If the rod itself is level but the panels look uneven, the panels are likely different widths or the ring clips aren't spaced evenly. Re-distribute the clips or check that both panels came from the same product run (widths can vary slightly between different dye lots).
Curtains don't fully cover the door when closed (light gap at sides)
This is a fabric width issue. If your total panel width isn't at least 2x the rod length, you'll always have gaps. The fix is either adding panels or replacing the current ones with wider panels. You can also adjust where each panel's leading edge falls by moving ring clips, overlap the two center panels by 2–4 inches so there's no gap at the seam when closed.
Curtains catch or drag on the door handle
The rod brackets don't have enough projection from the wall. Either replace the brackets with deeper-projection ones (3–5 inch projection is the minimum; go deeper if your handle sticks out more than 3 inches), or move the rod up higher so the fabric clears the handle height entirely. Increasing the bracket projection is usually the cleaner fix.
Rod sags in the middle on a wide door
Add a center support bracket. Most patio door openings are 72–96 inches wide, and any rod spanning more than 60 inches without a center support will bow under the weight of two full panels. If you already have a center bracket and it's still sagging, the rod itself may be too thin, upgrade to a heavier-gauge rod.
Draft gaps at the bottom or center seam
Bottom drafts usually mean the panels are too short, re-measure and replace or have the hems let down if there's extra fabric. Center seam gaps happen when the panels don't have enough overlap. Move the panels so they overlap at the center by at least 2–4 inches when closed. For blackout or weatherproofing purposes, you can also add a magnetic or weighted bottom hem to keep the fabric flush against the door frame.
No-drill rod keeps slipping or falling
The panels are too heavy for the hardware. Check the weight capacity of your hooks or adhesive mounts against the actual weight of both curtain panels combined. Adhesive hooks rated at 5 lbs each will handle about 10 lbs total if you have two, that's often not enough for full blackout panels on a patio door. Either switch to lighter fabric or switch to drilled brackets.
Final checks and seasonal weatherproofing tips
Before you call the job done, run through this quick checklist:
- Slide the door fully open and fully closed at least twice. The panels should not catch on the handle, drag on the floor, or interfere with the door frame.
- Check the rod with a level one more time after hanging the full weight of both panels—sometimes the brackets settle slightly.
- Stand back with the curtains closed and look for light gaps at the sides, the center seam, and the bottom. Adjust panel overlap or hem as needed.
- Gently tug on each panel and on the rod itself (especially if you used no-drill mounting). Nothing should shift.
- Test any tiebacks or holdbacks you plan to use when the door is open. They should hold the panels far enough off the door path that the door swings clear.
For seasonal weatherproofing, heavier blackout or thermal-lined panels will noticeably cut down on drafts in winter, but they only work if the panels actually overlap the wall on both sides when closed and don't have a gap at the bottom. Come fall, check the hem clearance again: floorboards swell slightly in humid summers, and a panel that cleared the floor in July might drag in October. A quick hem adjustment or a taller rod setting can fix that.
In summer, if you're using the curtains to block heat from a south- or west-facing patio door, make sure the panels are wide enough to close fully during peak sun hours. A rod that's too narrow or panels that are too skimpy will leave the door partially exposed. If you previously measured for vertical blinds or are deciding between options, curtains can be layered over existing track hardware in many cases, check that the track doesn't interfere with your bracket placement before mounting anything new.
If you're still not happy with the coverage after adjustments, the most common underlying issue is that the original measurements were taken at the door glass rather than at the planned rod position. Re-measuring from the actual rod location, accounting for the distance from the rod to the floor and the rod extension past the frame, will usually reveal where the gap crept in. Getting those measurements right before you shop is the part that makes the whole install go smoothly, and it's worth the extra five minutes before you leave the hardware store.
FAQ
Can I hang patio door curtains from the ceiling instead of the wall above the frame?
Yes, but re-check the handle clearance after you move the rod upward. A ceiling-mounted rod changes the curtain drop angle, so you should still confirm the fabric will clear the handle and track through several door positions. Measure from the new rod height to the floor and keep the hem about 1/4 to 1/2 inch above the floor for a no-drag fit.
What if my patio door handle is off-center or unusually bulky?
Base your projection measurement on the maximum handle height and the farthest handle point, not the average. If the handle sticks out more than 3 inches, increase bracket projection beyond 5 inches or move the rod higher so the curtain fabric does not rub the handle during sliding.
Should I choose grommet, rod pocket, or ring clips for a patio door I open every day?
For frequent use, grommets or ring clips are usually the smoothest options. Rod pockets often bunch and wear faster when constantly moved, so they are better for lighter sheers or mostly stationary panels framing the door.
Do I need two curtain panels, or can I use one wide panel?
Two panels are the practical choice for sliding doors because they can stack to each side when the door opens. If you try one panel, you often end up with fabric in the door’s path or a difficult closing overlap at the center.
How wide should the curtains be if I want them to close with no gaps at the seam?
Use at least 2x the rod length for fullness, then aim for 2 to 4 inches of overlap at the center seam when closed. If you still see a seam gap after overlap, add width (more overlap material) rather than only adjusting clip positions.
My rod looks level, but the curtains still hang uneven. What’s the usual cause?
Most of the time it’s uneven clip spacing or differences between the two panels. Re-distribute ring clips so they match between panels, and verify the panels came from the same product run if you suspect slight width variation.
Will floor-length curtains drag if the floor is slightly uneven?
They can, especially on older floors or in seasonal humidity. Keep the hem clearance in mind, then consider measuring in the exact spots where the door will slide. If you notice drag after a few open-close cycles, adjust to reduce length or add a small hem clearance allowance instead of forcing the fabric to skim the floor.
How much sagging is normal on a wide patio door rod?
Sagging usually indicates missing support or a rod that’s too light. A common rule is to add a center support bracket when spanning more than about 60 inches, and upgrade rod gauge if sag continues even with a center bracket.
Are tension rods acceptable for patio doors?
They work best only when installed inside the frame with lightweight sheers. For an outside-mount setup spanning roughly 80 to 100 inches, tension rods are prone to sag, so drilled wall brackets are more reliable for heavier panels.
If I use adhesive hooks, how do I confirm the installation is strong enough?
Check the curtain weight against the stated weight limit for each hook, and remember that two hooks does not automatically mean the full rated total applies in real conditions. Let the adhesive cure for the full recommended time (often 24 to 72 hours) and do a gentle tug test after installation. If the rod shifts, stop and re-mount before hanging the panels.
Can I use magnetic or weighted hems on patio door curtains?
Yes, they can help with bottom gaps and drafts, especially for thermal or blackout goals. Use them when the curtain is long enough and positioned so the hem can actually contact the frame area, otherwise the magnetic or weight won’t solve a too-short panel.
What’s the quickest way to troubleshoot drafts or light leaking after installation?
Start with the overlap when closed (center seam overlap and wall-side coverage) and then confirm bottom clearance. If drafts persist, re-measure panel length from the rod location to the floor, because seasonal swelling can change whether hems clear or drag and whether the bottom stays sealed.
Next Article
How to Measure for a Sliding Patio Door: Size Guide
Step-by-step guide to measure rough opening and frame for sliding patio doors and screen doors, including hardware place