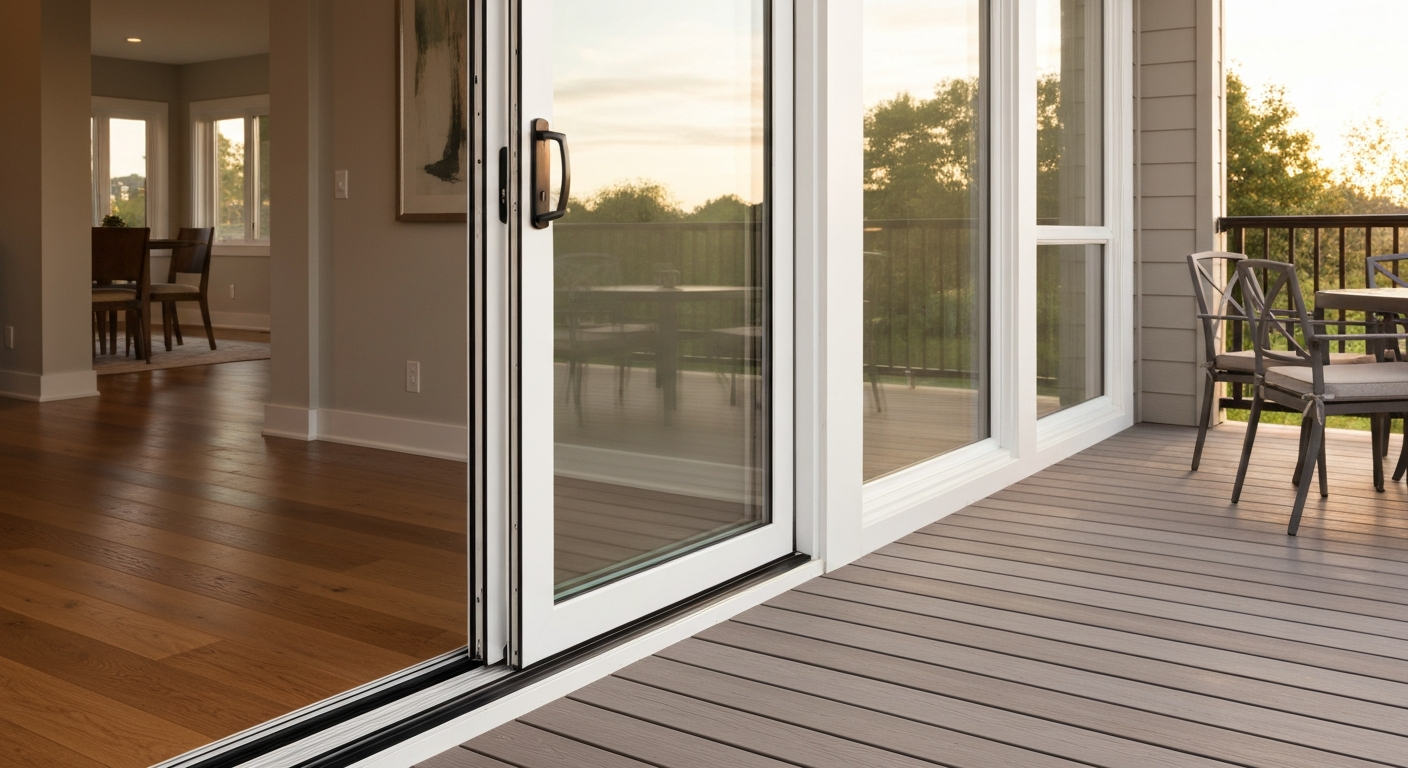
Installing brick molding around a patio door means cutting and fastening a profiled exterior casing that covers the gap between the door frame and the surrounding wall cladding, then sealing everything with proper flashing so water never gets behind it. For step-by-step guidance on fitting patio doors, see our how to fit patio doors guide. Done right, it takes one solid weekend for a retrofit or about half a day on new construction. Done wrong, you get rot behind the siding within a few years. The job is DIY-friendly if you can run a miter saw, use a caulk gun carefully, and follow a flashing sequence without skipping steps. For step-by-step guidance on constructing a patio door from scratch, see how to build a patio door.
How to Install Brick Molding Around Patio Door: DIY Guide

Jamie Archer
12 Aug 2026
What brick molding actually does on a patio door
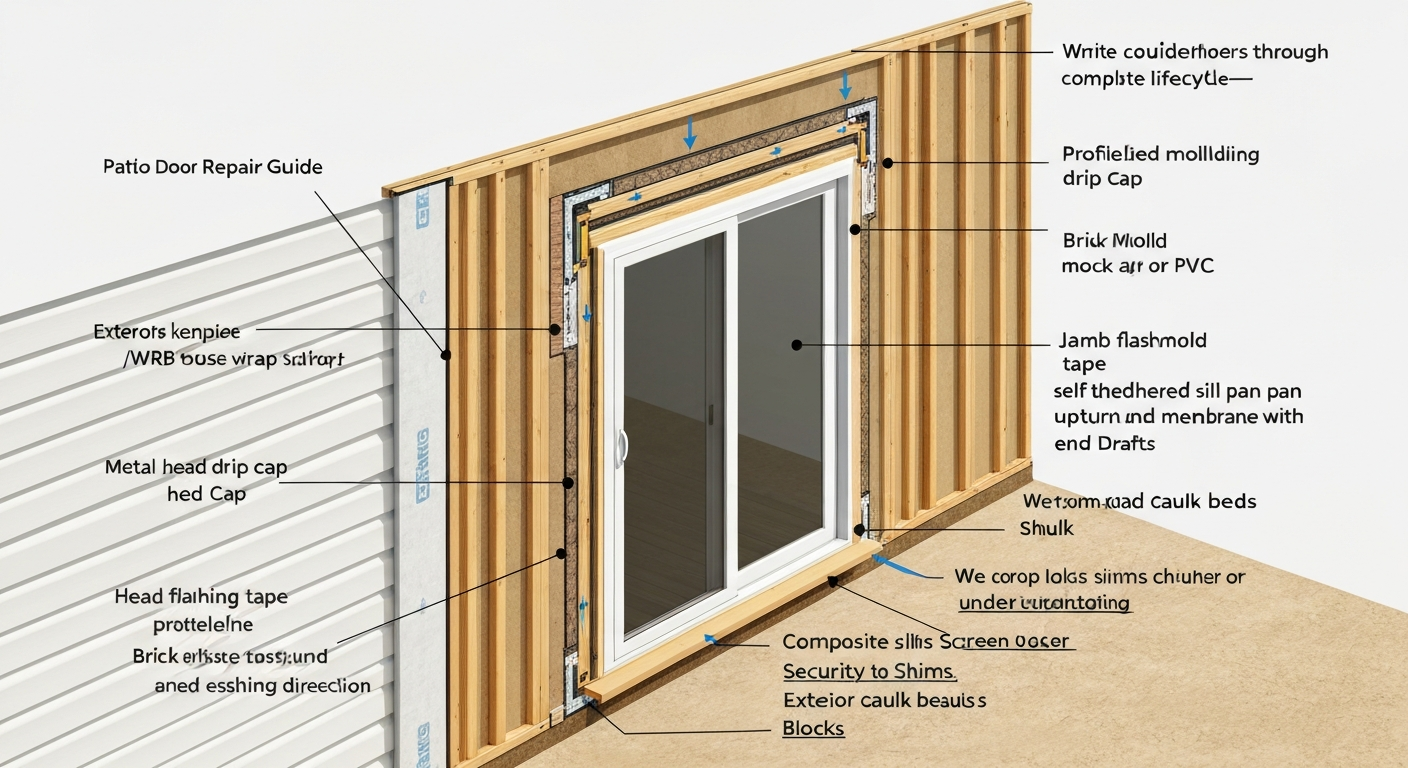
Brick molding is the profiled exterior trim that sits between the door frame and whatever cladding surrounds it, whether that's brick, siding, stucco, or fiber cement. On a patio door specifically, it serves three jobs at once: it closes the visual gap between the frame and the wall, it provides a nailing surface that clamps the frame into the rough opening, and it creates a ledge for caulk and flashing to seal against. Most standard brick mold profiles sold at home centers run about 1-3/16 inches thick by 2 inches wide, though wider profiles exist for thicker walls or decorative purposes. See Brickmould Moulding, Home Depot product category (example nominal sizes) for typical retailer listings and nominal profile dimensions sold at home centers Brickmould Moulding — Home Depot product category (example nominal sizes).
You need brick molding any time the door frame doesn't extend flush to the face of the exterior cladding, which is almost every installation. On new construction it gets installed as part of the door unit before the siding goes on. On a retrofit, you're adding or replacing it around an existing opening, sometimes without touching the siding at all. The approach differs significantly depending on which situation you're in, so I'll cover both.
Tools and materials you'll need before you start
Pull everything together before you cut a single piece. Discovering mid-job that you're missing sill flashing tape is a frustrating half-day delay.
| Category | Item | Notes |
|---|---|---|
| Trim | Brick molding (primed wood, PVC, or composite) | Buy 10–15% extra for waste |
| Trim | Head drip cap / cap flashing (aluminum or galvanized) | Minimum 3" longer than door width |
| Flashing | Self-adhered sill flashing tape (6"–9" wide) | Blueskin VP160, Grace Vycor Pro, or equivalent |
| Flashing | Jamb flashing tape (4"–6" wide) | Same brand as sill tape for compatibility |
| Flashing | Head flashing tape or rigid drip cap | Metal drip cap preferred at head |
| Fasteners | #8 x 2-1/2" corrosion-resistant screws or 16d galvanized casing nails | Hot-dip galvanized or stainless steel only |
| Fasteners | 1-1/2" roofing nails or screws for drip cap tabs | Corrosion-resistant |
| Sealant | Paintable polyurethane exterior caulk | For trim-to-siding joints |
| Sealant | Silicone or hybrid sealant | For flashing seams and threshold |
| Shimming | Composite shims (non-compressible, moisture-resistant) | Cedar is traditional; composite is better |
| Safety | Safety glasses, work gloves, hearing protection | Required for saw work |
| Tools | Miter saw (power miter box) | Essential for accurate angle cuts |
| Tools | Pry bar and flat bar | For removing old trim cleanly |
| Tools | Tape measure, speed square, 4-ft level | Plumb and square checks |
| Tools | Utility knife and straightedge | For cutting flashing tape |
| Tools | Caulk gun, putty knife, wire brush | Prep and sealing |
| Tools | Nail set or drill/driver | Setting fasteners flush |
Choosing the right brick molding
Material options
Primed finger-jointed pine is the cheapest option and works fine in dry climates if you back-prime every cut and paint it promptly. In humid, wet, or coastal environments, go with cellular PVC or composite (PVC-wrapped or extruded) brick mold. It won't absorb moisture, holds paint longer, and costs maybe 30–50% more upfront but lasts dramatically longer. Polyurethane profiles are a middle option: they look great, take paint well, and resist moisture better than wood, but they can crack if they're not properly supported. For most patio door installs in mixed climates, cellular PVC is the practical sweet spot.
Profiles and compatibility
Standard brick mold profiles have a flat back face with a stepped or ogee front. The key compatibility issue is thickness: the profile needs to be at least as thick as the gap between the door jamb face and the plane of the exterior cladding. If your cladding sits proud of the jamb by 3/4 inch, you need a brick mold that's at least 3/4 inch thick on its back leg. Many patio doors from Andersen, Pella, and JELD-WEN ship with factory-attached brick mold already installed on the unit; if you're replacing just the casing on an existing door, match the profile width and thickness to what was there, or you'll have gaps to fill.
Sliding patio doors and hinged or French-style patio doors use the same brick mold profiles, but sliding doors often have a wider head section with a track cover, so double-check that the mold you choose clears any track hardware before buying. Screen door frames also sit inside or just outside the main door frame, and they should not be covered by brick mold; the mold terminates at the main door jamb, leaving the screen track exposed.
Measuring and buying the right amount
Measure the exterior of the door opening, not the rough opening. You want the height of each side jamb from the sill to the head jamb, and the full width of the head (outside of one jamb to outside of the other). Brick mold wraps around the outside of the frame, so your side pieces will be slightly shorter than the rough opening height, and your head piece will be longer than the door width because it extends past the side pieces.
For a standard patio door, you'll need two side pieces and one head piece. If your door is 6 feet 8 inches tall and 6 feet wide, your side pieces run about 82 inches each and your head piece runs about 76 inches plus 2x the mold width on each end (roughly 4 to 5 inches added per side). Add a sill return piece at the bottom of each side if the mold needs to terminate cleanly rather than butt into a sill cap. Buy your lengths as close to the actual cuts as possible, then add 10 to 15 percent for waste. For guidance on selecting and purchasing the right unit, see how to buy a patio door. Most home centers sell brick mold in 7-foot and 8-foot lengths; for a standard patio door you'll typically need four 8-foot pieces.
If your wall has returns, meaning the brick mold has to wrap around a corner before it meets the cladding, account for those additional short pieces in your order. Same if the door is set deep in the wall and needs an extended return leg.
New construction vs retrofit: the key differences
The fundamentals of cutting and fastening brick mold are the same in both cases. What changes is the flashing sequence and whether you have to work around existing siding. Here's a side-by-side comparison of what that means in practice.
| Factor | New Construction | Retrofit (Replacement) |
|---|---|---|
| House wrap / WRB | Installed before door; flash tape integrates cleanly | Already in place; may need slitting or careful tucking |
| Sill pan | Full pan installed before door unit drops in | May need retrofit sill pan or careful tape work under existing sill |
| Cladding clearance | Siding goes on after brick mold; no conflict | Must slip flashing behind existing siding or cut cladding back |
| Head flashing | Drip cap tucked under house wrap above door | Drip cap slid behind siding or J-channel; may require cladding removal |
| Brick mold attachment | Nailed or screwed directly into framing before siding | Fastened into existing jamb/framing; may need longer fasteners |
| Typical timeline | Half a day for framing crew | Full day to two days for one DIYer |
| Rot risk | Zero if done right first time | Common; inspect framing before proceeding |
The retrofit scenario is where most homeowners find themselves, and it's where most mistakes happen. The urge to just nail on new trim and caulk the gap is strong, but if you don't properly tie the flashing into the existing house wrap, you're just hiding a future water problem. This article covers both, but pay close attention to the retrofit-specific steps in the flashing section.
Preparing the opening before any trim goes on
Removing old trim and inspecting what's underneath
Use a flat bar and pry bar to remove the existing brick mold carefully, working from the outside corners inward so you don't split the jamb casing. Score the caulk lines with a utility knife first so you don't tear the house wrap along with the trim. Once the old trim is off, press firmly on the jamb faces and sill with your thumb. Any spongy, soft, or discolored wood means rot, and you need to deal with it before going further.
Check the rough opening framing with a 4-foot level on each jamb side and across the head. JELD-WEN's installation documentation requires the exterior face of the rough opening to be in a single plane with no more than 1/8 inch of twist from corner to corner, and plumb and square within that same tolerance. If your framing is out of square by more than that, your door will bind or the mold joints will gap. Minor out-of-square can be corrected with shimming; significant framing issues should be addressed by sistering in new lumber alongside the existing jack or king studs before you proceed.
Fixing rot and repairing the sill
Small soft spots (less than 1/2 inch deep, under 2 inches across) can be treated with a two-part epoxy wood consolidant and filler such as LiquidWood and WoodEpox. Anything larger, or any rot that has penetrated into the structural framing, means replacing the affected lumber. Don't skip this step; new trim and flashing over rotted framing will fail within two to three years and create a much larger repair. While you have everything exposed, also check the sill pan area for standing water stains or flashing remnants that were installed incorrectly the first time.
Checking insulation and air sealing at the jamb
Look at the gap between the door frame and the rough framing. This should be filled with low-expansion foam or fiberglass batt. If it's empty, fill it with minimal-expanding window and door foam (not standard great stuff) before you close everything up. Shims at this stage should be composite or treated wood; they'll be compressed against the framing when final fasteners go in.
Flashing and weatherproofing: get this right or nothing else matters
Flashing is the single most important part of this job. I've seen beautifully cut and finished brick mold fail within three years because someone skipped the sill pan or reversed the flashing lap sequence. ASTM E2112 – Standard Practice for Installation of Exterior Windows, Doors, and Skylights (summary/resource) recommends using a drainage (sill) pan with back and end dams and a layered 'shingle‑style' flashing sequence to shed water to the exterior ASTM E2112 – Standard Practice for Installation of Exterior Windows, Doors, and Skylights (summary/resource) recommends using a drainage (sill) pan with back and end dams and a layered 'shingle‑style' flashing sequence to shed water to the exterior.. The rule is simple: every layer laps over the layer below it like shingles on a roof, so water always sheds to the exterior. For step-by-step instructions and diagrams on how to install exterior trim on a patio door, consult our dedicated guide on how to install exterior trim on a patio door.
The correct flashing sequence
- Sill pan flashing first: apply self-adhered membrane across the full sill width, extending 6 inches up each jamb side and 1 inch past the exterior face of the opening. Slope the pan toward the exterior by at least 5 percent (about 1/4 inch per foot) using a thin shim under the back leg if the sill is flat. Per ASTM E2112 consensus practice, the pan needs a back dam (upturned rear lip) and end dams (upturned side lips) to prevent water from running laterally into the framing.
- Jamb flashing tapes second: apply 4- to 6-inch wide self-adhered flashing tape up each jamb side, lapping over the ends of the sill pan tape. Run the jamb tape from the sill up past the head of the opening by at least 6 inches.
- Head flashing last: install a rigid metal drip cap (aluminum or galvanized) above the head jamb, extending at least 1-1/2 inches past each side jamb. Bend a small end dam at each end. Tuck the top edge of the drip cap behind the house wrap or WRB (on new construction) or behind the siding/J-channel (on retrofit). Apply self-adhered head flashing tape across the top of the opening that laps over the jamb tapes below.
On a retrofit where you cannot easily lift the siding to tuck flashing, use a thin pry bar to gently separate the bottom course of siding above the door just enough to slip the drip cap behind it. Many retrofit patio doors from Pella and JELD-WEN provide specific guidance for working around existing J-channels and cladding, essentially the same idea: slide thin flashing tape or the drip cap behind the existing layer rather than removing it. If the cladding is stucco or adhered stone, you may need to cut a kerf with an oscillating tool and fill it after the flashing is seated.
For the jamb tapes, products like Grace Vycor Pro and Henry Blueskin VP160 both call for priming the substrate if it's concrete, OSB with a rough face, or previously painted wood. blank" rel="noopener noreferrer">Henry Blueskin VP160/VP100 window flashing details and install drawings (manufacturer datasheets) specify extending sill flashing 6 inches up each jamb, using a continuous sill pan membrane, and priming where noted. Follow the manufacturer's primer instructions; skipping the primer on rough or dusty surfaces causes adhesion failure at the corners, which is exactly where you need it most. Corner patches cut from the same tape, applied diagonally at each sill corner, reinforce the most vulnerable spot in the system.
Tying into the house wrap
On new construction, the house wrap should be cut in an inverted Y pattern at the door opening: horizontal cut at the head, diagonal cuts down to each lower corner, then fold the flaps inward and tape them to the framing. The sill pan flashing goes over the folded-in sill portion of the house wrap. After the door is set and the jamb tapes are applied, the side house wrap flaps fold back out over the jamb tapes, and the head house wrap flap folds down over the head tape and drip cap. This shingle sequencing means every lap sheds water outward.
Step-by-step installation for new construction
This sequence assumes the rough opening is framed, the house wrap is cut and ready, and you have your door unit with brick mold either pre-attached or ready to attach. Use this as a working checklist. For full step-by-step instructions on how to put a patio door in, see our detailed installation guide. For a detailed walkthrough on framing the opening itself, see our guide on how to frame a patio door.
- Install the sill pan flashing across the rough opening sill. Use 6- to 9-inch wide self-adhered membrane. Extend it 6 inches up each jamb face and 1 inch past the exterior. Form end dams by notching and folding the tape at the corners, or apply corner patches. Pella's published instructions specify the sill tape extending 1 inch past the exterior and 6 inches up each jamb; that's the minimum, not a suggestion.
- Apply jamb flashing tapes over the sill pan ends, running them from the sill all the way to 6 inches above the head of the opening. Press firmly from center outward to avoid air bubbles.
- Set composite or pressure-treated shims on the sill pan at each planned fastener location. JELD-WEN requires shims at no more than 24 inches on center, and shims must be placed at hinge locations on hinged doors. Shims must be plumb, level, and firm; don't let the door unit rest directly on the flashing membrane.
- Lift the door unit into the opening and set it on the shims. Have a helper hold the unit plumb while you check level across the sill with a 4-foot level. A patio door sill must be within 1/8 inch of level across its width, or the sliding panel will roll crooked.
- Drive one temporary fastener through the hinge jamb near the top to hold the unit in place while you adjust. Check plumb on both jamb sides. Adjust shims as needed.
- Once plumb and level, drive final fasteners. For vinyl patio doors, use #8 x 2-1/2-inch pan or truss head screws per JELD-WEN's JII118 specification. For wood or composite doors, Andersen specifies #8 screws with a minimum 3-inch shank length, corrosion-resistant (galvanized, ceramic-coated, or stainless steel). Space fasteners no more than 8 inches from each end and at 8 to 10 inches on center along the side jambs. At the head jamb, space at 9 to 10 inches on center.
- Install the head drip cap. Slide its top edge behind the house wrap or WRB. It should extend at least 1-1/2 inches past each side jamb. Nail the lower leg of the drip cap through the brick mold into framing with corrosion-resistant roofing nails or screws spaced 12 inches on center.
- Apply head flashing tape across the top of the opening, lapping over the jamb tapes and under the drip cap's top leg. Fold the house wrap head flap down over the drip cap and tape the WRB lap with compatible seam tape.
- Cut side brick mold pieces with a miter saw. The top end gets a 45-degree miter that matches the head piece; the bottom end gets either a square cut that sits on the sill or a small return. Dry-fit all three pieces before applying any sealant.
- Apply a continuous 3/8-inch bead of exterior sealant (polyurethane or hybrid) to the back face of each brick mold piece where it contacts the door jamb. Pella's installation documents specifically call for a 3/8-inch bead at key joints; this is the primary secondary air and water seal.
- Press side pieces into place, check plumb, and fasten through the mold into the framing with 16d galvanized casing nails or #8 x 2-1/2-inch screws, spaced 16 inches on center. Keep fasteners at least 1/2 inch from the edge of the mold to prevent splitting.
- Install the head brick mold piece with mitered ends matching the side pieces. Fasten the same way. Set all nail heads below the surface with a nail set.
- Fill nail holes and miter joints with exterior paintable filler or caulk. Apply a finish bead of paintable exterior caulk along the outer edge of the brick mold where it meets the cladding or will meet future siding. Do not caulk the bottom edge of the side pieces where they terminate at the sill; that gap needs to drain.
- Prime and paint all cut ends and exposed wood surfaces before siding goes on. Two coats of exterior primer on all cut ends; back-prime the mold if it came unprimed.
Retrofit-specific adjustments
On a retrofit, steps 1 through 3 happen after you've removed the old trim and exposed the rough opening. Your existing house wrap may have slits or tape remnants; patch any damage with compatible seam tape before applying new flashing. For the head drip cap, carefully pry the bottom of the first siding course above the door upward just enough to slide the drip cap behind it, then re-nail that siding course. If you cannot remove any siding, use a flexible self-adhered flashing tape for the head detail and run it up behind the siding as far as possible, at minimum 2 inches under the siding course.
Sliding vs hinged patio doors: what changes
The brick mold and flashing installation is nearly identical for both door types. The practical differences are in shimming and fastening. On a sliding patio door, the sill must be perfectly level because even 1/8 inch of slope affects how the panel rolls. On a hinged or French-style patio door, the hinge jamb must be plumb because the hinges carry the door weight and a twisted hinge jamb binds the door immediately. Place shims specifically at each hinge location on hinged doors in addition to the standard 24-inch on-center spacing.
Screen doors on sliding patio doors sit in their own track and don't require their own brick mold. The screen panel rolls in a track that's part of the door frame assembly. Make sure your brick mold terminates flush with the exterior face of the screen track frame so the screen door can open and close without rubbing the trim. If the brick mold projects past the screen track face, plane or rip it down before fastening.
Finishing, caulking, and painting
Once all pieces are fastened, go around the entire perimeter and fill every nail hole with exterior-grade filler, let it dry, and sand flush. For step‑by‑step guidance on cutting, coping, and fitting the casing itself, see how to trim a patio door. Apply a continuous bead of paintable polyurethane exterior caulk where the brick mold meets the door frame on the interior side of the mold (the rabbet line), and where the outer edge of the mold will meet the cladding. Smooth the bead with a wet finger. Don't caulk the bottom of the side pieces at the sill; that's an intentional drain path.
For PVC or composite mold, use a caulk rated for use with PVC (some silicones and polyurethanes are not compatible and will not adhere). Check the compatibility note on the caulk tube. Prime bare wood mold with two coats of exterior primer before applying finish paint; for PVC mold, use a 100-percent acrylic paint in a color with a light reflectance value above 55 (dark colors can cause PVC to overheat and warp). Apply paint to all cut ends before installation, not after.
Troubleshooting: leaks, drafts, and fit problems
| Symptom | Likely Cause | Fix |
|---|---|---|
| Water on interior sill after rain | Missing or failed sill pan flashing | Remove door unit, install proper sill pan per ASTM E2112 |
| Water stain on interior wall above door | No head drip cap or drip cap not tucked behind WRB | Remove head brick mold, install or reposition drip cap, re-tape |
| Drafts at corners of brick mold | Caulk failed at miter joints or back bead missing | Re-caulk with exterior polyurethane; add back bead at rabbet |
| Brick mold pulling away from wall | Fasteners too short or into rot | Replace with longer corrosion-resistant screws into solid framing |
| Visible gap at outer edge of mold | Mold too narrow for wall thickness or cladding sits proud | Add a second layer (backband) or replace with wider profile |
| Miter joint opening at corners | Wood movement or incorrect cut angle | Re-cut miter, back-prime, re-glue with exterior adhesive and re-nail |
| Sliding door binds after install | Sill out of level; shims compressed unevenly | Adjust shims under sill; re-check level and re-fasten |
Common mistakes that cause early failure
- Caulking the bottom of the side pieces at the sill, trapping water instead of letting it drain
- Installing flashing in reverse sequence (head first, sill last), which creates reverse laps that funnel water inward
- Using standard interior or non-corrosion-resistant fasteners outdoors, which rust and stain within two seasons
- Skipping the sill pan entirely and relying only on caulk, which fails within three to five years
- Not back-priming or back-painting wood brick mold before installation, leading to paint failure at the back face
- Overdriving screws or nails and splitting the brick mold edge, creating a crack that collects water
- Ignoring existing rot in the framing and trimming over it
When to call a professional
Most of this job is well within DIY range if you're comfortable with a miter saw and careful about flashing. But there are clear situations where calling a pro is the right move. If you find structural rot in the king studs, jack studs, or header when you open the wall, that's a framing repair that needs a carpenter, not just patching with epoxy. If the rough opening is out of square by more than 1/2 inch, correcting it properly requires sistering framing and potentially adjusting the door threshold, which is tricky to do right the first time.
Stucco or EIFS cladding is another reason to reconsider DIYing the full job. Cutting and patching those systems without creating new water entry points requires specific knowledge and materials. Similarly, if your door is on a second story or set back in a deep reveal with complicated return angles, the risk of incorrect flashing is high enough that a weatherproofing specialist is worth the cost. A failed flashing detail on a second floor can rot your floor system before you notice the problem.
As a rule of thumb: if the prep work (what's behind the trim) turns out to be more than 20 percent of the job's scope, reassess. The trim installation itself is straightforward; it's the framing and flashing that get expensive to fix after the fact.
FAQ
What is brick mould and why use it around a patio door?
Brick mould (brickmould) is exterior door casing that covers the gap between the door frame and the cladding (siding, brick, etc.). It provides a finished look, protects the frame from moisture and physical damage, and creates a mounting surface for caulk/paint. It also helps hide the WRB/housewrap termination and flashing details when installed correctly.
What tools and materials do I need to install brick mould around a patio door?
Essential tools: tape measure, combination square, pencil, circular saw or miter saw with fine-tooth blade, coping saw or jamb saw for returns, utility knife, pry bar (for retrofit), cordless drill/driver, finish nailer or hammer, caulk gun, level and shim set, chalk line. Materials: brickmould trim (wood, PVC, or composite), corrosion-resistant fasteners (galvanized or stainless screws/nails), exterior-grade sealant (low-modulus, compatible with substrate), backer rod if large gaps, self-adhered flashing (6"+ wide), sill pan material or tape, head/drip cap flashing (metal or membrane), housewrap/WRB tape, pan flashing corner patches, shims, and primer/paint or finish. Follow manufacturer fastener types and spacings.
How do I measure the rough opening and pick the right size brick mould?
Measure the rough opening (RO) width and height, as well as finished door frame dimensions. For block-frame retrofits, manufacturers often recommend the new unit be 1/2"–3/4" narrower and 3/8"–1/2" shorter than the RO. Choose brickmould wide enough to cover the gap from the door frame edge to the outer face of the cladding plus an allowance for WRB and a reveal (commonly 1–2" beyond the frame). Confirm profile depth to overlap the exterior siding/trim without creating binding against the door.
What are the key differences between new-construction and retrofit (block-frame) brick mould installation?
New-construction: cladding/WRB are typically open, enabling full sill pan and WRB integration—follow shingle-style flashing: sill pan first, jamb tapes up, head flashing last. Retrofit: siding and J‑channels often remain—flashing is applied by tucking thin self-adhered membranes behind J‑channels or by removing a small section of siding to properly insert flashing. Retrofit sill pans may be preformed or formed with flashing tape and often require special care to create end dams and positive slope to the exterior.
How do I build and install a proper sill pan (pan flashing)?
Sill pan essentials: continuous waterproof membrane sized to span the jamb-to-jamb interior face and extend past the exterior face of the sill, a positive slope toward the exterior (≈5% or minimum drop), a back dam at the interior/rear, and end dams at both jambs. Install pan first (under the door sill), lap the pan over the WRB below so discharge is to the exterior, extend 6" up each jamb where possible, and protect corners with preformed corner patches. Follow ASTM E2112 and Building Science guidance.
What self-adhered flashing sequence should I follow around the door?
Use shingle-style sequencing: 1) Install sill pan/membrane first (with back dam and end dams), 2) Apply jamb flashing up both sides, extending at least 6" up each jamb, 3) Install head flashing so it laps over the jamb flashing (head last) to shed water. Ensure each layer overlaps the one below toward the exterior. Use corners/patches for non-formable tapes and prime substrates where manufacturer requires.
Next Article
How to Buy a Patio Door: A Complete Guide for Homeowners
How to buy a patio door: choose style, measure openings, compare materials, costs, installation, and maintenance tips.