Building a patio door yourself means three distinct tasks: framing the rough opening in your wall, assembling or preparing the door unit, and building out the exterior threshold and step area so there's a safe, weather-tight transition. Do all three right and you get a door that swings or slides smoothly, seals against drafts, and sheds water away from the house. Skip steps or get the sequence wrong and you're dealing with leaks, binding, and rot within a season or two. This guide walks you through the whole process in order. If you want the full walkthrough from rough opening to installation and weatherproofing, follow this guide on how to fit patio doors.
How to Build a Patio Door: Frame, Fit, and Threshold Step

Jamie Archer
1 Jul 2026
First, decide what you're actually building
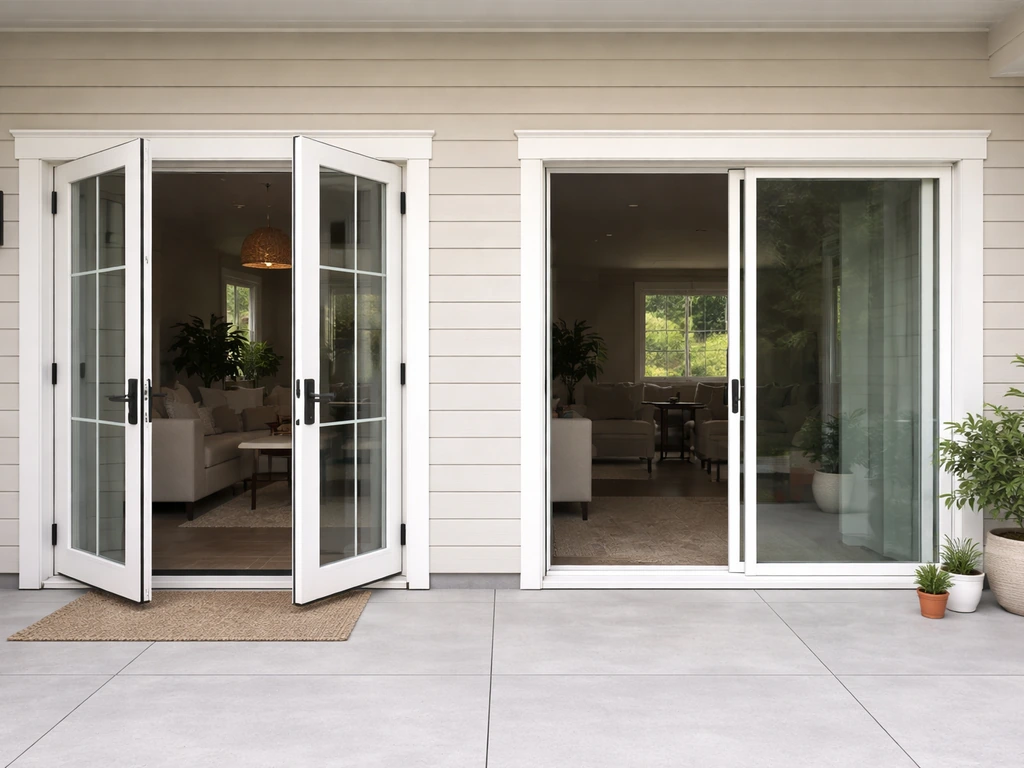
"Patio door" covers a lot of ground. You could be installing a hinged French-style door (single or double panel), a sliding glass door, or adding a screen door to an existing opening. Each one changes the frame details, rough opening size, and how you handle the threshold. A sliding door, for example, needs its rough opening sized to the entire unit (both the fixed and operating panels), not just the moving panel. A hinged door needs swing clearance and a solid hinge-side king stud. A screen door typically gets added after the primary door is in and uses the same rough opening with an added track or frame. Nail down your door type before you touch a tape measure, because changing your mind after framing is expensive and annoying.
This guide covers the full build sequence for both hinged and sliding patio doors, with callouts wherever the process differs between the two. If you're only fitting a pre-hung door unit into an existing opening, the framing section still applies for checking and correcting the opening, but you can skip the wall-cutting steps. Related tasks like trimming out the exterior or fitting brick molding get their own treatment elsewhere on this site. If you need to finish the trim cleanly, follow the right trimming steps so the edges look even and the door seals properly.
Measurements and planning before you cut anything
Get the door unit spec sheet before you frame. The manufacturer's rough opening (RO) dimensions are what you build to, not the door's nominal size. The general rule for sliding patio doors is to add at least 1/4" on each side and 1/2" above the head jamb to the unit's overall dimensions. That buffer lets you shim to plumb and level without binding the frame against the unit. For a hinged door, the same logic applies: you want enough slop to adjust, but not so much that you're filling a huge gap with caulk.
Measure the rough opening in three places: across the top, middle, and bottom for width, and down both sides for height. The smallest measurement is your controlling dimension. If the existing opening is already framed and it's slightly too big, that's actually fine since you can reduce it with added framing or shimming. Home Depot’s patio door installation instructions also advise reducing a slightly oversized rough opening by adding framing or shimming rather than trying to enlarge it reduce it with added framing or shimming. It's much harder to enlarge a rough opening that's already too small. While you're measuring, check whether the subfloor at the sill is level and solid. Any flex or sag there will cause alignment problems after the door goes in, and no amount of shimming fully compensates for a springy subfloor.
For the exterior step area, measure the height difference between the interior finished floor and the exterior grade or patio surface. This determines whether you need one step, multiple steps, or just a beveled threshold. A single step is typically 6 to 7.5 inches of rise. If the drop is more than that, plan for multiple steps. If it's under 3/4 inch, a beveled threshold strip handles it without a full step. Keep the ADA beveling guideline in mind even for private homes: a threshold over 3/4 inch should be beveled at no steeper than 1:2 slope for a safe, trip-resistant transition.
| Door Type | Rough Opening Width Formula | RO Height Formula | Key Framing Note |
|---|---|---|---|
| Sliding (two-panel) | Unit width + 1/2" (1/4" each side) | Unit height + 1/2" | Frame to full unit width, not just the operating panel |
| Hinged (single) | Door width + 2" (jamb + shim space) | Door height + 2" | King and jack studs on hinge side; solid header |
| Hinged (double/French) | Combined door width + 2.5" to 3" | Door height + 2" | Center mullion or astragal must be accounted for |
| Screen door (added) | Fits within primary door's RO | Fits within primary door's RO | Installs after primary door; track added to existing jamb |
How to build the patio door frame
If you're cutting a new opening in an existing wall, you need to determine whether the wall is load-bearing before you start. Load-bearing walls require a properly sized header (doubled 2x lumber or engineered beam depending on span) supported by king and jack studs on both sides. If you're not sure, treat it as load-bearing or get a quick structural consult. This is the one place in this project where cutting corners genuinely puts people at risk.
Materials you'll need for the frame
- 2x6 or 2x4 lumber (matching your wall framing) for king studs, jack studs, cripple studs, and sill plate
- Header lumber: doubled 2x10 or 2x12 for spans over 4 feet, or as specified by local code
- 1/2" plywood for header spacer (to match wall thickness)
- 16d and 10d framing nails or structural screws
- Composite or pressure-treated sill lumber (in contact with concrete or masonry)
- Cedar or composite shims
- Construction adhesive for shims at sill
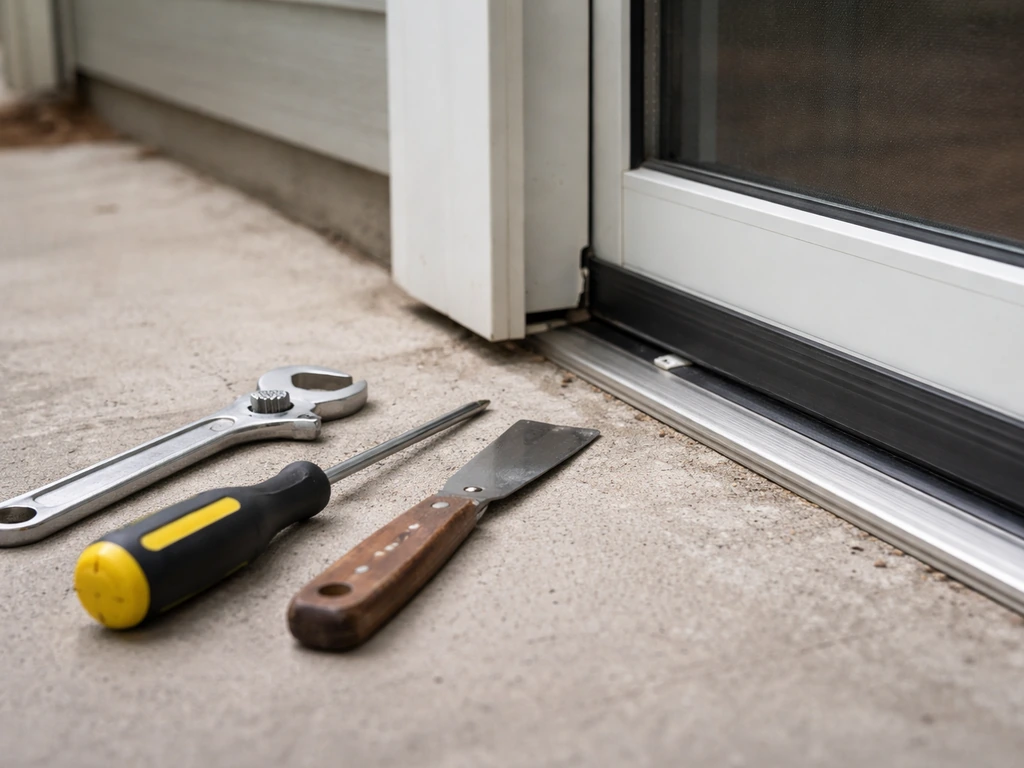
- Level (4-foot minimum), framing square, tape measure, laser level if available
Building the frame step by step
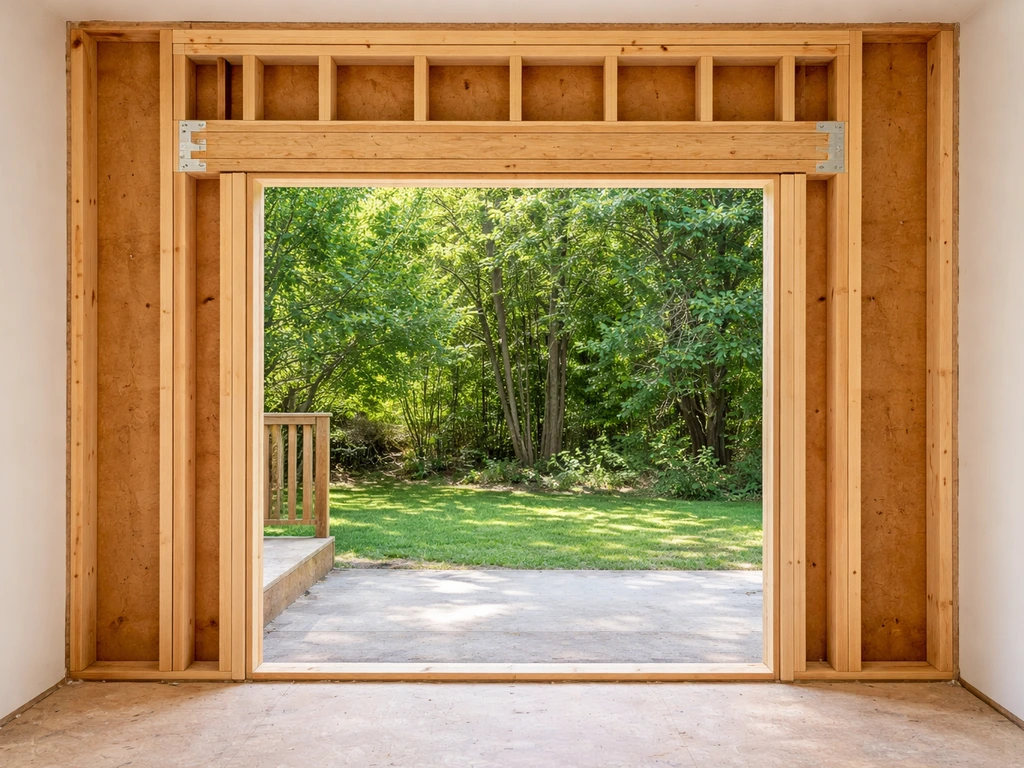
- Mark the rough opening on the wall, including the header height. Account for the finished floor, threshold, and any sill pan thickness you'll add later.
- Install king studs on both sides, running full height from bottom plate to top plate. These carry the load.
- Cut and install jack studs (trimmer studs) inside the king studs, running from the bottom plate to the underside of the header. These support the header directly.
- Build the header: sandwich two pieces of 2x lumber with a 1/2" plywood spacer between them to match a 2x6 wall thickness, nail together, and set it on top of the jack studs.
- Nail the header to the king studs. Toenail cripple studs from the header up to the top plate to carry any load above.
- Install the rough sill at the correct height, supported by short cripple studs below it.
- Check the completed frame: the opening must be plumb on both sides, level across the head and sill, and square (measure diagonally corner to corner; both measurements should match within 1/8").
- If the frame is out of square, adjust by adding or repositioning shims rather than forcing a door into an out-of-square opening.
Some manufacturers require sill plates or gussets attached directly into the rough opening for their specific units. Check the installation instructions for your door before you assume a standard frame is enough. It's easier to add blocking during the frame stage than to retrofit it after.
Preparing the door unit for installation
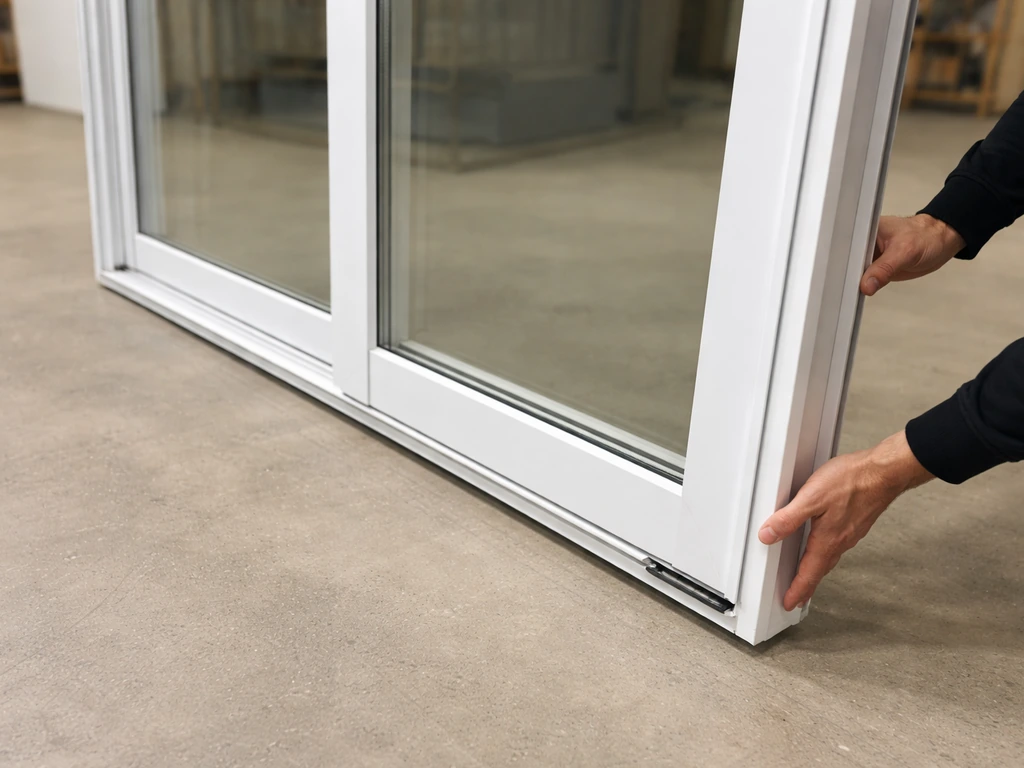
Most homeowners buying a patio door today are working with a factory-built pre-hung unit: the door panel (glass, frame, and hardware) comes assembled and ready to set into your rough opening. If you are still deciding what unit fits your space and budget, start with these practical tips for how to buy a patio door Most homeowners buying a patio door today. You're not usually cutting and glazing glass yourself unless you're building a custom wood frame door, which is a much more involved project. What you are doing is unboxing the unit, inspecting it for damage, removing any shipping materials and blocks, and making sure you understand which end is up before you carry it outside.
For a sliding door, confirm which panel is the operating panel and which is fixed. Some units ship with the panels separate and require you to set the track, snap in the fixed panel, then hang the operating panel. For a hinged door, check that the door swings in the direction you planned. If you ordered an inswing when you needed an outswing, it's better to find out in the driveway than after it's shimmed in place.
If you're adding a screen door, hold off on installing it until the primary door is fully in, trimmed, and functioning. Screens go on last and fit into a track or frame that gets attached to the existing jamb. Once the exterior trim and weather seals are in place, finish by reinstalling any screen door hardware so everything lines up cleanly Screens go on last. Trying to install both at once just creates confusion and scratch risk on the glass.
A note on glass: tempered safety glass is standard for patio doors and isn't something you cut or modify in the field. If the glass panel in your unit is cracked or chipped at delivery, document it and contact the supplier before installation. Installing a compromised panel creates both a safety hazard and a warranty problem.
Building the exterior step and threshold area
The transition from your interior floor level to the exterior grade is often an afterthought, but it's one of the most-used parts of any patio door installation. If you want the full step-by-step process, include how to frame a patio door before you plan the threshold and exterior steps patio door installation. Get it wrong and you get trips, standing water against the door, and eventually rot at the sill. Plan this area at the same time as the frame.
Single step
A single step makes sense when the drop from interior floor to exterior grade is between 5 and 8 inches. Use pressure-treated lumber for the frame and a composite or concrete paver for the tread. Set the step landing so it slopes slightly away from the house (1/4" per foot is enough for drainage) and sits at least 6 inches below the door's sill threshold. That gap keeps rain splash away from the door bottom. Make sure the step is wide enough to be comfortable: 36 inches minimum across, with a tread depth of at least 11 inches.
Multiple steps
If you're dropping more than 8 inches, you need a staircase with consistent rise and run. Keep each riser between 6 and 7.5 inches, keep each tread at least 11 inches deep, and make all risers the same height so nobody trips. Concrete, composite decking, or pressure-treated wood all work. Use gravel or compacted base material under any concrete or paver landing to prevent settling. A landing pad (at least 36x36 inches) at the bottom of the stairs is both safer and more comfortable than steps that end directly on lawn or uneven grade.
Drainage and the threshold connection
Water management at the base of the door is critical. The sill pan (covered in the next section) handles what gets past the door, but the step and landing need to direct surface water away before it even reaches the door. ASTM E2112 describes layered flashing and sill-pan integration principles to help manage water at the door base and reduce the chance it reaches the framing the step and landing need to direct surface water away. Slope everything away from the house. If you're building concrete steps, add a slight crown or pitch to the treads. If you're building a wood landing, use gapped decking boards or leave a small gap at the house edge so water drains through rather than pooling against the sill.
Install, align, and weatherproof the door
This is the longest and most detail-sensitive part of the job. The sequence matters: sill flashing first, door unit in, shim and check plumb/level/square, fasten, then jamb and head flashing. If you reverse that order you create water traps that rot the framing from the inside.
Sill pan and flashing sequence
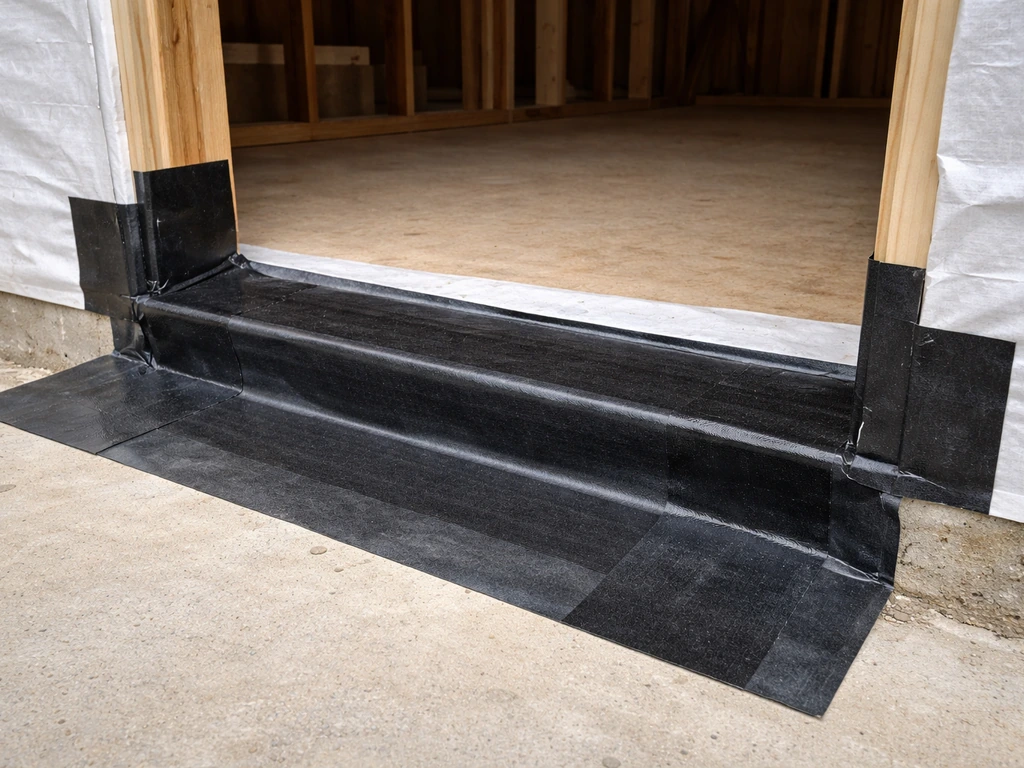
- Install the water-resistive barrier (WRB) or house wrap on the sheathing around the opening before the door goes in, if not already in place.
- Apply a sill pan flashing membrane or rigid sill pan across the bottom of the rough opening. The sill pan should slope slightly outward and extend up the jambs a few inches. This is your last line of defense against water that gets past the door.
- Apply sill flashing tape (6-inch minimum width is a common benchmark) over the sill pan and lapping up the jambs. Seal corners thoroughly.
- Apply caulk to the sill area where the door's nailing fin or sill plate will sit.
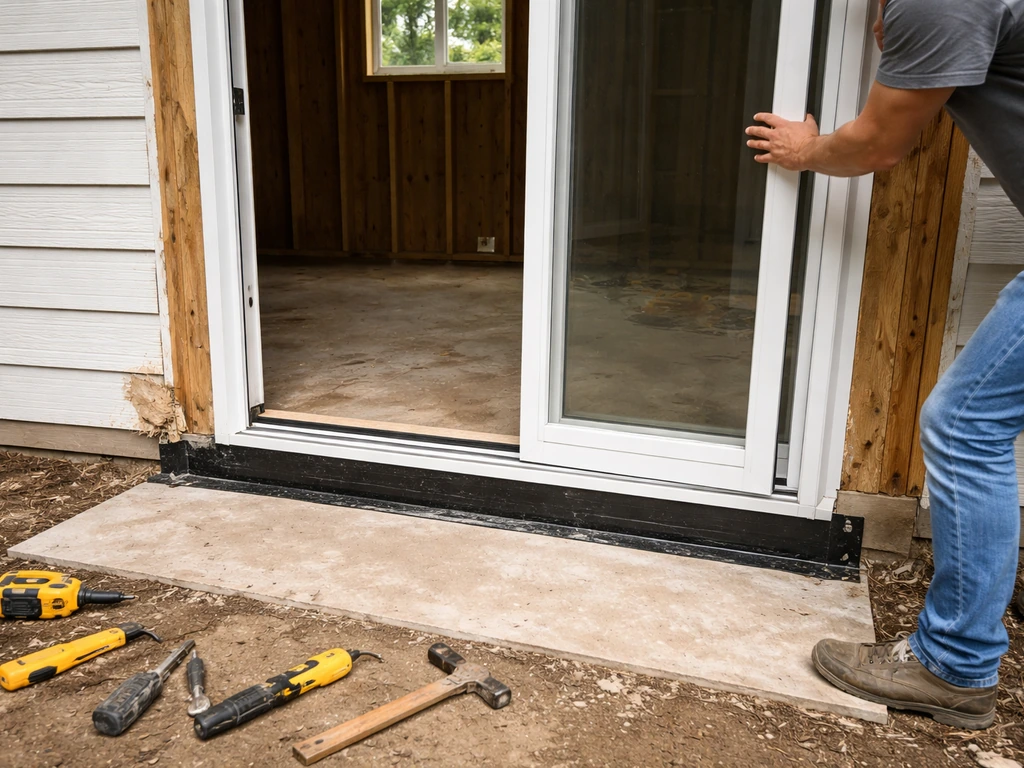
- Set the door unit: for most doors, tilt the bottom into the opening first, then push the top (and nailing fins) tight to the sheathing. Have a helper on the outside.
- Tack the unit in place with a few nails through the nailing fin or casing; don't fully fasten yet.
- Check plumb, level, and square. Use shims at the hinge jamb, sill corners, and head as needed to get the unit perfectly in the opening. For a hinged door, place shims directly under hinge locations and behind strike-side jamb hardware. Caulk under any shims at the sill so they don't create a water pathway.
- Confirm reveals are even (about 1/8" between door panel and frame on all sides) before final fastening.
- Drive fasteners through the jamb into the framing at shim locations (this locks the shimmed position). Do not fasten through unsupported areas.
- Apply flashing tape vertically up both jambs, lapping over the sill pan flashing below and under the head flashing above. Use 4-inch tape for jambs as a minimum.
- Apply head flashing last, overlapping the jamb flashing and the WRB above it. Water should always be able to drain down and out, never into a pocket.
- Insulate the gap between the rough opening framing and the door unit with low-expansion spray foam or backer rod and caulk. Do not use high-expansion foam on door jambs; it can bow them inward and bind the door.
Integrating the door with the threshold and step
Once the door is in and fastened, install the threshold. Most pre-hung units come with a threshold already attached to the sill; you're connecting that to the exterior landing or step. Apply a bead of exterior-grade caulk where the threshold meets the sill pan, and where the door frame meets the exterior sheathing. If you're using a separate saddle threshold, fasten it into the sill framing, not just the flooring. Check that the exterior step or landing surface sits below the threshold so water sheds away from the door, not toward it. Check the weep holes on sliding door thresholds are clear and pointing outward before you close everything up.
Testing the door and setting up for the long term
Before you call the job done, test everything with the door in its final installed position. Open and close it at least a dozen times. A well-installed door should move with light, consistent effort the whole way. Any sticking, rubbing, or grinding is a sign of misalignment that's much easier to fix now than six months from now.
What to check before finishing
- Reveals: the gap between the door panel and frame should be uniform (roughly 1/8") all the way around. Uneven reveals mean the door is racked in the frame.
- Sliding doors: the operating panel should glide without lifting or dragging. If it lifts at one end, adjust the roller height screws at the bottom of the panel.
- Hinged doors: the door should swing freely and latch without you having to lift or push the panel into position. If it doesn't, check hinge-side shims and tighten any loose hinge screws before adjusting shims.
- Lock and handle: the latch or lock bolt should engage without forcing. If it misses the strike, adjust the strike plate or re-shim the door.
- Weather seal: close the door and check for light gaps with a bright light on one side and a dark room on the other. Any visible light means air and water can get in.
- Threshold drainage: pour a cup of water at the exterior threshold. It should flow away from the house, not toward the door bottom.
- Weep holes (sliding doors): confirm the small drain holes in the sill track are open and facing outward. These are intentional, not defects.
- Exterior caulk: all joints where the door frame meets sheathing, trim, or sill should be fully sealed with no gaps.
Post-build maintenance to keep things working
The work doesn't fully end at installation. Patio doors are one of the harder-working parts of a house and need periodic attention to stay weather-tight and smooth-operating. Here's a simple schedule to follow after your build:
| Frequency | Task |
|---|---|
| Monthly | Clean the track or sill channel of debris (dirt and grit wear rollers and seals fast) |
| Every 3 months | Inspect and lubricate rollers, hinges, and lock hardware with silicone spray or appropriate lubricant |
| Every 6 months (spring/fall) | Check weatherstripping for compression, cracking, or gaps; replace if the door leaks air or light |
| Annually | Inspect all exterior caulk joints; touch up any cracked or separated seams before winter |
| As needed | Check roller wear on sliding doors; a door that drags or jumps the track usually needs new rollers, not a new door |
If the door doesn't work right after installation
If a sliding door drags or won't stay in the track, start by checking that the bottom track is level (not just the frame). A track that's low at one end causes the panel to want to drift and drag. Adjust the roller height screws at the bottom corners of the panel to raise or lower the panel in the track. If a hinged door won't close square, check whether the hinge-side jamb has moved (shims can compress over time) or whether a hinge screw has stripped out. A stripped hinge screw is fixed with a longer screw or a wood anchor, not shim work. Drafts after installation almost always trace back to weatherstripping gaps or incomplete caulk at the frame perimeter. Check both before assuming the door itself is the problem.
One thing worth knowing: patio doors built in summer can feel slightly tighter in winter when framing contracts. A door that's perfectly adjusted in July might need a small roller or hinge tweak by November. That's normal. Build in a hair of extra clearance during installation (don't adjust to zero gap in warm weather) and you'll avoid the seasonal binding issue entirely.
FAQ
What if my existing rough opening is slightly too small or slightly too big? Can I just shim?
Before framing anything, confirm your door’s required rough opening from the unit spec sheet, and verify it against the framing you already have. If the opening is too small, enlarging usually means adjusting header and studs, while shimming can only correct small out-of-square or plumb issues.
Is it safe to force the patio door unit into the opening if it seems close?
Yes, but only in the short margins the manufacturer allows. If you have to force the unit to fit, you risk bowing the frame, which leads to chronic rubbing, warped seals, and water leakage. Use the RO tolerance ranges on the spec sheet, and if you’re outside them, plan to modify framing rather than “pulling it in.”
My sliding patio door drags. Should I adjust the rollers first or check something else?
Check the track and panel condition, then verify your floor level at the bottom track line. Many “roller” problems are actually caused by a track that is slightly out of level, so the panel drifts. Only after the track is correct should you adjust roller height screws, in small increments, then retest smooth travel.
What should I do if the glass arrives cracked or chipped?
Document the damage immediately, take photos of the label and the problem area, and contact the supplier before installation. Even if the crack seems minor, compromised tempered glass can become a safety hazard, and installing it can create warranty issues.
How can I tell if the sill pan and weep holes will actually drain correctly?
Before you close up flashing and trim, confirm the sill pan, threshold connection, and (for sliding doors) the weep holes are unobstructed. A common mistake is leaving foam, caulk, or sealant where drainage must exit, which can trap water and cause rot even if the door “looks sealed.”
What happens if my exterior steps or landing sit too high relative to the threshold?
If the step surface is higher than the threshold, water can run toward the door instead of away, increasing the chance of standing water at the sill. Make sure your exterior landing or tread is set below the threshold line, and recheck the slope away from the house using a straightedge.
Do I need to use pressure-treated wood and special materials for the step/landing?
Use pressure-treated lumber for any wood framing at the exterior step, and let concrete or composite tread materials cure fully before you start relying on them for load. For wood landings, gapped decking or a small house-edge gap helps drainage and reduces water pooling at the sill area.
How do I avoid installing a hinged patio door with the wrong swing direction?
For hinged doors, verify swing direction based on how the door is intended to clear furniture and the weather side of the house. An incorrect inswing/outswing order can trap you into removing and re-shimming, so it’s worth doing a dry test in the driveway before the unit is installed.
Should I caulk and install exterior flashing before confirming the door opens and closes smoothly?
Yes. You should not “finish” weatherproofing until you’ve confirmed the door operates properly in the final position, with consistent light effort and no binding through the full travel. Fixing misalignment later is much harder once flashing, trim, and caulk are complete.
What are the most common causes of drafts after a patio door is installed?
If drafts appear right after install, check for weatherstripping gaps and incomplete perimeter caulk at the frame-to-sheathing joints before assuming it’s a door issue. Also verify threshold contact and, on sliding units, ensure the door is sitting correctly over the sill and not lifting away in one corner.
Why does my patio door feel tighter in winter, and what should I adjust?
Plan for seasonal adjustment by leaving a small operational clearance during installation rather than dialing seals to contact perfectly in summer. If it tightens in winter and starts to bind, make a minor roller or hinge adjustment instead of forcing it closed.
Next Article
How to Trim a Patio Door: Fix Gaps and Clearance
Step-by-step DIY guide to trim patio doors, fix gaps and clearance, and adjust sweeps, rollers, and locks.