Buying a patio door comes down to four decisions made in order: the right style for your opening and how you use the space, an accurate rough-opening measurement, a frame material and glass package that match your climate and budget, and an honest call on whether you're installing it yourself or hiring someone. Get those four things right and the rest, including hardware, trim, and screens, falls into place. Skip any one of them and you're looking at costly surprises on delivery day or after the first hard rain.
How to Buy a Patio Door: A Complete Guide for Homeowners

Jamie Archer
21 Jul 2026
Quick decision flow: picking the right door for your house, budget, and skills
Before you look at a single spec sheet, answer these questions in sequence. They eliminate most of the wrong options before you spend any time on them.
- How much interior and exterior swing clearance do you have? If furniture, a deck railing, or a step sits within 36 inches of either side, a swinging French door will cause constant problems. A sliding or pocket door removes that issue entirely.
- What's your rough opening width? Standard replacement sliders and French doors are stocked in 5-foot, 6-foot, and 8-foot nominal widths. Anything outside those dimensions means a special order, which adds lead time and cost.
- What's your primary goal: ventilation, large clear opening, or everyday traffic flow? Sliding doors are best for daily in-and-out use. French doors shine when you're moving furniture or want a classic look. Multi-panel systems (bi-fold, stacking) are built for opening up an entire wall.
- Are you replacing an existing door or cutting a new opening? A retrofit into an existing frame is within reach of a skilled DIYer. Cutting a new opening into a load-bearing wall, re-framing, and flashing from scratch almost always warrants a professional.
- What's your realistic budget? A basic vinyl slider can be in the ground for $800–$1,500 installed. A fiberglass French door lands in the $2,500–$5,000 range. Multi-panel lift-and-slide systems start around $5,000 for the unit alone and run well past $15,000 installed.
- How hands-on are you? If you've hung a pre-hung interior door and done basic flashing work, a standard retrofit replacement is manageable. If this is your first door project, budget for a professional installation and use this article to make sure they're doing it right.
Patio door styles and when to choose each
Every style has a use case it was designed for. Using the wrong one creates ongoing frustration, whether that's a door that fogs from condensation, one that requires a gymnastics move to lock, or one that leaks under a driving rain. Here's what each style actually does well and where it falls short.
Sliding (gliding) doors
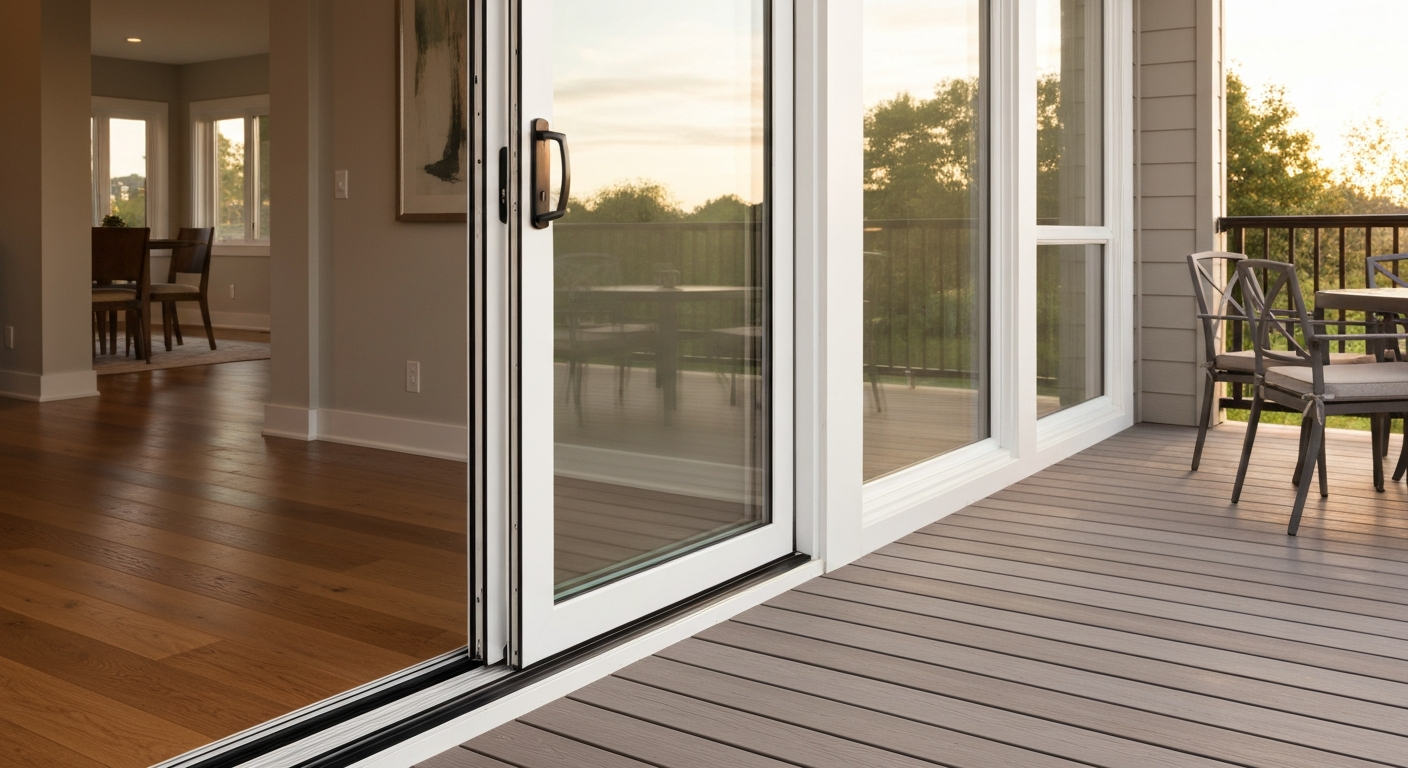
Sliding doors are the workhorse of patio access. They have a low-profile sill that's easy to step over, no swing clearance requirement, and simpler hardware than any other style. The tradeoff is that one panel is fixed, so you're getting roughly half the rough-opening width as usable clear passage. On a 6-foot door, that's about 35 inches of clear opening. They also rely on rollers and a track that collect debris over time, though cleaning and roller replacement are straightforward DIY repairs. Sealing against wind-driven rain is the weakest point of a basic sliding door, so if you're in a coastal or high-wind zone, look for units rated to AAMA 101 or AAMA 2101 water infiltration standards.
French (hinged) doors: inswing and outswing
A French door swings on hinges and gives you nearly the full rough-opening width as clear passage, which makes a real difference when you're moving a couch or carrying a large item outside. Outswing units generally seal better against water because the sill sheds rain away from the opening, but they need clear exterior space. Inswing doors work well under a covered porch but put water intrusion risk on the interior side of the sill if the weatherstripping wears. For the best air and water performance, look for multi-point locking hardware, which engages the door frame at three or more points rather than just the latch side. It costs more but closes the gap significantly on weather resistance.
Multi-panel stacking and multi-slide doors
These systems use three or more panels that stack to one or both sides on a flush track, creating a very large glazed opening. A four-panel stacking system in a 12-foot opening gives you the kind of indoor-outdoor connection you see in home magazines. The reality is that panels in lift-and-slide systems weigh 200 to 800-plus pounds each, the sill track flashing is complex, and level and plumb tolerances are tight. Most manufacturers void the warranty if a certified installer doesn't do the work. These are rarely a DIY project.
Pocket sliding doors
A pocket door slides entirely into a cavity in the wall, disappearing when open. That's a genuinely useful feature in tight spaces, but it requires either a pre-built pocket jamb system or a wall cavity built specifically for it. The framing, flashing, and drainage work on a pocket exterior door is more involved than a standard replacement, and a mistake in the drainage plane integration creates a slow leak inside the wall. See Marvin, Modern Sliding Door Installation Instructions (PDF) for detailed guidance on pocket-door framing, sill-pan drainage, and WRB/flashing integration, which underscores why these installs are usually done by professionals Marvin — Modern Sliding Door Installation Instructions (PDF). This is almost always a professional job.
Bi-fold (accordion) doors
Bi-fold doors fold accordion-style and open up nearly the entire wall width. They're popular in warm climates and sheltered patios. The downside is the number of moving seals and hardware pivot points, each of which is a potential wear spot. In a climate with heavy rain or high wind, the sealing performance of a bi-fold is harder to maintain than a multi-slide system. If you're in a sheltered location in a mild climate, bi-fold doors are spectacular. If you're on an exposed elevation in the Midwest or Southeast, a multi-slide with robust multi-point hardware will serve you better long-term.
Size, operation, and sightlines: picking your configuration
Patio doors are described by their nominal width (the rough opening), the number of panels, and which panel(s) operate. A 6-0 x 6-8 (six feet wide by six feet eight inches tall) two-panel sliding door with the operable panel on the right is noted as 6068 OX (O = operable/active, X = fixed). Reversing that gives you an XO. Get this right before you order because most manufacturers do not accept returns on the wrong hand.
Standard patio door heights are 6 feet 8 inches and 8 feet. Eight-foot units are increasingly common and add a lot of perceived space, but they require a taller rough opening and usually a structural header upgrade, especially if this is a new cut-in. Think about the view: a taller door raises the bottom rail out of the sightline to a garden or view. Also consider which side the operable panel belongs on. Stand at the door from inside, decide which side has the clearest path to the outdoor space, and put the operable panel there.
How to measure and check the rough opening
This is where most buying mistakes happen. The rough opening is the framed hole in the wall before any door unit is installed. The frame size of the door is always smaller than the rough opening so there's room to shim and plumb. Manufacturers typically specify that the rough opening should be about 1/2 inch wider and 1/2 inch taller than the door frame for shimming clearance, though this varies by brand, so always confirm with the specific manufacturer's installation instructions before ordering.
For a retrofit replacement (removing an old door and installing a new one in the same opening), your measurement process is different from a new construction cut-in. In a retrofit, you're measuring the existing door frame's daylight opening (the inside edge of the jambs), the jamb depth (wall thickness), and the sill condition. For a new opening, you're measuring the rough framing. If you're measuring for an insert, meaning a new slab drops into an existing frame, measure the daylight opening of the existing frame, not the rough opening behind it. Ordering the wrong dimension here means re-framing or a door that won't fit.
Also check squareness before you order. Measure the diagonals of the rough opening from corner to corner. If they differ by more than 1/4 inch, the opening is out of square and shimming the new unit plumb will create visible reveal inconsistencies. Correcting the framing before the door arrives is far easier than wrestling with it during installation. Your jamb depth (wall thickness) also needs to match the door's standard jamb width, typically 4-9/16 inches for a 2x4 wall with drywall or 6-9/16 inches for a 2x6 wall. If your wall is stucco, brick, or has added exterior insulation, you may need jamb extensions.
Accurate measuring checklist before you buy
Take all of these measurements yourself, in writing, before you contact a dealer or place an order. Follow a best-practice door measuring checklist, measure rough opening width at top/mid/bottom and use the smallest; height at left/center/right and use the smallest; measure jamb depth (wall thickness), sill level, jamb reveals, check squareness (diagonals), and record masonry/stucco/brick returns and interior trim depth (see Marvin, Modern Sliding Door Installation Instructions (measurement & site prep)) Marvin — Modern Sliding Door Installation Instructions (measurement & site prep). A tape measure and a 4-foot level are all you need for this part.
- Rough opening width: measure at the top, middle, and bottom of the opening (inside face of framing to inside face of framing). Record the smallest of the three.
- Rough opening height: measure at the left, center, and right (top of rough sill to underside of header). Record the smallest of the three.
- Wall thickness (jamb depth): measure from the exterior sheathing face to the interior drywall face at the sill or jamb. This determines your jamb size or whether you need jamb extensions.
- Sill level: place your level on the rough sill. If it's out of level, note how much drop there is side to side. Significant slope will need to be corrected before the door goes in.
- Diagonal measurements: measure corner to corner both ways across the rough opening. The difference tells you how out-of-square the opening is.
- Masonry or stucco returns: if there's masonry, stucco, or EIFS outside the opening, measure the depth of those returns. Standard brick mold may not reach, and you may need a separate exterior trim detail.
- Interior trim depth: measure how much wall depth is available for interior casing. This affects whether you can use standard casing or need to modify it.
- Exterior sill-to-grade or deck distance: measure how far the sill is above the deck or grade. This affects threshold choice and drainage.
- Header height clearance: if you're considering an 8-foot door and currently have a 6-foot 8-inch door, measure from the existing header to the floor plate to know how much of a structural change is needed.
- Existing glass opening (for screen sizing): if you'll be ordering a screen door with the unit, record the daylight opening (visible glass area) for reference.
Comparing frame materials: vinyl, aluminum, wood, and fiberglass
Frame material affects thermal performance, maintenance, cost, and how long the door looks good. None of them is universally best. Your climate, your house's exterior style, and how much maintenance you're willing to do are the deciding factors.
| Material | Typical Lifespan | Maintenance Level | Thermal Performance | Relative Cost | Best For |
|---|---|---|---|---|---|
| Vinyl (PVC) | 20–40 years | Very low | Good (no thermal break needed) | Lowest | Budget-conscious buyers, rental properties, cold climates |
| Aluminum | 30+ years | Low | Poor without thermal break; adequate with one | Low to mid | Modern aesthetics, slim sightlines, mild climates |
| Wood | 30+ years with upkeep | High (paint/stain every 3–5 yrs) | Good natural insulator | Mid to high | Historic homes, interior wood matching, custom aesthetics |
| Fiberglass/composite | Up to 50 years | Very low | Excellent (low expansion/contraction) | Highest | High-performance builds, coastal/harsh climates, long-term value |
Vinyl is the right call for most straightforward replacements. It's low-maintenance, insulates well, and the market is competitive enough that quality products are available at reasonable prices. Aluminum needs a thermal break (a layer of non-conductive material separating interior and exterior metal) to perform reasonably in cold climates; without one, it will condense in winter and drain energy. Wood is beautiful and natural, but if the exterior is exposed to rain and UV, plan on repainting or restaining every few years or the wood degrades at the joints. Fiberglass expands and contracts very little across temperature swings, which keeps seals and glazing gaskets tight over decades. If you're in a coastal environment or planning to live in the house for 20-plus years, fiberglass is worth the premium.
Glass, insulation, and security options
Low-E coatings and gas fills
Low-E (low emissivity) glass has a microscopically thin metallic coating that reflects infrared heat. In cold climates, a low-E coating on the interior glass surface reflects heat back into the room. In hot climates, a coating on the exterior surface reflects solar heat before it enters. Most ENERGY STAR-qualified patio doors come with low-E glass as standard, but the specific coating position (surface 2 vs surface 3 in a double-pane unit) matters for your climate. Ask the dealer to confirm the coating position and whether it's optimized for heating-dominated or cooling-dominated climates.
Argon gas fill between the panes reduces conductive heat transfer better than air alone. It's a standard upgrade on mid-range and above units, and the incremental cost is small relative to the performance gain. Krypton gas performs even better but costs more and is typically reserved for triple-pane units. For most homeowners, double-pane with low-E and argon fill is the practical sweet spot.
Tempered and laminated glass
Building codes in the US require safety glazing (tempered or laminated glass) in patio doors. Tempered glass breaks into small, blunt pieces rather than large shards, and it's required by code for door panels. Laminated glass adds a plastic interlayer that holds the pane together if it breaks, which provides a meaningful upgrade in security (a broken pane still blocks entry) and in hurricane or impact-rated applications. If you're in a hurricane zone or a high-crime area, ask specifically about impact-rated laminated glass and whether the unit carries a Miami-Dade or Florida Product Approval rating.
Screens and insect protection
Sliding screen doors run on a separate track outside the glass panel track. They're inexpensive and replaceable. On French doors, retractable screens (either a roll-up cassette at the top or a pleated screen that pulls across) are a cleaner option than a traditional swinging screen door. Bi-fold and stacking systems typically require purpose-built screen systems from the same manufacturer. If screens matter to you, confirm screen compatibility before you order the door unit. Screens are often an add-on that costs $150–$400 and should be ordered with the door, not sourced separately after the fact.
Locks and security hardware
The standard latch on a sliding patio door is one of the weakest security points in most homes. At minimum, add a secondary lock: a foot bolt, a keyed auxiliary lock, or a security bar in the track. For a French door, multi-point locking hardware that engages the top and bottom of the frame in addition to the latch side is a significant upgrade and also improves weather sealing. If you're specifying a new door and security is a priority, ask whether the unit is rated to ANSI/BHMA Grade 1 or Grade 2 hardware standards.
Energy efficiency and code considerations
The single most useful number to compare between doors is the whole-unit U-factor shown on the NFRC label. The U-factor measures how much heat passes through the entire door assembly (frame, glass, edge seals) per hour per square foot per degree of temperature difference. Lower is better. A U-factor of 0.30 or below is a reasonable target in a cold climate; in a mild climate, 0.40 is often acceptable. Do not let a salesperson sell you on center-of-glass values alone. Those are always better than the whole-unit number and they don't represent real-world performance.
SHGC (Solar Heat Gain Coefficient) measures how much solar energy passes through the glass on a 0-to-1 scale. Lower SHGC blocks more solar heat. In a hot, sunny climate (the South, Southwest), you want a low SHGC (0.25 or below) to reduce cooling loads. In a cold, northern climate, a higher SHGC (0.40 or above) on south-facing doors can contribute passive solar heat gain and offset heating costs. ENERGY STAR sets specific U-factor and SHGC targets by climate zone; the current Northern Zone requires a U-factor of 0.27 or below, the North-Central and South-Central zones have different combined requirements, and the Southern Zone focuses primarily on SHGC.
The NFRC label also shows Visible Transmittance (VT), which measures how much daylight the glass passes. Higher VT means more natural light. Air Leakage (AL) is another useful number; lower is better and anything at or below 0.30 cfm per square foot is acceptable. Condensation Resistance (CR) is scored 1–100; higher scores mean the unit is less likely to develop condensation on the interior glass surface in cold weather. Ask the dealer to provide the actual NFRC certificate for the specific unit, not a brochure value.
From a code standpoint, most jurisdictions require that replacement doors in conditioned spaces meet a minimum energy performance, and new-construction openings must comply with local energy codes (typically based on IECC 2021 or the local adopted version). ENERGY STAR certification is not the same as code compliance, but ENERGY STAR-qualified products almost always meet or exceed the minimum code requirement for their climate zone. If you're pulling a permit (which you should for any full-frame replacement or new opening), ask the building department what the required U-factor and SHGC are for your zone.
Hardware, thresholds, and track choices
The threshold is the horizontal piece at the base of the door that you step over. A low-profile or ADA-compliant threshold (maximum 1/2 inch rise on the exterior side, 1/4 inch vertical rise on the interior side) reduces trip hazard and is required for accessible doorways. The tradeoff is that a low threshold needs very good sill pan drainage and weep holes to keep water from pooling at the sill. In exposed locations with wind-driven rain, a taller threshold provides better water resistance. Match the threshold height to your exposure level and drainage design, not just to aesthetics.
For sliding doors, roller quality is something you can ask about directly. Better rollers use stainless steel ball bearings and an adjustable mounting screw so you can raise or lower the panel to fine-tune the fit over time. Cheap rollers use nylon wheels that wear flat, making the door hard to slide and eventually damaging the track. You often can't easily see the rollers before buying, but asking whether rollers are adjustable and what the replacement part number is tells you a lot about how the manufacturer thinks about long-term ownership.
Installation methods: new construction vs. retrofit, and DIY vs. pro
A new-construction installation uses a nailing flange around the door frame that's fastened through the sheathing into the framing, then lapped with housewrap and flashing tape. This is the cleaner installation when framing is exposed. A retrofit or replacement installation typically removes the old door unit and sets the new one into the existing rough opening using a combination of shims, screws through the jamb, and careful flashing integration with whatever water-resistive barrier is already there. Retrofit is what most homeowners are doing when they replace an existing patio door.
The flashing sequence matters more than most people realize. The correct sequence, referenced by ASTM E2112, is: install a back-dammed, sloped sill pan that drains to the exterior, lap the jamb flashing over the sill pan legs, set the door, then install head flashing and lap the housewrap or WRB over the top of the head flashing. Never seal the bottom of the sill pan or the weep holes. That drainage path is your insurance against the slow leak that rots the framing over years. Skipping or reversing any step in that sequence is a common cause of water damage that doesn't show up until the wall is open during a future renovation.
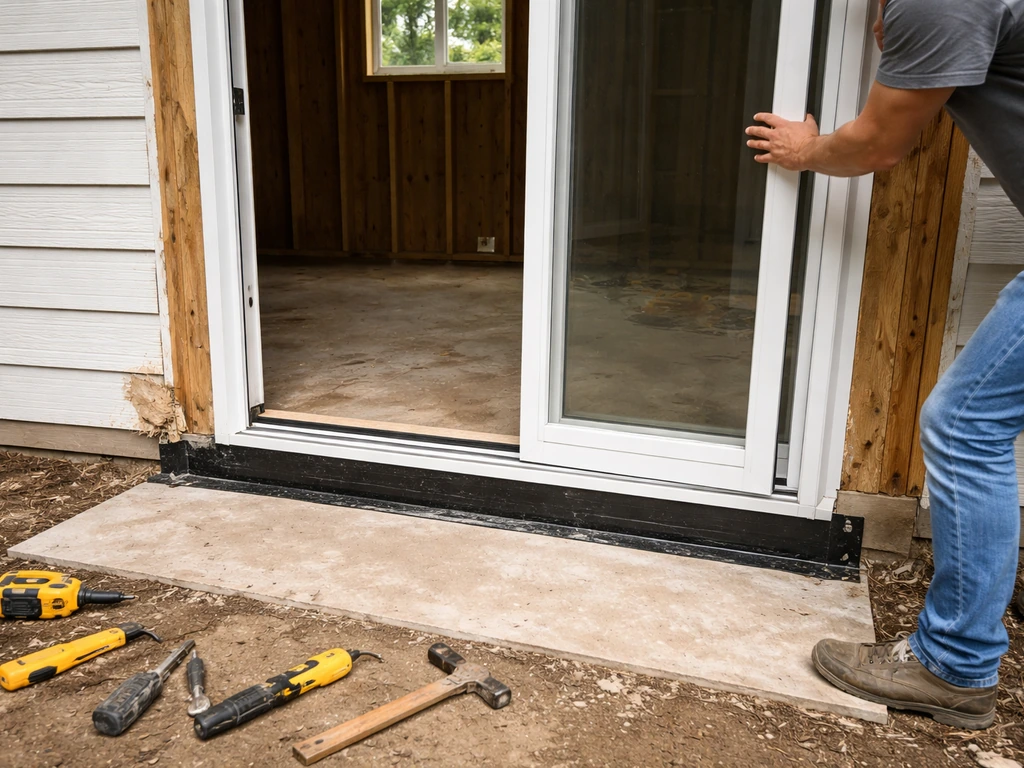
DIY is a reasonable choice for a standard retrofit sliding or French door in a standard wood-framed wall if you've done exterior work before and are comfortable with flashing and shimming. For step-by-step instructions on installing a patio door yourself, see how to put a patio door in. If you're attempting the install yourself, read our step-by-step guide on how to build a patio door for detailed instructions, required tools, and safety tips. Budget a full weekend: one day to remove the old door, prep the opening, and flash the sill, and a second day to set and trim the new unit. If you need step‑by‑step guidance on finishing the jambs and casing after setting the unit, see how to trim a patio door for clear instructions (03fa8863-a8f4-4223-bfed-b05f91901bee). For step-by-step instructions on measuring, prepping the opening, and installing a replacement unit, see our guide on how to fit patio doors. If you're cutting a new opening, dealing with a load-bearing wall, working with stucco or brick exterior cladding, or installing a multi-panel system, hire a professional installer. For step-by-step instructions on finishing the exterior edge, see our guide on how to install exterior trim on a patio door. If you're cutting a new opening, consult a how to frame a patio door guide to make sure the header, jack studs, and rough-opening dimensions are correct before you proceed. The trim and framing decisions alone, including whether you need a bucked opening, jamb extensions, or a custom brick-mold profile, are where inexperienced installs go wrong.
Where to buy and what each channel offers
Big-box stores (Home Depot, Lowe's) stock a limited range of standard-size sliding doors and basic French doors in vinyl and aluminum. Prices are competitive and you can take delivery in days rather than weeks. The tradeoff is limited customization, often fewer glass options, and sales staff who may not know the product deeply. These are fine for a standard 6-foot vinyl slider in a straightforward retrofit.
Specialty door dealers and window-and-door distributors carry a wider range of manufacturers, can order custom sizes, and typically have staff who know the product in detail. Lead times are longer (4–12 weeks for custom orders) but you get better access to NFRC documentation, installation support, and warranty service. If you're spending $3,000 or more, the dealer channel is usually worth the wait.
Buying direct from a manufacturer's website (Marvin, Andersen, Pella, Milgard, JELD-WEN, and others all have online configurators) is a good way to specify exactly what you want and confirm NFRC ratings before committing. Most manufacturers will direct you to a local dealer for the actual purchase and installation coordination. Some regional manufacturers sell factory-direct and can be excellent value for a custom size at competitive pricing.
What to check when the door is delivered
Do not sign the delivery receipt until you've done a basic inspection. Large door units are shipped on pallets and travel a long way; damage happens more than you'd expect.
- Check the unit dimensions against your order confirmation. Measure the frame width and height before uncrating if possible.
- Inspect the glass for chips, scratches, or stress cracks. Tilt the panel to catch light at an angle — small chips near edges are easy to miss straight-on.
- Check that the correct hand (swing direction) was built. OX vs XO, inswing vs outswing.
- Verify the hardware matches what you ordered, including lock type and finish.
- Look for shipping damage on the frame corners and glazing bead.
- If there's a screen door included, confirm it's in the package before the delivery truck leaves.
- Note any damage on the delivery receipt and photograph it before the driver leaves. Freight damage claims are nearly impossible without this documentation.
Questions to ask before you buy
Whether you're talking to a big-box associate, a specialty dealer, or a manufacturer's rep, these questions will tell you whether you're dealing with someone who knows the product.
- Can you provide the NFRC-certified whole-unit U-factor and SHGC for this exact unit in this size?
- Is this unit ENERGY STAR certified for my climate zone?
- What is the rough opening required for this frame size, and what's the recommended shim clearance?
- What jamb depth does the standard unit come in, and what jamb extension options are available?
- Does this unit include a sill pan or do I need to buy or build one separately?
- What are the roller part numbers and are they field-replaceable without removing the door?
- What is the warranty coverage and does it require certified installation?
- Are there utility rebates available for this unit in my zip code?
- What is the lead time for this configuration?
- What are the approved flashing and installation materials that won't void the warranty?
Realistic cost ranges
| Door Type and Material | Unit Cost (Approx.) | Installed Cost (Approx.) | Notes |
|---|---|---|---|
| 6-ft vinyl sliding door, basic | $400–$900 | $800–$1,800 | Big-box stock; limited glass options |
| 6-ft vinyl or aluminum sliding door, mid-grade | $700–$1,500 | $1,500–$3,000 | Better rollers, low-E glass, more hardware options |
| 6-ft fiberglass or wood French door | $1,500–$3,500 | $2,500–$5,500 | Multi-point lock, argon/low-E standard |
| 8-ft sliding door, mid-grade vinyl or fiberglass | $1,200–$2,500 | $2,500–$5,000 | May require header upgrade |
| Multi-panel stacking or bi-fold, 10–12 ft | $5,000–$15,000+ | $8,000–$20,000+ | Always professional install; structural work likely |
These ranges reflect 2025–2026 market pricing. Labor rates vary significantly by region. Complex installations involving stucco removal, new framing, or masonry work add cost quickly. Get at least two quotes for any job that involves structural or exterior cladding work.
Warranty, rebates, and what to read in the fine print
Most major manufacturers offer a limited lifetime warranty on the frame and a 10-to-20-year warranty on the insulated glass unit (IGU) against seal failure. Read carefully: many warranties are transferable only once, and most require installation by a licensed contractor or following the manufacturer's published installation instructions to be valid. If you're doing a DIY install, save every document, photograph the flashing installation in progress, and keep the installation manual. That documentation protects you if a warranty claim comes up years later.
Utility rebates for ENERGY STAR-qualified doors are available in many states and from many utilities. The federal residential energy efficiency tax credit (25C) has covered qualifying door replacements in recent years; confirm the current credit percentage and eligibility requirements with your tax advisor before you buy, since these programs change. Your dealer or the manufacturer's website should have a rebate-finder tool. Even a $200 rebate is worth five minutes of paperwork.
Maintenance and repair points to keep in mind while buying
The door you buy today will need maintenance, and the easiest time to plan for that is before you buy. Sliding door rollers are the most common repair point: they wear out over years of use and need to be replaced. On better-quality doors, the roller adjustment screw is accessible from the face of the stile at the bottom corner without removing the panel. On cheaper units, the panel has to come out to access the rollers. Ask about this before you buy.
Weatherstripping on patio doors (the pile or foam seals on the door edges and meeting stiles) typically lasts 5–10 years before it compresses enough to allow drafts. It's an inexpensive and DIY-friendly replacement. Buy a door from a brand with widely available replacement weatherstripping rather than a proprietary profile that requires sourcing from a single supplier.
Track maintenance is straightforward: keep it clean and lubricated with a silicone-based lubricant (not WD-40, which attracts dirt). A dirty track is the number one cause of a sliding door that's hard to operate, and it's a two-minute fix. Choosing a track design with fewer recesses where debris can accumulate, some manufacturers use a rounded or elevated track profile for this reason, pays off in reduced maintenance over time.
Drafts around a patio door are almost always a weatherstripping or threshold seal issue, and both are DIY-repairable. A door that leaks water at the sill after installation is a flashing or sill pan problem, which is a much more serious issue. Buying the right door for your exposure level and ensuring correct installation is the only way to prevent that outcome. Everything else is maintenance.
FAQ
How do I choose the right patio door style for my house and needs?
Match style to opening, clearance, and use: Sliding (gliding) doors are lowest cost, low‑profile sills, and good where interior swing clearance is limited but give about half the clear opening. French/hinged doors give nearly full clear width and are best for moving large items but need swing space and good multipoint hardware for weather/security. Multi‑panel systems (stacking, multi‑slide, pocket, bifold) create the largest openings and views but cost more, are heavier, and often require certified installers and more robust sills/drainage. Choose by desired clear opening, traffic patterns, weather exposure, and budget.
Which frame material should I pick—vinyl, aluminum, wood, or fiberglass?
Consider tradeoffs: Vinyl = lowest upfront cost, low maintenance, good durability for typical climates. Aluminum = slim profiles and strength, best with a thermal break for efficiency. Wood = superior interior look and paint/stain options but needs regular maintenance. Fiberglass/composite = high stability, low expansion, paintable/stainable, longer life and better dimensional stability (higher cost). Base choice on budget, desired finish, climate, and how much maintenance you’ll do.
What glass and performance features matter (low‑E, gas fills, tempered, NFRC ratings)?
Focus on whole‑unit NFRC ratings (U‑factor, SHGC, VT, AL) rather than pane count alone. Low‑E coatings reduce heat transfer and can be tuned to climate. Argon or krypton gas fills improve insulation. Tempered or laminated glass increases safety and security. Ask for NFRC‑certified labels for the exact configuration to compare performance across options.
How should I measure: a concise measuring checklist for retrofit and new‑construction?
Measuring checklist: 1) Rough‑opening width: measure top, middle, bottom; record smallest. 2) Rough‑opening height: measure left, center, right; record smallest. 3) Wall/jamb depth (from interior finish to exterior cladding). 4) Check squareness: measure both diagonals. 5) Sill level and slope. 6) Interior trim/brickmould depth and masonry returns. 7) Existing frame daylight opening and jamb depth for insert/retrofit. 8) Record floor/finish thickness at threshold. 9) Note exterior cladding type (brick, stucco, siding) and whether pocketing is possible. Allow typical manufacturer shim clearance (often ~1/4" each side/top) unless the unit spec says otherwise.
What’s the difference between new‑construction and retrofit (insert) installation methods?
New‑construction units are sized to the rough opening and include nailing flanges or bucking; they require full flashing, sill pans, and WRB integration. Retrofit/insert units replace the sash or frame inside the existing jamb and work where the existing frame is plumb and in good shape—less invasive but limited by the existing opening and jamb depth. Full‑frame replacement is an option between the two. Choose based on condition of existing framing, cladding work needed, and your willingness to do flashing/frame repairs.
What threshold and sill choices affect weatherproofing and accessibility?
Low‑profile/ADA thresholds reduce trip hazard and are desirable for accessibility but need carefully detailed sloped, back‑dammed sill pans and weep/drainage to avoid leaks. Higher thresholds are better for exposed conditions and wind‑driven rain. For sliding and multi‑panel doors, ensure sill drainage, weeping, and correct end‑dam details per installation standards to prevent water intrusion.
Next Article
How to Build a Patio Door: Frame, Fit, and Threshold Step
Step-by-step DIY guide to build a patio door frame, fit the door, and create a weatherproof threshold step.