If the steps outside your sliding glass door feel uneven, wobbly, or slightly off, the fix usually starts with checking two things: whether the step landing is level and whether the door threshold clearance is still within the code-required ¾ inch maximum height. When either one drifts out of spec, you end up with a door that drags, gaps that let in cold air and water, and a trip hazard every time someone walks out. The good news is that most of these problems are diagnosable with a four-foot level and fixable in a weekend.
Patio Steps From Sliding Door: Fix Uneven, Drafty Entry

Jamie Archer
12 Jun 2026
How patio steps and your sliding door threshold actually interact
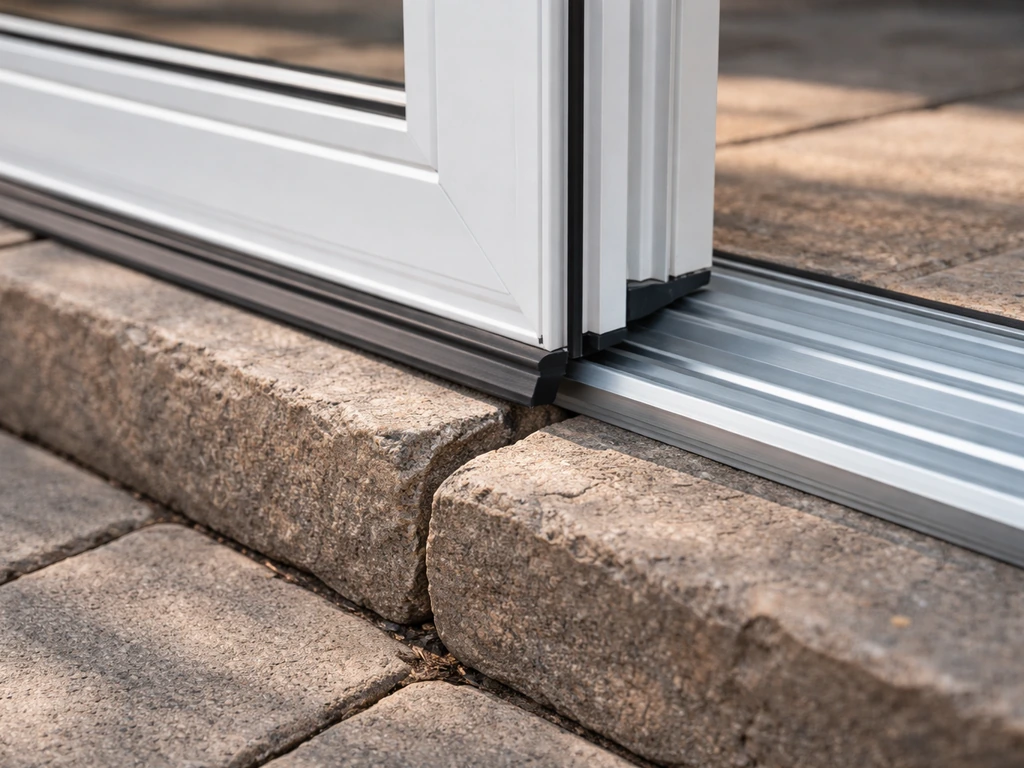
Your sliding door sits on a track that's built into a threshold frame. That frame is anchored to your home's subfloor or slab, and it has to line up cleanly with whatever landing or step exists on the exterior side. Under building code, a sliding door threshold can't rise more than ¾ inch (19.1 mm) above the finished floor or landing surface. Any floor-level change greater than ¼ inch (6.4 mm) at a doorway also has to be beveled at no steeper than a 1:2 slope, meaning 1 inch of rise over 2 inches of horizontal run.
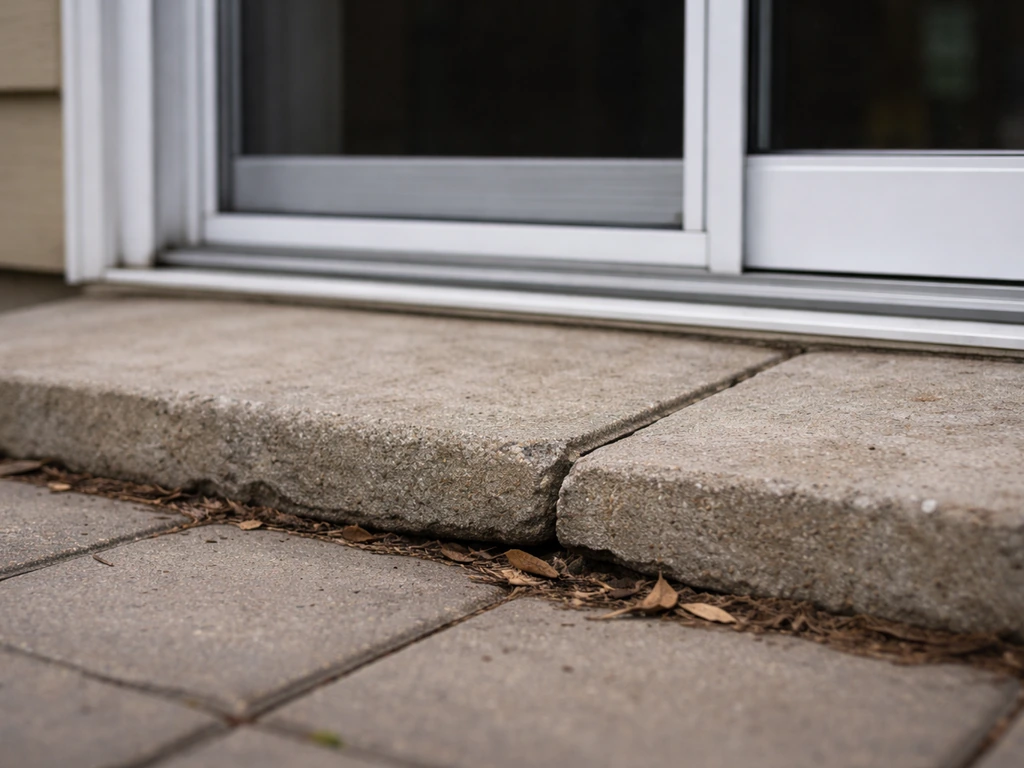
In practice, this means the step or landing just outside your door needs to sit close to the same level as the interior floor. When your patio steps settle or shift even an inch, the effective step height from inside to outside changes, the door panel may drag on the track lip, and water can pool right at the threshold instead of draining away. Think of the threshold, the sill pan beneath it, the door track, and the exterior step as one connected system. When one piece moves, the others feel it.
The sill pan under a patio door is also critical here. It's designed to catch any water that gets past the track and direct it away from the house. If your exterior step has shifted toward the door and is pressing against the sill area, or if debris has blocked the weep holes in the track, that drainage system stops working and you'll start seeing water intrusion at the threshold. This is why a settling step isn't just a cosmetic or tripping issue.
Why steps feel wrong in the first place
Ground settling is the most common culprit. Concrete steps, precast pavers, and even poured landings all shift over time as the soil beneath them compresses, erodes, or freezes and thaws. In northern climates, frost heave can lift a step several inches in a single winter. In clay-heavy soils, dry summers shrink the ground and wet springs swell it back up, causing gradual but cumulative movement.
- Ground settling or frost heave: the most common cause of steps that tilt toward or away from the door
- Poor original drainage: if the step was installed without proper slope away from the house, water pools and accelerates settling and erosion under the base
- Worn or spalled surfaces: concrete that has pitted or crumbled creates an uneven walking surface even if the structure underneath is solid
- Loose or missing mortar joints: on brick or block steps, failed mortar lets individual units shift independently
- Track and threshold wear: the door side of the equation can also shift if the threshold screws have worked loose, the sill pan has cracked, or the track has been bent by debris or foot traffic
- Improper original installation: steps built without a gravel base, proper footing depth, or connection to the house foundation tend to move early and often
It's worth separating the step problem from the door problem before you start fixing things. A door that suddenly drags or sticks after years of smooth operation is more likely a roller or track issue than a step issue. But if the door started feeling off after a hard winter, or if you can see daylight between the step and the threshold, the step has almost certainly moved.
Quick fixes you can do right now
Before you rent equipment or call anyone, run through these checks. Most of them take less than 30 minutes and will either solve the problem or tell you exactly what you're dealing with.
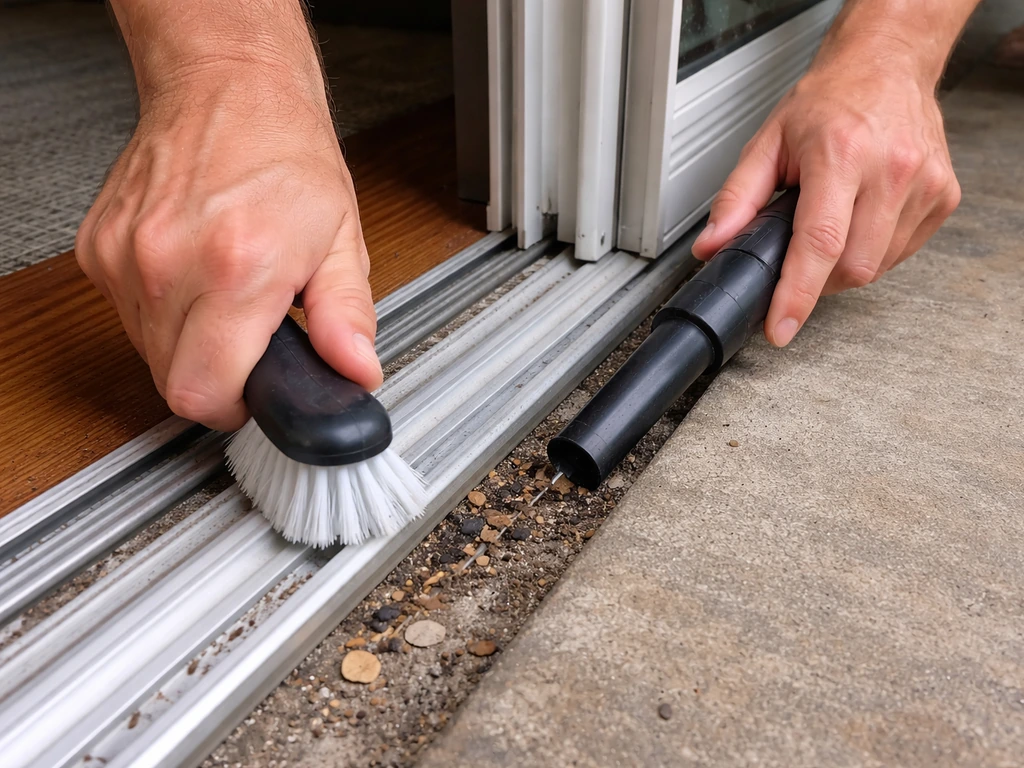
- Clean the track and weep holes: Use a stiff brush and a vacuum to clear dirt, sand, leaves, and debris from the bottom door track. Then locate the weep holes (small slots or holes at the base of the exterior track frame) and clear them with a pipe cleaner or compressed air. Blocked weep holes are a leading cause of water pooling at the threshold.
- Check the step for rocking: Stand on the step and shift your weight side to side. Any movement means the base has settled unevenly. Note which corner is high and which is low.
- Put a level on the step surface: A four-foot level tells you how far out of plane the step is. Code allows a small amount of slope (ideally ¼ inch per foot away from the house for drainage) but the step should not tilt toward the door.
- Check the threshold gap: With the door closed, look at the gap between the door bottom and the threshold. It should be consistent across the full width. A gap that's wider on one end means the door has shifted, the threshold has shifted, or both.
- Inspect threshold screws: Open the door and look at the threshold frame. If screws are backed out or missing, tighten or replace them. A loose threshold causes the door to drag and creates gaps that let in drafts and water.
- Shim a rocking step temporarily: If the step rocks on a single low corner, a non-compressible shim (a plastic or composite shim, not wood) under that corner can stabilize it while you plan a permanent fix. Tap it snug and make sure the step no longer rocks before walking on it.
- Adjust the door rollers: Most sliding doors have roller adjustment screws accessible from the bottom edge of the door panel. Turning them clockwise raises the door; counterclockwise lowers it. A ⅛-turn at a time is enough to make a meaningful difference.
Making the steps genuinely safe and stable
Temporary shims buy you time, but they're not a long-term answer. Here's how to address the real structural issues so the steps stay put and the door continues to operate correctly.
Leveling a settled step
For concrete or masonry steps that have settled but are otherwise intact, mudjacking (also called slabjacking) is often the most cost-effective fix. A contractor drills small holes through the slab and pumps a grout mixture underneath to lift and stabilize it. Polyurethane foam injection is a newer alternative that's lighter and faster, though more expensive. For DIY purposes, if a step has settled less than an inch and the void underneath is accessible, you can pack it with a dry mortar mix or hydraulic cement and tamp it firm before it sets.
If the step has cracked significantly or the foundation has shifted more than 2 inches, patching and lifting rarely hold. At that point, removal and repour is the right answer. This is also your chance to add a proper gravel base (6 inches minimum) and ensure the step is not mechanically attached to the house foundation in a way that transfers movement from the house to the steps or vice versa.
Anti-slip surfaces
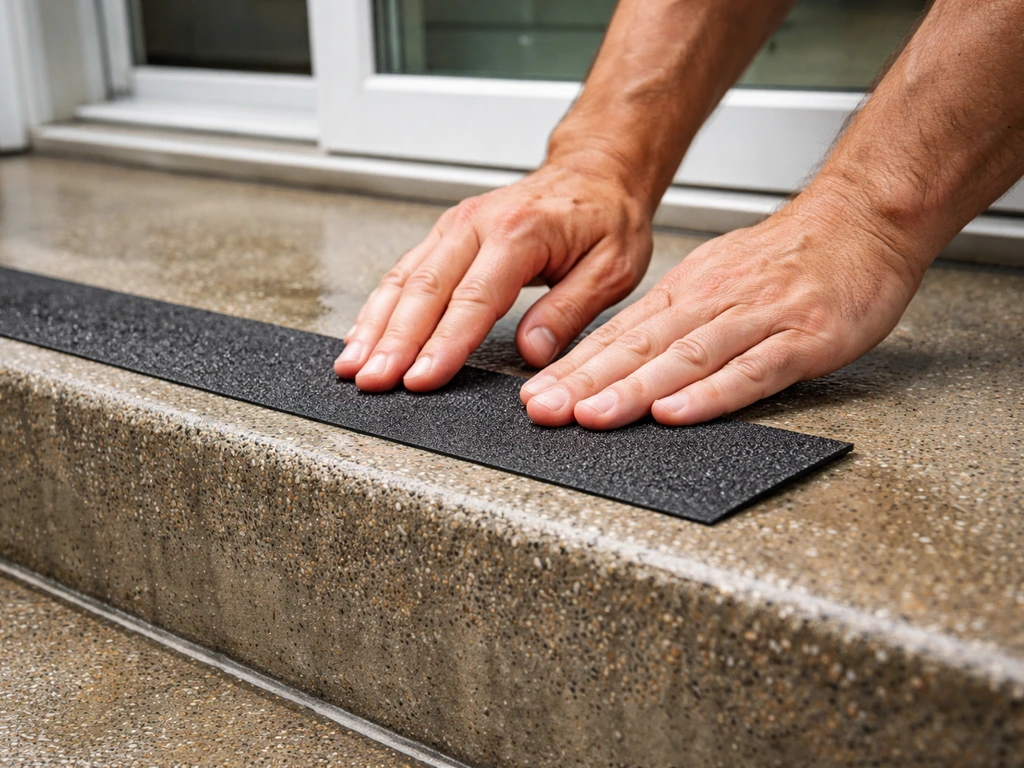
A smooth concrete or tile step right outside a sliding door is a slip hazard, especially when wet. Add abrasive non-slip strips or apply a grit additive mixed into concrete sealer or paint. For a more permanent solution, bonded non-slip nosing strips along the front edge of each step tread are inexpensive (typically $5 to $15 per tread) and last several years. If you're retiling or resurfacing, use a tile rated for wet exterior use with a coefficient of friction (COF) of 0.60 or higher.
Handrails and bracing
If your exterior steps have more than two risers (generally anything over 30 inches of total rise), a handrail is required by most building codes. Even if you're just at two steps, adding a grab rail next to the sliding door opening is a practical safety upgrade, especially for households with older adults or young children. A surface-mounted post set in a ground sleeve is the easiest DIY option and doesn't require breaking concrete. Make sure the post is rated for exterior use and is fastened securely enough that it doesn't flex when you pull on it hard.
Closing gaps between the step and the door frame
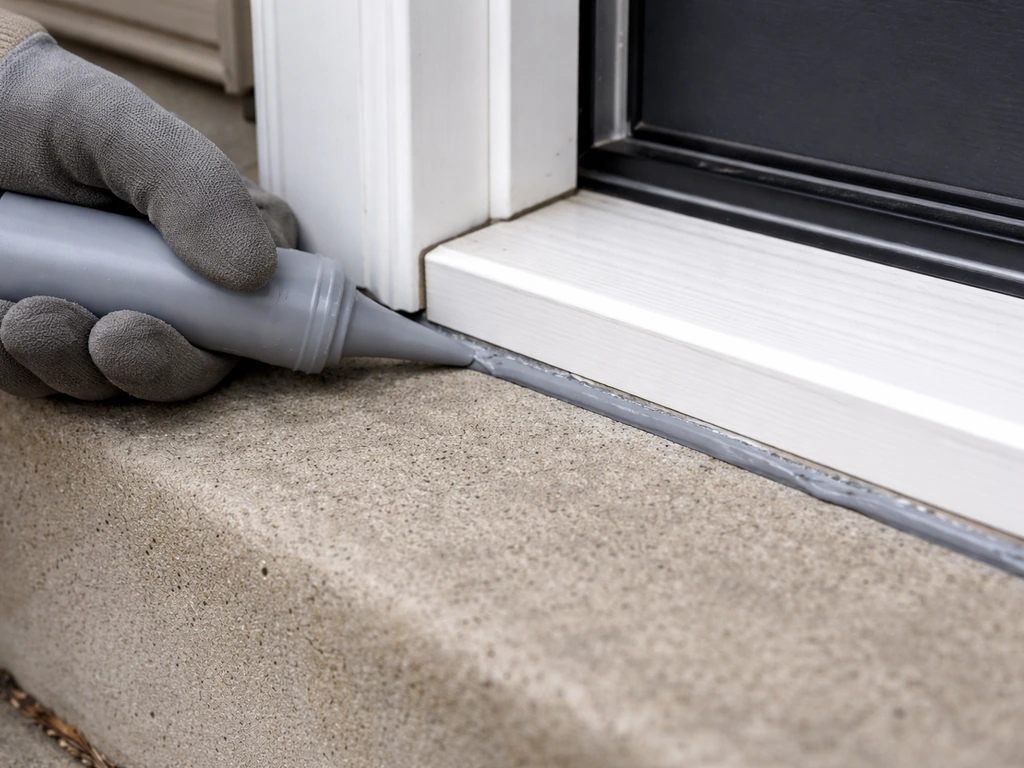
A gap between the top of the step and the exterior door casing or sill is an entry point for water, drafts, and insects. If you are dealing with sliding glass door steps to patio drainage or misalignment, tightening this seal is one of the most important steps you can take. If the gap is less than ½ inch, a high-quality exterior sealant (polyurethane or silicone-modified) applied to the joint will close it. For larger gaps, use a backer rod first to fill the void, then tool a sealant bead over the top. Never use spray foam in this joint because it absorbs water and will eventually cause more problems than it solves.
Repair or replace: how to decide
Not every situation calls for full replacement, but sometimes a repair is just delaying the inevitable. Here's a straightforward way to think about it for both the steps and the door threshold.
| Situation | Repair | Replace |
|---|---|---|
| Step settled less than 1 inch, no cracking | Yes: mudjack or pack void with mortar | Not necessary |
| Step settled more than 2 inches or cracked through | Unlikely to hold long-term | Yes: remove and repour with proper base |
| Step surface spalled or pitted but structurally sound | Yes: resurface with concrete overlay or bonded topping | Not necessary unless damage is deep |
| Threshold screws loose or threshold slightly warped | Yes: tighten screws, apply exterior sealant, adjust door rollers | Not necessary |
| Threshold frame cracked, corroded, or sill pan failed | Temporary patch only | Yes: full threshold replacement, inspect sill pan |
| Door drags after step repair | Yes: adjust rollers, clean track | Only if track or frame is bent or corroded |
| Persistent water intrusion at sill despite cleared weep holes | Investigate sill pan and flashing integrity | Yes: replace sill pan and threshold if flashing has failed |
The honest answer on step replacement: if your steps are more than 20 to 25 years old and are showing significant settling, surface deterioration, and drainage problems all at once, putting money into repairs is often a losing proposition. A new set of precast or poured concrete steps with a proper gravel base, correct slope, and fresh sealant typically costs $500 to $2,500 depending on size and complexity, and you won't be back on a ladder patching them every two years.
The same logic applies to the door threshold. A threshold replacement on a standard patio door is a half-day job for a capable DIYer, but it does require removing the door panel, pulling the old threshold, and properly integrating the new sill pan with the existing flashing and housewrap. Viwinco’s installation guide also stresses proper exterior sill pan installation and integration with the existing flashing and housewrap for patio doors. If you're not comfortable with that scope, it's worth having a window and door installer handle it rather than risk creating a water intrusion path that damages your subfloor.
If you're also weighing whether to replace the entire sliding door while you're at it, consider that a new door with a properly installed sill pan, integrated flashing, and new weatherstripping will solve threshold problems definitively and improve energy efficiency at the same time. The steps from french doors to patio involve similar threshold and landing height considerations if you're ever comparing door styles. For sliding doors, the steps from sliding door to patio rely on the same threshold and landing height considerations to stay safe, level, and properly weather-sealed steps from french doors to patio.
Weatherproofing and keeping everything working long-term
Once the steps are level and the threshold is solid, a little maintenance goes a long way toward preventing the same problems from coming back. These are the checks I'd put on a seasonal schedule.
Every spring and fall
- Clear the door track with a brush and vacuum, then wipe it down with a damp cloth. Don't use oils or WD-40 on the track itself as they attract dirt. Use a dry silicone spray on the track if you want lubrication.
- Check the weep holes in the threshold frame and clear any blockage with a pipe cleaner or compressed air.
- Inspect the sealant joint between the step and the door casing. Any cracking, shrinkage, or gaps should be cut out and resealed before water gets behind the frame.
- Check the step surface for new cracking or spalling. Small surface cracks can be filled with a concrete crack filler before they grow.
- Put your level on the step again. Even a small new tilt caught early is a shim job; caught late it's a mudjacking bill.
- Test the door weatherstripping by closing the door on a piece of paper. If the paper pulls out easily, the strip is compressed and needs replacing.
- Look at the gap between the door bottom and the threshold. It should be consistent and the door should lock smoothly.
Before winter
In freeze-thaw climates, the period between late October and early December is your window to seal any open joints before frost locks in moisture and starts the expansion-contraction cycle that causes the most damage. Apply fresh sealant to the step-to-casing joint, verify the step drainage slope is clear of leaves and debris, and make sure no standing water is sitting against the threshold frame. Water that freezes against aluminum or vinyl threshold components will eventually crack or warp them.
Drafts after a fix
If you still feel a draft after leveling the steps and adjusting the door, the problem is almost always the door's bottom weatherstrip or the threshold seal insert, not the step itself. Most sliding door thresholds have a replaceable vinyl or rubber fin that presses against the door bottom. These cost $15 to $40 and snap or screw into the threshold channel. Replacing a worn fin takes about 20 minutes and eliminates most cold-air infiltration at the base of the door. Persistent drafts around the sides of the door panel point to worn pile weatherstripping on the door jamb, which is an equally quick and cheap replacement.
The broader point is that a sliding glass door and the steps leading to it work as a system. Keeping the steps level protects the threshold. Keeping the threshold sealed and the weep holes clear protects the frame and subfloor. And keeping the track clean and the rollers adjusted keeps the door moving the way it should. Fix one piece correctly, maintain the rest consistently, and you won't be troubleshooting this again in two years.
FAQ
My patio steps look close to level, but the sliding door still drags. What should I check first?
Yes. If the step height is within the ¾ inch threshold limit but the door still drags, the track lip or rollers are usually out of alignment or have debris buildup. Clean the track channel, check roller height adjustment if your door has it, and confirm the threshold fin is making full contact across the door’s width.
How do I measure the effective step height from inside to outside for a sliding door?
A quick way to verify is to measure from the interior finished floor to the top of the threshold, then compare it to the exterior landing surface. Use the same reference point for both sides, and recheck after the door is closed because some thresholds compress slightly where the fin presses.
What does it mean if water pools at the threshold even after I resealed the joint?
If you see standing water right at the threshold after rain, the problem is often the exterior slope or blocked drainage path, not just the sealant. Clear leaves and debris from the step edges and track weep areas, confirm the landing falls away from the house, and avoid sealing over weep openings that need to breathe.
Can I fill the gap between the step and the door casing with spray foam to stop drafts?
You should not. Spray foam in that step-to-casing joint can retain moisture and create hidden deterioration because it does not function as an exterior drainage or sealing system. Use a backer rod for larger gaps, then apply a proper exterior sealant, then tool it so it drains instead of holding water.
What’s the safest way to reduce slip hazards on a wet patio step outside a sliding door?
Use non-slip treatment rated for exterior wet conditions and make sure it is compatible with your step surface. For concrete or resurfaced steps, avoid products that can become slick when they weather, and if you apply a sealer with grit, test a small area first since some coatings change traction.
When is it okay to DIY a small settled concrete step, and when should I use mudjacking instead?
If the settling is small and the underside is accessible, you can sometimes pack voids with dry mortar or hydraulic cement, but only if the step is still sound and won’t flex when you step on it. For most cases where you need lifting and long-term stabilization, mudjacking or polyurethane injection performs better.
What situations make threshold replacement a bad DIY idea?
A threshold replacement can become a poor DIY project if the door frame is not square, the existing flashing is compromised, or you cannot integrate a new sill pan into housewrap and flashing correctly. If you see water stains inside after storms or the subfloor around the frame looks soft, plan on professional installation.
Do I really need a handrail for just two patio steps, and what if codes differ?
If there are more than two risers or the total rise is substantial, most codes require a handrail, but you should also consider safety if the path is regularly used in winter. Even where not strictly required, adding a grab rail near the sliding door opening helps with balance, especially for children or older adults.
If I replace the sliding door, should I still fix the steps first?
Yes, it can. If you replace the door but the exterior step is still out of spec, you may worsen dragging or water pooling because the threshold fin and sill pan depend on correct landing alignment. Always level and stabilize the steps first, then choose a door and threshold components that match your clearance and sealing design.
How can I tell whether the draft is from the bottom fin versus the step misalignment?
Replace the bottom fin or weatherstrip promptly if you feel airflow at the base or notice the fin no longer contacts evenly. As a quick diagnostic, close the door and inspect whether the fin is fully wiped across the door bottom, then check the track channel for grit that can prevent a tight seal.
Next Article
Steps Down From Patio Doors: DIY Fix and Adjustment Guide
Diagnose and fix patio doors that step down: clean tracks, adjust rollers, realign frame, repair screen and latch.
