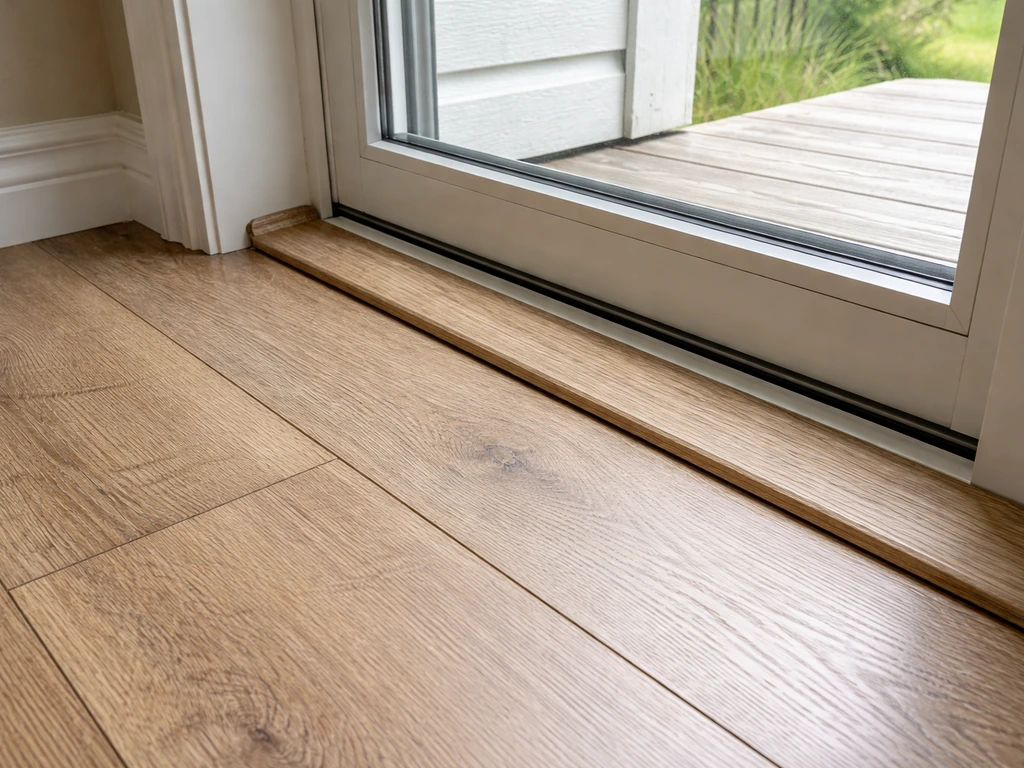
To protect a patio door from rain, you need to address four things: a functional weatherstrip around the frame, a working door sweep or bottom seal, a clear and sloped sill that drains water outward, and properly lapped exterior flashing and caulk above the door. Miss any one of them and rain will find its way in. This guide walks you through diagnosing exactly where your door is failing, then fixing it yourself, from swapping weatherstripping in under an hour to repairing a rotted sill pan over a weekend. For detailed, step-by-step instructions on how to stop a patio door from leaking, see our guide on how to stop patio door from leaking.
How to Protect Patio Door from Rain: DIY Fixes, Steps & Costs

Jamie Archer
16 Jul 2026
What this guide covers and who it's for
This article is for homeowners who have spotted water on the floor near a patio door, felt a draft during a storm, or simply want to weatherproof before the rainy season hits. You don't need contractor experience, but you should be comfortable using a utility knife, caulk gun, and drill. I've organized the guide so you can jump straight to your problem: run the inspection checklist, confirm where water is entering, then follow the matching fix. Sliding glass doors and hinged French doors share most of the same failure points, and I'll call out where they differ. Screen door considerations and temporary rain-protection options are also covered.
Why patio doors leak, the common failure points
Water almost never enters randomly. It finds specific weak spots, and patio doors have a predictable set of them. Understanding each one makes diagnosis much faster.
Weatherstripping
The foam, vinyl, or pile strip that runs around the door frame compresses every time the door closes. Over time it flattens, tears, or pulls away from the kerf channel. Even a 1/8-inch gap along the head or jamb is enough to let wind-driven rain inside. On sliding doors, the vertical pile brush seals on the meeting stile are especially prone to wear because the door drags across them every single use.
Sill and threshold
The threshold sits right at floor level where foot traffic, moisture, and UV all attack it simultaneously. Aluminum thresholds can corrode and pull away from the subfloor, opening a gap underneath. Wood sills can rot. Vinyl thresholds can crack. When the sill no longer slopes outward (about a 1/8-inch drop toward the exterior over the sill width is typical), standing water has nowhere to go except inward.
Sill pan and flashing
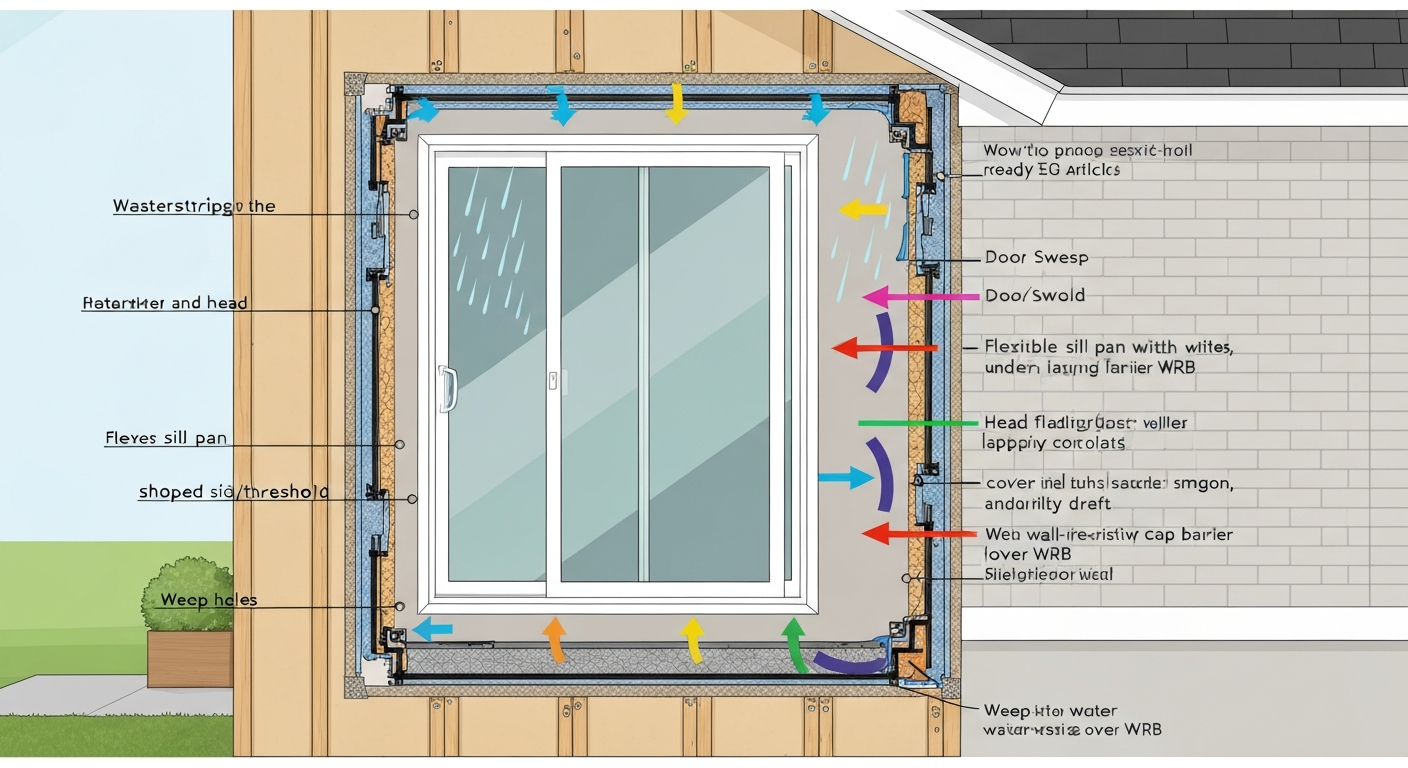
Behind the threshold, underneath the door frame, there should be a sloped sill pan, a tray of flexible or rigid flashing material that captures any water that gets past the threshold and directs it outward. Marvin and Andersen both require a pan-flashing integrated with the wall's water-resistive barrier (WRB), with end dams at least 4 inches high on each side to stop corner leakage. If your door was installed without one, or the original pan cracked or separated, water drains into the wall cavity instead of out through the weep system. This is the failure point most likely to cause rot or mold you can't see.
Exterior head flashing and caulk
Above the door, a metal drip cap or self-adhered head flashing should lap over the WRB and direct water away from the top of the frame. If that flashing is missing, improperly lapped, or the caulk bead along the head and side jambs has cracked, rain runs straight behind the trim and into the rough opening. Building science guidance is clear here: don't rely on exterior caulk alone as your primary water barrier. Caulk is the last line of defense, not the first.
Glass unit and door-to-frame fit
On sliding doors, if the rollers are worn or the door sags, the panel no longer sits squarely against the frame seals. Even a well-maintained weatherstrip can't compensate for a door that's tilted a quarter-inch out of plumb. Similarly, a fogged or cracked insulated glass unit can indicate seal failure, which can also allow moisture infiltration around the glazing gasket.
Weep holes
Most sliding patio door frames have weep holes or channels at the bottom of the sill track, small slots designed to drain any water that enters the track back outside. JELD-WEN installation instructions explicitly warn: do not seal weep holes or channels. Manufacturer installation guidance (JELD‑WEN, Installation instructions (explicit 'DO NOT seal weep holes/channels' guidance)) explicitly warns not to plug or seal weep holes or channels so designed drainage remains clear JELD‑WEN — Installation instructions (explicit 'DO NOT seal weep holes/channels' guidance). Plugged weep holes turn the sill track into a bathtub that overflows inward.
Tools, materials, and common measurements you'll need
Get everything together before you start. Nothing is more frustrating than stopping mid-job to run to the hardware store.
Tools
- Tape measure
- Utility knife with fresh blades
- Flat pry bar (6- to 12-inch)
- Caulk gun
- Putty knife or 5-in-1 tool
- Drill and Phillips/square-drive bits
- Hacksaw or tin snips (for cutting aluminum door sweeps)
- Wire brush or toothbrush (for track cleaning)
- Shop vacuum
- Stiff-bristle brush
- Rubber mallet
- Garden hose with adjustable nozzle
- Flashlight or work light
- Painter's tape
- Safety glasses and work gloves
Materials
- Replacement weatherstrip: kerf-in bulb seal (EPDM or silicone, typically 3/16" to 1/4" bulb diameter), pile/brush strip for sliding door meeting stiles (3/16" or 1/4" pile height), or foam compression tape (3/8" x 1/4" or 1/2" x 3/16" for irregular gaps)
- Door sweep or bottom seal: screw-on aluminum sweep with vinyl fin (cut to door width, typically 32"–36"), automatic drop seal for hinged French doors
- Exterior-grade polyurethane or MS-polymer caulk (for head/jamb joints up to 1/2" wide; avoid silicone where paint adhesion is needed)
- Self-adhered flashing tape, 4-inch or 6-inch roll (for sill pan patching and head-flashing repairs; products meeting AAMA 711 or comparable)
- Liquid-applied flashing (for corners and transitions; products meeting AAMA 714)
- Aluminum drip cap, 3-1/2" or 4" face height (for head flashing replacement)
- Silicone spray lubricant (dry formula; not WD-40 or petroleum-based oils)
- Backer rod, 3/8" or 1/2" (for deeper joints before caulking)
- Replacement threshold/sill cap (match existing width, typically 4" to 6")
- Painter's tape (for masking caulk lines)
Common measurements to take before buying parts
- Door width (typically 60" for a standard 2-panel slider, or 72"/96" for wider units)
- Door height (standard 80"; 96" for 8-foot openings)
- Weatherstrip kerf width (usually 1/4" or 3/16" — measure the slot in the frame with a caliper or bring a 1-inch sample to the hardware store)
- Door bottom gap (measure at three points: latch side, center, hinge or strike side; note the largest gap for sweep selection)
- Threshold width (front-to-back dimension, usually 3" to 6")
Safety and preparation before you start
Most of this work happens at ground level, but a few tasks, inspecting or replacing head flashing, caulking above the door, may require a step stool or a 6-foot ladder. Use a stable ladder positioned on level ground, keep three points of contact, and never lean the ladder against the glass panel. Wear safety glasses when cutting metal door sweeps (aluminum burrs are sharp and fly unpredictably). Wear gloves when handling self-adhered flashing membrane; the adhesive is aggressive and the membrane edges can cut. If you're working with liquid-applied flashing or solvent-based primers, ventilate the area and don't work near open flames. Before lifting or tilting a sliding door panel off its track, have a second person help, full-size sliding glass panels typically weigh 50 to 100 pounds and can shift unexpectedly.
Quick visual inspection checklist
Do this inspection in good light, ideally on a dry day so existing water stains are visible but fresh water isn't masking damage. Work through both the interior and exterior sides.
Interior side
- Water stains or discoloration on the floor, subfloor, or baseboard near the door
- Soft, spongy, or discolored wood at the sill or threshold — press firmly with a screwdriver handle; it should not flex
- Visible gaps between the threshold and the floor or subfloor
- Weatherstrip that is flattened, torn, brittle, or missing sections
- Condensation or moisture between glass panes (indicates failed IG seal, not directly a rain leak, but worth noting)
- Door panel that doesn't close flush against all four sides of the frame
- Any caulk at interior trim joints that is cracked, missing, or has separated from the surface
Exterior side
- Caulk along the head (top) and side jambs: look for cracks, gaps, or sections that have pulled away from the frame or siding
- Head flashing or drip cap: confirm it exists, laps over the WRB or house wrap, and is not corroded or lifted
- Sill: confirm it slopes outward; stand back and sight along it — it should not be perfectly level or slope inward
- Weep holes at the base of the frame: confirm they are open (a toothpick or thin wire should pass through freely)
- Exterior trim boards around the frame: tap them — a hollow sound or soft feel can indicate water behind them
- Any gaps where the frame meets the siding or stucco; daylight visible from inside is a fail
- Glazing gasket around the glass: look for shrinkage, gaps, or sections that have pulled out of the frame groove
Simple tests to find exactly where water enters
Draft test (candle or incense)
On a windy day, hold a lit candle or incense stick about an inch from the weatherstrip, moving slowly around the entire perimeter, head, both jambs, and the sill. Do the same along the bottom of the door panel. A flicker or smoke deflection pinpoints air infiltration. Where air gets in, water follows in wind-driven rain. Mark each problem spot with painter's tape.
Hose test (adapted from AAMA 501.2 field check)
This is the most reliable DIY diagnostic. The approach is adapted from AAMA 501.2, a diagnostic water field-check method used by fenestration professionals. You'll need a helper inside the house watching for water entry while you work the hose outside.
- Set your garden hose nozzle to a steady, medium-pressure stream — not a jet, not a mist. You want roughly the flow of water running from an open faucet.
- Start at the bottom of the door and direct water across the sill and threshold for 60 seconds. Have your helper watch the interior floor and threshold.
- Move up to one side jamb and run water upward from the sill to the head for 60 seconds. Watch for entry at the bottom corner first, then along the jamb.
- Repeat on the other side jamb.
- Move to the head of the door and run water along the top of the frame, including across the top of any exterior trim, for 60 seconds.
- Finally, direct water at the joint where the siding meets the top trim, simulating water running down the wall.
- Mark any interior entry points with tape and note which hose position caused them. The location of entry and the timing tell you the source: entry at the sill during the bottom test points to threshold or sill pan failure; entry at the head during the wall test points to missing or failed head flashing.
Reading the water pattern
Water on the floor directly below the door panel usually means a failed door sweep or sill. Water appearing at the corner where the jamb meets the sill points to a missing end dam in the sill pan or a cracked sill pan corner. Water staining the drywall above the door suggests head flashing failure. Water that appears during the storm but not during your hose test may indicate a pressure-driven situation where wind is pushing water through small gaps that gravity flow doesn't expose, in that case, close the door, hold a piece of tissue paper along the weatherstrip seams, and use a box fan outdoors aimed at the door to simulate wind while repeating the hose test.
How to install or replace weatherstripping
Weatherstripping is the most common fix and the easiest one. Most patio door weatherstrip replacements take 30 to 60 minutes and cost $15 to $40 in materials. Industry performance standards for weatherstrips (AAMA 701/702) define pile, bulb, and polymer seal types, matching the right type to your door frame is the key step. For detailed, step-by-step instructions on how to seal patio door, see the dedicated sealing guide.
Identify the weatherstrip type in your door
| Type | Where it's used | How it's held in place | Best for |
|---|---|---|---|
| Kerf-in bulb seal (EPDM or silicone) | Hinged door jambs and head, some sliding door frames | Snaps into a routed channel (kerf) in the frame | Consistent compression seal; long lifespan |
| Pile/brush strip | Sliding door meeting stiles, sill track edges | Adhesive backing or screwed fin carrier | Low friction on sliding panels; handles frequent movement |
| Foam compression tape | Irregular gaps, older wood-frame doors | Self-adhesive | Budget fix for irregular surfaces; shorter lifespan |
| Vinyl or silicone bubble/gasket strip | Hinged French door perimeter | Kerf or adhesive channel | Good for exterior-facing surfaces with UV exposure |
Removing old weatherstripping
- Open the door fully. Pull the old weatherstrip out of its kerf channel by hand or with a flat-head screwdriver — it should pop out without much force if it's kerf-in style.
- If it's adhesive-backed, peel it slowly at a low angle to minimize tearing. Use a plastic scraper to remove the adhesive residue; a little mineral spirits on a rag cleans up stubborn adhesive without damaging most frames.
- Clean the channel or the frame surface with a dry rag. Remove all debris, old adhesive, and loose material.
- Measure the channel width with calipers or a small ruler. Most kerf channels are 1/4" wide. Buy replacement strip that matches this dimension exactly — a too-wide strip won't seat properly; too-narrow and it will fall out.
Measuring and cutting new weatherstripping
- Measure each section (head, left jamb, right jamb) separately. Doors are not always perfectly square; don't assume all three are the same.
- Cut the new strip about 1/4" longer than each measurement. You'll compress it slightly into corners for a tighter fit.
- For corners, cut the strip at a 45-degree angle with a sharp utility knife for a mitered fit, or cut square and let the strip compress into the corner.
- For pile strips on sliding doors, cut straight and butt the ends into the corners — pile compresses rather than mitering.
Installing the new weatherstripping
- For kerf-in bulb seals: press the fin of the weatherstrip into the channel, starting at one end. Use your thumb to press it firmly into the kerf, working in 6-inch sections. A rubber mallet tapped lightly along the fin can help seat it fully without damaging the bulb.
- For adhesive-backed strips: wipe the surface with isopropyl alcohol and let it dry fully. Peel the backing and press the strip firmly into place, holding each section for 30 seconds before moving on.
- For pile strips on sliding door stiles: most are held by a metal carrier that screws to the door edge. Position it so the pile just touches the frame when the door is closed, not compressed hard (that increases drag). Fasten with the supplied screws.
- Close the door and check compression. You should feel light resistance. If you can pull a piece of paper out without tearing it, the seal is too loose. If the door is genuinely hard to latch, the seal is too thick — check that you have the right profile.
How to install or replace a door sweep or bottom seal
The door sweep seals the gap between the bottom of the door panel and the threshold or sill track. On hinged French patio doors this is a sweep mounted to the door face. On sliding glass doors it's typically a kerf-in pile strip along the bottom of the panel or a vinyl fin integrated into the threshold. Materials run $10 to $35; installation takes 20 to 45 minutes.
Measuring the gap and selecting the sweep
- Close the door and slide a piece of paper under the bottom edge at three locations: near each end and in the center. Mark how much paper slides through freely — this is your gap dimension at each point.
- A gap under 1/4" can be sealed with a standard vinyl fin sweep. A gap of 1/4" to 1/2" needs a wider fin or double-fin sweep. A gap over 1/2" usually means the door needs roller adjustment (on sliders) or hinge adjustment (on hinged doors) before a sweep will help much.
- Measure the door bottom width for sweep length. Standard sliding doors are 32" to 36" per panel; French door leaves are commonly 30" to 36" wide.
- For hinged doors with an uneven floor, an automatic drop-down seal works better than a static sweep — it lifts when the door opens and drops when it closes, sealing across slight variations in floor height.
Fitting and attaching a screw-on aluminum sweep (hinged doors)
- Cut the sweep to the door width using a hacksaw or tin snips. Debur the cut ends with a file or fine sandpaper — aluminum edges are surprisingly sharp.
- Hold the sweep against the door bottom so the vinyl fin just touches the threshold without lifting the door. Mark the screw hole locations in pencil.
- Pre-drill pilot holes at your marks to prevent the door from splitting or the sweep mounting holes from stripping.
- Fasten the sweep with the supplied screws, starting from the center and working outward. Snug but do not overtighten — aluminum strips can bow.
- Open and close the door. The fin should brush the threshold lightly. If it causes noticeable drag on the door swing, loosen the screws and raise the sweep 1/16" before retightening.
Replacing the bottom pile strip on a sliding door panel
- Remove the sliding panel from the track: lift the panel upward into the upper track, then swing the bottom out toward you. Have a helper support the panel — it's heavy.
- Lay the panel flat on a padded surface such as moving blankets on the floor.
- The pile strip runs along the bottom of the panel in a metal carrier kerf. Pull it out from one end. If it's riveted or screwed in place, remove the fasteners first.
- Cut the replacement pile strip to the exact length of the original. Insert the carrier fin into the kerf slot and press it in firmly along the full length.
- Rehang the panel: tilt the top into the upper track first, then swing the bottom in and lower it onto the rollers. Test that it glides smoothly before re-engaging the anti-lift hardware.
Repairing the threshold and sill
If the threshold itself is cracked, corroded, or no longer slopes outward, a sweep alone won't fix the leak. On most patio doors, the threshold is a separate aluminum or composite cap screwed to the rough sill. Replacing it is a moderate DIY job that takes 1 to 2 hours. For guidance on trimming and finishing laminate flooring where it meets a patio threshold, see our how to finish laminate flooring at a patio door article.
- Remove the old threshold: unscrew the mounting screws along its length (typically every 6 to 8 inches). If it's also caulked, score the caulk with a utility knife before prying.
- Inspect the rough sill and sill pan beneath. Look for soft wood, cracked flashing, or standing water stains. If the sill pan is damaged, repair it before installing the new threshold (see the sill pan section below).
- Ensure the rough sill slopes outward. A bubble level should show a slight fall toward the exterior. If it's perfectly level or slopes inward, a tapered shim under the new threshold can correct this.
- Measure the rough opening width and buy a matching replacement threshold. Most replacement thresholds have adjustable vinyl inserts that let you fine-tune the height to meet the door bottom.
- Set the threshold in place, drill pilot holes, and fasten with stainless-steel or coated screws to resist corrosion.
- Apply a bead of exterior-grade caulk along the interior edge of the threshold where it meets the flooring, and along the exterior edge where it meets the sill pan or exterior surface. Smooth with a wet finger and allow full cure before exposing to rain.
Exterior flashing, head drip cap, and caulk
These repairs address water entering from above and from behind the exterior casing. Building science guidance is clear that exterior caulk is a backup, not a primary water barrier, your goal is correct flashing sequencing first, with caulk filling the final joint.
Patching a sill pan
If your hose test shows water entering at the sill corners, the sill pan's end dams have likely failed. A partial repair using self-adhered flashing membrane (products meeting AAMA 711) is workable if the pan is otherwise intact. Remove the threshold as described above, clean the existing pan surface, and apply a 4- to 6-inch wide piece of flashing tape over the cracked or separated area. Lap the tape at least 2 inches onto the intact existing membrane on each side. For corners, use a liquid-applied flashing product (AAMA 714 compliant) to fill and bridge the corner geometry, self-adhered tape doesn't conform reliably to inside corners. Follow the specific product instructions for minimum application temperature and cure time before exposing to water. Full sill pan replacement, where you remove the door, remove the old pan, install a new pan integrated with the WRB, and reinstall the door, is a significant job aligned with ASTM E2112 installation practice and is usually worth hiring a professional for if the pan is extensively damaged.
Replacing head flashing and adding a drip cap
- Carefully remove the top piece of exterior casing (head trim) with a flat pry bar. Work slowly to avoid tearing the house wrap behind it.
- Check whether head flashing exists. It should be a piece of metal drip cap or self-adhered membrane behind the trim, with its top edge tucked under the house wrap and the bottom leg extending out over the top of the door frame.
- If it's missing or corroded: cut a piece of aluminum drip cap (3-1/2" or 4" face) to the width of the opening plus 2 inches on each side for end coverage.
- Slide the back leg of the drip cap behind the house wrap at the top. The front leg hangs over the door frame top. Fasten through the back leg into the framing with galvanized roofing nails or cap staples — do not nail through the front drip leg.
- Seal the top back edge of the drip cap to the house wrap with a 4-inch wide piece of self-adhered flashing tape, lapping 2 inches onto the house wrap above and 2 inches onto the drip cap below.
- Reinstall the head trim, prime and paint the cut ends, and caulk the joint between the trim and the siding above with exterior-grade polyurethane or MS-polymer caulk. Do not caulk the joint between the bottom of the head trim and the door frame — this joint should remain open at the bottom to allow any water that gets past the trim to weep out.
Recaulking the side jambs and head
- Remove all old caulk with a utility knife and plastic scraper. Don't caulk over existing caulk — it won't adhere properly and you'll repeat this job in a year.
- Clean the joint surfaces with isopropyl alcohol and let them dry completely.
- For joints deeper than 3/8", insert backer rod first to give the caulk a proper backing depth ratio (sealant depth should be about half the joint width).
- Apply polyurethane or MS-polymer caulk in one continuous pass. These chemistries bond to aluminum, vinyl, wood, and most siding materials and accept paint — check the product data sheet for your specific substrate combination.
- Tool the bead immediately with a wet finger or caulk tool, pressing it firmly into both sides of the joint.
- Do not caulk the sill/threshold-to-siding joint on the exterior at the very bottom corners — water that gets behind the casing needs a way out. Sealing all four sides can trap moisture and accelerate rot.
Sliding door specifics: rollers, tracks, and weep holes
Sliding glass doors have failure points that hinged doors don't. Getting the panel to sit square in the frame is as important as any weatherstripping fix, a misaligned panel creates gaps that no seal can fully compensate for. For step-by-step instructions specifically on how to weatherproof a sliding patio door, see our detailed guide on that topic.
Roller adjustment
Most sliding door rollers are adjusted via screws accessible from the interior face of the panel at the bottom corners, or through small access holes in the bottom rail of the panel frame. Turning the adjustment screw clockwise typically raises that corner; counterclockwise lowers it. The goal is to set the panel so it's parallel to the frame and compresses the weatherstrip evenly around the perimeter. JELD-WEN product guides warn specifically that raising the door panel too high increases water and air leakage, the panel bottom needs to maintain contact with the sill track seal, not float above it. Make small adjustments (half-turns at a time) and test the door closure after each adjustment. If rollers spin freely but the door still drags or won't align, the rollers are worn and need replacement.
Track cleaning
A debris-clogged sill track forces the door to ride high and misalign. Clean the track with a stiff brush and shop vacuum, then use a damp rag to remove grit. Milgard maintenance guidance recommends doing this at minimum every six months, and more often if you have a pet or live in a dusty or sandy environment. After cleaning, apply a thin coat of silicone spray lubricant, dry formula only. Andersen's product care guidance is explicit: use silicone (dry) lubricant, not oil-based products. Oil-based lubricants attract dirt, gum up the track, and degrade the rubber and vinyl seals over time.
Clearing and maintaining weep holes
Locate the weep holes or weep slots on the exterior face of the sill track frame, they're usually small rectangular or round openings every 12 to 24 inches along the bottom rail. Insert a toothpick, thin wire, or the tip of a utility knife to clear any debris. Rinse with the hose. Confirm water flows out freely. Never caulk or plug these openings. If your hose test shows water entering when you run water across the sill track, but the weep holes are clear, the weep channels inside the frame may be blocked by debris or by a sagging track, this is a more involved repair that may require removing the threshold or door frame sill section.
Screen door considerations
Screen doors don't seal against rain, they're not designed to. But a damaged or improperly hung screen door can indirectly make rain protection worse by holding the main door ajar or by directing airflow that drives water into the main door frame. Check that the screen door closes completely and that its perimeter doesn't press against or interfere with the main door's weatherstrip. Screen door sweep and weatherstrip replacement uses the same pile and foam products described above, just in lighter-duty form. If your screen door rattles or lets wind through in large volumes, replacing the pile strip along the vertical stiles reduces the wind load on the main door's seal.
Temporary rain protection options
If a storm is coming and you haven't finished repairs, or if you're waiting for a contractor, a few temporary measures reduce risk. Apply self-adhesive weatherstrip foam tape over any known gaps, it won't last more than a season but it buys time. Roll up a tightly coiled towel and place it along the interior sill as an emergency flood barrier for severe storms. For a failing caulk joint at the head or jambs, a temporary bead of paintable acrylic caulk (which cures in 30 minutes) can hold until you do the proper repair. These are bridges, not solutions, prioritize the permanent fixes before the next rain season.
Seasonal maintenance schedule
Milgard and Andersen both recommend semiannual maintenance checks. For step-by-step seasonal measures, see our guide on how to seal a patio door for winter (6e23314f-0057-4919-9662-3fd87414b797). Here's a practical schedule that keeps patio doors rain-tight year-round.
| When | Task |
|---|---|
| Spring (before rainy season) | Run the hose test. Clean and inspect weatherstripping. Clean and lubricate tracks with silicone spray. Clear weep holes. Inspect and retouch caulk at head and jambs. |
| Fall (before winter) | Inspect door sweep and bottom seal for wear. Check threshold for cracks or separation. Inspect head flashing. Consider adding heavier pile strip if winter winds are a problem in your area. |
| After any major storm | Check floor near sill for moisture. Inspect weep holes (storm debris can plug them). Confirm weatherstrip hasn't been dislodged by door slamming in wind. |
| Every 3–5 years | Inspect sill pan condition if accessible. Evaluate weatherstrip for complete replacement even if it appears intact — EPDM and silicone last 10–20 years, foam tape 2–5 years, pile strip 5–10 years depending on use. |
When to call a professional, and what it costs
Most of the repairs in this guide are genuinely DIY-friendly. But a few situations are worth hiring out, either because the structural consequences of getting it wrong are serious or because the work requires removing the door frame entirely.
| Situation | Why it's pro territory | Rough cost range |
|---|---|---|
| Soft or rotted rough sill framing under the door | Structural repair; requires proper drying, sistering or replacing framing members, and correct sill pan reinstallation per ASTM E2112 | $800–$3,000+ depending on extent of rot |
| Full sill pan replacement (door must come out) | Requires integrating new pan with WRB; improper lapping causes wall cavity damage | $500–$1,500 for pan only; more if door reinstallation is included |
| Head flashing failure with water-damaged drywall above door | Drywall repair, mold risk assessment, and proper flashing replacement in one scope | $600–$2,500 |
| Failed insulated glass unit (fogged panes) | Glass replacement requires ordering to size; seals must match original frame | $200–$600 per pane for glass replacement |
| Door panel that can't be aligned by roller adjustment | Likely warped frame or settled structure; may need door replacement or frame correction | $300–$1,500 depending on cause |
| Any leak you can't locate after two hose tests | A professional can perform a pressure-differential test (ASTM E1105) to find infiltration under simulated wind-load conditions | $300–$800 for diagnostic; repair cost varies |
A good rule of thumb: if the water damage has extended beyond the door itself into the wall framing, flooring structure, or drywall, get a professional opinion before spending money on surface repairs. Sealing the door perfectly over wet or rotted framing just traps the moisture and accelerates decay.
Troubleshooting by symptom
| Symptom | Most likely cause | Where to start |
|---|---|---|
| Water on floor directly under door panel | Failed door sweep or bottom pile strip | Replace door sweep or bottom pile; check threshold slope |
| Water at sill corners only | Sill pan end dam failure | Inspect and patch sill pan corners with liquid flashing |
| Water along the entire bottom of the door | Blocked weep holes and/or flat sill slope | Clear weep holes; check and correct threshold slope |
| Water coming in at the top corners | Head flashing missing or improperly lapped | Inspect and replace head drip cap; seal to WRB |
| Water appearing high up on the frame or drywall above | Head flashing failure or wall penetration above door | Hose test at wall above door; check flashing integration |
| Water entry during wind but not during hose test | Pressure-driven infiltration through weatherstrip gaps | Repeat hose test with fan simulating wind; replace weatherstrip |
| Sliding door leaks but all seals look intact | Door panel out of alignment (roller adjustment needed) | Adjust rollers; verify even weatherstrip compression around perimeter |
| Water seeps in only on one side of a sliding door | Meeting stile pile strip worn on that side | Replace vertical pile strip at meeting stile |
Connecting to related repairs
Rain protection and weatherproofing overlap heavily with sealing and winterizing work. For seasonal styling ideas, see how to decorate a patio door for Christmas. For seasonal sealing tips and a simple checklist, see our guide on how to winterize patio door. If your inspection reveals that air infiltration is as much of an issue as water, a full sealing job, including the glazing gaskets and interior trim joints, addresses both at once. Similarly, if roller problems are causing your sliding door to misalign, fixing the rollers properly (rather than just adjusting them to compensate) is the more permanent solution. A door that won't lock correctly or drags on the track often has both water-entry and security implications, making it worth dealing with comprehensively rather than patching one symptom at a time.
FAQ
What authoritative standards and test methods should I cite when explaining how to diagnose patio‑door water entry and verify repairs?
Cite ASTM E1105 (field determination of water penetration for installed fenestration) and AAMA/FGIA AAMA 501.2 (hose‑stream/diagnostic water leakage field check). These describe pressure/hose testing protocols and acceptance context and are the most widely recognized references for field verification of door leakage and repair effectiveness.
Which industry standards cover proper flashing, sill pans and integration with the wall water‑resistive barrier (WRB)?
Reference ASTM E2112 (standard practice for installation and flashing of exterior windows and doors) for sill‑pan and flashing sequencing. Also cite AAMA 711 (self‑adhering flashing) and AAMA 714 (liquid‑applied flashing) when recommending specific flashing product families and application protocols.
Which manufacturers’ materials should I consult for model‑specific instructions (rollers, weep holes, adjustment, removal)?
Use the installation and owner manuals from major manufacturers (Andersen, Pella, JELD‑WEN, Milgard, Marvin, etc.). These provide model‑specific roller adjustment procedures, panel removal safety, weep‑hole locations and explicit cautions (for example: do not plug weep holes). Quote or link to the exact model/series manual when giving step‑by‑step repair directions.
What product technical data are required for recommending flashing, sealants and membranes?
Use manufacturer product technical data sheets (TDS) and installation guides for flashing membranes (Henry Blueskin, DuPont LiquidArmor, Sika MaxFlash, Tremco) and sealants. TDS provide cure/wet film thickness, allowable substrate moisture, temperature limits, recommended primers, lap sizes and movement capability required to specify correct material and application details for DIY sill pans and joint seals.
Which weatherstrip and sweep performance specs should I reference when recommending replacement products?
Reference AAMA 701/702 (performance specifications for pile weatherstrips and polymer seals) to explain expected durability and profile selection. Also consult manufacturer installation instructions and sizing charts (Pemko, Frost King, Ultrafab) for dimensions, substrate attachment methods (screw vs adhesive vs kerf), and typical cut/fit guidance.
What building‑science guidance should I include about system design and why exterior caulk alone is insufficient?
Cite Building Science Corporation guidance on drained vs. face‑sealed systems. Emphasize a drained approach: sill pans, integrated WRB laps and drainage paths, and backer‑rod + sealant for movement joints. Warn that exterior caulk is a secondary barrier and not a substitute for proper flashing and drainage.
Next Article
How to Finish Laminate Flooring at a Patio Door
Step-by-step DIY tips to finish laminate by a patio door: expansion gaps, undercutting jambs, trims, and waterproofing.