To lift a sliding glass patio door, you tilt the operating panel toward you at the top, lift it up so the bottom rollers clear the sill track, and walk it out of the opening. For a screen door, you press the corner rollers inward, lift the top into the screen track, then swing the bottom out. Both jobs are doable for most DIYers, but a full-size sliding glass door can weigh anywhere from 130 to over 225 lb, so you need at least one helper, a clear path, and the right grip on the glass before anything moves.
How to Lift a Patio Door Safely: Remove & Reinstall

Jamie Archer
10 Aug 2026
Who this guide is for
This walkthrough is written for homeowners who want to handle the job themselves, whether that means lifting the door panel to swap out a broken roller, removing the whole unit for replacement, or getting it ready for transport. It also works as a reference if you're hiring someone and want to know exactly what they should be doing. I'll cover sliding glass doors and screen doors separately, since the weights and steps are completely different. If you're dealing with leveling after reinstallation or planning to move the door to a new location, the later sections on reinstallation and transport have you covered too.
Why you might need to lift or remove your patio door
There's more than one reason to lift a patio door, and the reason matters because it determines how much of the door you actually need to remove. Here are the most common situations:
- Roller adjustment or replacement: The rollers that ride inside the bottom track wear out over years of use. To access them, you need to lift the panel out of the frame entirely. This is probably the most common reason a homeowner finds themselves doing this job.
- Leveling the door: If the door drags on one side, rocks, or won't latch properly, the rollers can be adjusted in place using a screwdriver through the access holes in the bottom rail—but sometimes you need the panel out to clean or rebuild the roller carriages first.
- Track cleaning and repair: Heavy debris, bent track sections, or corrosion sometimes requires removing the panel to properly clean or replace the lower track.
- Full door replacement: When a door is beyond repair—failed insulated glass seal, rotted frame, or serious damage—you remove the panel and eventually the whole frame assembly.
- Transport to a new home or job site: If you're taking a door with you during a move or supplying one for a renovation, it needs to come out cleanly and travel safely.
Tools and materials you'll need
Get everything on the table below together before you start. Stopping mid-lift to find a tool is how glass gets damaged or people get hurt.
| Category | Item | Notes |
|---|---|---|
| Hand tools | Phillips and flat-head screwdrivers | For roller adjustment screws and stop strip removal |
| Hand tools | Pry bar (small, padded) | To gently pop interior stop strips without splitting them |
| Hand tools | Utility knife | To score any painted-over stop strips or caulk lines |
| Hand tools | Tape measure | To confirm door width/height before planning transport |
| Lifting gear | Suction cup handles (2–4) | Hand cups rated 70–125 lb each; use pairs rated to exceed panel weight combined |
| Lifting gear | Panel dolly or furniture dolly | For moving the lifted panel horizontally without carrying full weight |
| Lifting gear | Rubber-wheeled appliance dolly | For moving the door upright across floors and loading into a vehicle |
| Protective materials | Moving blankets (2–4) | Pad both faces of the glass panel during transport and storage |
| Protective materials | Foam pipe insulation or edge guard | Protect glass edges and frame corners from chipping |
| Protective materials | Painter's tape | Tape an X across the glass face to reduce shard scatter if breakage occurs |
| Securement | 2-inch ratchet straps with published WLL | For securing in a truck; use straps with edge protectors where they contact the frame |
| PPE | Cut-resistant gloves (ANSI A4 or higher) | Tempered glass breaks into chunks; gloves protect against unexpected edge contact |
| PPE | Safety glasses | Mandatory when scoring, prying, or working near glass edges |
| PPE | Steel-toed boots | A dropped panel corner causes serious foot injuries |
Safety checklist before anything moves
I want to be direct about the risks here without being dramatic. A 200 lb panel of tempered glass does not forgive mistakes. Tempered glass, which is required by federal safety glazing standards (CPSC 16 CFR Part 1201 and IBC Chapter 24) for all door glazing, shatters into thousands of small chunks when it breaks. The 2024 IBC (Chapter 24) treats glazing in swinging and sliding doors as hazardous locations requiring safety glazing (tempered or laminated) and manufacturer/standard marking on each pane 2024 International Building Code — Chapter 24: Glass and Glazing. That's safer than large shards, but it still causes cuts and the cleanup is miserable. Take the checklist below seriously.
- PPE on before you touch the door: cut-resistant gloves, safety glasses, and steel-toed boots for everyone involved.
- Know the weight before you start. Look up your door model online or check the frame label. Many 60×80 vinyl sliding doors weigh around 130–165 lb; larger units (72×96 or 96×80) commonly reach 208–225 lb or more.
- Never attempt a full-size sliding glass panel alone. Two people is the minimum for a standard panel. For anything over 180 lb or taller than 80 inches, three people or a mechanical lifter is strongly recommended.
- Test suction cups on a clean, dry section of glass before lifting. Press firmly, twist to lock, and tug to confirm hold. Do not use suction cups on textured, frosted, or wet glass surfaces.
- Clear the path completely before you lift. Remove rugs, furniture, pets, and any person not actively helping. Measure the path width to confirm the door fits through doorways and around corners.
- Never rest the panel flat on a hard floor unsupported. Lean it vertically against a padded wall or lay it on two sawhorses with moving blankets if horizontal storage is unavoidable.
- Check the weather. Wind is a serious hazard when carrying a large glass panel. Do not attempt this on a day with gusts over 15 mph.
- If the door has a failed insulated glass seal (fogging between panes), the IGU is already compromised. Handle it with extra care and limit flex stress on the panel.
Estimating door weight and planning the lift
The single most useful thing you can do before lifting is find the actual weight of your door panel. Check the frame sticker, the manufacturer's website, or the original receipt. As a reference range: a Milgard 60×80 vinyl slider runs about 130 lb, a JELD-WEN 60×80 vinyl model is around 165 lb, and larger units like a Milgard 96×80 or 72×96 can reach 208–225 lb. Composite or aluminum-clad wood doors can push 240 lb or more at standard sizes.
OSHA does not set a single universal numeric maximum for manual lifting. What they and NIOSH both point to is the NIOSH Revised Lifting Equation, which accounts for load weight, grip quality, lift distance, and body posture. In practical terms: an awkward, large glass panel over about 100 lb should not be handled solo, and anything over 150 lb is a two-person minimum under good conditions. For very heavy or very large panels, rent a panel lifter (vacuum lifter systems are rated from several hundred pounds up to 2,800 lb depending on the model) or hire a glazier.
Plan where the door goes the moment it clears the frame. If you're storing it temporarily, identify a padded leaning spot within a few steps of the opening. If you're loading it into a vehicle, have the vehicle backed up and the loading area cleared before you start. The worst time to make these decisions is when you're already holding a 175 lb glass panel.
Assessing the door and site before you start
Spend five minutes on this inspection. It will save you from surprises mid-job.
- Door type: Is this a standard two-panel slider (one fixed, one moving), a three- or four-panel system, or a single hinged patio door? This guide covers the sliding panel removal. Fixed panels and full-frame removals are bigger jobs.
- Frame and track condition: Look for bent track sections, screws that have pulled out, or frames that have shifted out of square. A frame that's no longer plumb may cause the panel to bind or drop unexpectedly when you try to lift it.
- Stop strips: Most sliding panels are held in the frame by an interior vertical stop strip. Check whether yours is screwed in place or snapped. Screwed stops need to come out before the panel can tilt free.
- Roller adjustment screws: Find the access holes on the bottom edge or face of the bottom rail. You'll be turning these before removal to drop the rollers and give yourself clearance to lift the panel up and over the sill track.
- Obstructions inside and outside: Map the path from the door to your staging area. Check for steps, threshold height changes, and narrow passages.
- Vehicle access (if transporting): Measure the door panel height and width. Confirm your truck bed length, van interior height, or trailer capacity before you carry the door outside.
Step-by-step: lifting and removing a sliding glass patio door
This procedure covers the moving panel (the one that slides). The fixed panel is typically screwed or bracketed into the frame and requires additional steps to remove, focus on the sliding panel unless you're doing a full replacement.
- Put on your PPE. Gloves, glasses, and boots on before you open the door.
- Tape an X across both faces of the glass with painter's tape. This won't prevent breakage, but it reduces scatter if something goes wrong.
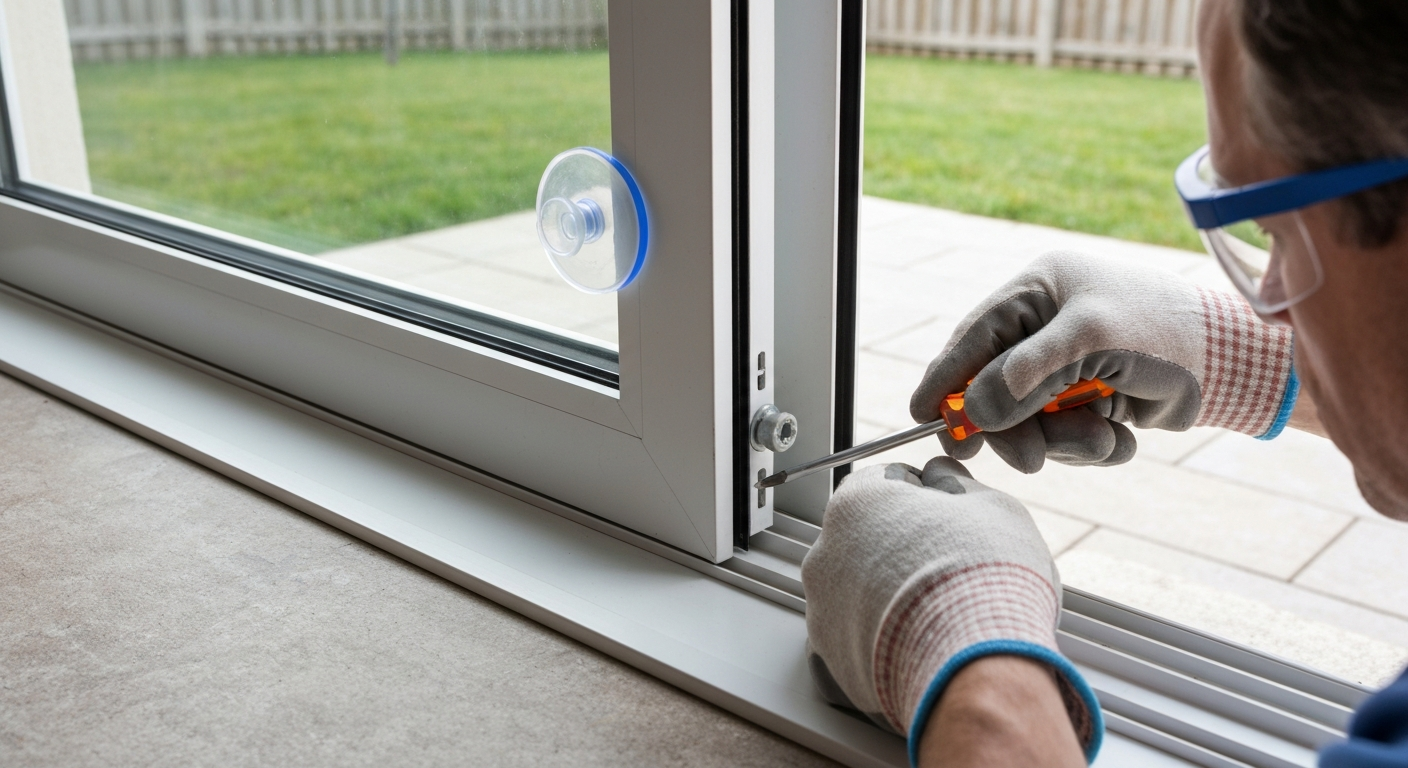
- Open the panel fully and locate the roller adjustment screws. These are typically Phillips screws accessed through holes in the bottom rail or bottom face of the door. Turn them counterclockwise to retract the rollers upward into the door frame—this lowers the panel slightly and gives you clearance to lift it over the sill track. Turn both screws an equal number of turns.
- Remove the interior stop strip. This is the vertical trim piece on the interior side of the door that keeps the panel captive in the frame. Most are either screwed in or snapped into a channel. Unscrew or gently pry it free with a padded pry bar. Set it aside without bending it—you'll reinstall it.
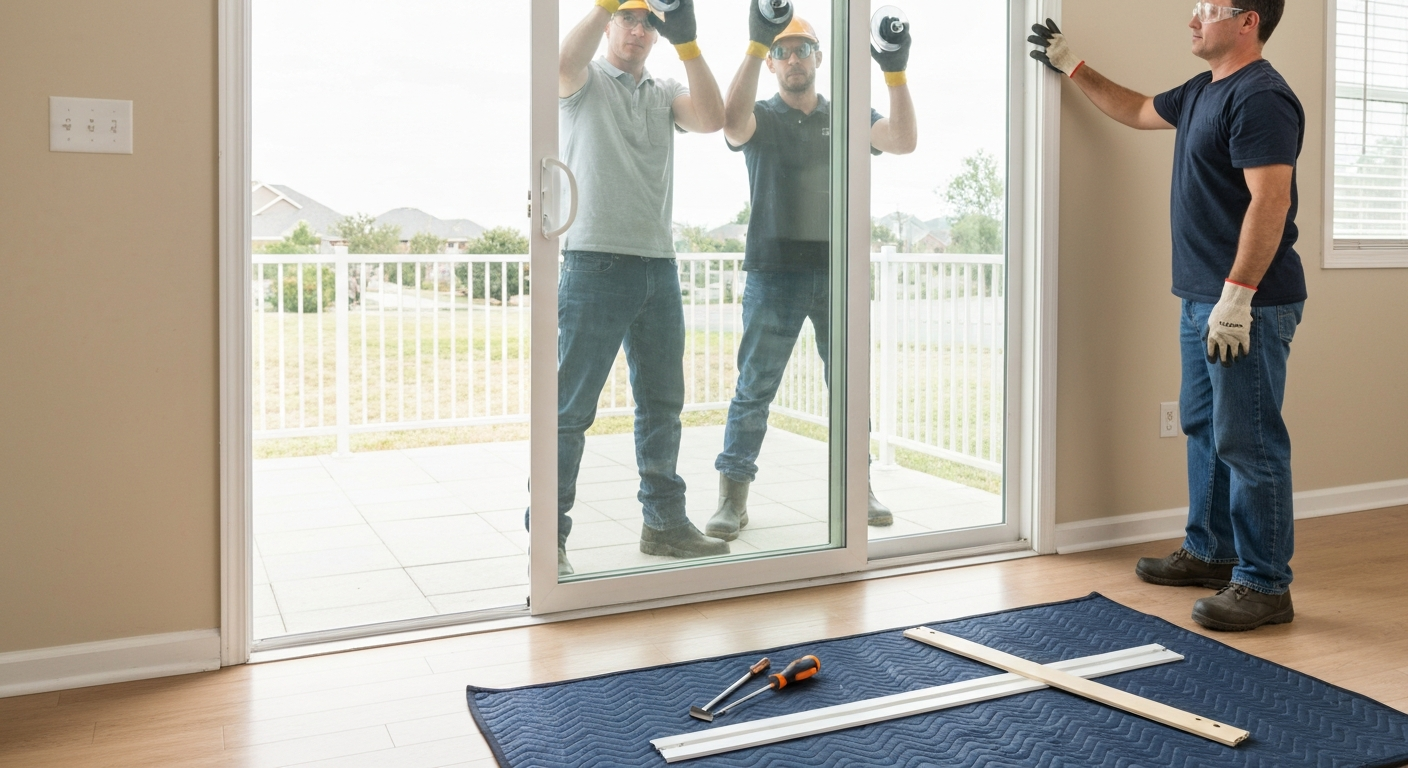
- Have your helper take position on the opposite side of the panel from you, both of you gripping at approximately waist height. If using suction cups, apply them now to clean, dry areas of the glass, test the hold, then grip both the suction cup handle and the frame.
- Tilt the top of the panel toward the interior of the home. The panel needs to angle inward far enough for the top rail to clear the upper track. This is typically only a few inches of tilt—do not wrench it hard. If it's resisting, check that the stop strip is fully removed and that no screws remain.
- Once the top rail clears the upper track, lift the bottom of the panel up and forward so the rollers rise above the sill track. The panel is now free. Maintain your grip and stay in control of the tilt angle.
- Walk the panel directly to your staging area. Move slowly and in sync with your helper. Call out each step: 'stepping over threshold,' 'turning left,' and so on. Set it down against a padded wall vertically, or onto padded sawhorses.
- Inspect the track and hardware now that the panel is out. This is the right time to clean the track, replace rollers, or check the sill condition before reinstalling.
Raising the door in place for roller adjustment
Not every roller job requires full removal. If your rollers are adjustable through access holes in the bottom rail and are simply worn down, you can raise the panel height by turning the adjustment screws clockwise (tightening them extends the rollers downward, lifting the door body). Open the door, find both adjustment holes, and turn each screw in quarter-turn increments. Check the gap at the top and bottom of the panel against the frame as you go, you want roughly even clearance all the way across. If one side is dragging, adjust only that side's screw until the door rides level and slides freely. This is the fix for most 'door drags at one end' complaints and takes about ten minutes with a screwdriver.
Step-by-step: lifting and removing a screen door
Screen doors are a much simpler job. A standard aluminum screen door weighs between 15 and 35 lb, and one person can usually handle it safely. The process is slightly different from a glass panel because screen door rollers work differently.
- Open the screen door to the middle of its travel so you have room to work from both sides.
- Locate the corner adjustment screws at the bottom corners of the screen frame. These are small Phillips screws that control the corner roller wheels. Turn them counterclockwise to retract the rollers inward, which gives you clearance to lift the frame above the bottom track.
- Grip the screen frame at the top corners. Lift upward firmly—you're seating the top rollers or the top rail into the upper track channel, which gives you extra height to work with.
- Once the top is engaged in the upper channel, swing the bottom of the screen outward (toward you, away from the home). The bottom will pivot free of the lower track.
- Lower the frame out of the upper track and set it aside. Lean it against a wall or lay it flat on a soft surface—screen frames dent and bend easily.
- To reinstall, reverse the process: angle the top into the upper track first, then swing the bottom in over the lower track, then extend the corner rollers by turning the adjustment screws clockwise until the door rides smoothly.
Transporting your patio door safely
Once the door is out of the frame, transporting it without damage is the next challenge. For step-by-step guidance on loading, securing, and transporting oversized panels, see how to move large patio doors. For detailed, step-by-step instructions on how to move a patio door, see how to move a patio door. For detailed, step-by-step guidance on how to transport a patio door safely, see the linked transport guide. The core rule is this: keep it upright. Transporting a patio door laying down is not recommended; panels should be carried and secured on edge to avoid bending stress, seal failure, and glass damage transport a patio door laying down. Large glass panels and insulated glass units (IGUs) should ride on edge, not flat. Laying an IGU flat puts bending stress across the entire pane and can cause spacer separation or seal failure in the insulated unit, even if the glass itself doesn't break. Industry best practice is to transport glass panels vertically on padded A-frame racks or supported upright against a padded interior wall in a van or truck bed.
Loading into a pickup truck
A standard pickup truck bed is workable for most 60×80 or 72×80 panels if you set up correctly. For step-by-step guidance on loading and securing a patio door in a pickup, see how to transport a patio door in a pickup truck. Stand the door upright in the bed, leaning against the cab. Pad the cab wall and the tailgate with moving blankets. Place foam pipe insulation or edge guard on every frame edge that contacts the truck bed floor or sides. Once the door is positioned, use two 2-inch ratchet straps to secure it, one near the top of the panel and one near the bottom. Under DOT cargo securement rules (49 CFR Part 393), the combined working load limit of your tie-downs needs to be at least half the weight of the cargo. For a 200 lb door, that means tiedowns with a combined WLL of at least 100 lb, any quality 2-inch ratchet strap easily exceeds this, with common straps rating 1,000–3,300 lb WLL each. See JJ Keller, cargo securement handbook (practical tie‑down guidance referencing WLL and DOT rules) for practical tie‑down guidance and DOT WLL requirements JJ Keller — cargo securement handbook (practical tie‑down guidance referencing WLL and DOT rules). What matters is that the straps are in good condition (no cuts, knots, or fraying), anchored to rated tie-down points in the bed, and that you use edge protectors wherever a strap contacts the glass or aluminum frame to prevent cutting into the material.
If the door is taller than the cab wall, extend it over the cab roof using padding, and use additional straps or a flag on the overhang. Drive at reduced speed and avoid abrupt braking. If you're moving a very large or particularly heavy door (96×80 and up), a cargo van with interior padding and A-frame support is a much better option than a pickup bed.
Reinstalling, testing, and adjusting after the lift
Reinstalling a sliding glass panel is the removal process in reverse, but take your time on the adjustments at the end. Once the panel is back in the frame and the stop strip is reinstalled, run through this sequence:
- Adjust the rollers so the door rides evenly. Extend both rollers by turning adjustment screws clockwise in equal increments until the bottom of the panel is parallel to the sill. Check with a gap gauge or just eyeball the top rail gap—it should be consistent across the full width.
- Test the slide. The door should glide with light hand pressure and stop smoothly. If it sticks at any point, look for debris in the track, a bent track section, or uneven roller height.
- Check the latch engagement. Close the door and test the latch handle. The latch bolt should engage the strike plate cleanly without lifting or forcing the handle. If it doesn't catch, adjust roller height to raise or lower the panel until the latch aligns.
- Test the lock. A lock that requires the door to be pushed or lifted to engage often indicates the panel is sitting too low. Raise the rollers slightly on the latch side.
- Inspect the weatherstripping. Make sure the pile weatherstripping or brush seal along the frame is contacting the panel consistently. Gaps at the corners or along the sides indicate either frame misalignment or worn weatherstripping that needs replacement.
- Reinstall and test the screen door last. Once the main panel is adjusted, reinstall the screen and verify it slides and latches independently.
Troubleshooting common problems after lifting and reinstalling
| Symptom | Likely cause | Fix |
|---|---|---|
| Door drags or scrapes the track | Rollers retracted too far or worn flat | Extend rollers via adjustment screws; replace rollers if worn |
| Door won't latch or lock without lifting | Panel sitting too low; latch misaligned with strike plate | Raise rollers on the latch side in small increments until latch engages cleanly |
| Visible gap or draft along the side jamb | Stop strip not fully seated, or panel sitting out of plumb | Check stop strip installation; adjust roller heights to plumb the panel |
| Door rocks or wobbles when sliding | One roller extended more than the other | Re-adjust rollers equally; check for bent track or debris under the low side |
| Bottom track is bent or cracked | Impact damage or debris compression | Replace the track section; clean and lubricate before reinstalling panel |
| Lock handle turns but latch doesn't throw | Worn lock mechanism, not an alignment issue | Rebuild or replace the lock cylinder and latch assembly |
| Condensation or fogging between glass panes | Failed IGU seal—pre-existing or caused by rough transport | IGU replacement required; this is not a roller or track issue |
When to call a professional instead
Most roller replacements, track cleanings, and standard panel removals are well within a capable homeowner's reach. But there are situations where calling a glazier or door installer is the right call, and recognizing them upfront saves you from a much more expensive mistake:
- The panel weighs more than 180 lb and you don't have a second person or any lifting equipment. A solo lift on heavy glass is genuinely dangerous.
- The frame is visibly out of square, racked, or the rough opening has structural damage. Removing the door in this condition can cause the opening to shift and trap or drop the panel.
- The IGU has failed and needs reglazing. Handling a compromised insulated unit requires specialized tools and a controlled environment.
- You're removing a large multi-panel system (three or four panels, stacking configurations, or heavy commercial-grade hardware rated for much higher weights). These systems often require specialized lifting equipment.
- The door is historic, custom-made, or has irreplaceable glass. The risk of damage during a DIY removal isn't worth the cost savings.
- You're uncomfortable at any point during the assessment. There is no shame in stopping and calling someone. The job gets more expensive if you drop the glass.
What to do next
If you lifted the door to access the rollers, the logical follow-up is a full roller replacement rather than trying to extend a set that's already worn flat, new roller carriages are inexpensive and the door will slide like new. If you leveled the door and are now noticing drafts along the edges, the weatherstripping probably needs attention too; that's a separate job but a quick one. And if you removed the door for transport or a full replacement, the reinstallation sequence above applies whether you're putting the original door back or fitting a new one. Take your time on the adjustment phase, getting the rollers, latch, and weatherstrip right at the end is what makes the door actually work well for the next several years.
FAQ
What are the main reasons you might need to lift, raise, remove, or transport a patio door?
Common reasons: adjust or replace rollers, level the door/frame, repair or replace damaged glass or frame, remove for weatherproofing/threshold work, transport the panel to storage or a workshop, or replace with a new unit. Lifting is required for roller access (raise to free rollers), full removal (tilt-and-lift out of the track), and safe transport.
What safety checks and personal protective equipment (PPE) should you use before attempting to lift a patio door?
Safety checklist: determine door weight and hardware rating; inspect glass for cracks or loose glazing; check roller/track condition; confirm team size (two+ people for most full‑size glass panels); gather rated suction cups or panel lifters, gloves, safety glasses, long sleeves, steel‑toe boots, and back support if needed. Use hand suction cups or vacuum lifters sized so the aggregate rated capacity exceeds panel weight. If in doubt, treat as a heavy lift and get help or pros.
How heavy are typical residential sliding patio doors and how does weight affect lifting plans?
Typical single sliding glass panels commonly range roughly 130–240 lb depending on size and material (e.g., many 60×80 to 72×96 panels fall in this range). Manufacturer or product pages list exact weights—always confirm model weight. Use NIOSH ergonomic guidance: if load or lift geometry is beyond safe single‑person limits, use team lifts, mechanical aids, or hire pros.
What basic tools and equipment should I have ready?
Tools table (essentials): screwdriver/hex key set (roller adjustment screws), pry bar and putty knife (trim/stop removal), utility knife (sealants/weatherstripping), suction cups or vacuum panel lifter (rated for panel weight), moving straps and edge protection, furniture dolly and A‑frame or padded vertical supports, ratchet straps with known WLL, soft blankets/padding, cordless drill, tape measure, level, replacement rollers/locks/weatherstripping. Have a helper and vehicle rated for the load.
Step‑by‑step: How do I raise a sliding glass door panel to access rollers or to level the frame?
1) Open the door to expose roller adjustment screws (usually at the bottom edge). 2) Retract or partially retract the screen if present and unlock the panel. 3) With two people, use rated suction cups or lift handles near center and sides. 4) Tilt the panel slightly toward you (top inward) and lift straight up until rollers clear track edge—lift evenly to avoid binding. 5) Support panel on blocking or have helpers hold while you adjust roller screws to raise/lower. 6) Lower panel straight down onto rollers and test operation. If binding occurs, lift and recheck alignment and track debris.
Step‑by‑step: How do I remove a sliding glass door panel completely?
1) Remove interior stops/trim if required and slide the operating panel fully to the middle or opposite side per manufacturer guidance. 2) Retract roller adjustment screws to lower or raise slightly as instructed (some models require lowering to tilt out). 3) With two or more people and suction cups, tilt the top inward and free the top edge from the upper track, then lift the panel up and out of the lower track—follow manufacturer tilt/lift points. 4) Carry panel vertically with edge protection and transport on a dolly/A‑frame. 5) Store upright on padded supports. Keep the glass supported and do not let it flex.
Next Article
How to Raise a Patio Door: Step-by-Step DIY Guide and Transport Tips
How to raise a patio door, step-by-step DIY: diagnose, adjust rollers, shim frame, safe lifting, repair vs pro