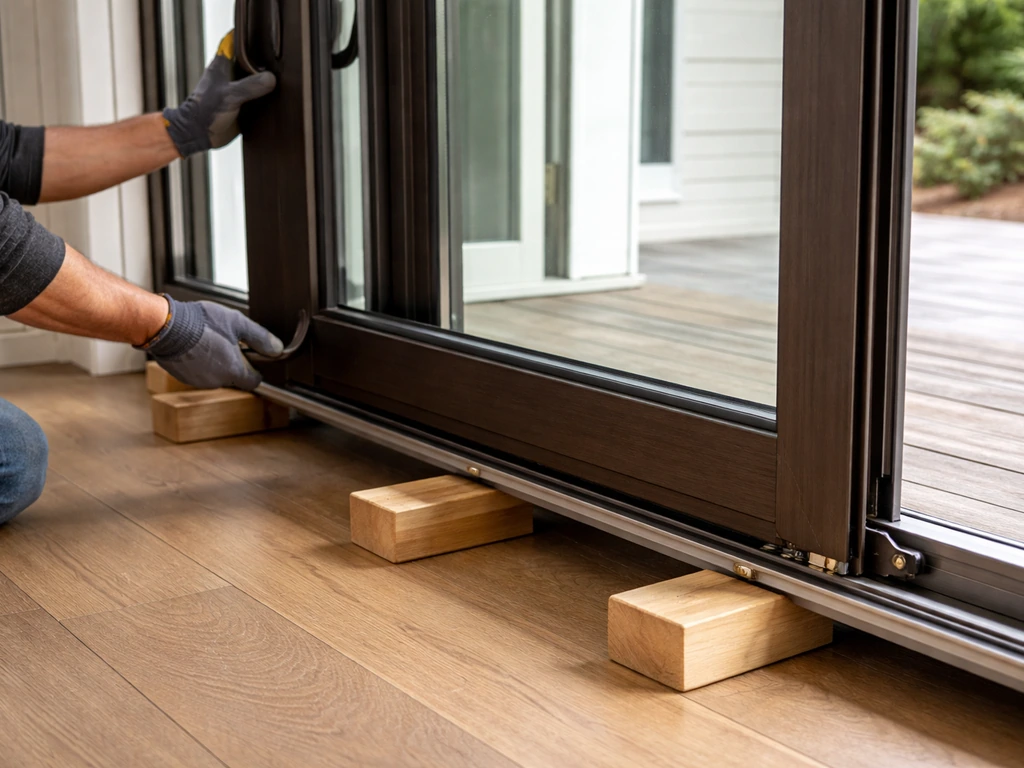
Raising a sliding patio door comes down to one thing: adjusting the roller height screws at the bottom of the panel. Turn them clockwise to raise the door, counterclockwise to lower it. For most sticky, dragging, or misaligned sliding doors, that quarter-turn adjustment is the entire fix, and it takes about 20 minutes with a single screwdriver. This guide walks you through that process for both sliding glass doors and screen or secondary doors, covers how to remove and replace rollers when adjustment alone won't cut it, explains shimming and frame leveling for bigger problems, and tells you honestly when to stop and call a pro.
How to Raise a Patio Door: Step-by-Step DIY Guide and Transport Tips

Jamie Archer
4 Aug 2026
What This Guide Covers and Who It's For
This guide is written for DIY-focused homeowners dealing with a single sliding glass door panel or a multi-panel patio door system (two-, three-, or four-panel configurations). It covers the full process: diagnosing why your door is low or dragging, adjusting rollers in place, removing the panel to replace worn rollers, shimming a sill that's out of level, realigning the lock and strike, resealing weatherstripping, and safely lifting or moving a heavy glass panel. If you're evaluating whether to hire someone instead, there's a decision guide at the end.
Stop Here First: Safety Warnings and Red Flags
Before you touch anything, run through these red flags. Some situations look like a simple door adjustment but are actually structural or glass-safety issues that need a professional.
- Cracked or crazed glass anywhere on the panel: do not attempt to move or adjust the door. Stressed glass can fail unexpectedly. Call a glazier or door specialist.
- The frame is visibly racked, bowed, or the rough opening looks out of square by more than 1/4 inch: this is a framing problem, not a door problem. Adjusting rollers won't fix it.
- The track is bent, deeply grooved, or creased: forcing the panel over a damaged track can make it worse and may derail the door mid-slide, which is a glass-breakage risk.
- The door has dropped more than 3/4 inch on one side and the frame feels loose or moves when you push on it: the frame may not be properly anchored to the rough opening.
- The door is a large triple- or quad-panel unit and you're working alone: panels on these systems are heavy enough to cause serious injury if they tip or slip during removal.
- Any rot, mold, or soft wood visible at the sill or header: this is a structural repair job before it's a door adjustment job.
Tools and PPE Checklist
Gather everything before you start. Running to the garage mid-job while a panel is partially lifted is how accidents happen.
- #3 Phillips screwdriver (manual, not power — power tools can strip roller adjustment screws and damage threads)
- Flat-head screwdriver or stiff putty knife (1.5–2 inch blade) for popping adjustment plugs and relieving panel weight off rollers
- Tape measure (standard 25-foot)
- 6-inch digital or analog calipers (for measuring roller wheel diameter before buying replacements)
- Torpedo level or 4-foot spirit level
- Suction cup handles — minimum two, rated for at least 120 lbs combined (essential for panel removal on heavier doors)
- Rubber mallet
- Non-marring pry bar or plastic trim tool
- Utility knife (for weatherstripping cuts)
- Safety glasses or safety goggles
- Cut-resistant gloves rated ANSI A4 or higher — glass edges are sharp even when the panel looks intact
- Closed-toe footwear with a hard toe cap
- Low-profile work gloves for fine screw work (over cut-resistant gloves when handling hardware only)
Materials and Replacement Parts Checklist
You may not need all of these, but knowing what's available before you start the diagnosis saves a trip to the hardware store.
- Replacement tandem roller assemblies: most residential sliding doors use 1-1/8 inch, 1-1/4 inch, or 1-1/2 inch diameter wheels; measure yours before buying — housing width and tab layout also vary by manufacturer
- Nylon wheel rollers (quieter, common on vinyl doors) or steel ball-bearing rollers (more durable, common on aluminum-frame and heavier doors)
- Plastic adjustment screw plugs (usually color-matched to the frame; often sold in packs of 10 by door hardware suppliers)
- Plastic or composite shims, non-compressible (cedar shims compress over time and are not ideal under sill plates — use composite or engineered shims for sill leveling)
- Non-shrinking sill grout or leveling compound (for larger gaps under the sill, per FMA/AAMA/WDMA 300-12 installation standards)
- Foam backer rod and low-expansion polyurethane sealant (for sealing after shimming)
- Replacement door weatherstripping: measure the kerf width and fin depth of your existing strip before buying; common profiles are Q-lon, bubble seal, and pile (brush) seal
- Strike plate for the lock (if the lock latch no longer aligns with the keeper after raising)
- Silicone-based track lubricant spray (not WD-40, which attracts dirt and gums up over time)
Photos and Diagrams to Take Before You Start
Taking reference photos before you disassemble anything is one of those habits that looks unnecessary until it saves you an hour of puzzling over how something goes back together. Here's exactly what to photograph and diagram for this job.
- Full exterior shot of the patio door from 10 feet away, showing the whole frame and both panels side by side — this gives you a baseline reference for the reveal gaps before adjustment.
- Close-up of each bottom corner of the sliding panel, showing the gap between the panel frame and the sill (measure and annotate the gap in millimeters on the photo if you can).
- Close-up of each adjustment plug location on the bottom rail of the panel — note whether plugs are present, missing, or damaged.
- Close-up of the track, both ends, showing any debris buildup, rust, bending, or scoring.
- The roller assembly from below (accessible once you tilt the panel out): photograph the wheel diameter, housing, and adjustment screw orientation.
- The lock mechanism and strike plate alignment before any adjustment — if the lock worked before and doesn't after, this photo shows you the original position.
- Annotated diagram (sketch or digital): mark the four corners of the panel, note the measured gap at each corner, and mark which rollers are being adjusted. Label clockwise as 'raise' and counterclockwise as 'lower' directly on the diagram for quick reference while working.
How to Diagnose the Problem
The goal here is to figure out exactly why the door is low before you start turning screws. A door that's dragging because of debris needs cleaning, not adjustment. A door that's dropped on one corner needs that corner's roller raised. Working through the inspection in order saves you from fixing the wrong thing.
Step 1: Check the Reveal Gaps
Close the door and look at the gap between the top of the sliding panel and the head frame, and the gap between the bottom of the panel and the sill. Measure with your tape measure at both the latch side and the hinge/handle side. A well-adjusted door should show an even reveal, typically 1/8 inch to 3/16 inch at the top across the full width, with no contact at the head frame. If one corner is noticeably lower (larger gap at the top on one side, smaller gap or contact on the other), that corner's roller is the problem.
Step 2: Check Roller Play and Condition
Crouch down and look at the bottom of the panel from the outside. Grip the bottom rail and try to lift the panel slightly, you should feel minimal vertical play if the rollers are engaged and adjusted correctly. Excessive play (more than 1/8 inch of free movement up and down before the panel weight engages the roller) suggests the adjustment screw is already at its lowest position and the roller may be worn or broken. Spin each wheel by hand if you can access it; a smooth spin with no wobble means the wheel is intact. Wobble or a flat spot means the roller needs replacing, not just adjusting.
Step 3: Inspect the Track
Slide the door fully open and look at both the bottom track (where the rollers ride) and the top track (which guides the panel). Run a gloved finger along the bottom track from end to end. Common findings: compacted debris (sand, pet hair, leaves), rust on steel tracks, and bent or creased sections. Debris almost always accompanies a door that's hard to slide and is often the actual cause of apparent height problems, the roller is sitting on a pile of debris and the adjustment screw is compensating for it. Clean the track before you adjust anything.
Step 4: Check the Sill for Level
Lay your torpedo level across the sill track from side to side. A sill that's out of level by more than 1/8 inch over its width means the door frame itself needs shimming or re-leveling, not just roller adjustment. Roller adjustment can compensate for small sill variations, but if you're trying to overcome a significantly unlevel sill by cranking one roller all the way up and the other all the way down, you've hit the limit of what adjustment alone can do. Leveling the frame is a more involved job, covered in its own guide on this site. For step-by-step instructions on re-shimming and leveling a door frame, see our guide on how to level patio doors.
Step 5: Check the Frame for Racking and Squareness
Measure the diagonal of the door frame opening from corner to corner in both directions. The two measurements should match within 1/8 inch. A difference greater than that indicates a racked frame, which is a structural issue beyond roller adjustment. Also push gently on the frame jambs, they should feel solid and immovable.
Troubleshooting Table: Common Causes and Exact Fixes
| Symptom | Most Likely Cause | Exact Fix |
|---|---|---|
| Door drags along bottom track, especially mid-slide | Debris buildup in track (dirt, sand, pet hair) | Vacuum track thoroughly, scrub with stiff brush and mild detergent, dry, then apply silicone spray. Test before adjusting rollers. |
| Door sits unevenly — one corner is lower than the other | One roller is lower than the other (sagging roller or uneven adjustment) | Remove adjustment plug from the low corner; turn roller screw clockwise in small increments (1/4 turn at a time) to raise that corner. Check reveal after each turn. |
| Door has dropped evenly on both sides — drags on sill across full width | Both rollers worn down or screws backed out to lowest position | Attempt full clockwise adjustment on both screws simultaneously. If no height gain is possible, rollers are worn or broken and must be replaced. |
| Door is hard to slide but sits at correct height | Roller wheels worn flat or cracked (nylon wheels especially) | Remove panel and inspect roller wheels directly. Replace roller assemblies — measure wheel diameter (common sizes: 1-1/8", 1-1/4", 1-1/2") before purchasing. |
| Door slides but scrapes against the head track at the top | Panel raised too high, or head track debris/deformation | Turn roller adjustment screws counterclockwise slightly to lower the panel. Clean head track. If the track is bent, it needs repair or replacement. |
| Frame is visibly out of square or sill is unlevel | Improper installation shimming or settling/movement of house framing | Re-shim the sill with non-compressible composite shims; use non-shrinking grout for large voids under sill. May require full frame re-installation. |
| Lock latch won't engage the strike plate after adjustment | Panel has been raised and latch is now above or below the strike | Loosen the strike plate screws and slide the strike up or down to align with the latch. Use #8 pan-head screws in structural framing for secure remount. |
| Door comes off track when opened | Bent track section, broken anti-lift block, or roller failure | Inspect track for bends, straighten minor bends with pliers or replace track section. Check anti-lift block is in place at top of panel. Replace broken rollers. |
How to Raise a Sliding Glass Door: Step by Step
Method 1: Adjusting Rollers In Place (No Panel Removal)
This works for most situations where the rollers are intact but just need height adjustment. It's the first thing to try.
- Clean the track first. Vacuum and wipe the entire bottom track before adjusting anything. Debris under the panel can make the door seem lower than it is.
- Locate the adjustment plugs. These are small plastic or rubber plugs in the bottom rail of the sliding panel, usually one at each end. On most doors you'll see them when you crouch down and look at the face of the bottom rail. Pop them out with a flat-head screwdriver.
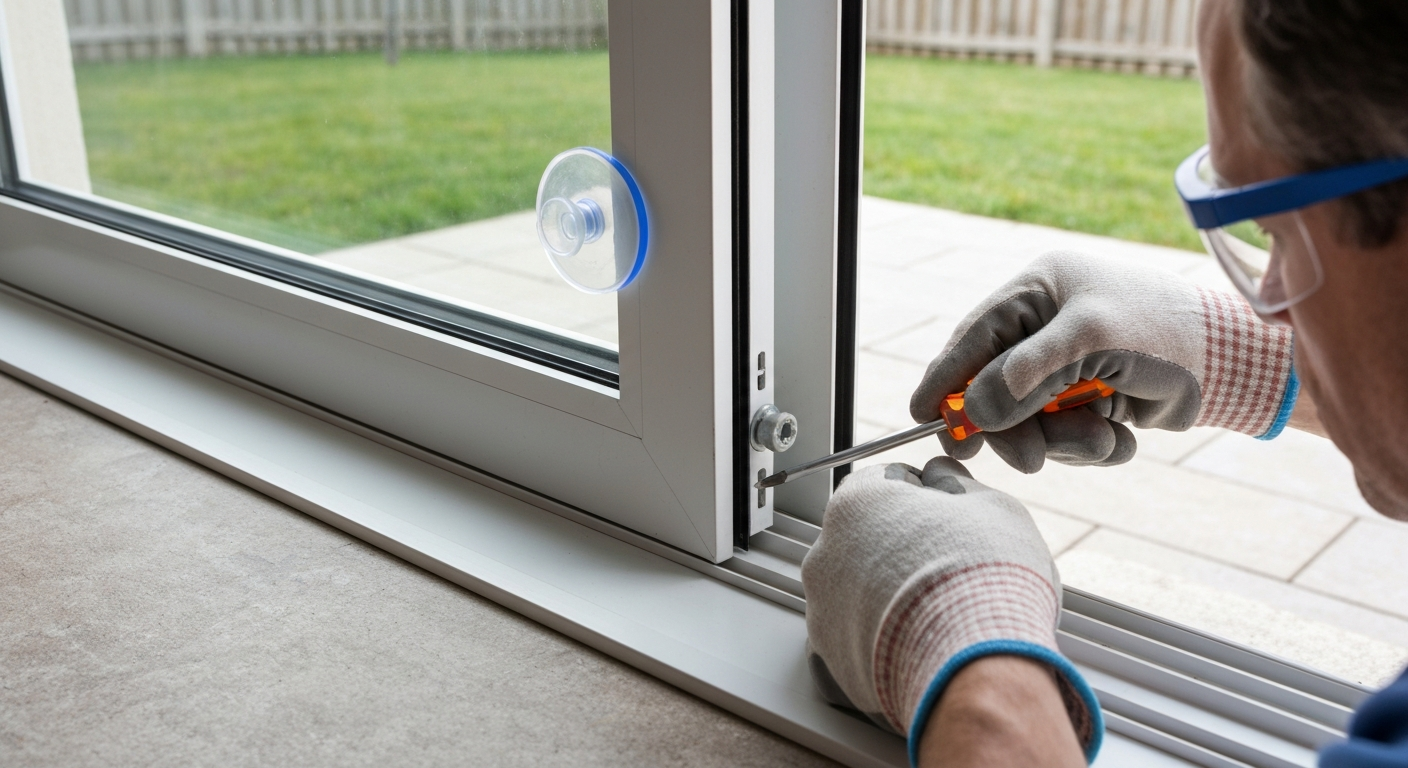
- Relieve the panel weight from the rollers. Wedge a stiff putty knife under the bottom corner of the panel near the roller you're adjusting and gently lever it up just enough to take weight off the wheel. Alternatively, use a suction cup on the panel face and pull slightly upward. This prevents you from trying to turn a screw while 100+ pounds of glass is pressing down on it.
- Insert your #3 Phillips screwdriver into the adjustment hole. You'll feel it seat in the roller adjustment screw. Use a manual screwdriver only — power drivers strip these screws easily.
- Turn clockwise to raise, counterclockwise to lower. Make no more than a quarter-turn at a time. Release the panel weight after each turn and check the reveal gap at the top of the panel.
- Adjust both ends together. Raise both rollers evenly if the whole door is low. If only one corner is low, adjust that corner only — but check the opposite corner's reveal so you don't create a new problem.
- Check the reveal at the head frame across the full width. You want a consistent, even gap. The door should glide without touching the head track.
- Reinstall the adjustment plugs. This keeps debris out of the roller mechanism.
- Test the lock. If the latch no longer engages cleanly after raising the panel, adjust the strike plate position.
Method 2: Removing the Panel to Replace Rollers
When rollers are worn, cracked, or broken, adjustment alone won't fix the problem. You need to remove the panel and swap the roller assemblies. This is a two-person job, do not attempt it solo on a standard residential sliding glass door. Large panels on triple or quad systems need three people or a mechanical vacuum lifter.
- Lower both rollers all the way. Turn both adjustment screws counterclockwise until they stop. This drops the panel as low as possible, giving maximum clearance to lift it out of the top track.
- Remove the interior trim stop or anti-lift block if present. On most doors there is a removable stop on one side of the frame (usually the interior jamb side) that prevents the panel from being lifted out. Unscrew and set it aside.
- Position your helper. One person stands inside, one outside. Both wear cut-resistant gloves and safety glasses. Agree on who leads the lift and how you'll communicate.
- Lift the panel up into the head track. Grip the panel at waist height — both hands on the frame, not the glass. Lift straight up so the bottom of the panel clears the sill track. You're compressing the panel up into the head cavity to give the bottom clearance to swing out.
- Angle the bottom of the panel outward and lower it. Once the bottom clears the sill, tilt the bottom toward you (toward the interior or exterior depending on your door design) and lower the panel to the ground. For heavy panels, use suction cup handles for a secure grip.
- Set the panel flat or upright. If you need to set it down, lean it against a wall at a slight angle on its long edge — never lay it flat on a hard surface unsupported, as this risks cracking the glass or bending the frame.
- Remove the old roller assemblies. On most doors, rollers are either pressure-fit into the bottom rail or held by one or two Phillips screws. Some Andersen and similar brands use pressure-fit rollers that pull straight out once the panel is removed.
- Measure the old roller wheel diameter and housing width with calipers before buying replacements. Common sizes are 1-1/8 inch, 1-1/4 inch, and 1-1/2 inch diameter. Housing tab layout and axle size also vary.
- Install the new rollers and set them to mid-range adjustment. Don't run them all the way up or down — mid-range gives you room to fine-tune later.
- Reinstall the panel by reversing the removal steps: tilt the top into the head track first, then lower the bottom onto the sill track. Check for smooth travel before reinstalling the trim stop.
- Adjust the roller height as described in Method 1 until the reveal is even and the door glides freely.
Raising a Screen Door or Secondary Sliding Panel
Screen doors and secondary panels on dual-track systems follow the same basic principle as the main glass panel, but they're lighter and usually easier to remove. The rollers are typically simpler wheels in a plastic housing, and the adjustment screws (if present) work the same way: clockwise to raise, counterclockwise to lower. Many screen doors also have a lift-and-tilt removal method where you simply push up, angle the bottom out, and lift the panel free, no tools required. Replacement rollers for screen doors are widely available at hardware stores. The main difference is that the screen door runs in a separate, shallower track, usually on the exterior side. Clean this track separately and make sure the screen door rollers don't interfere with the glass panel's track.
Shimming and Leveling the Frame
If your diagnosis showed the sill is out of level or the frame has settled, roller adjustment is only a band-aid. The right fix is re-shimming the frame. Per FMA/AAMA/WDMA 300-12 installation standards, the sill must be level, fully supported across its entire width, and the shims used should be non-compressible. The North American fenestration performance and installation specification, AAMA/WDMA/CSA 101/I.S.2/A440 - North American Fenestration Standard/Specification (NAFS), is the primary consensus standard referenced by codes and manufacturers for performance, operability, and acceptable tolerances and should be used when determining acceptable installation/shim/leveling tolerances. Cedar shims are easy to find but compress over time, composite plastic shims or engineered shims are the better choice for long-term stability. For gaps larger than about 3/8 inch under the sill, use non-shrinking sill grout or leveling compound rather than stacking shims.
- Remove the door panel(s) as described above before shimming.
- Remove any existing sill trim and expose the underside of the sill plate where it contacts the rough sill.
- Lay your 4-foot level across the sill and identify the low spots. Mark them with a pencil.
- Slide composite shims under the sill at the low points. Tap gently with a rubber mallet until the level reads true across the full width. Check both along the sill and across it.
- For large voids, pack with non-shrinking grout and allow to cure before reinstalling the door.
- Drive fasteners through the sill into the structural framing at the specified locations — typically at each end and at any joiner points. Use the fastener size specified by the manufacturer (commonly 2-1/2 inch screws into structural framing).
- Seal around the perimeter with foam backer rod and low-expansion polyurethane sealant before reinstalling trim.
- Reinstall the panel and re-adjust rollers from scratch with the newly leveled frame.
Finish Steps: Lock Alignment, Weatherstripping, and Final Test
Realigning the Lock and Strike
Raising the door panel almost always shifts the lock latch position relative to the strike plate. After final roller adjustment, close the door and try the lock. If the latch hits above or below the keeper opening, loosen the two screws on the strike plate and slide it vertically to align with the latch. Use #8 pan-head screws driven into the door frame's structural backing for a secure mount. If the door was raised significantly and the old screw holes are now in the wrong spot, fill them with a wooden toothpick and wood glue, let it dry, then drive the screws into the filled holes.
Replacing or Reseating Weatherstripping
If the door was dragging because it had dropped, the weatherstripping along the bottom or sides may be compressed or damaged. Run your hand along the perimeter seal with the door closed, you should feel consistent, even resistance from the weatherstrip on all sides. Cold air or light showing through gaps means the seal is compromised. For pile (brush) weatherstripping, pull the old strip out of its kerf channel and press new pile strip in. For Q-lon or bubble-type seals, measure the kerf width carefully before buying, these come in multiple profiles and the wrong one won't seat properly. Cut the new strip about 1/4 inch longer than the channel and compress it in at the ends for a tight fit.
Final Operational Test
- Slide the door open and closed 10 times from both sides. It should move smoothly with light pressure throughout the full travel.
- Check that the panel doesn't lift off the bottom track at any point during travel (if it does, the anti-lift block is missing or the panel is raised too high).
- Verify the lock latches cleanly and fully on the first push — no lifting or forcing required.
- Check the top reveal is consistent from end to end.
- Apply silicone-based lubricant to the bottom track and the top guide channel. Wipe off any excess. Do not use oil-based lubricants — they attract dirt and degrade rubber seals over time.
Safe Lifting and Moving a Patio Door Panel
Once you're removing a full glass panel, you're dealing with a heavy, fragile, and awkward load. For step-by-step instructions on raising and handling a patio door panel, see our guide on how to lift a patio door. The NIOSH Revised Lifting Equation uses a Load Constant of 51 lbs as the baseline for an ideal lift, but a residential sliding glass door panel can easily weigh 100 to 200 lbs depending on the glass type and size. If the panel weight divided by the number of people lifting it exceeds what each person can safely handle given the lift geometry (distance from body, height, twisting), you need more people or a mechanical aid. Using suction cup lifters isn't optional on heavy panels, it's the only way to get a reliable grip on a smooth glass surface.
- Always use at least two people for standard residential single panels. Three people or a vacuum lifter for large panels on triple/quad systems.
- Use suction cup handles rated for the panel weight — don't share one pair between both sides of the panel.
- Lift with your legs, keep the panel close to your body, and communicate every move with your partner before it happens.
- Never stand in the fall zone of a suspended glass panel. If it tips, step away — do not try to catch it.
- Clear the path completely before moving the panel. A 3-foot-wide door panel needs a 4-foot clear path.
- If moving the panel any distance, use an A-frame cart or lean it securely against a padded wall at all times. Never lay a glass panel flat on a hard surface without full, continuous support underneath.
If you're moving the door further, transporting it for replacement or repair, the same principles apply. Keep it upright on an A-frame or stillage, secure it with straps, and pad the edges. Tru‑Vue recommends shipping and storing glazed products upright on A‑frame crates and securing them to the frame blank" rel="noopener noreferrer">Tru‑Vue recommends shipping and storing glazed products upright on A‑frame crates and securing them to the frame.. Glass industry guidance (GANA) is consistent on this point: upright transport in a proper rack is the only recommended method for intact glazed panels. Related guides on this site cover the specifics of moving large patio doors, transport in a pickup truck, and whether you can transport a patio door laying down. See the guide on how to transport a patio door in a pickup truck for step-by-step instructions and packing tips. See our guide on how to move large patio doors for step-by-step transport and handling advice. See the guide on can you transport a patio door laying down for detailed risks and recommended practices when moving glazed panels. For step-by-step instructions on transporting and handling a full panel, see our guide on how to move a patio door. For step-by-step instructions, see our guide on how to transport a patio door.
DIY vs. Call a Pro: How to Decide
Most single-panel roller adjustments are genuinely DIY-friendly, 20 minutes, one screwdriver. Roller replacement takes about an hour with a helper and is still well within reach for a capable homeowner. But some situations are worth hiring out, either for safety or because the scope of the problem has expanded beyond what a homeowner can realistically tackle.
| Situation | DIY or Pro? | Why |
|---|---|---|
| Roller adjustment (in-place, panel stays in frame) | DIY | 20–30 minutes, one screwdriver, no panel removal needed |
| Track cleaning and lubrication | DIY | No tools beyond a brush and vacuum; 15 minutes |
| Roller replacement on a standard single panel | DIY with helper | 1–2 hours, two people, moderate difficulty — panel must be removed |
| Roller replacement on triple or quad-panel system | Pro or experienced DIYer with 3+ helpers | Very heavy panels, tight tolerances, high consequence if dropped |
| Strike plate and lock realignment after roller adjustment | DIY | 15 minutes, basic tools, low risk |
| Sill shimming and re-leveling (minor) | Confident DIYer | 2–4 hours, requires precision measurement and patience |
| Full frame re-installation due to racked or rotted opening | Pro | Structural work, may require permits depending on jurisdiction |
| Bent or creased track replacement | Pro preferred | Track replacement requires specialized tools and affects the whole system |
| Cracked or broken glass panel | Pro (glazier) | Glass handling is a specialized skill; wrong moves can be dangerous |
| Door has dropped significantly and the cause is unclear | Pro for diagnosis | Could be roller failure, structural settling, or framing movement |
What a Pro Fix Typically Costs and How Long It Takes
A service call for roller adjustment typically runs $75–$150 including a basic track cleaning. Roller replacement by a door service company usually falls in the $150–$350 range for a standard single panel, parts included. Full track replacement can run $300–$600 or more depending on the door size and track material. Frame re-installation is a larger job, budget $800 and up, and check whether a permit is required in your area. The DIY cost for roller replacement is usually under $30 in parts, making it genuinely worth attempting if you're comfortable with the panel removal process.
FAQ
What is the quickest way to diagnose why my patio door needs raising?
Inspect both the door operation and reveal (gap) before doing anything: 1) Try to slide the door — note sticking, grinding, or catching locations. 2) With the door closed, look at the vertical reveal (gap between operable and fixed frame) top and bottom and at the head — an uneven gap indicates sag or tilt. 3) Check the sill and track for debris, dents, or corrosion. 4) Look for visible broken, missing or seized rollers, and for swollen or warped wood at the frame. 5) Test the lock/handle alignment — if latch misses strike the sash is low/high. 6) Measure panel weight or estimate size (you’ll need this when planning removal). Safety note: don’t try to force an off‑track or heavy panel by yourself — use suction cups and at least one helper for most panels.
What tools and safety gear do I need to raise or adjust a sliding patio door?
Tools: suction cup glass lifter(s), flat putty knife or small pry bar, #2 and #3 Phillips screwdrivers, 7/16" or 11mm wrench/socket (common roller pins), adjustable wrench, shim pack (plastic/non‑shrinking shims), torque screwdriver for gently seating fasteners, nylon/plastic shims, level (24" minimum), masking tape, marker, shop vacuum for track cleaning, replacement rollers (measure before buying). Safety gear: safety glasses, cut‑resistant gloves, steel‑toe or protective footwear, kneepads. Lifting aids: A‑frame cart or vacuum lifter for large/heavy panels. Follow NIOSH lifting guidance — if the Revised NIOSH Lifting Equation gives a lifting index >1, use mechanical aids or more people.
How do I raise a patio door in place (adjust rollers without removing the panel)?
1) Clean the track and remove debris so you can see roller housings. 2) Open the door slightly to expose the roller adjustment plug(s) in the bottom edge; remove plastic plugs. 3) Take the panel weight off rollers using a putty knife under the bottom edge while you gently lift, or use suction cups to support the sash. 4) Use the correct screwdriver (#3 Phillips for many manufacturers) and turn the bottom adjustment screw clockwise to raise, counterclockwise to lower. Make one small quarter‑turn, then release weight and check reveal and operation. 5) Repeat small turns and test until reveals are even and lock aligns. 6) Reinstall adjustment plugs and lubricate track lightly if needed. Safety: do not use power tools to turn adjustment screws (risk of stripping). If roller screws won’t move or the roller is broken, remove the panel to replace rollers.
How do I remove the sliding panel safely to adjust or replace rollers?
1) Read your manufacturer’s panel removal procedure if available. 2) Put on PPE and position two or more helpers or a vacuum lifter. 3) Unlock and open the door fully. 4) Lift the sash up into the head cavity (use suction cups if heavy), tilt the bottom out and lower onto an A‑frame or pad — some designs require tilting the top first into the head and sliding out sideways. 5) For heavy IGUs use at least two people; if RNLE indicates task is unsafe, use mechanical aids. 6) Once removed, lay panel on a soft, flat padded surface or upright on an A‑frame stillage. 7) Replace rollers or access adjustment screws per component layout. Reinstall in reverse: set top into head cavity then lower onto sill supports and test reveals and lock alignment.
What exact adjustment actions do manufacturers recommend for roller screws?
Most manufacturers (Milgard, Andersen, Pella) advise: remove bottom plastic adjustment plug(s); support/lift panel weight off rollers (putty knife or suction cups); use the specified screwdriver (often #3 Phillips) and turn adjustment screw clockwise to raise, counterclockwise to lower; make only small incremental turns and re‑check operation and reveal after each turn; do not use power tools; reinstall plugs when done. If the screw won’t move or the roller is damaged, replace the roller assembly.
How do I shim and level the door frame (when the frame — not the sash — needs raising)?
1) Remove interior trim around the door to expose jamb fasteners. 2) Check with a 24" level for plumb on jambs and level across the header and sill. 3) Identify locations needing load transfer: strikes and hinges or roller carrier locations. 4) Loosen the exterior or jamb screws that allow micro‑adjustment. Insert non‑shrinking plastic shims at fastening points or under the sill per manufacturer/AAMA guidance. 5) Tighten fasteners while holding shims in place; re‑check plumb and level. 6) Where continuous sill support is needed, use engineered grout or continuous shim if specified. 7) Refasten perimeter screws at manufacturer‑specified intervals and lengths (refer to AAMA/WDMA installation tolerances). Finish by reinstalling trim and testing sash operation and lock alignment. Safety: don’t overdrive fasteners into thin jambs; follow manufacturer screw length and locations.
Next Article
How to Move Large Patio Doors Safely and Adjust Track Issues
Step-by-step guide to safely move large patio sliding doors, fix stuck tracks, adjust rollers, and re-level for a tight