Installing a patio door in an exterior wall is a full weekend project at minimum, and for most homeowners it runs two to three days once you factor in framing, flashing, and trim. You will be cutting a structural opening, building or enlarging a header to carry the load above, setting a heavy door unit (sliding glass doors often weigh 150 to 300 lbs), and waterproofing everything to code. Done right, the result is a properly flashed, plumb, weather-tight opening that will last decades. Done wrong, you get a leaking, racking door that is miserable to operate and expensive to fix. This guide walks you through every stage, from the first measurement to the final bead of caulk, including the harder cases: converting an existing window to a door opening and working through a brick or masonry wall. For step-by-step instructions and checklists specific to how to install patio doors, see this detailed guide (ID: 0f050f5f-2022-4aca-a1da-5fdf2b1bf2ee).
How to Install Patio Doors in a Wall: DIY Step-by-Step Guide

Is this project right for you?
This guide applies to homeowners installing a sliding glass door or French/double patio door in a standard wood-framed exterior wall, or in a brick veneer wall over a wood frame. If you are comfortable with basic framing, can work safely from a ladder, and are not intimidated by cutting through drywall and sheathing, you can tackle most of this yourself. The structural pieces, specifically sizing and installing the header over a load-bearing opening, are where I strongly recommend involving either a structural engineer or a licensed contractor for anything beyond what the IRC prescriptive tables clearly allow. If you are converting an existing window to a door, the framing work is more intensive but still DIY-viable for a prepared homeowner. A pure brick or concrete block wall (not a wood-framed wall with brick veneer) is a professional job; this guide covers brick veneer over wood framing, not solid masonry construction.
Budget roughly $800 to $2,500 for a mid-grade sliding patio door unit, and $1,200 to $4,000 for a French door unit, before labor or framing materials. Total project cost including materials (framing lumber, flashing, insulation, trim, fasteners) typically lands between $1,500 and $6,500 for DIY, depending heavily on door size, wall type, and whether a window is being removed. Professional installation adds $500 to $1,500 in labor on top of materials. Time-wise, plan for two full days for a straight replacement in an existing rough opening, and three to four days when you are opening up a new or enlarged rough opening.
Tools and materials checklist
Pull everything together before demolition starts. Running to the hardware store mid-project with a gaping hole in your wall is not a good time.
- Circular saw with framing blade and masonry blade (for brick veneer cuts)
- Reciprocating saw with wood/nail and masonry blades
- Angle grinder with diamond cutting wheel (for brick and mortar joints)
- Drill/driver and impact driver
- Level (4-foot minimum), torpedo level, and plumb bob or laser level
- Tape measure, speed square, and chalk line
- Pry bar and flat bar
- Hammer and nail gun (framing nailer helpful but not required)
- Caulking gun
- Utility knife and straight edge
- Safety glasses, work gloves, dust mask/respirator (N95 minimum for masonry cutting), hearing protection
- Temporary support wall materials: 2x4 studs, adjustable post shores, or Acrow props
- Framing lumber: 2x4 or 2x6 king studs, jack studs, cripple studs, sill plate stock (match existing wall dimension)
- Header material: doubled 2x10 or 2x12 dimensional lumber, or LVL beam per engineer/IRC span tables
- 1/2-inch plywood or OSB for header sandwich filler
- Structural connector hardware (Simpson Strong-Tie joist hangers, post caps, or header hangers as applicable)
- Structural screws and 16d framing nails
- Patio door unit (confirm rough-opening dimensions match before ordering)
- Self-adhered flashing tape (Grace Vycor Plus, Henry FortiFlash, or equivalent) — minimum 6-inch width
- Pre-formed or field-fabricated sill pan (rigid PVC or self-adhered membrane)
- Backer rod and exterior-grade polyurethane sealant (Sika or equivalent)
- House wrap or WRB tape for sheathing repairs
- Low-expanding spray foam (window and door formula)
- Exterior trim (brick mold or PVC trim board)
- Interior casing and jamb extension material
- Shims (cedar or composite — avoid wood that will compress or rot)
- 3-inch exterior screws and appropriate concrete/masonry anchors if needed (3/16-inch Tapcon with 1.25-inch minimum embedment for masonry)
- For brick veneer walls: steel angle lintel (sized to span), through-wall flashing, weep inserts or open head joints
- Fiberglass batt or spray foam for cavity insulation around frame
Permits, codes, and safety before you touch a wall
Almost every municipality requires a building permit when you cut a new or enlarged structural opening in an exterior wall. This is not optional or a technicality: it protects you financially (unpermitted structural work can void homeowner's insurance and complicate a future sale), and an inspector will catch errors before they become buried problems. Pull the permit before demo. In most jurisdictions you submit a simple application describing the work, the door size, and your header plan. For non-prescriptive headers or load-bearing modifications, you may need a stamped engineering drawing.
Before you cut anything, call 811 (in the U.S.) to have underground utilities marked. More critically, open the wall cavity or hire an electrician to confirm there are no electrical circuits, plumbing lines, or HVAC ducts running through the section of wall you are removing. Electrical wires inside exterior walls are more common than people expect, particularly near kitchen or laundry adjacencies. Shut off the circuit breaker for any circuit you cannot definitively trace and confirm is clear. Never cut into a wall assuming it is clear.
For structural safety: any wall that supports ceiling joists, roof rafters, or a floor above is load-bearing, and you must install temporary support before removing any studs. Use adjustable post shores or a built temporary stud wall parallel to and roughly 2 feet from the exterior wall, positioned to carry the load while the header goes in. Never remove studs in a load-bearing wall without temporary support in place first. If you are unsure whether a wall is load-bearing, treat it as if it is until you confirm otherwise with a structural engineer or by thoroughly tracing the framing above.
Choosing the right door: sliding glass vs. French patio doors
The two most common patio door types each have real trade-offs. Sliding glass doors move panels horizontally along a track and are the better choice for tight spaces where a swinging door would be awkward. They tend to be more affordable, easier for a DIYer to handle during installation (panels can be set into the frame one at a time), and take up no floor space when open. Their weak spots: the bottom track collects debris and rollers wear out over time, and they typically provide less of a clear opening than their frame width suggests because one panel is always stationary.
French patio doors (also called hinged or swinging patio doors) open outward or inward on hinges and provide a wider unobstructed opening when both panels are open. They look more traditional, tend to seal better when properly adjusted, and are often the right choice when the opening connects to a deck where you want maximum clearance. The downside is that they need clearance to swing, which limits furniture placement near the opening, and a two-panel active/passive set is heavier and harder to handle during installation.
| Feature | Sliding Glass Door | French/Hinged Patio Door |
|---|---|---|
| Typical rough opening width | 72" to 96" | 60" to 72" (per pair) |
| Floor space required when open | None (panels stack) | 3 to 4 ft swing arc |
| Install difficulty for DIY | Moderate (panels removable) | Moderate-high (heavy, hinge alignment) |
| Track/roller maintenance | Yes, periodic | Minimal (hinges and weatherstrip) |
| Energy performance | Good with quality seal | Excellent with multi-point lock compression |
| Typical mid-grade unit cost | $800 to $2,500 | $1,200 to $4,000 |
| Best application | Tight patios, limited swing space | Decks, wide openings, traditional style |
On sizing: standard patio door widths run 60, 72, and 96 inches (5, 6, and 8 feet) with a standard height of 80 inches. Non-standard sizes can be ordered but add cost and lead time. Your rough opening needs to be approximately 1/2 inch wider and 1/2 inch taller than the door unit's listed frame dimensions (some manufacturers specify 3/4 inch; always follow the specific product's installation manual, which may reference AAMA/WDMA/CSA 101/I.S.2/A440 performance classes and tolerances).
Assessing your wall before demo
Walk around both sides of the wall before you cut. On the exterior, look for: proximity to a corner (corners are often structural), intersection with an interior partition wall at a 90-degree angle (a strong indicator of a load-bearing condition), and whether the wall runs perpendicular to the floor joists above (run a joist finder or check the attic/crawl space). On the interior, check for ceiling joists or roof rafters resting directly on the top plate of the wall. If any of these apply, the wall is load-bearing.
Identify your wall construction type. Standard wood-frame exterior walls in U.S. homes built after about 1940 are either 2x4 or 2x6 stud construction with exterior sheathing and a cladding material. Brick veneer over wood frame is common in many regions; the brick is non-structural cladding attached to the frame with metal ties, and the actual structural wall behind it is still wood-framed. True solid brick or concrete block construction requires professional assessment and is outside the scope of a straightforward DIY project. This article covers wood frame and brick-veneer-over-wood-frame construction.
Measuring and planning the rough opening
Start with your door unit's listed frame dimensions from the manufacturer. The rough opening (RO) is typically the door frame width plus 1/2 inch to 3/4 inch, and the frame height plus 1/2 inch to 3/4 inch. Add those tolerances precisely per your specific product manual. Do not guess. A rough opening that is too tight forces you to shim excessively; one that is too large makes plumbing and shimming difficult and can compromise the header bearing.
The finished sill height from the floor or deck surface is a critical measurement that many DIYers overlook. For a patio door leading to an outdoor deck, the sill ideally sits 1/2 inch above the deck surface to prevent water intrusion while allowing a comfortable threshold. Check local code for the minimum sill height above grade for ground-level installations; most jurisdictions require at least 4 to 6 inches above finished exterior grade. Mark the RO dimensions on the wall with chalk lines, double-check the layout with a 3-4-5 triangle to confirm squareness, and then check the diagonal measurements: both diagonals must be equal within 1/8 inch before you frame the opening.
On the rough opening framing itself: the RO width is spanned by a header bearing on jack studs (also called trimmer studs) on each side, with full-height king studs beside them. The header sits at the top of the RO, supported by the jack studs. Cripple studs fill the space between the header and the top plate above. The bottom of the opening gets a pressure-treated rough sill (2x framing) since it will be in contact with moisture-prone zones.
Converting a window to a patio door opening
This is the most common starting point for homeowners adding a patio door to an existing wall. For step-by-step instructions on installing a patio door where a window was, see the dedicated guide. You are not just swapping one unit for another: you are enlarging an opening that was designed for a window, which means extending the rough opening downward to the floor and most likely widening it as well. The existing window header may or may not be adequate for a wider door span, and the bottom portion of the wall (the cripple studs below the window) must be removed entirely to bring the floor plate into play.
Setting up temporary support
Before any framing is removed from a load-bearing wall, build a temporary support wall on the interior side. Use doubled 2x4 plates (top and bottom) with studs at 16 inches on center, positioned about 18 to 24 inches from the exterior wall. Wedge the top plate snugly against the ceiling joists and use adjustable post shores or Acrow props if you need to go over a finished floor without damage. The temporary wall carries the ceiling/roof load while you work below.
Demo sequence
- Remove the existing window: interior trim first, then exterior trim, cut any fasteners or nails through the flange, and lift the unit out.
- Mark the new RO on the interior wall surface using your planned dimensions.
- Cut the drywall back to the nearest stud outside your king stud locations on each side.
- Remove the interior sheathing/drywall to expose the framing.
- Cut and remove the existing cripple studs below the window rough sill.
- Remove the rough window sill and its supporting cripple studs.
- If widening the opening, cut the existing jack and king studs as needed, but leave the existing header in place temporarily if the wall is load-bearing.
- Once temporary support is confirmed solid, remove the old header and install the new, properly sized header.
Header sizing for a patio door opening
The header carries all the load above the opening to the king and jack studs on either side. IRC 2024 Table R602.7 provides prescriptive header sizes for common spans and loading conditions. For a standard 6-foot (72-inch) rough opening in a single-story home with a roof above, a doubled 2x10 or doubled 2x12 (with 1/2-inch OSB filler to match wall thickness) typically meets prescriptive requirements, but the actual table selection depends on your building width, snow load zone, and whether it is a one- or two-story home. For 8-foot or wider openings, or for any situation where the prescriptive tables do not clearly apply, use an LVL or engineered beam sized by the manufacturer's span tables or a structural engineer. Headers bear on jack studs (the IRC specifies the required number per table), which in turn rest on the bottom plate. Make sure all bearing points are solid and plumb. Use Simpson Strong-Tie connectors where specified by your header hardware or engineer to tie the assembly together properly.
Re-framing the rough opening
- Install new king studs at the correct RO width positions, full-height from bottom plate to top plate, and nail them to the top and bottom plates.
- Cut and install jack studs inside the king studs, running from the bottom plate to the underside of the header; nail them to the king studs.
- Lift the header into position and rest it on the jack studs; nail through the king studs into each end of the header.
- Install cripple studs between the header and the top plate at 16 inches on center.
- The bottom of the opening sits at the floor; the existing bottom plate is either left in place (for a framed sill step) or cut out flush to allow a true threshold installation. A pressure-treated sill plate should be used at the base of the door opening.
- Cut the exterior sheathing (OSB or plywood) to the RO dimensions using a circular saw set to the sheathing depth only.
- Cut the exterior cladding (siding, stucco, or brick veneer) last, after all framing is confirmed solid.
Installing in a brick veneer wall: masonry cutting and lintel work
If your home has brick veneer over wood framing, cutting the brick is an additional layer of work on top of everything described above. The wood-frame portion of the installation follows the same sequence. The brick veneer is the part that requires special attention. For step-by-step instructions on cutting brick and installing a lintel when working through brick veneer, see how to install patio doors in a brick wall.
Cutting the brick opening
Mark the brick cut lines using a chalk line and level, extending the lines to align with the mortar joints wherever possible. Cutting through the middle of a brick face is harder and leaves a less finished edge than cutting at a joint. Use an angle grinder with a diamond wheel to score the mortar joints first, then cut through the brick face with a circular saw and masonry blade, or a cold chisel and hammer for the final removal. Work in sections from the top of the opening downward: remove bricks from the top of the new opening first. Wear a respirator rated for masonry dust (silica dust is a serious respiratory hazard), eye protection, and hearing protection. This is one of the dustier, louder parts of the whole project.
Installing the steel lintel
Before you remove the brick that will sit below the lintel position, you must have the lintel ready to go in. A steel angle lintel (also called a shelf angle) spans the new brick opening and carries the brick above it. Per Brick Industry Association Technical Note 28D, the lintel must bear a minimum of 4 inches on solid masonry on each side of the opening. Size the lintel angle for the span: for openings up to about 6 feet, a 3.5 x 3.5 x 5/16-inch or 4 x 3 x 5/16-inch steel angle is commonly used, but this must be confirmed for your specific span and load conditions. Longer spans need heavier angles or a structural engineer's input.
Set the lintel in a fresh mortar bed on each bearing end, ensuring it is level and has the full 4-inch bearing on each side. The lintel should be coated or galvanized to resist corrosion. Once the lintel is in place and the mortar has cured (24 to 48 hours minimum), you can safely remove the bricks below it to complete the opening. Do not rush this step: removing brick below an unsupported span can cause the brickwork above to crack or collapse.
Through-wall flashing and weep holes in brick veneer
Brick veneer has a drainage cavity between the brick and the wood sheathing behind it. When you cut a new opening, you break the through-wall flashing system that diverts water from this cavity back to the exterior. You must reinstall through-wall flashing at the sill of the new opening: install a piece of flashing that runs from the back of the wall sheathing, across the cavity, and out under the first course of brick above the door frame, sloping toward the exterior to direct water out. Install weep inserts or leave open head joints (every third or fourth vertical joint) at the course immediately above the lintel level to allow the cavity to drain. Skipping this step will result in moisture accumulating inside the wall cavity and eventually rotting the framing.
Anchoring the door frame in masonry
For anchoring the door frame to masonry or concrete surfaces, use 3/16-inch Tapcon concrete screws with a minimum embedment of 1.25 to 1.75 inches into the masonry (verify against your specific product approval and local code; blank" rel="noopener noreferrer">Florida Product Approval reports, for example, specify minimum embedment and spacing explicitly). Maximum fastener spacing at the head and jambs is typically 12 inches on center for masonry anchors, though always confirm with the door manufacturer's installation manual. Pre-drill with the correct Tapcon bit (supplied with the fasteners) and keep spacing consistent. Check plumb and square after every two fasteners.
Mortar repair and finishing the brick
After the door is installed and the frame is flashed, tuck-point any cut or disturbed mortar joints around the perimeter of the brick opening. Match the mortar color and joint profile to the existing work as closely as possible. Use a pre-mixed mortar matched to your brick type (type S mortar for below-grade and exterior exposures is standard). Allow mortar to cure fully before caulking the perimeter joint between the door frame and the brick face with an exterior-grade polyurethane sealant in a matching color.
Setting the door: sill pan, flashing, and installation sequence
With the rough opening framed and confirmed plumb, level, and square (check both diagonals), you are ready to set the door. This is the sequence that follows ASTM E2112 and what major manufacturers like Pella, Andersen, Marvin, and Milgard specify in their installation manuals. Deviating from this order is how water infiltration problems start.
Step 1: Install the sill pan
The sill pan catches any water that gets past the door threshold and directs it back to the exterior. This is required by ASTM E2112 and explicitly mandated by manufacturers including Marvin (who states it for all multi-sliding doors) and Pella (whose instructions specify cutting the sill pan to rough-opening width plus 2 inches to allow 1-inch bends up each end as a back dam). You can use a pre-formed rigid PVC sill pan, a field-fabricated pan made from self-adhered membrane, or a liquid-applied pan flashing. For most DIY installs, a self-adhered membrane (Grace Vycor Plus, Henry FortiFlash, or similar) folded to form a sloped pan with end dams is practical and reliable. Apply primer to the sill framing if the membrane manufacturer requires it. Fold corner patches first, then run the continuous sill piece, pressing firmly and rolling out air bubbles. The exterior lip of the pan must extend to or past the exterior face of the sheathing so water drains away from the structure.
Step 2: Apply the perimeter sealant
Run a continuous 3/8-inch bead of exterior-grade sealant on the sill pan, back from the exterior edge. For flanged (nail-fin) door units, run a continuous 3/8-inch bead of sealant behind the mounting flange at the sill, jambs, and head before setting the unit. Milgard's field installation instructions specifically require this continuous bead behind the flange, with no gaps. Do not run sealant at the very bottom of the sill flange; leave a small drain gap so any incidental water can escape rather than being trapped.
Step 3: Set the door unit
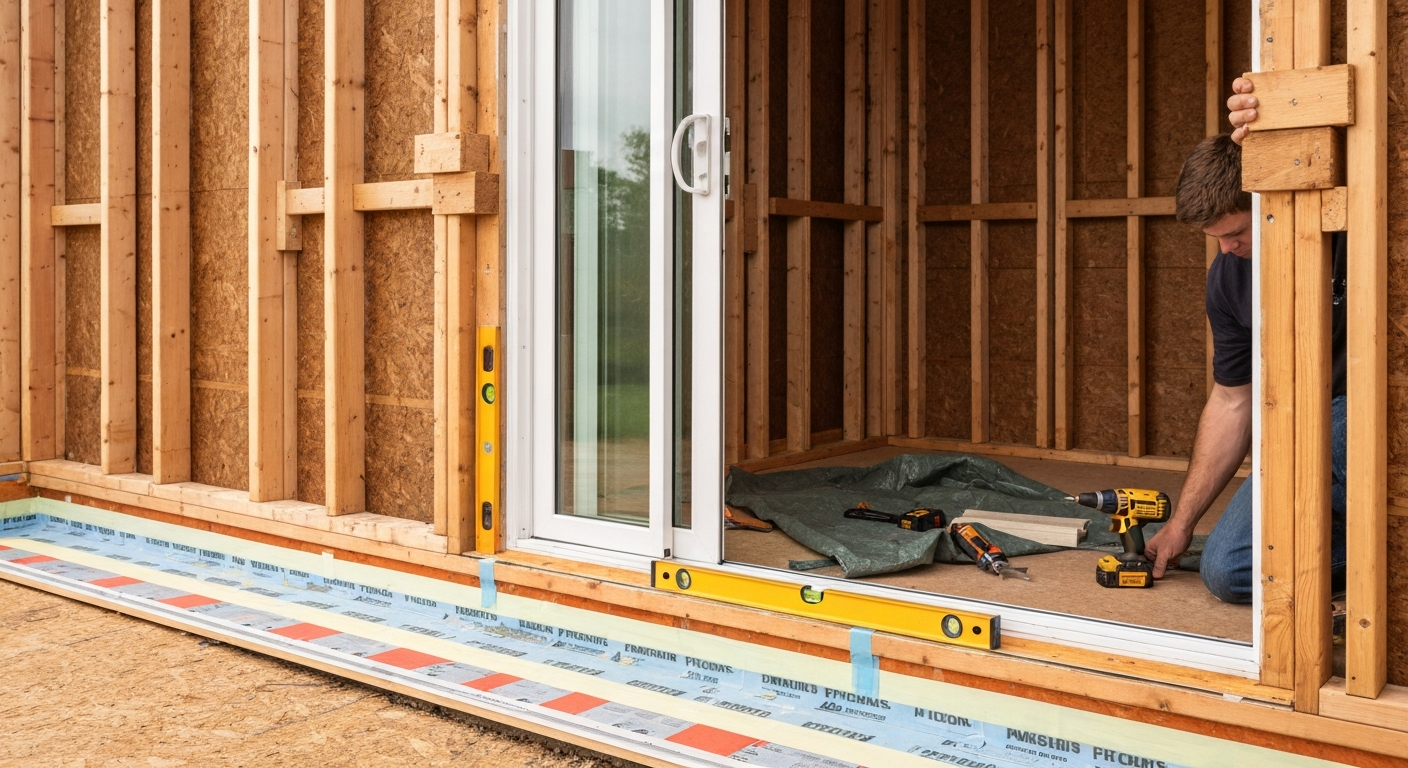
For sliding glass doors, carry the frame into the opening (without the sliding panel installed) and tip it into place. For French doors, the entire pre-hung unit goes in as one assembly. With a helper, tip the unit into the rough opening from the exterior side, resting the sill frame on the sill pan. Check for plumb on both jambs and level on the sill. Insert shims at the sill corners, behind each hinge location (for French doors), and at the head. Use composite shims rather than wood to avoid compression and rot over time. Drive one fastener at each upper corner of the flanges or through the jambs (do not fully tighten) and re-check plumb, level, and square (diagonal measurements). Adjust shims until both diagonals match within 1/8 inch, then fasten the frame fully.
Step 4: Fasten the frame
For flanged units, nail or screw through the nail fin into the framing per the manufacturer's spacing requirement. Milgard's vinyl sliding door instructions call for a maximum of 16 inches on center with plumb and square verified every two fasteners. For non-flanged units, fasten through the interior jamb into the jack studs at the manufacturer's specified spacing. For masonry anchoring, use the Tapcon schedule described in the brick veneer section above. Do not over-drive fasteners into vinyl frames; this will rack the frame and make the door impossible to operate correctly.
Step 5: Flash the perimeter (the shingled sequence)
Flashing must be installed in a shingled (watershedding) sequence: sill first, then jambs overlapping the sill flashing, then the head piece overlapping the jamb pieces. This is the sequence specified by Building America/PNNL guidance and by individual manufacturers. Pella's installation instructions, for example, specify sill flashing extended 1 inch past the exterior and 6 inches up each jamb, with jamb tape overlapping the sill tape and head tape overlapping the jambs. Pella’s installation manual specifies cutting the sill pan to the rough‑opening width plus 2 inches (to allow 1‑inch bends each end), sliding the pan until the exterior lip is flush, applying flashing tape that extends 1 inch past the exterior and about 6 inches up each jamb, and placing 3/8‑inch continuous sealant beads in the pan blank" rel="noopener noreferrer">Pella — New Construction / Patio Door Installation Instructions (NC_NFBW-HPD). Apply the self-adhered flashing tape directly over the mounting flange and onto the WRB or sheathing, pressing firmly and rolling for full adhesion. Integrate the head flashing tape under the WRB above so water runs over it, not behind it.
Step 6: Install sliding panels, hardware, and screens
For sliding glass doors, the sliding panel goes in after the frame is fully fastened and flashed. Tilt the top of the panel into the upper track first, then swing the bottom in and set it into the lower track. Test the slide: the panel should glide smoothly with consistent resistance. Adjust the roller height (most units have adjustment screws at the bottom of the sliding panel accessible from the interior) until the panel rides level and the seal compresses evenly. Install the screen door in its own track. Install the lock hardware and test the latch: it should engage cleanly without force. For French doors, hang the doors on the hinges, check the reveal (gap) around each door panel, and adjust hinges as needed for a consistent 1/8-inch gap.
Insulation, air sealing, and interior finish
Fill the gap between the door frame and the rough framing with low-expanding spray foam (use a product labeled specifically for windows and doors; standard expanding foam can bow the frame). Apply in thin passes, let it cure, then trim flush. Do not over-fill: the goal is to eliminate air gaps, not to exert pressure on the frame. Add fiberglass batt insulation in any larger cavities in the surrounding framing before closing the wall.
On the interior, install jamb extensions if the door frame does not extend to the full wall thickness. Nail the casing (interior trim) over the gap between the jamb extension and the drywall. Use a nail gun for speed, but set nails just below the surface and fill with wood filler before painting. On the exterior, install brick mold or PVC trim around the perimeter, then run a final bead of paintable exterior caulk between the trim and the siding or brick at all four sides. This exterior caulk line is the last line of defense against water; make it continuous and uniform.
Security, weatherproofing, and long-term performance
A freshly installed patio door is only as secure as its lock hardware and frame integrity. Sliding glass doors with a single latch are notoriously easy to defeat; add a secondary lock (a bar in the track or a Charlie bar) or a double-bolt keyed lock as a baseline security upgrade. French patio doors benefit from a multi-point locking system that engages at the top, middle, and bottom of the door panel simultaneously, greatly improving both security and the compression of the weatherstrip seal.
For weatherproofing, the quality of your sill pan and perimeter flashing is the foundation. Beyond that, check the weatherstripping around the full perimeter of the door panel. Most patio doors ship with adequate weatherstrip, but it compresses over time; replacing worn weatherstrip is a cheap seasonal maintenance task that has an outsized impact on draft prevention and energy bills. If you are in a cold climate, consider adding a door sweep to the bottom of French door panels if the threshold gap exceeds 1/8 inch.
Sliding door tracks need periodic cleaning and lubrication. Dirt and debris in the lower track is the primary cause of hard-sliding doors and accelerated roller wear. Clean the track with a stiff brush and vacuum, then apply a silicone-based lubricant (not WD-40, which attracts dirt). Roller adjustment, weatherstrip replacement, and lock realignment are all straightforward repairs that are worth knowing for the life of the door.
Practical notes: install time, video resources, and temporary AC venting
Realistically, a skilled DIYer replacing an existing patio door unit in a pre-existing rough opening can complete the job in about 4 to 8 hours. For a concise timing summary, see how long does it take to install a patio door. Creating a new rough opening from a wall with an existing window takes a full day for the framing and demo alone, plus a second day for the door installation, flashing, and interior finish work. Brick veneer work adds another half to full day for the masonry cutting, lintel setting, and mortar repair. If you are new to framing, add 30 to 50 percent to these estimates.
If you want to supplement this guide with video, look for tutorials that show the actual flashing sequence clearly (not just a quick montage), demonstrate shimming and squaring technique in real time, and cover the specific door type you are installing (sliding vs. French, flanged vs. non-flanged). For a visual walkthrough, watch a step-by-step how to install French patio doors (YouTube) that demonstrates flashing, shimming, and hinge installation in real time. Videos associated with manufacturer training programs (Andersen, Pella, Marvin) tend to be the most technically accurate; avoid tutorials that skip the sill pan and flashing steps entirely.
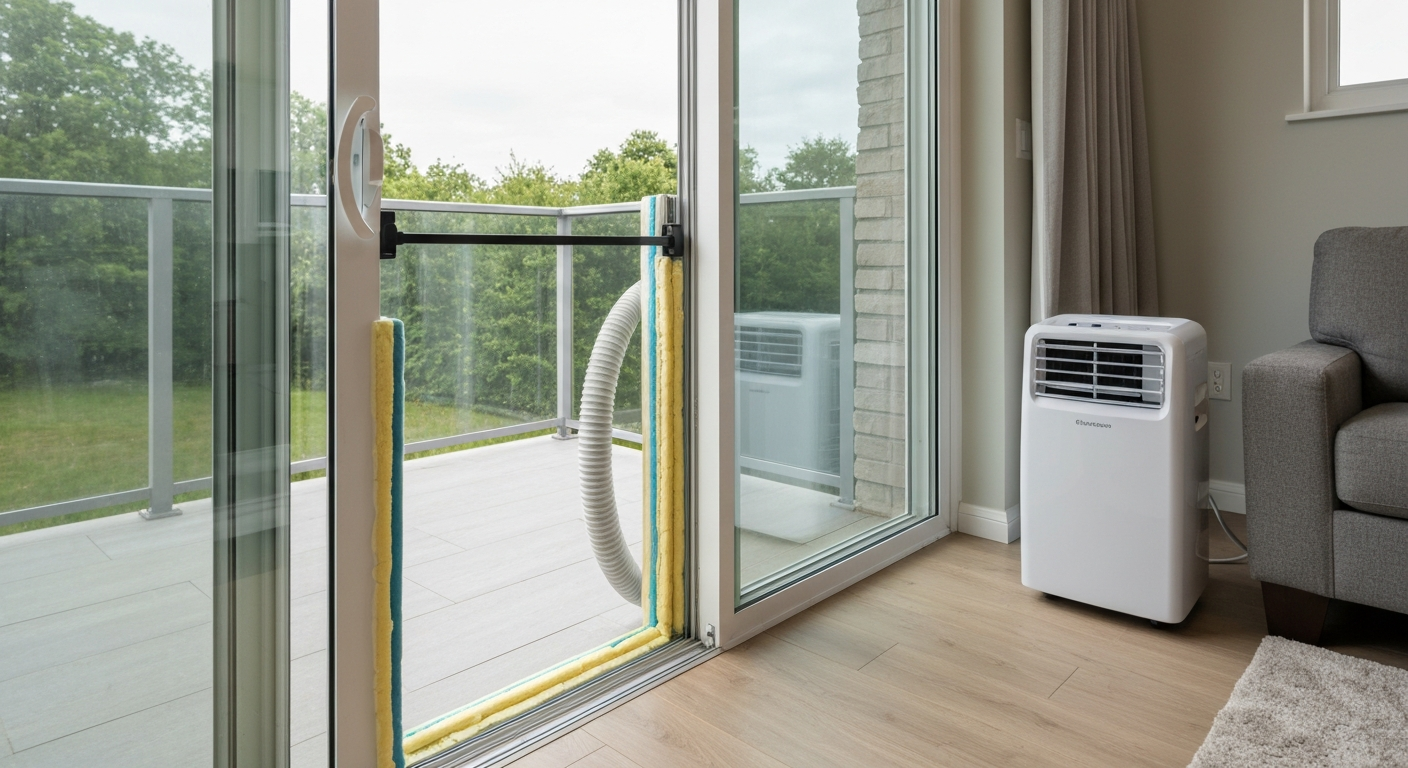
One question that comes up often in summer: can you vent a portable air conditioner through a sliding patio door? The short answer is yes, temporarily, using a patio door AC vent kit that mounts a vertical panel in the open portion of the door track. This is a separate accessory topic worth exploring if you need to cool a room while permanent HVAC work is pending; it does not affect the permanent door installation.
When to stop and call a professional
There are several clear trigger points where hiring a licensed contractor or structural engineer is the right call. If you open the wall and find the framing is rotted, insect-damaged, or significantly different from what you planned (doubled top plates missing, unusual load-bearing configurations), stop and bring in a pro. If the prescriptive IRC header tables do not clearly cover your span and load condition, get an engineer to specify the header before you proceed. If you are working on a solid masonry wall (full brick or concrete block, not veneer), the structural and cutting work is beyond a typical DIY scope. And if mid-project inspection reveals plumbing or electrical in the wall that you cannot safely reroute yourself, get the right trades involved before continuing. A partially installed patio door in a load-bearing wall is not a situation to improvise through.
FAQ
What are the high‑level steps to install a patio door (sliding or French) in an exterior wall?
1) Plan & verify: measure, choose door type & performance rating (AAMA/NAFS), check local codes/permits. 2) Tools & materials: gather checklist (see separate FAQ). 3) Site prep: protect interior, turn off utilities, remove exterior cladding/trim. 4) Demo/opening: remove existing window or wall section while supporting the structure above (temporary shoring if needed). 5) Structural framing: install required header or lintel per IRC/span tables or engineered design; add jack studs and cripple studs as required. 6) Prepare rough opening: size per manufacturer (usually door width + 1¾" to 2" and height + 1½" to 2"—confirm product manual). 7) Sill pan & flashing: install a continuous sill pan (factory or field‑fabricated per ASTM E2112) and integrate self‑adhered flashing with the WRB in a shingled sequence (sill, jambs, head). 8) Set & anchor: shim for level/plumb/square, fasten per manufacturer anchor schedule (spacing & anchor type; masonry anchors for brick). 9) Insulate & air‑seal: low‑expanding foam at jambs or backer rod + sealant; install continuous air barrier transitions. 10) Install threshold, trim & hardware: fit interior/exterior trim, install locks/rollers/screens per instructions. 11) Exterior weatherproofing: flash head, caulk, reinstall cladding and flanges. 12) Test & adjust: operate doors, check drainage, adjust rollers/strikes, test locks and weatherstripping. 13) Final inspection/cleanup: remove protection, touch up finishes, schedule permit inspection if required.
What specific tools and materials are essential for a DIY patio door install?
Tools: circular saw with carbide blade, reciprocating saw, drill/impact driver, level (4' or longer), laser or long spirit level, shims, pry bar, hammer, framing square, caulk gun, utility knife, torque screwdriver, masonry drill & bit set (for brick), vacuum, safety gear (glasses, gloves, respirator), temporary support posts/adjustable jack, tape measure, chalk line. Materials: door unit with installation manual, factory sill pan or self‑adhered membrane (Vycor/Henry), flashing tape, exterior grade sealant, low‑expansion foam, mechanical fasteners (wood screws, concrete/masonry anchors like Tapcon), galvanized steel lintel or engineered header (as required), pressure‑treated sill or buck, housewrap/WRB repair materials, drip edge/weep screed (masonry), interior/exterior trim, exterior flashing cap and counterflashing, screws/washer plates for anchors, backer rod and weatherstripping, insect/vent screen if needed.
How do I size the rough opening and why does it vary?
Follow the door manufacturer’s rough‑opening (R.O.) specifications—these account for required shim space, sill pan dimensions, and insulating/air‑sealing gaps. Typical guidance: R.O. = door unit width + 1¾" to 2" and height + 1½" to 2" (examples vary by brand and door type). Multi‑slide or oversized doors often need larger clearances and engineered bucks. Always verify the specific product approval/installation guide and allow slightly more room for adjustments. If the opening exceeds IRC prescriptive header spans, upgrade the header or consult an engineer.
What are the correct sill‑pan and flashing steps to prevent water intrusion?
1) Follow ASTM E2112 and the door manufacturer: choose factory sill pan or field‑fabricate one from peel‑and‑stick membrane or liquid flashing. 2) Create a positive‑drain sill pan with a back dam (per ASTM guidance) and slope toward the exterior drainage plane. 3) Flash the sill first, extending flashing tape 1" past exterior face and ~6" up each jamb (manufacturer variations exist). 4) Apply jamb flashing up to the head; then install head flashing last (shingled sequence). 5) Integrate flashing with the WRB/housewrap—cut WRB and tape flashing to create a continuous drainage plane. 6) Seal fastener penetrations and provide insect/weep holes per the door and flashing product instructions.
What structural issues must I watch for when cutting a new opening or converting a window to a door?
Main concerns: whether the wall is load‑bearing, size of the new opening relative to prescriptive IRC header tables, and presence of masonry veneer with a lintel. For wood framing follow IRC R602.7 header tables (or use engineered headers/LVLs for large spans). In brick/masonry, install a structural steel lintel/shelf angle before removing brick, maintaining minimum bearing (typically 4" each side per BIA) and providing through‑wall flashing and weeps. If the opening is beyond prescriptive limits, shows unusual loads (second‑floor bearing wall, roof rafters, concentrated loads), or you’re unsure, stop and consult a structural engineer or licensed contractor.
How do you anchor patio doors into masonry or brick walls?
Use concrete/masonry anchors specified in the product approval (e.g., Tapcon or sleeve anchors) with the minimum embedment recommended (typically ~1.25"–1.75"). Drill appropriate diameter and depth holes through the frame into the mortar or masonry per manufacturer spacing (commonly 12" O.C. at head/jambs, 16" O.C. on some frames). Maintain correct clearance around fasteners to avoid cracking brick; when cutting brick, avoid undermining surrounding masonry support—install a lintel prior to removing masonry above the new opening.
How to Install Portable Air Conditioner in a Patio Door
How to install portable air conditioner in patio door: step-by-step venting guide, tools, sealing, drainage and common-f