Installing a patio door yourself is completely doable in a weekend if you go in prepared. If you want a rough timeline for the whole job, see how long does it take to install a patio door, because timing varies by door type and how much prep is involved.
How to Install Patio Doors: Step-by-Step DIY Guide

Jamie Archer
1 May 2026
The basic sequence is: measure and confirm your rough opening, remove the old unit, prep and square the opening, set the new frame with shims until it's plumb and level, fasten it, flash and seal every gap, then hang the panels and install the hardware. Get each step right and the door will slide, swing, or fold smoothly for years. Rush the shimming or skip the weatherproofing, and you'll be fighting drafts and sticky operation for just as long.
Choose the right door type before you buy anything
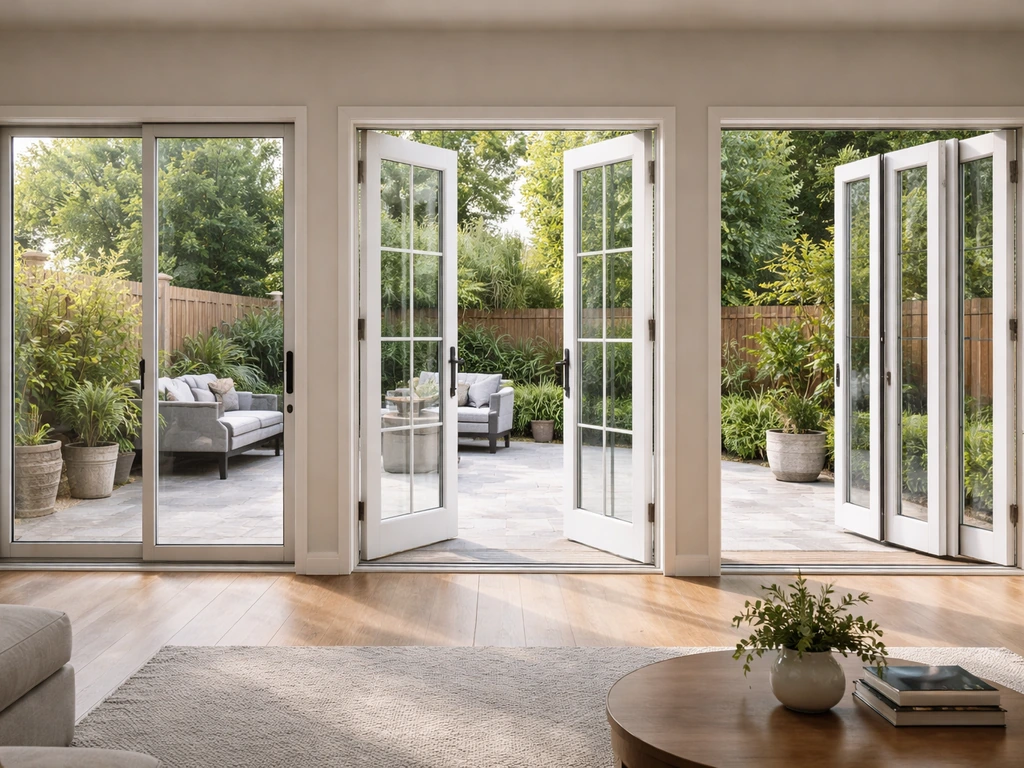
The type of patio door you choose shapes every step that follows, so nail this down before you touch a tool. Sliding glass doors (gliding doors) are the most common and the most forgiving to install. French-style double patio doors swing open on hinges and need more floor clearance but offer a classic look. Bifold patio doors fold on a track and work well for wide openings where a swing door would be inconvenient. Each type has different hardware, different framing considerations, and a different post-install adjustment routine.
Think honestly about your opening size, how the door will be used, and your budget. Sliding doors tend to be the most affordable and the easiest solo install. Double French doors look great but typically require two people to hang and adjust the hinges properly. Bifolds are the most complex: the track alignment and panel folding sequence have to be exact or the door won't operate at all. If you're working in an existing opening rather than cutting a new one, measure what you have first and shop to fit that opening rather than forcing a reframe. Lowe's is right on this point: determine your rough opening dimensions before you purchase, not after.
Also consider where the door is going. A standard existing opening in a wood-framed wall is straightforward. Installing a patio door where a window was, or putting one in a brick or masonry wall, is a significantly bigger project involving structural lintels and different flashing strategies. Those scenarios are worth treating as separate projects from a standard door-in-door swap.
Tools, materials, safety, and measuring the opening
What you'll need
- Tape measure, 4-foot level, framing square
- Pry bar, reciprocating saw, utility knife, hammer
- Cordless drill and appropriate bit set
- Wood shims (a couple of bundles)
- Exterior flashing tape (self-adhesive, minimum 4 inches wide)
- Low-expanding spray foam (not high-expanding — more on why below)
- Backer rod (foam rope, 1/4 to 3/8 inch diameter)
- High-quality exterior and interior caulk/sealant
- Galvanized or stainless structural screws (length per door manufacturer spec)
- Safety glasses, gloves, and hearing protection
- A helper — seriously, patio door frames are heavy and awkward
Lead paint warning for older homes
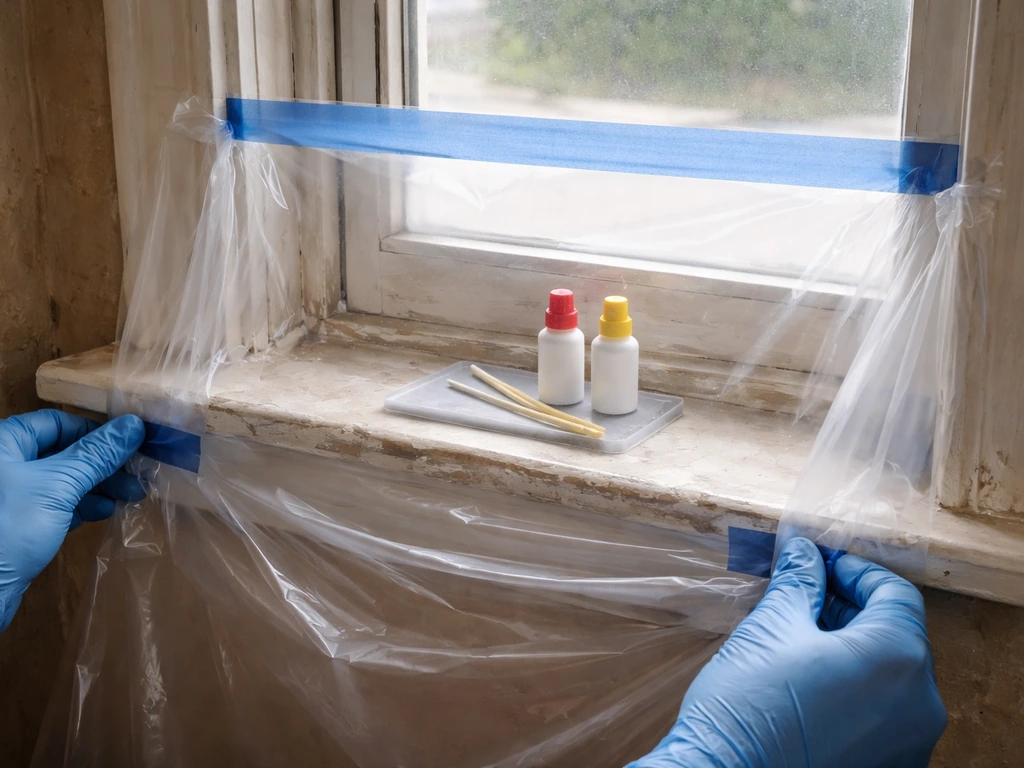
If your home was built before 1978, stop and test for lead paint before you start demolition. Disturbing lead-based paint without proper precautions is a health hazard, and under the EPA's Renovation, Repair and Painting (RRP) program, work that disturbs it in pre-1978 homes must be done by a lead-safe certified contractor. If you're a homeowner doing the work yourself in your own residence, you're not bound by the RRP rule the same way a contractor is, but use proper dust containment and respirator protection regardless.
Measuring the rough opening correctly
The rough opening is the framed hole in your wall, not the finished doorway you see from inside. Measure its width and height at multiple points because openings in older homes are rarely perfectly square. The industry standard clearance between your door unit and the rough opening is 1/4 inch on all sides, that's what Andersen specifies, and it's enough room to shim the unit into perfect alignment without leaving gaps that are hard to seal later.
If your opening is significantly larger, you may need to add framing to bring it to the right size. Confirm these dimensions against the door manufacturer's rough opening requirements before you order or buy. Andersen's Frenchwood outswing patio door installation guide PDF includes [rough opening preparation requirements](https://www. andersenwindows.
com/-/media/Project/AndersenCorporation/AndersenWindows/files/technical-docs/installation-guide/installationguide-0004255. pdf), including measurements and details to meet the unit’s installation requirements. Home Depot's installation instructions list this measurement step explicitly as non-optional, and it really isn't.
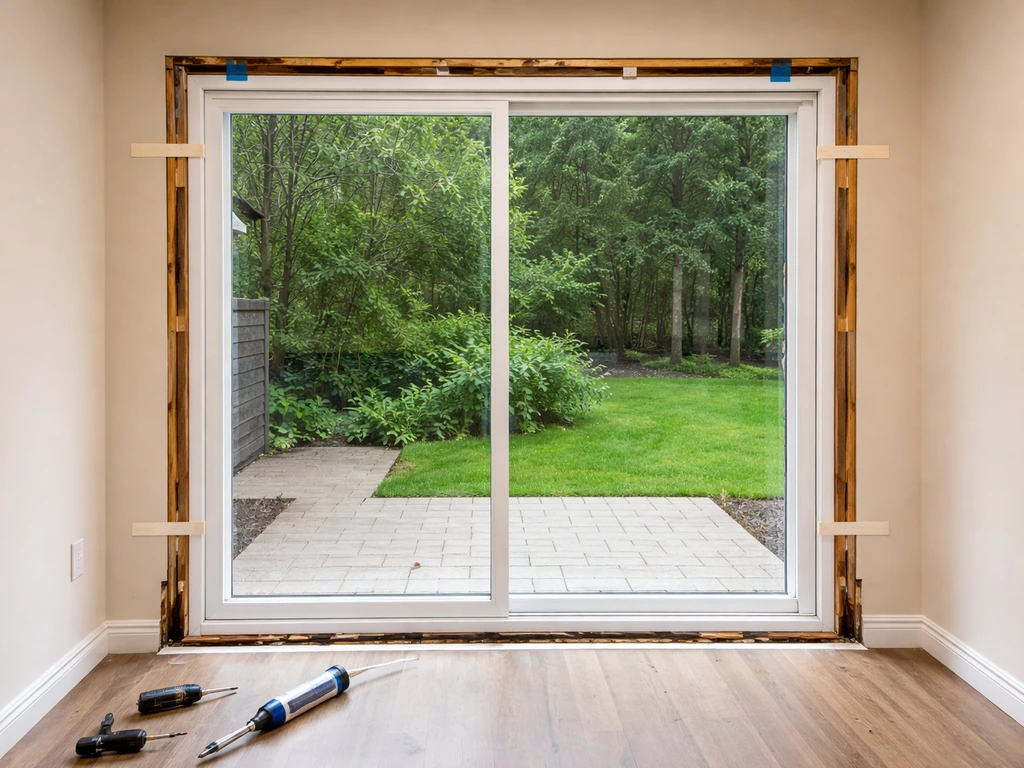
Remove the old door and prep the rough opening
Start by removing the interior trim and casing around the old door. A utility knife and pry bar handle this without destroying drywall if you work carefully. Once the trim is off, look for screws through the door jamb into the framing, remove them, then cut any caulk or sealant along the exterior with a utility knife. Have your helper hold the frame as you pull it free, old frames can be awkwardly heavy and will fall outward if you're not ready.
With the old unit out, inspect the rough opening thoroughly. Check for rot, especially along the sill and lower framing where water tends to collect. Probe with a screwdriver, soft or crumbling wood needs to be cut out and replaced with treated lumber before anything else happens. A new door over a rotten sill is just a slow-motion disaster. Also check whether the opening is plumb, level, and square. Pella's rough opening guidance is clear: if the framing is out of plumb or square, fix the framing before the install, not with shims alone. Shims compensate for minor variation; they can't rescue badly out-of-square framing.
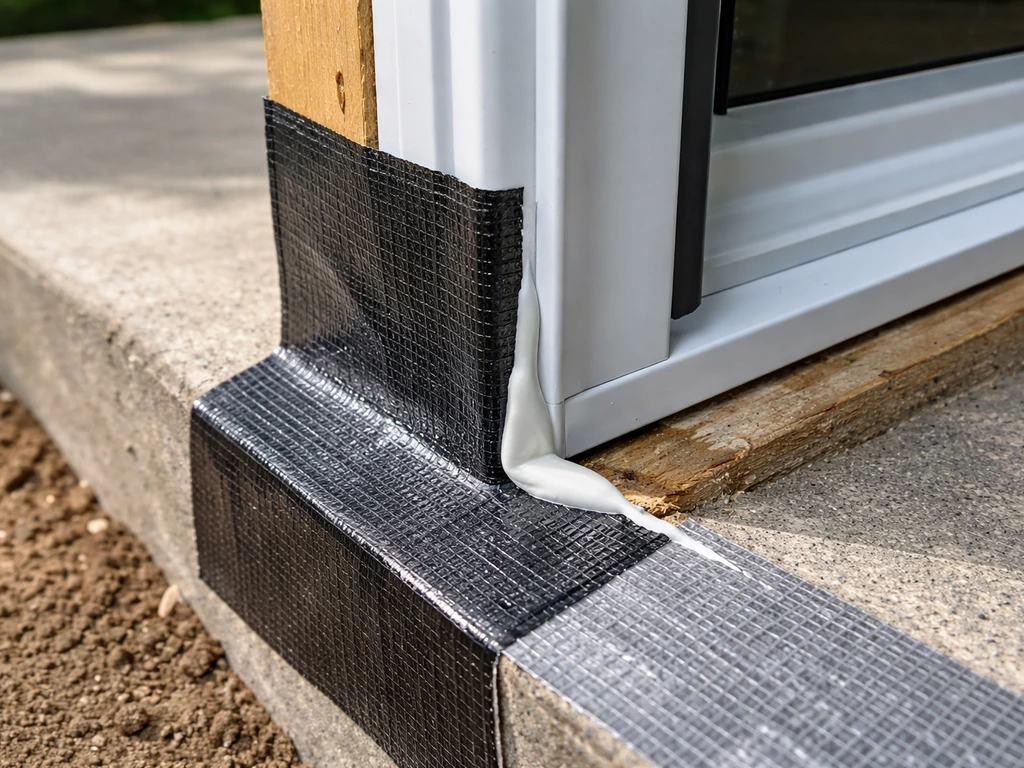
Once the framing is solid, apply self-adhesive flashing tape across the sill of the rough opening and up the sides a few inches. This is your first line of defense against water intrusion. Some installers also run a bead of sealant under where the door sill will sit. Either way, make sure the sill area is clean, dry, and protected before the new frame goes in.
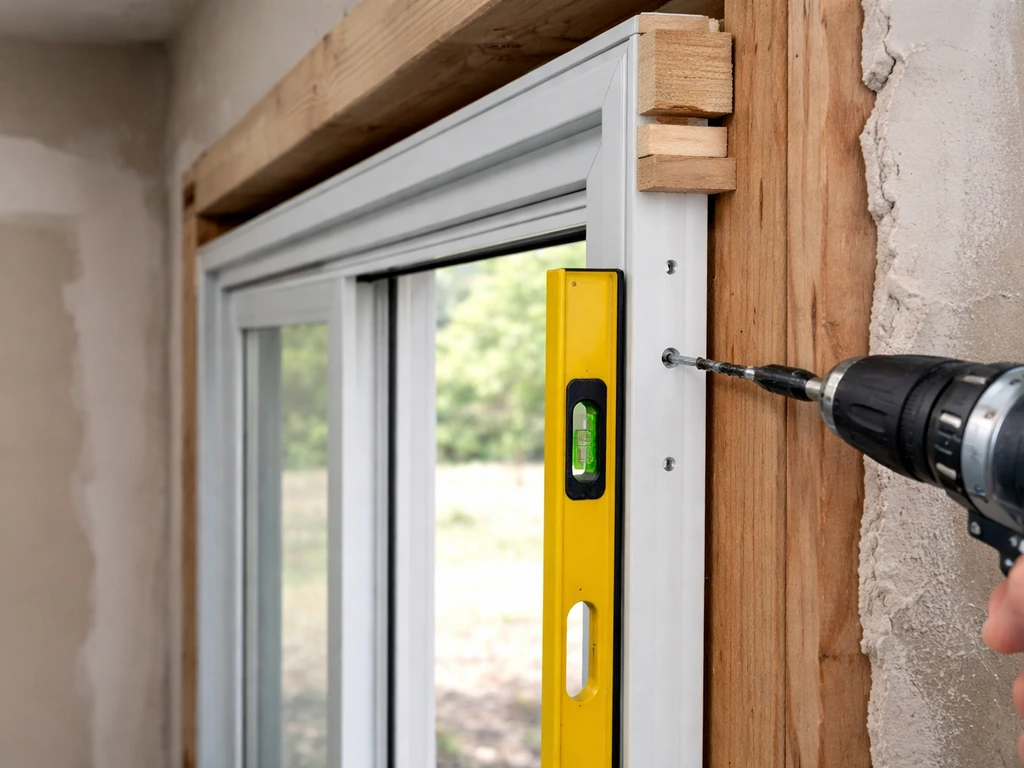
Set the frame: leveling, shimming, and fastening
This is the most critical stage of the whole install. Get it right here and everything else is easy. Get it wrong and the door will never operate smoothly.
With your helper, lift the door unit into the opening from outside. Pella's Steady Set system uses pre-applied sill shims that automatically raise the unit 1/4 inch above the rough opening sill, which gives you tool access and prevents pinched fingers. If your door doesn't have these, place your own shims under the sill before setting the unit. Check the sill for level immediately, this is your foundation. If the sill isn't level, nothing else will be.
- Set the unit in the opening and have your helper hold it while you check the sill with a 4-foot level.
- Adjust sill shims until the sill reads perfectly level, then tack the unit in place with one screw through the casing or fin to hold it temporarily.
- Check the hinge-side jamb (or the fixed-panel side on a slider) for plumb with your level.
- Add shims behind the jamb at the top, middle, and bottom until plumb. Do the same on the latch side.
- Recheck the sill for level after shimming the jambs — adjusting one can shift the other.
- Check for square by measuring diagonally corner to corner. Both measurements should be equal within 1/8 inch.
- Once plumb, level, and square, drive your fasteners through the pre-drilled holes in the frame or through the nailing fin into the framing. Follow the manufacturer's spec for screw size and pattern.
- Score the shims flush with the frame using a utility knife or handsaw. Don't leave them sticking out.
A note on fasteners: use the length and type specified by your door manufacturer. Too short and the frame won't be anchored solidly; too long and you risk splitting the framing. Galvanized or stainless screws are the right call for exterior applications where moisture is a factor.
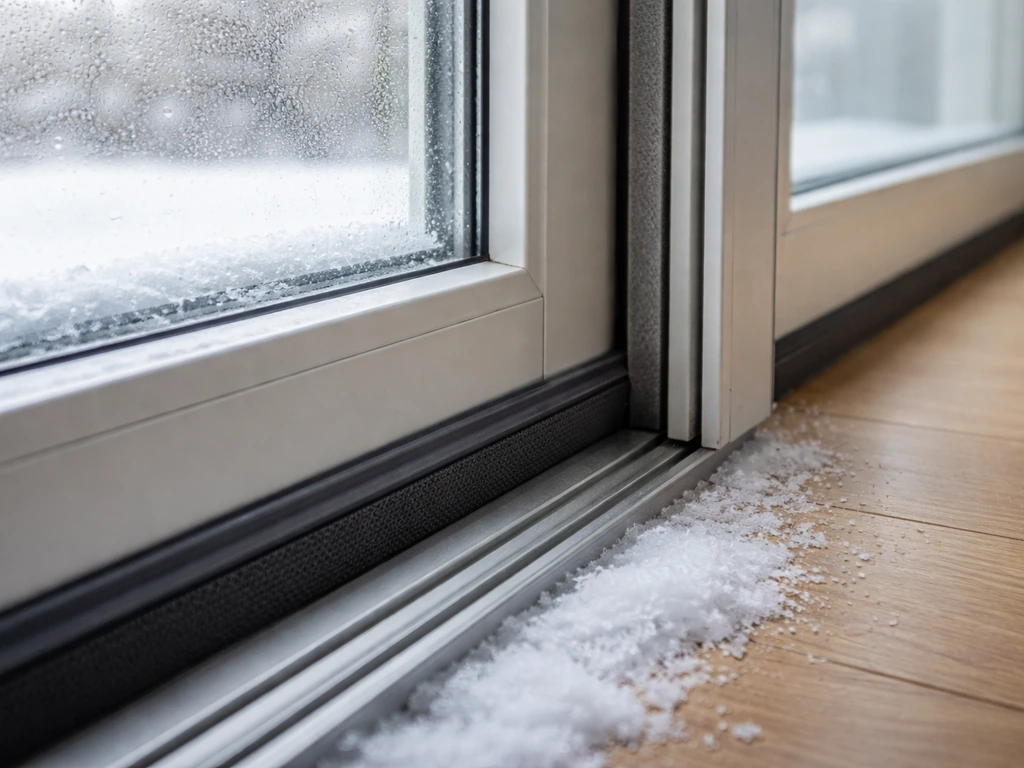
Weatherproofing and sealing so drafts stay outside
Sealing is where a lot of DIY installs fall short. People do a good job on the frame and then rush through this step, and then wonder why they feel a cold draft on their ankles every winter. Don't rush it.
On the exterior, apply flashing tape over the nailing fin or the edges of the frame, lapping it onto the house wrap or sheathing. Work in the right order: sill first, then sides, then head (top). This way each layer sheds water over the one below it rather than creating channels that funnel water in. Run a bead of exterior-grade sealant along any exposed edges where flashing tape ends or where the frame meets the siding. Once the patio door is installed, you can mount the portable air conditioner in a way that seals the gap and keeps airflow directed outdoors portable air conditioner in a patio door.
On the interior, fill the gap between the door frame and the rough framing with low-expanding spray foam or backer rod plus interior sealant. This is important: use low-expanding foam, not the high-expansion version. Andersen's installation guidance specifically warns against overfilling with foam or over-packing with backer rod because excessive fill pressure can actually bow the jambs inward, which will make the door bind. Fill the gap enough to stop air movement, not enough to stress the frame. Pella's instructions call for a continuous bead of sealant at the intersection of the door sill and the subfloor, don't skip that detail, it's a common infiltration point.
Finish the interior with casing trim, caulk the seam between the casing and the wall, and paint or prime any exposed wood. This isn't just cosmetic: unsealed wood around the opening is a moisture entry point.
Install the panels and hardware: sliding, double, and bifold
Sliding patio doors
Most sliding door panels ship separately from the frame. The fixed panel usually drops into the outer track first and is secured with screws through the frame. The sliding panel goes in second: tilt the top into the upper track, then lower the bottom onto the lower track rollers. Most panels have an adjustment screw at the bottom corners that raises or lowers the roller to fine-tune the height and tilt of the panel.
Adjust until the panel slides smoothly with light effort and sits parallel to the frame with even gaps top and bottom. Install the security bar or anti-lift block in the track, then install the lock hardware and handle per the manufacturer's instructions. For the screen door: screens typically install the same way as the sliding panel but in the outermost track channel.
Double French patio doors
French-style double doors hang on hinges attached to the jamb. Hinge placement is typically pre-marked or pre-mortised on quality units. Hang one door at a time, checking that it swings freely and that the gap between the door edge and the jamb (the reveal) is even from top to bottom. Pella's hinged patio door installation documentation notes that adjustable hinges are a standard feature, and you should expect to use them. Most adjustable hinges let you shift the door up/down, in/out, and side to side with a hex key. Once both doors hang correctly, install the astragal (the vertical strip between the two doors), the locks, and the handles. Check that the latch catches cleanly without forcing.
Bifold patio doors
Bifold doors are the most involved to install and align. The track (top and sometimes bottom) has to be perfectly level and straight before any panels go up. Install the track first, double-check level, then hang the panels one by one using the pivot brackets at the top and bottom. Each panel connects to the next with hinges.
Follow the manufacturer's sequencing exactly, panels typically need to go up in a specific order. Once all panels are hung, adjust the pivot brackets so the folded stack sits flush against the jamb and the panels seal tightly when closed. Opening bifold patio doors correctly once installed: push the first panel toward the stack, which causes the connected panels to fold accordion-style. The lead panel typically has a handle; pulling it draws all panels with it.
If any panel drags or binds, adjust the top pivot bracket first before touching anything else.
Post-install checks and fixing common problems
Once the door is fully installed, give it a thorough test before you put away your tools. Run through these checks:
- Open and close the door (or each panel) multiple times. It should move with light, consistent effort.
- Check that the lock or latch engages without lifting or forcing the door.
- Look at all four sides of the frame from inside for visible light gaps — if you can see daylight, air is getting in.
- Run a hand along the bottom of the closed door on a windy day. Any draft here points to a sill seal or threshold adjustment issue.
- Check the corners of the frame inside and outside for gaps in the sealant.
Door sticks or slides hard
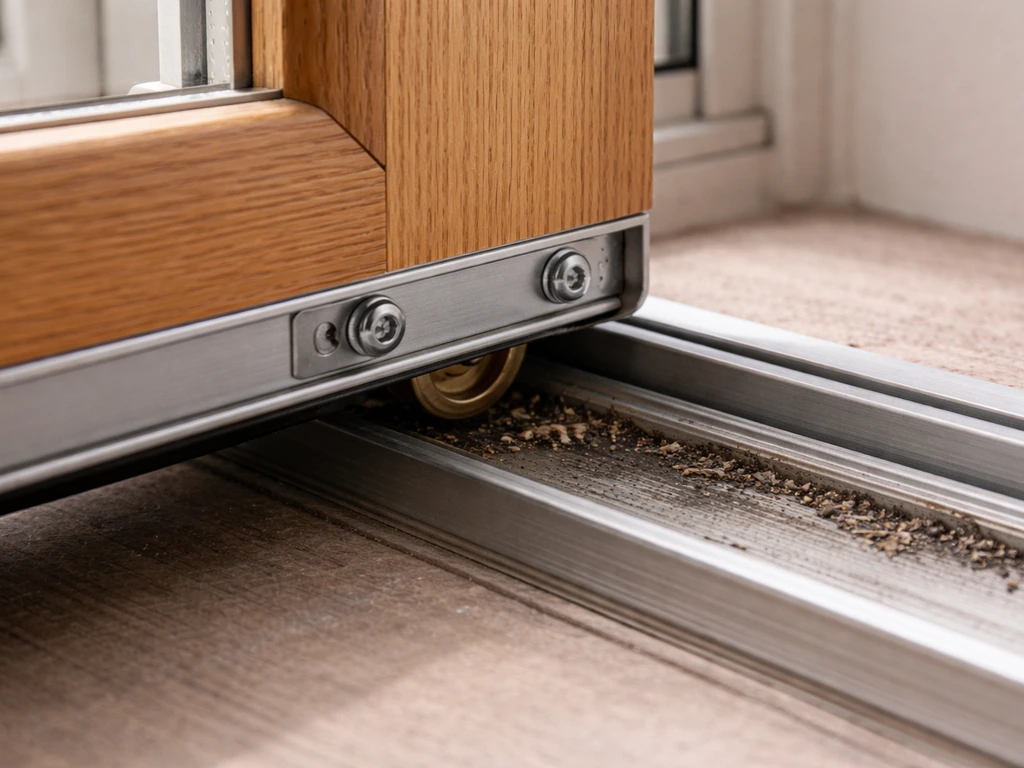
On a sliding door, this almost always means the rollers need adjustment or the track needs cleaning. Locate the adjustment screws at the bottom of the sliding panel (usually covered by a small plastic cap) and turn clockwise to raise the panel, counterclockwise to lower it. Andersen's adjustment guidance notes that roller movement direction directly affects panel position, so make small adjustments and re-test between each turn. If the track is dirty or has debris, clean it with a vacuum and a damp cloth, then apply a silicone-based lubricant. Don't use WD-40 on tracks, it attracts grime and makes the problem worse over time.
Frame is bowed or jamb is out of alignment after install
If you notice the jamb has bowed inward, the most likely cause is over-packed foam or shims that are too tight. Andersen's help center guidance for this situation is direct: remove all insulation and shims and refer back to the installation guide to reset the unit. That means taking the foam out (a utility knife and patience), removing the offending shims, and re-shimming with less pressure. It's annoying but it's the right fix.
Drafts after sealing
If you still feel a draft after sealing, work through the door systematically. Check the weatherstripping around the perimeter of the panel first, it should compress slightly when the door closes. If it's damaged or missing, replace it. Then check the threshold: most patio door thresholds have an adjustable sweep or seal that can be raised or lowered to close the gap at the bottom. Finally, check your exterior caulk in cold or wet weather; sealant that looks fine in summer can shrink and crack in winter, opening up small gaps that are significant air infiltration points.
A quick comparison of door types
| Door Type | Install Difficulty | Best For | Main Post-Install Issue |
|---|---|---|---|
| Sliding/Gliding | Easiest | Standard openings, frequent use, DIY-friendly | Roller adjustment, track debris |
| French Double | Moderate | Classic look, good ventilation | Hinge adjustment, latch alignment |
| Bifold | Most complex | Wide openings, indoor-outdoor flow | Panel sequencing, track level, pivot adjustment |
If this is your first patio door install, a sliding door in an existing opening is the place to start. The frame goes in the same way regardless of type, and rollers are far more forgiving to adjust than hinges or bifold pivots. Once you've done one, the skills carry directly to more complex door types or more involved scenarios like converting a window opening or installing in a masonry wall.
If you are installing patio doors in a brick wall, the key difference is the masonry rough opening, anchoring, and added weatherproofing steps. If you need to install patio doors in a wall opening or masonry, plan for the right rough opening size and weatherproofing so the door seals properly.
FAQ
How do I know if I really have the right rough opening before I buy or order the door?
In most cases the weekend plan assumes you are working from a properly sized, factory-rough-opening door kit, with an exterior weather barrier already in place. The longer delays usually come from fixing an out-of-plumb or out-of-square framing, waiting for sealants to cure, and dealing with rotted sill areas. If you discover rot once the old unit is removed, budget extra time to cut out damaged sections and replace with treated lumber before the flashing tape goes on.
My opening isn’t perfectly square, should I just rely on shims?
A practical check is to measure width and height in at least three spots (near the top, middle, and bottom) and confirm diagonals if you have the tools. If the opening varies a lot, shopping for a standard fit can force you to over-shim, which increases the risk of a binding door. Instead, add framing to bring the opening to the manufacturer’s rough opening requirements before installation.
What should I do if I used the wrong foam and the door seems to bow?
You should remove high-expansion foam entirely if it pushed the jamb out or bowed it inward, then reset the unit. High-expansion foam can continue expanding as it cures, creating pressure that shows up later as doors that don’t latch cleanly or panels that rub. Resetting usually means cutting foam back with a utility knife, re-shimming with lighter pressure, then re-sealing with the correct low-expansion method or low-expansion foam.
Can I install patio doors without removing the old door trim completely?
Yes, but only if you can follow the manufacturer’s installation method for your door type. The frame still needs to be plumb and level, the flashing sequence still matters, and the interior air seal still needs a controlled gap fill. If you skip the nailing fin flashing strategy or don’t have the right integration with house wrap, the door may look fine but leak during wind-driven rain.
My sliding patio door doesn’t roll smoothly, what’s the first thing to troubleshoot?
Before you hang panels, confirm the track or sill area is level and free of debris, then test operation gently with the door set in place but not fully adjusted. For sliders, a new track that is slightly out or not clean commonly causes rough rolling, even when the frame is square. Clean with a vacuum and damp cloth, then use a silicone-based lubricant, avoid lubricants that turn into grit over time.
Where do drafts most often come from after a DIY patio door install?
If you feel a consistent draft, the weatherstrip at the perimeter is the first stop because it should compress slightly when closed. Next check the bottom threshold sweep or seal, many have an adjustable component that can be raised or lowered. Finally inspect exterior caulk made during cold or wet weather, sealant can shrink and crack as conditions change.
Do I need a second person for every patio door type?
Expect different minimum requirements for different door types, but a common decision aid is to use your door type’s handling difficulty: sliding doors are typically manageable by one person, while double French doors and heavier units often require two people for safe lifting and hinge alignment. If the door kit includes adjustable hinges or pre-hung panels, having a helper reduces the chance of misalignment mid-install.
Can I use any screws I have for the patio door frame?
Use fasteners specified by the door manufacturer, because correct length and type matters for anchoring without splitting framing. Exterior-rated screws (galvanized or stainless) resist corrosion when they are exposed to moisture around the sill and jamb. If you use random longer screws, you can strike framing members in the wrong way or over-penetrate and create stress points.
How do I install the screen door correctly if it came in a separate piece?
The screen typically installs into the outermost track channel, but the exact order depends on whether your unit uses the sliding panel track, a separate screen track, or a quick-snap screen frame. If your screen doesn’t slide after installation, don’t force it, check that the rollers and guides are seated fully and that the screen isn’t installed on the wrong track.
What makes installing a patio door where a window was, or in brick, a different job?
It depends on the condition of the wall system and door type. A wood-framed replacement in a standard opening is usually the simplest, but window-to-patio conversions, and masonry or brick installs, require different structural support (like lintels) and a different flashing integration plan. Treat these as separate projects, because the weatherproofing details and anchoring strategy are not the same.
Do I need to test for lead paint even if I’m doing a DIY install at home?
Yes, you should test for lead paint before disturbing coatings in homes built before 1978, especially if you will cut, scrape, or remove old trim and sealants. Even if you are the homeowner, the safer approach is dust containment and respiratory protection, because lead hazard is about exposure during demolition and cleanup. If you are not prepared for safe containment and disposal, hire a lead-safe certified contractor.
Next Article
How to Seal a Patio Door for Winter: Step-by-Step
Step-by-step how to seal sliding or screen patio doors for winter: adjust, add sweeps and weatherstripping, stop drafts,