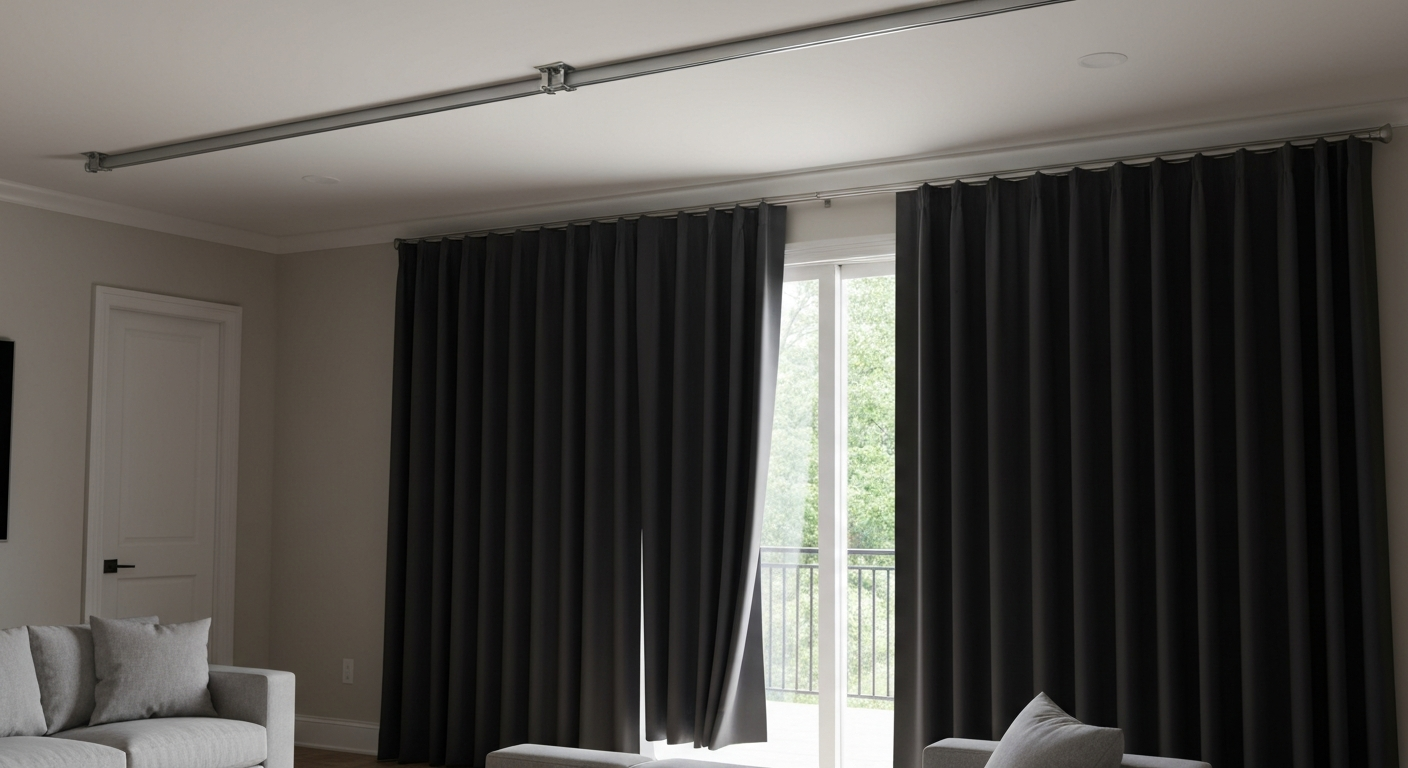
Getting rid of an old patio door means deciding first whether you actually need to remove it, then working through removal, glass handling, transport, and disposal in the right order. For most sliding glass doors, two people, a basic tool kit, and a half-day are enough to pull the door out safely. Screen and storm doors are even simpler. The tricky parts are handling heavy glass panels without injury, wrapping and transporting them without breakage, and then figuring out where your municipality will actually accept tempered flat glass, because it is almost never the curbside recycling bin.
How to Get Rid of Old Patio Doors: Removal, Salvage, Recycle

Jamie Archer
20 Jul 2026
Remove it, darken it, or add privacy: pick your path first
Before you rent a truck and grab the pry bar, spend five minutes on this decision. A lot of homeowners want to get rid of a patio door because it lets in too much light, feels like a fishbowl from the street, or looks outdated. Full removal is not always the right answer for those problems, and it is definitely the most labor-intensive and expensive option.
- The door is damaged, rotted, broken beyond repair, or you are reconfiguring the wall: remove and replace it.
- The door works fine but you want light control or privacy: blackout curtains, roller shades, or window film applied directly to the glass can solve this in an afternoon without touching a single screw. These are worth trying before committing to removal.
- You want permanent privacy but want to keep the door: frosted window film, etched glass film, or privacy-tinted film are semi-permanent options that do not require removal.
- You need privacy only in one direction or at certain times: adjustable louvered blinds or cellular shades mounted inside the frame are removable and reversible.
- The door is functionally fine but you are selling, remodeling, or doing a full exterior renovation: removal and replacement is the right call.
If you are leaning toward the privacy or blackout route rather than full removal, that is covered in detail later in this article. If removal is your decision, keep reading in order.
Tools and materials you will need
Pull these together before you start. Missing a tool mid-job with a glass panel half out of a track is a bad situation.
General tools
- Flathead and Phillips screwdrivers (multiple sizes)
- Pry bar (small flat bar, not a full demolition bar)
- Utility knife with fresh blades
- Reciprocating saw or oscillating tool (for cutting caulk beads and fasteners if doing full-frame removal)
- Hammer
- Tape measure
- Torpedo level
- Cordless drill/driver
- Shims (wooden or composite)
- Shop vacuum
- Bucket and rags
Door-specific items
- Panel-lifting suction cup handles (strongly recommended for glass panels over 40 lbs; available at tool rental stores)
- Moving blankets or thick furniture pads (minimum 4, ideally 6)
- Painter's tape or masking tape (to hold cracked glass in place during removal)
- Cardboard sheets (for glass wrapping and padding)
- Plastic stretch wrap or shrink wrap
- Foam edge guards or pool noodles cut lengthwise (for glass edges)
- Zip ties or ratchet straps rated for the panel weight
- Permanent marker for labeling panels
Safety gear
- Safety glasses or goggles with side protection (ANSI Z87.1 rated)
- Cut-resistant gloves, level A4 or higher (not standard work gloves)
- Steel-toed boots or heavy work boots
- Long sleeves and pants
- Face shield for cracked or damaged glass panels
Safety checks and permits before you touch anything
A like-for-like patio door replacement in most jurisdictions does not require a permit. However, if you are enlarging the rough opening, changing the egress configuration, or altering the structural framing, a permit and inspection are typically required under the International Residential Code framework that most local building departments follow. When in doubt, call your local building department and ask directly. It takes five minutes and can save you a headache at resale.
If your home was built before 1978, there is a meaningful chance the painted trim and frame around the door contains lead paint. Under the EPA's Renovation, Repair and Painting (RRP) Rule, certified contractor firms must follow lead-safe work practices when disturbing painted surfaces above threshold amounts in pre-1978 housing. Homeowners working on their own residence are exempt from the RRP Rule's contractor certification requirements, but the EPA still strongly recommends lead-safe practices: wet the surface before cutting or scraping, use an N100 respirator, contain debris, and dispose of dust and debris as lead-contaminated waste. Buy a lead test swab kit (under $10 at any hardware store) and test the painted trim before you start.
- Check local permit requirements for door removal and replacement before starting
- Test painted trim for lead if the home is pre-1978
- Locate your electrical panel in case you need to cut power to outlets near the opening
- Check for gas or water lines in any adjacent wall if you are doing full-frame removal
- Confirm the door panel glass is tempered (look for a small etched or silk-screened mark in a corner, typically showing ANSI Z97.1 or CPSC 16 CFR 1201; tempered glass shatters into small cubes rather than large shards)
Preparing the work area
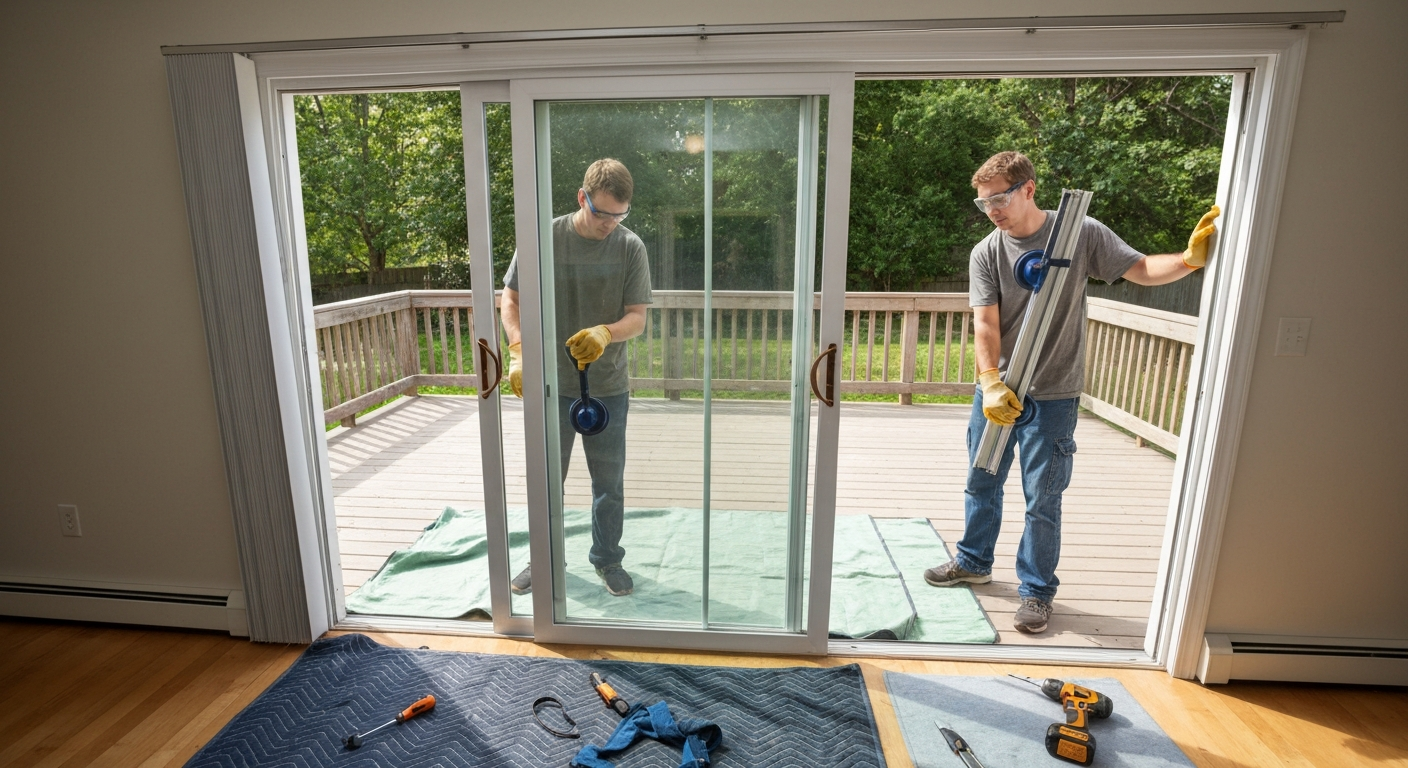
Clear a path from the patio door to wherever the door will be staged after removal. That means moving furniture at least 6 feet back from the door on the interior side and clearing the deck or patio on the exterior side. Lay moving blankets on the floor where the panel will rest once it is out. Patio door glass panels are heavy: a standard 6-foot sliding glass door panel typically weighs between 80 and 150 pounds depending on the glass type and frame material, so you need a clean, padded staging area before you start lifting.
- Move furniture and rugs away from the work zone
- Lay moving blankets on the floor inside and on the deck outside
- Crate or confine pets in another room
- Recruit at least one helper: every major manufacturer including Pella, JELD-WEN, and Andersen explicitly states panels require two people minimum
- Have your staging area (a flat, padded surface) ready before the panel comes out of the track
- Put on PPE before handling any glass
Removing a sliding glass patio door, step by step
This process applies to most standard vinyl, aluminum, and wood-framed sliding glass patio doors from major brands. Always pull the manufacturer's installation or service manual for your specific model if you have it, because details like roller adjustment screw location and filler configuration vary. The general sequence below works for the vast majority of residential sliding doors.
Step 1: Remove the screen door first
Before touching the main glass panel, pull the screen door out. Lift the screen panel up firmly into the head track, then tilt the bottom out toward you. It should pop free. Set it aside flat on a moving blanket. If it does not lift easily, look for a small roller adjustment screw on each bottom corner of the screen frame and back it out to lower the rollers and create clearance.
Step 2: Remove interior stops and trim
Use a utility knife to score any caulk or paint bead along the interior stop molding. Work a flathead screwdriver or small pry bar behind the stop, moving along its length gradually to avoid cracking it if you want to reuse it. Remove any head filler strips (these are typically narrow trim pieces in the top of the frame). Set screws aside in a cup.
Step 3: Retract the rollers
On the bottom edge of the sliding panel, look for two roller adjustment access holes or screws, usually on the interior-facing side of the panel stile near each bottom corner. Turn these screws clockwise to retract the rollers upward, lowering the panel in the track and creating the clearance you need to lift it out. If you cannot find the adjustment screws, check the manufacturer manual for your model.
Step 4: Lift the operating panel out
With your helper in position (one person on each side of the panel), grip the panel firmly using suction cup handles if available, or grip the frame stiles. Lift the panel up into the head track until the bottom clears the sill track, then tilt the bottom of the panel toward you and lower it out. Move it immediately to your padded staging area. Do not set it down on concrete or hard flooring without padding.
Step 5: Remove the fixed panel (if applicable)
Fixed panels are held in place by interior and exterior stops screwed or nailed into the frame. Remove these stops on both faces. The fixed panel can then be lifted out the same way as the operating panel, but it may have additional fasteners through the frame jamb that need to be backed out first. Check all four edges before lifting. Fixed panels are often heavier than operating panels because they lack the cutouts for hardware.
Step 6: Remove the frame (full replacement only)
If you are doing a full-frame removal rather than just pulling the panels, cut the exterior caulk bead with a utility knife, then use an oscillating tool or reciprocating saw to cut through any fasteners or nailing fins securing the frame to the rough opening. Work around all four sides, then have your helper support the frame while you remove the last fasteners. The empty frame can then be pulled out as a unit or cut into sections.
Removing a screen door or storm door, step by step
Screen and storm doors are considerably lighter and easier to handle than glass panels, but they still have a few quirks worth knowing.
- Open the door fully and use a wedge or doorstop to hold it in place while you work.
- Disconnect the closer arm: most pneumatic or hydraulic closers are attached with a pin through a bracket on the door and a bracket on the frame. Slide out or unscrew the pin to detach the closer arm. Do this carefully because the closer is under tension.
- Remove the hinge pin or hinge screws. For pin-type hinges, tap the pins out from the bottom up with a hammer and flathead screwdriver. For screw-mounted hinges, back out the screws on the door leaf, not the frame leaf, so the frame brackets stay in place if you are installing a replacement.
- Lift the door off and set it flat on a moving blanket.
- For screen-only frames with rollers at the bottom, look for a small flathead screw in each bottom corner of the frame to adjust roller height. Back these out, lower the rollers, then lift the screen up into the head channel and tilt out.
- To disassemble a screen panel, use a spline roller tool to pull the rubber spline out of the groove around the perimeter of the frame. The mesh screen will come free. Roll the screen loosely (do not crease it) and store flat.
- If the frame is aluminum and held together with corner keys (plastic or metal inserts in each corner), the sections can often be separated by tapping them apart gently with a rubber mallet.
Disassembling door components safely
Once the panels are out, you can break down the hardware and frame sections. Keep all hardware in labeled zip-lock bags, especially if you might reuse or sell components. This is also the point where you identify what is salvageable and what is trash.
- Remove the handle set and latch hardware using a screwdriver; set aside if in good condition for resale or reuse
- Remove the lock cylinder if a keyed lock is present (typically two screws on the interior escutcheon)
- Pull the rollers out of the panel frame by removing the access screws or cover plate at each corner
- Score and remove any weatherstripping from the panel edges and sill; note whether it is pile-type, foam, or vinyl bulb for replacement matching
- Remove sill track covers or threshold caps by pulling or unscrewing
- If the main frame is aluminum, it can be cut into sections with a reciprocating saw for easier handling and metal recycling; wear eye protection and gloves
- Separate glass from frame only if the frame is being discarded and the glass will be transported separately; this requires removing the glass bead (a snap-in or screwed retaining strip around the perimeter of the glass)
Wrapping and securing glass panels for transport
This step gets skipped or rushed and that is how glass breaks in transit. A 150-pound tempered glass panel that shatters in the back of a truck is a cleanup nightmare and a safety hazard. Do it right.
- If the glass has any cracks or chips, cover the entire cracked area with wide painter's tape or packing tape before moving it. This holds fragments together and reduces the risk of the panel shattering during handling.
- Apply foam edge guards (or split pool noodles) to all four edges of the glass panel. Tape them in place. Glass edges are sharp and are where breakage typically initiates during transport.
- Place a sheet of cardboard flat against each face of the glass panel. The cardboard should be at least as large as the glass.
- Wrap the cardboard-sandwiched panel with multiple layers of plastic stretch wrap, starting at one end and overlapping each pass by half. Three full passes is the minimum.
- Add a second layer of moving blanket around the wrapped panel and secure with stretch wrap or zip ties.
- Use a permanent marker to write GLASS, HEAVY, and THIS SIDE UP on the outside of the wrapped panel.
- Store and transport glass panels upright, never flat. Flat transport puts the full weight of the glass on the face and dramatically increases breakage risk.
Loading and transporting door panels
A standard pickup truck bed works for single panels if they are secured properly and transported upright against the cab wall with padding between the glass and metal. For multiple panels or a full door assembly, a cargo van or box truck is safer because panels can be kept vertical and strapped to the interior walls. Never lay large glass panels flat in a truck bed.
- Line the truck bed or cargo floor with moving blankets before loading
- Stand panels upright and lean them against a padded wall or use a purpose-built glass transport rack if hauling multiple panels
- Use ratchet straps across the face of each panel to hold it against the wall or rack; do not over-tighten directly on glass, use padding at every contact point
- Place foam or cardboard between panels if stacking them vertically side by side
- Tie a bright ribbon or flag to anything that extends past the tailgate
- Drive smoothly: hard braking is the most common cause of glass breakage in transit
- Have at least two people for any panel over 50 lbs; use suction cup handles to maintain a secure grip during loading
What is worth keeping: salvage, upcycle, sell, or donate
Before everything goes to the dump, walk through what you have. Patio door components have real resale and reuse value, and some organizations will pick them up for free.
What is likely worth keeping or selling
- Handle sets and lock hardware in good condition: these sell for $20 to $80 on local marketplace platforms
- Intact glass panels with no chips or cracks: usable for greenhouse glazing, cold frames, room dividers, or tabletops
- Aluminum or vinyl frame sections: aluminum has scrap metal value; vinyl frames are less valuable but sometimes accepted
- Rollers and hardware sets: DIYers fixing similar doors are often looking for these
- Screen mesh in good condition: worth keeping for repairs or selling in large rolls
How to sell or donate
- List intact glass panels and hardware on Facebook Marketplace or Craigslist with exact dimensions, frame material, and clear photos; people looking for replacement parts or repurposing materials will find them
- Habitat for Humanity ReStores accept used doors and door components in resalable condition; call ahead to confirm they are accepting large glass items and to arrange drop-off or pickup
- Local salvage architectural material companies buy and resell usable door components, especially in older hardware
- For upcycling: intact glass panels work as cold-frame covers for gardens, sliding barn door glass panels, or framed art displays; frame sections have been used as trellis structures and wall hooks
Where to dispose of or recycle old patio doors
This is where most homeowners hit a wall. You cannot just put a patio door in the recycling bin, and you cannot always leave it at the curb. Here is how each disposal route actually works. For local options and drop-off rules, see where to dispose of old patio doors. If you need a step-by-step guide on options for disposal, recycling, donation, or resale, see our detailed resource on what to do with old patio doors.
| Disposal route | What they accept | Typical cost | Notes |
|---|---|---|---|
| Municipal bulky item pickup | Whole door assemblies, framed panels | Free to $50 depending on municipality | Call ahead; some require scheduling; size limits vary |
| C&D recycling facility or transfer station | Glass panels, aluminum frames, vinyl frames, hardware | Usually $20 to $80 per load by weight | Most accept mixed construction materials |
| Scrap metal yard | Aluminum frames and hardware, steel hardware | May pay you for aluminum by the pound | Clean metal gets better rates; remove glass first if possible |
| Specialized flat glass recycler | Tempered and annealed flat glass panels | Free to small fee | Not available everywhere; search Earth911 for local options |
| Habitat ReStore or salvage company | Intact, undamaged doors and frames | Free (they take it) | Must be in sellable condition; call to confirm acceptance |
| Landfill or transfer station | Everything else | $30 to $100+ per load | Last resort; fees vary by jurisdiction |
One critical point on glass recycling: tempered glass and flat architectural glass are almost universally excluded from curbside recycling programs. GANA and USGlass technical guidance define heat‑treated, heat‑strengthened, and fully tempered glass, describe quench/strain patterns used to identify tempered glass, and reference ASTM C1048 and ASTM C1036 as applicable standards for architectural glazing GANA introduction and glazing technical references (USGlass / Glass Association of North America material). Municipalities like Santa Fe County and Cuyahoga County explicitly state this in their recycling guidelines, and it is standard practice nationwide. Tempered and flat glass melt at different temperatures than container glass and contaminate the bottle-glass cullet stream. Do not put patio door glass in your curbside bin even if your bin accepts glass bottles.
How to find local disposal and recycling options
Disposal rules vary enormously by county and city, so the fastest approach is to search specifically rather than assume. Use Earth911, recycling search and guidance to locate local acceptance and disposal options (bulky pickup, transfer stations, specialized glass recyclers) for building materials and glass Earth911 — recycling search and guidance.
- Search Earth911.com using 'flat glass' or 'tempered glass' plus your zip code to find local drop-off sites
- Search '[your county] bulky item pickup schedule' to find municipal large-item collection rules and booking links
- Search '[your city] construction debris recycling' or 'C&D recycling near me' to find transfer stations that accept building materials
- Search '[your city] scrap metal recycler' for aluminum frame drop-off; call ahead to confirm they take door frames with glass still attached or ask if you need to separate materials first
- Call your local solid waste authority directly and ask: 'I have a sliding glass patio door to dispose of, what are my options?' They will know the current rules and any fees
- Have the approximate dimensions and weight of your door ready when calling, as size limits apply to many pickup and drop-off programs
Legal, safety, and environmental considerations for disposal
- Illegal dumping of construction materials carries fines in every state; do not leave door panels at roadsides, parks, or in dumpsters you do not own
- Pre-1978 painted frames may be classified as lead-containing construction debris in some jurisdictions; check local solid waste rules before disposing
- If you find any fibrous insulation material inside the frame cavity during full-frame removal, do not disturb it until you know what it is; older homes occasionally have asbestos-containing insulation near window and door openings
- Some transfer stations charge by weight and require documentation of origin for C&D waste; keep your address and basic project description handy
- Glass panels from commercial buildings may carry different disposal requirements than residential; this article addresses residential doors only
When to hire a pro instead of doing it yourself
Full-frame patio door removal and replacement is one of the more accessible large DIY projects if your rough opening is in good shape and you have a helper. But there are specific situations where hiring a contractor is the clearly smarter call.
- The rough opening shows signs of rot, moisture damage, or structural compromise: this requires a framing carpenter, not just a door installer
- The door opening is in a load-bearing wall and you are changing the opening size: a structural engineer and permitted work are required
- You cannot get a second person to help and the panels are over 80 lbs
- The existing door has unusual framing or is part of a curtain wall or multi-panel system beyond a standard two-panel slider
- You are in a condo or HOA property with building rules about exterior work
- You need a warranty on the new installation
What to ask and how to compare contractor quotes
- Ask specifically whether the quote includes removal and disposal of the old door, or just installation of the new one
- Ask how they dispose of the old glass (important for environmental and liability reasons)
- Get at least three quotes; for a standard sliding door removal and replacement, expect $400 to $1,200 in labor depending on your region and the complexity of the job
- Ask whether a permit is required for your specific project and who pulls it (the contractor should pull their own permits, not ask you to)
- Confirm they carry general liability insurance and ask for a certificate
- Check reviews specifically for door installation work, not just general remodeling
Preparing the rough opening for a new door
Once the old door is out, the opening needs to be in good shape before the new unit goes in. Skipping this step leads to air leaks, water infiltration, and a door that will never operate smoothly.
- Inspect the sill, jack studs, header, and king studs for rot, insect damage, or moisture. Probe with a screwdriver: soft spots mean rot and require replacement before installing anything.
- Measure the rough opening: width at top, middle, and bottom; height on left side, center, and right side. Use the smallest measurement in each direction. Compare against the new door's required rough opening size (always in the product spec sheet).
- Repair or replace any damaged framing. The sill is the most commonly rotted component on patio door openings.
- Apply a self-adhering flashing membrane to the sill and up the side jambs per the new door manufacturer's instructions. This is the most important moisture protection step.
- Check that the sill is level. Shim if necessary. A patio door installed on an out-of-level sill will bind, drift open, or fail to latch.
- If there will be any gap between completing the removal and installing the new door, cover the opening with a sheet of plywood or rigid foam board, sealed at the edges with caulk or weatherstripping tape. Even overnight exposure lets in moisture, insects, and drafts.
Privacy and blackout alternatives if you are keeping the door
If after reading the decision flow at the top of this article you are reconsidering full removal, here are the practical options. These range from a $15 film you apply yourself to a more involved blind installation, and none of them require touching the door structure.
| Option | DIY difficulty | Cost range | Light control | Privacy level | Reversible? |
|---|---|---|---|---|---|
| Blackout roller shade | Easy | $40 to $200 | Full blockout | Full | Yes |
| Blackout curtains on ceiling track | Easy to moderate | $60 to $300 | Full blockout | Full when closed | Yes |
| Frosted window film | Easy | $15 to $60 | Partial (diffuses) | High (obscures silhouettes) | Yes, with effort |
| One-way privacy film | Easy | $20 to $80 | Minimal | Daytime only | Yes |
| Cellular or honeycomb shades | Moderate | $80 to $400 | Partial to full | Moderate | Yes |
| Exterior louvered shutters | Moderate to hard | $150 to $600 | Adjustable | Adjustable | No (permanent mount) |
Blackout films and privacy films are applied directly to the glass using a soapy water solution and a squeegee. The main limitation is that frosted or privacy films reduce visibility through the door in both directions, which is worth knowing before you apply. If you want to keep the view out while blocking the view in during daylight, a one-way reflective film is the right call, with the caveat that it reverses at night when interior lights are on.
DIY vs. professional: cost, time, and honest difficulty
| Factor | DIY removal | Professional removal |
|---|---|---|
| Labor cost | $0 (your time) | $200 to $600 for removal alone |
| Tool cost (one-time) | $50 to $150 if renting suction cups and specialty tools | Included in contractor price |
| Disposal cost | $0 to $100 depending on local options | Often included or $50 to $150 extra |
| Time required | Half day for panel-only; full day for full-frame | 2 to 4 hours for an experienced crew |
| Risk of injury | Moderate if safety steps are skipped; low if followed | Low (contractor carries insurance) |
| Risk of damage to home | Moderate for first-timers on full-frame removal | Low |
| Permit handling | Homeowner's responsibility | Contractor responsibility |
| Ideal for | Panel-only removal, intact framing, helper available | Full-frame removal, damaged framing, no helper, permit required |
My honest take: pulling the glass panels and screen out of a standard sliding door is genuinely a beginner-friendly project as long as you have one other person and follow the glass-handling steps carefully. Full-frame removal with caulk cutting and fastener removal is moderate difficulty. The hard part is never the removal itself. It is disposing of the glass correctly and prepping the opening properly for a new door. Those two steps are where most DIYers underestimate the time and logistics involved.
Your complete step-by-step plan from decision to done
Use this as your project checklist. Work through it in order and you will not miss anything important.
- Decide: remove the door, or solve with privacy/blackout options (films, shades, curtains). Only proceed below if removing.
- Check permit requirements with your local building department before starting.
- Test painted trim for lead if home is pre-1978. Take appropriate safety precautions.
- Gather all tools and materials including PPE before starting work.
- Clear and pad the work area; recruit at least one helper.
- Remove the screen door first, then address the main glass panels.
- For sliding glass doors: remove interior stops, retract rollers, lift and remove operating panel, then fixed panel.
- For screen/storm doors: detach closer arm, remove hinge pins or screws, lift door off.
- Disassemble components: remove hardware, rollers, weatherstripping. Sort into keep, sell/donate, and dispose piles.
- Wrap glass panels for transport: tape any cracks, apply edge guards, sandwich in cardboard, wrap in stretch film, cover with moving blanket, label clearly.
- Contact disposal and donation destinations before loading the truck. Confirm they accept what you have.
- Transport panels upright in a padded vehicle, strapped securely. Drive smoothly.
- Deliver salvageable components to ReStore, salvage company, or list on marketplace.
- Deliver glass to flat glass recycler or C&D facility. Take aluminum frames to scrap yard.
- Inspect the rough opening: check for rot, measure, repair framing as needed.
- Apply sill and jamb flashing membrane.
- Cover the opening temporarily if there is any gap before the new door installation.
- Install new door or schedule a licensed contractor for the installation.
FAQ
What authoritative source categories should I consult to write a complete homeowner-facing article on getting rid of old patio doors?
Manufacturer installation/removal manuals (Pella, Milgard, JELD‑WEN, Andersen) for model-specific removal and hardware details; retailer and trade DIY guides (Home Depot, This Old House) for practical stepwise procedures; federal safety and health standards (OSHA for eye/hand protection, ANSI Z87.1 for eyewear, NIOSH lifting guidance) for PPE and lifting limits; EPA RRP and local lead rules for pre‑1978 homes and lead‑safe practices; building code/permit guidance (ICC/IRC and local AHJ) for when permits/inspections are required; glazing standards (GANA/ASTM) to identify tempered vs annealed glass; recycling and disposal resources (municipal recycling pages, Earth911, C&D/transfer station and scrap yard guidance) for accepted routes; and resale/donation marketplaces and salvage networks for reuse options.
What homeowner-specific facts should I collect before deciding to remove or modify a patio door?
Door brand/model or serial number and photos; door type (sliding glass, multi‑panel, hinged, screen), glass type (tempered vs annealed), panel weight and dimensions, age of house (pre‑1978 lead risk), presence of hardware/rollers in good condition, condition of frame/threshold, whether the opening will change (structural work), local permit requirements, and available disposal or recycling services in your area (bulky pickup, transfer station, glass recyclers).
How do I decide: remove the patio door entirely vs darken/modify it as a short‑term alternative?
Use a decision flow: 1) If structural opening stays same and you want permanent replacement -> remove. 2) If door is sound but you want privacy/light control short-term -> choose blackout film, privacy film, curtains/blinds, or frosted spray/film. 3) If glass is cracked, hardware failing, or frame rotted -> remove and replace. 4) If you plan to sell/donate door or salvage hardware -> remove carefully. Consider cost, time, permit needs, lead risk, and whether DIY capability and two+ people are available for heavy panels.
What tools, PPE and materials checklist is needed for DIY removal of sliding glass and screen doors?
Tools: screwdrivers (Phillips and flat), cordless drill/driver with bits, pry bar, utility knife, putty knife, 1/8–3/8" hex/Allen set, adjustable wrench, pry bar, shim stock, tape measure, ratchet, crowbar, suction cups/glass lifter, dolly/hand truck, moving blankets, ratchet straps. PPE: ANSI Z87.1 safety glasses or goggles, face shield for glass work, cut‑resistant gloves/gauntlets, steel‑toe shoes, long sleeves. Materials: packing tape, cardboard, corrugated corner protectors, moving blankets, stretch wrap, glass wrap/tempered glass signage, rigid cardboard or plywood sheets for panels, trash bags, caulk cutter/utility knife, buckets for hardware. Have a second person or mechanical aid for lifts.
Step-by-step: how to safely remove a sliding glass patio door (high-level)?
1) Review manufacturer manual for model-specific steps. 2) Remove screen panel first. 3) Unlock and remove interior stops/trim as needed. 4) Retract rollers via adjustment screws to lower panel slightly. 5) Tilt panel up into head track to free from sill, then lift out with two people (use suction cups). 6) For heavy panels, use a dolly and protect glass with moving blankets and cardboard. 7) Remove remaining fixed panels per manual, unfasten frame fasteners if full‑frame removal is needed. 8) Label and bag fasteners and hardware, inspect opening for lead paint risk and structural issues.
Step-by-step: how to remove a screen door and lightweight panels?
1) Unlock and lift the screen to disengage bottom track. 2) Compress screen frame if necessary and lift the bottom out, then tilt out the top. 3) Remove spline and screen mesh if salvaging. 4) Unscrew hinge screws or roller assembly. 5) Handle frames gently—screen frames are lighter but can bend; stack flat and protect with cardboard.
Next Article
How to Blackout Patio Doors: DIY Solutions & When to Hire Pro Help
DIY and renter-friendly ways to blackout patio doors, film, curtains, panels, shades, measuring, installs, and when to go