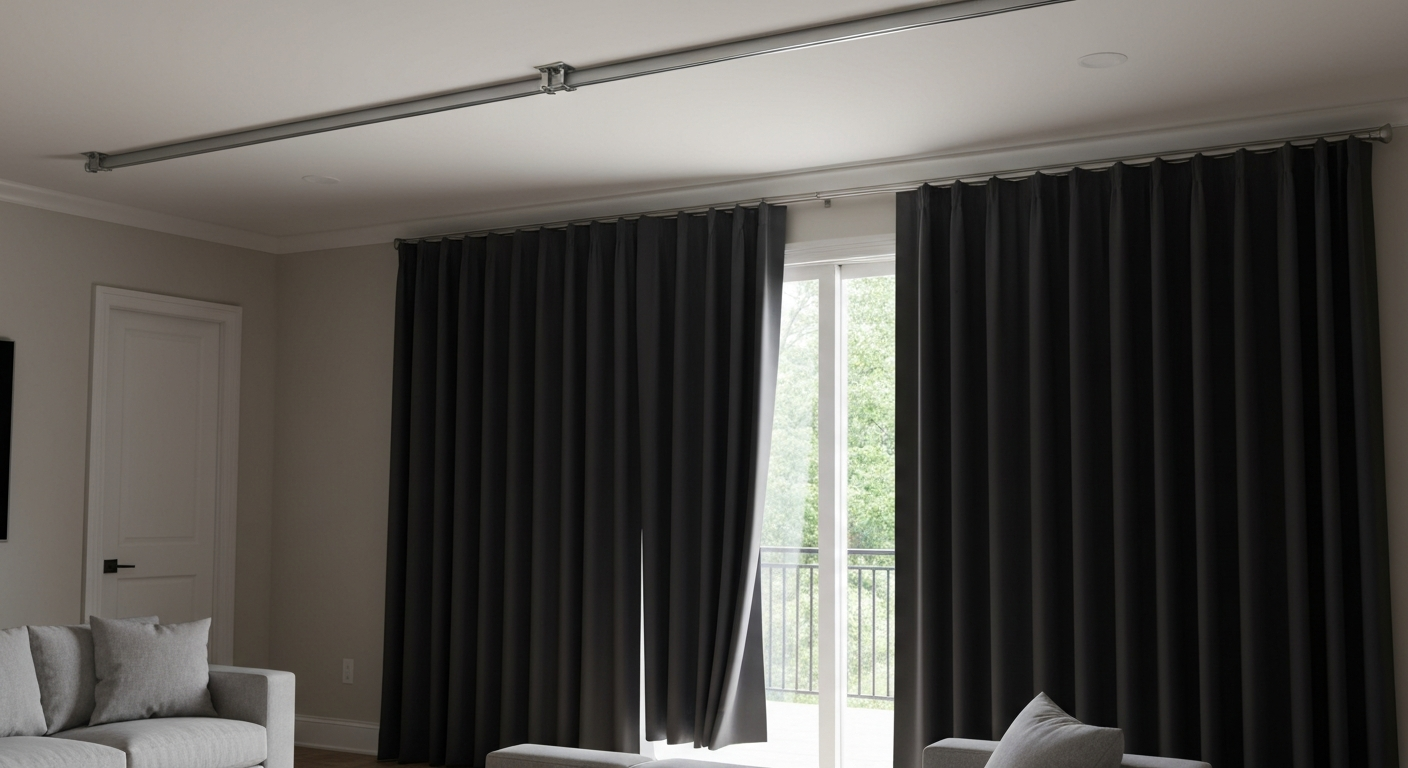
You can blackout patio doors with blackout curtain panels on a ceiling-mounted rod, a blackout roller or vertical shade on an outside-mount bracket, or blackout adhesive film applied directly to the glass. Each method can be done in a few hours with basic tools, costs anywhere from $20 for a roll of film to $300 or more for motorized shades, and can be installed without blocking your door's egress or interfering with its lock. The right choice depends on whether you rent or own, whether you need insulation alongside darkness, and how permanent you want the solution to be.
How to Blackout Patio Doors: DIY Solutions & When to Hire Pro Help

Jamie Archer
15 Jul 2026
Temporary vs. permanent, renter vs. owner: make the call first
Before you buy anything, work through these three decisions. Getting them wrong means buying twice or leaving damage behind on a rental.
| Decision | Temporary / Renter-friendly | Permanent / Owner |
|---|---|---|
| Primary goal | Block light with no damage to walls or glass | Full blackout plus energy savings or clean finish |
| Best method | Blackout curtain panels on a tension rod or Command-strip-mounted track; static-cling film | Ceiling-mounted curtain track, outside-mount roller/vertical shade with wall screws, or hardwired shade system |
| Mounting hardware | 3M Command strips (up to manufacturer weight limit), tension rods, VELCRO Extreme Lock strips | Drilled wall anchors, ceiling brackets, or built-in valance pockets |
| Insulation benefit | Minimal to moderate (curtain panels) | High if using foam insert panels (XPS R-5/in, polyiso R-6/in) behind a shade or curtain |
| Removal | Stretch-release Command strips, peel-off film, tension rod pulls free | Patch and paint required after bracket removal |
| Cost range | $20–$120 | $80–$600+ |
If you rent, focus on tension rods, Command strips, static-cling film, and VELCRO-mounted panels. If you own and want to treat the door properly (and reduce drafts at the same time), a drilled ceiling or wall-mounted blackout curtain track or outside-mount roller shade is worth the extra hour and the screw holes. If insulation is the main goal alongside darkness, a DIY foam insert panel (more on that in the materials section) paired with a blackout curtain or shade is your best combination.
Safety, egress, and security: what you cannot ignore
Patio sliding doors are frequently the primary egress point in a room, and building codes are specific about keeping them accessible. IRC R311.2 requires a minimum 32-inch clear width and 78-inch clear height at egress doors, measured from the top of the threshold to the bottom of the door stop. Per the 2018 International Residential Code (IRC), R311.2 Egress door, the primary egress door must be side‑hinged and provide at least a 32‑inch (813 mm) clear width and 78‑inch (1981 mm) clear height measured from the top of the threshold to the bottom of the stop 2018 International Residential Code (IRC) — R311.2 Egress door. The International Building Code (IBC Chapter 10) goes further and explicitly forbids concealing required egress doors with curtains or draperies. NFPA 101 reinforces this, limiting how much force is needed to operate an egress door (30 lbf to set in motion, 15 lbf to open to required width).
In practice this means: any curtain panel, shade, or physical insert you install must be easy to move out of the door path without tools, must not obstruct the lock or latch, and must not require significant force to push aside in an emergency. Stack curtains to the non-sliding side (or to both sides) so the door's travel path stays clear. Roller and vertical shades should raise or retract fully within a few seconds. Never permanently frame or seal a foam insert into a patio door opening without verifying with your local building department that the door is not your required egress, or that another compliant egress exists in the same room.
On the security side, sliding glass doors are vulnerable to lift-out attacks and lock bypasses. For a summary of A156 grading that defines these durability and performance classes, see What are ANSI BHMA hardware grades?, Allegion knowledge base (summary of A156 grades) What are ANSI BHMA hardware grades? — Allegion knowledge base (summary of A156 grades). While you are working on the door, inspect the frame for an anti-lift bar or pin (a drilled hole through the inner frame into the outer frame, with a steel pin dropped in). ANSI/BHMA A156.43 governs integrated sliding door assembly hardware. If your lock is worn or the handle is loose, this is the right time to address it. Blackout film adds a modest security benefit by making it harder to see inside, but it is not a substitute for a functioning lock and an anti-lift device.
Cost, DIY vs. pro: when to hire someone
Almost every blackout method covered here is genuinely DIY-friendly for a capable homeowner. The exception is a motorized shade system wired to a wall switch or smart home hub, that crosses into licensed electrical work in most jurisdictions. Here is a realistic breakdown of costs and the threshold at which hiring a pro makes sense.
| Method | DIY material cost | Pro install cost (labor + materials) | Hire a pro when... |
|---|---|---|---|
| Blackout curtain panels + rod/track | $40–$150 | $200–$400 | You want a motorized track or can't safely ladder-mount ceiling brackets |
| Blackout roller shade (manual) | $60–$200 | $250–$450 | Multiple doors, complex fascia trim, or motor wiring required |
| Blackout vertical shade | $80–$250 | $300–$550 | Wide openings over 100 in. or commercial-grade hardware needed |
| Blackout adhesive film | $20–$60 | $100–$200 | Large glass area or decorative glass requiring precise alignment |
| Rigid foam insert panel (DIY only) | $25–$80 | Not typically offered | N/A — this is a DIY-only solution |
| Motorized roller/cellular shade | $200–$600+ | $500–$1,200+ | Always — electrical wiring required in most jurisdictions |
If your budget is under $100, start with curtain panels on a tension rod or blackout film. If you want a clean, finished look and spend a weekend on it, a manually operated outside-mount roller or vertical shade is well within DIY range. For motorized systems, get a quote from a window treatment installer, the wiring alone can cost $150 or more from an electrician.
Master materials and tools list
Gather everything before you start. Nothing is worse than getting halfway through a curtain install and realizing you need a different drill bit.
Materials (buy what applies to your chosen method)
- Blackout curtain panels (100% blackout lining, not 'room darkening') — sized to your door measurement plus overlap
- Curtain rod or ceiling-mounted track (heavy-duty rod for panels over 15 lb total)
- 3M Command Large Picture Hanging Strips (for renter track mounting, per manufacturer weight limits)
- VELCRO Brand Extreme Lock strips (adhesive-backed, rated up to ~15 lb for semi-permanent use)
- Blackout roller shade or vertical shade cassette (sized to door width + 4 in. for outside mount)
- Side channels / guide rails (extruded aluminum, for true blackout on roller shades — Hunter Douglas and similar manufacturers recommend these explicitly)
- Blackout adhesive window film (e.g., 3M Scotchshield or similar; specify blackout/opaque, not solar/tint)
- Static-cling blackout film (no adhesive, renter-safe)
- XPS rigid foam board (e.g., Owens Corning FOAMULAR, R-5 per inch) — for insulating insert panels
- Polyiso rigid foam board (R-6 per inch, thinner for same R-value) — alternative to XPS
- Aluminum foil tape (for sealing foam panel edges)
- Fabric or felt adhesive edge trim (to seal foam panels against door frame without scratching)
- Wall anchors (plastic expansion anchors for drywall, toggle bolts for hollow wall over 50 lb loads)
- Wood screws: No. 8 x 1-1/2 in. for bracket mounting into studs; No. 8 x 2-1/2 in. if going through drywall to stud
- Ceiling brackets (J-channel or flat plate, for ceiling-mount curtain track)
- Spray bottle with soapy water (for wet application of adhesive film)
- Squeegee or credit card (for smoothing film)
- Painter's tape (for marking measurements)
- Measuring tape (25 ft)
- Level (24-in. or laser level)
Tools
- Drill/driver (cordless, 18V recommended)
- Drill bits: 1/8 in. pilot bit, 3/16 in. for drywall anchors, 1/4 in. for toggle bolts
- Stud finder (magnetic or electronic)
- Hacksaw or miter saw (for cutting curtain track or roller shade tubes to length)
- Utility knife with fresh blades (for cutting film and foam panels)
- Straight edge or T-square (minimum 36 in. for clean film cuts)
- Scissors (for curtain panels and trim)
- Step ladder (6 ft minimum for ceiling mounts)
- Pencil
- Sponge and isopropyl alcohol (for cleaning glass before film application)
Measuring your patio door correctly
Patio doors are not all the same width. Standard sliding glass doors run 60 inches (5 ft) and 72 inches (6 ft) wide, with 80-inch heights being most common. But older or custom units vary. Always measure the actual opening, not what the builder's spec sheet says.
How to measure for curtains and shades
- Measure the width of the door frame opening at the top, middle, and bottom. Use the narrowest measurement for inside-mount shades. For outside-mount (recommended for patio doors), measure the full frame width and add 2–4 inches per side for light-blocking overlap.
- Measure the height from where your bracket will sit (ceiling, wall above frame, or top of frame) down to 1 inch past the top of the door track. This prevents the shade or curtain hem from dragging in the track and interfering with door movement.
- For curtain panels, your finished rod width should equal the door frame width plus at least 12 inches per side so panels stack clear of the glass when the door is open.
- For roller shades on an outside mount, order the shade at door frame width plus 4–6 inches total (2–3 in. per side) for overlap. Specify the 'outside mount width' when ordering — most manufacturers deduct 1/4 to 3/8 in. automatically from inside-mount orders, which you do not want here.
- For screen doors: if a screen door sits in an outer track, measure it separately. Film applied to the screen itself will not work. A curtain or shade installed inside the main glass door handles both doors at once.
- Note the door's sliding direction (left-fixed/right-slides or vice versa) so you stack panels and mount shade clutches on the correct side.
Write all measurements on painter's tape stuck to the door frame before you go shopping or place an order. It sounds obvious, but it saves a second trip to the hardware store.
Blackout curtains and panels: step-by-step installation
What you need for this method
- 100% blackout curtain panels — two panels minimum, width each = half of total rod width (so they meet in the center)
- Heavy-duty curtain rod (1 in. diameter recommended for wide doors) OR ceiling-mounted curtain track
- Rod brackets or ceiling track brackets
- No. 8 x 2-1/2 in. wood screws (for stud mounting) or drywall toggle bolts (for between-stud positions)
- Level, drill, stud finder, measuring tape, pencil
Wall-mounted rod installation
- Decide your rod height. For maximum blackout, mount the rod as close to the ceiling as possible — 2 to 4 inches below the ceiling line is ideal. Mark the bracket positions with a pencil.
- Locate studs with a stud finder. Mark stud centers. If no stud falls near your bracket position, use drywall toggle bolts rated for at least twice your expected curtain weight.
- Hold each bracket against the wall at your pencil marks, drill a 1/8 in. pilot hole, then drive No. 8 x 2-1/2 in. screws. Check each bracket is level before final tightening.
- Set the rod across the brackets. Confirm the rod extends at least 12 inches past the door frame on each side so panels can stack clear of the glass.
- Hang your blackout panels, distributing rings or grommets evenly. Slide panels fully to each side and verify they clear the door's full travel path when open.
- Check that the panels reach within 1 inch of the floor but do not rest in the track channel. Hem or clip if needed.
Ceiling-mounted track installation (best blackout, owner method)
- Buy a ceiling curtain track (aluminum J-channel or flat-plate track) cut or trimmed to your rod width — typically door frame + 24 in. for stacking clearance.
- Locate ceiling joists with a stud finder. Mark joist centers. Joist spacing is typically 16 in. on center; patio doors often fall near an exterior wall where a doubled joist or header may be present.
- Hold the track against the ceiling and mark bracket hole positions. Drill 1/8 in. pilot holes into joists. Drive No. 8 x 1-1/2 in. screws every 12 inches along the track length. Use toggle bolts for any position not hitting a joist.
- Snap curtain gliders into the track channel before mounting if the track requires it (check your track's instructions — some allow glider insertion after mounting, others do not).
- Hang panels on the gliders. Push panels fully to both sides and confirm complete door clearance and no dragging on the track floor.
Renter version: tension rod or Command-strip track
For a no-drill approach, a tension rod works between drywall returns if your door is set inside a recessed opening. More commonly, a lightweight curtain track is mounted using 3M Command Large Picture Hanging Strips. Follow the manufacturer's weight ratings strictly, each pair of Command Large strips holds about 4 lb, so a 10 lb curtain panel needs at least three pairs at bracket points. Press strips firmly for 30 seconds and wait 1 hour before loading. For removal, pull the tab straight down slowly, they release cleanly from most painted walls and glass.
Blackout roller, vertical, and solar shades: step-by-step installation
Materials for this method
- Blackout roller shade cassette (outside-mount, ordered at door frame width + 4–6 in.)
- OR blackout vertical shade system (headrail + vanes, outside-mount, same width calculation)
- Side channel / guide rail kit (aluminum, cut to door height — strongly recommended for true blackout on roller shades)
- Heavy-duty bottom hem bar (weighted, for roller shade)
- Mounting brackets (included with most cassettes; verify for drywall vs. wood frame)
- No. 8 x 1-1/2 in. screws for wood frame; drywall anchors or toggle bolts for drywall
- Drill, level, measuring tape, pencil, hacksaw (if trimming shade tube)
Outside-mount roller shade installation
- Mark your bracket positions on the wall above the door frame, centered on each end of the shade cassette. Standard cassette brackets sit 2–3 in. above the top of the frame and 1–2 in. in from the shade's finished width on each side.
- Check for studs. Patio door frames are typically flanked by jack studs and a header — you often can hit solid wood within 2 in. of the frame edge. If not, use drywall toggle bolts.
- Hold each bracket to the wall, drill pilot holes, and drive screws. Use a level across both brackets before final tightening — an unlevel shade will creep to one side over time.
- Snap the cassette onto the brackets. Most Levolor and Hunter Douglas systems use a push-and-click bracket — the cassette snaps in from below.
- If you have side channel rails (recommended), mount them now. Measure from the top of the door track to the underside of the cassette. Cut aluminum channel to length with a hacksaw. Screw the channel to the door frame at 12 in. intervals, flush with the shade's edge. Slide the shade fabric into the channel groove.
- Lower the shade fully and check for light gaps at the sides and bottom. A weighted hem bar (typically 1–2 lb) helps the bottom seal. If light gaps remain at the sides, add a small foam weather seal strip to the inside face of the channel.
- Test that the shade raises fully clear of the door's travel path before the door contacts any hardware. Minimum clearance needed is typically 2 in. between the top of the door panel and the underside of the cassette bracket when the shade is fully raised.
Vertical shade installation
- Mark headrail bracket positions above the door frame at the same height as you would for a roller shade — 2–3 in. above the frame top, extending 2–3 in. beyond the frame on each side.
- Drill pilot holes and mount brackets. Check level.
- Snap headrail into brackets. Hang vanes by inserting the top clip of each vane into the headrail carrier, spacing them evenly across the full width.
- Test the traverse cord or wand: all vanes should stack cleanly to the non-sliding side (or split to both sides) to fully clear the door's travel path.
- Vertical shades with a wand-rotate feature let you angle vanes for partial light control — useful for morning light management without full blackout.
A note on solar shades
Solar shades are not blackout products, even a 1% openness fabric lets in visible light. If your goal is a dark room for sleeping or a home theater, use a true blackout fabric (0% openness, opaque backing). Solar shades are the right choice if you want glare reduction and UV blocking while keeping the view, not darkness.
Blackout adhesive and static-cling film: step-by-step installation
Materials for this method
- Blackout window film (opaque/blackout grade — not tinted or solar film) — buy 10% more than your glass area to account for cuts
- OR static-cling blackout film (no adhesive, fully renter-safe — grip hold is pressure only)
- Spray bottle with solution of 1 teaspoon dish soap per quart of water
- Squeegee or hard credit card wrapped in a lint-free cloth
- Utility knife and fresh blade
- Straight edge (36 in. minimum)
- Isopropyl alcohol (70%) and lint-free cloths for glass prep
- Measuring tape, pencil, painter's tape
Cutting film to size
- Measure each glass pane individually — on a sliding door, each pane is typically 28–36 in. wide and 76–78 in. tall, but measure yours.
- Roll film face-down on a clean, flat surface. Using a straight edge and fresh utility knife blade, cut each piece 1/2 in. oversize on all four sides. You will trim to exact fit after application.
- Label each cut piece (Top/Bottom, Left/Right pane) with painter's tape so you don't mix them up.
Wet application (adhesive film)
- Clean the glass thoroughly with isopropyl alcohol and a lint-free cloth. Any dust or grease under the film will create permanent bubbles.
- Spray the glass generously with soapy water solution. This gives you working time to reposition the film before it bonds.
- Peel the film backing from one corner. As you peel, spray the adhesive side lightly with soapy water to prevent it sticking to itself.
- Apply the film to the wet glass, starting from the top. Let it float on the water layer — you can slide it into position.
- Starting at the top center, use the squeegee to push water and bubbles outward toward the edges with firm, overlapping strokes. Work top to bottom.
- Once smooth, let the film sit for 5 minutes, then trim the oversize 1/2 in. border with a utility knife and straight edge held against the glass edge. Cut in one smooth stroke per side.
- Do a final squeegee pass. Some small water bubbles will remain — these evaporate within 2–4 weeks as the film fully cures. Air bubbles (a milky white pocket that doesn't move when pressed) need to be lifted and re-smoothed immediately while the film is still workable.
Dry application (static-cling film, renter-safe)
- Clean the glass with isopropyl alcohol. Static-cling film bonds purely by contact — any dust breaks the seal and causes bubbles.
- Peel the backing and apply the film directly to dry glass. It adheres on contact, so work from one edge across the pane to avoid trapping air.
- Use a credit card or squeegee to press out any air pockets as you go.
- Trim the 1/2 in. oversize border with a utility knife. Static-cling film cuts cleanly.
- To remove: start at a corner, peel at a low angle, and the film lifts cleanly with no adhesive residue.
Troubleshooting film problems
- Persistent large bubbles after curing: lift the edge, spray fresh soapy water underneath, re-squeegee. This works only with adhesive film, not static-cling.
- Film peeling at edges: re-trim with a sharp blade and press edges firmly with a fingernail or squeegee corner. Adhesive film edges sometimes lift if not cut flush against the frame.
- Adhesive residue on glass after removal: soak with isopropyl alcohol for 30 seconds, then scrape with a plastic razor blade. Avoid metal blades on tempered or coated glass.
- Film won't stick in humid conditions: adhesive film cures poorly below 50°F or in high humidity. Apply in a climate-controlled environment when possible.
Combining methods for maximum blackout
Film alone blocks light through the glass but does nothing about the gap between the door frame and the wall, or the crack at the bottom track. For a true blackout setup, layer methods: apply blackout film or mount a blackout shade for the glass, then hang floor-length blackout curtains that overlap the door frame by at least 4 inches on each side and extend to within 1 inch of the floor. This combination seals the perimeter light gaps that a shade or film alone cannot address. If you also want insulation, a DIY XPS foam insert panel (cut to the fixed-panel dimension of the door) behind the curtain adds significant thermal value, XPS provides about R-5 per inch of thickness, while polyiso gives around R-6 per inch, letting you get a higher R-value in a thinner panel.
Handling screen doors
Screen doors sit in an outer track and are typically removed seasonally. Blackout film applied to a screen mesh will not work and will damage the screen. The practical approach is to treat the main glass door with your chosen blackout method and simply remove the screen door during seasons when you need full blackout. If the screen door needs to stay in place, a blackout curtain mounted inside, stacked fully to the non-sliding side when not in use, handles both doors simultaneously without any modification to the screen. If the screen door track itself is causing a light gap at the outer edge of the door, add a self-adhesive foam weatherstrip (3/8 in. x 3/8 in. closed-cell) to the inner face of the outer track to close that gap.
Light gap troubleshooting
| Problem | Likely cause | Fix |
|---|---|---|
| Light stripe at top of curtain | Rod too low, panels too short | Move rod to ceiling or add a valance; buy longer panels |
| Light along side edges of shade | No side channels; shade narrower than frame | Add aluminum side channel rails; reorder shade at wider width |
| Light under curtain hem | Panels not reaching floor; track deflects light | Hem panels to 1 in. from floor; add weighted hem tape |
| Light at glass edge (film method) | Film cut short; didn't trim flush to frame | Apply thin strip of blackout tape or re-trim film edge |
| Light through fixed panel gap | Door gasket or seal worn | Replace door gasket; add adhesive foam seal to frame edge |
| Door catches curtain when sliding | Panels not stacked far enough past frame | Extend rod width; use thinner curtain ring hooks |
Maintenance and seasonal care
Blackout curtain panels can be machine washed on a gentle cycle (cold water, tumble dry low) unless the manufacturer specifies dry-clean only. Wash them before reinstalling, a clean, crisp panel hangs better and reduces light gaps at the hem. For roller shades, wipe the fabric with a damp lint-free cloth and mild soap; avoid soaking fabric-backed blackout materials. Inspect side channel guides annually for debris buildup, especially if the door is near a dusty patio surface, a clogged guide rail causes the shade to bind and can tear fabric edges. Adhesive film typically lasts 5–8 years before the adhesive yellows or begins to peel; plan to replace it. Static-cling film can be removed, washed gently, and re-applied several times before it loses grip.
If the patio door itself has become a problem, drafts you can't seal, a track that won't slide cleanly, or rollers that are worn beyond adjustment, treating the door cosmetically only buys you time. If you decide the door must be replaced, learn where to dispose of old patio doors to handle recycling, donation, or proper waste removal. A blackout shade over a door that doesn't seal properly will still leak cold air in winter. If you’re considering replacing the door, see what to do with old patio doors for disposal, recycling, and reuse options. If you're at that stage, you may be weighing whether to repair or replace the door entirely, which opens separate questions about what to do with an old patio door and how to dispose of it responsibly, both of which are worth reviewing before you commit to a full door replacement project.
Quick method comparison
| Method | Blackout quality | Insulation benefit | Renter-safe? | Keeps door operable? | Approximate cost |
|---|---|---|---|---|---|
| Blackout curtain panels (ceiling track) | Excellent with overlap | Moderate | No (screws) | Yes — stack to side | $80–$200 |
| Blackout curtain panels (tension/Command rod) | Good | Moderate | Yes | Yes | $40–$120 |
| Outside-mount roller shade + side channels | Excellent | Low | No (screws) | Yes — raises fully | $100–$300 |
| Outside-mount vertical shade | Very good | Low | No (screws) | Yes — stacks to side | $100–$280 |
| Adhesive blackout film | Good (glass only) | Low | No (adhesive) | Yes — no moving parts | $25–$70 |
| Static-cling blackout film | Good (glass only) | Low | Yes | Yes — no moving parts | $20–$55 |
| XPS/Polyiso foam insert panel + curtain | Excellent | High (R-5 to R-6/in) | If removable | Fixed panel only | $50–$130 |
FAQ
What building codes and life‑safety standards must be researched to safely advise blackout modifications to patio (sliding) doors?
Identify and cite applicable codes: IRC R311.2 and IBC Chapter 10 provisions on means of egress (clear widths, side‑hinged requirements, prohibition on concealing egress), and NFPA 101 Life Safety Code (egress widths, sliding‑door restrictions, opening force limits). Research local amendments/municipal codes and clarify that converting or permanently blocking a required egress may violate code and require a permit or professional evaluation.
Which authoritative hardware and lock standards are required when discussing security and egress compatibility for sliding patio doors?
Reference ANSI/BHMA (A156 series) standards for door and sliding‑door hardware (including A156.43 for sliding assemblies) and BHMA grading/testing protocols for locks and anti‑lift devices to ensure recommendations don’t compromise security or required egress performance.
What manufacturer installation and measurement documentation is needed for advising on roller, vertical and solar shade installations for patio doors?
Collect installation guides and measurement rules from major shade manufacturers (Levolor, Hunter Douglas, Rollashade) that specify inside vs outside mount deductions, bracket/headrail clearances, weight/width limits, and side‑channel/pocket accessory recommendations for full blackout. Use these to produce accurate measurement tables and mounting instructions.
What product technical data is necessary for recommending rigid foam or insulation panel inserts for patio door blackout and thermal performance?
Gather rigid‑foam product datasheets (Owens Corning FOAMULAR XPS, Johns Manville polyiso) for R‑values per inch, compressive strength, moisture resistance and typical panel thicknesses. Use these to calculate expected R‑value, recommend panel thickness for sliding doors, and advise on cutting/edge sealing and fit tolerances.
Which adhesive and temporary mounting product documentation should be referenced for renter‑friendly options?
Reference 3M Command™ product pages (weight limits, surface compatibility, removal instructions), VELCRO® Brand adhesive/hook‑and‑loop product specs (Industrial Strength/Extreme Lock limits), and manufacturers’ cautions about painted surfaces and removal methods. Also include guidance on adhesive residue removal and limits for permanent adhesives (spray contact adhesives, double‑sided tapes).
What measurement, tools and material lists must be validated with authoritative sources?
Compile and verify measuring protocols (measure width in three places, use narrowest; add overlap recommendations from blinds/shade guides), and tools/materials lists using manufacturers’ install guides: tape measure, level, drill, appropriate fasteners/anchors per substrate, utility knife/foam saw for insulation panels, heat gun for film, suction cups for glass, side channels/headrail kits for shades, and adhesive removers (isopropyl alcohol, adhesive cleaners). Cite vendor/manufacturer instructions for tool use and safety.
Next Article
Where to Dispose of Old Patio Doors: Donate, Recycle, Trash
Where to dispose of old patio doors: practical options, prep steps, recycling, donation, pickup rules, costs and privacy