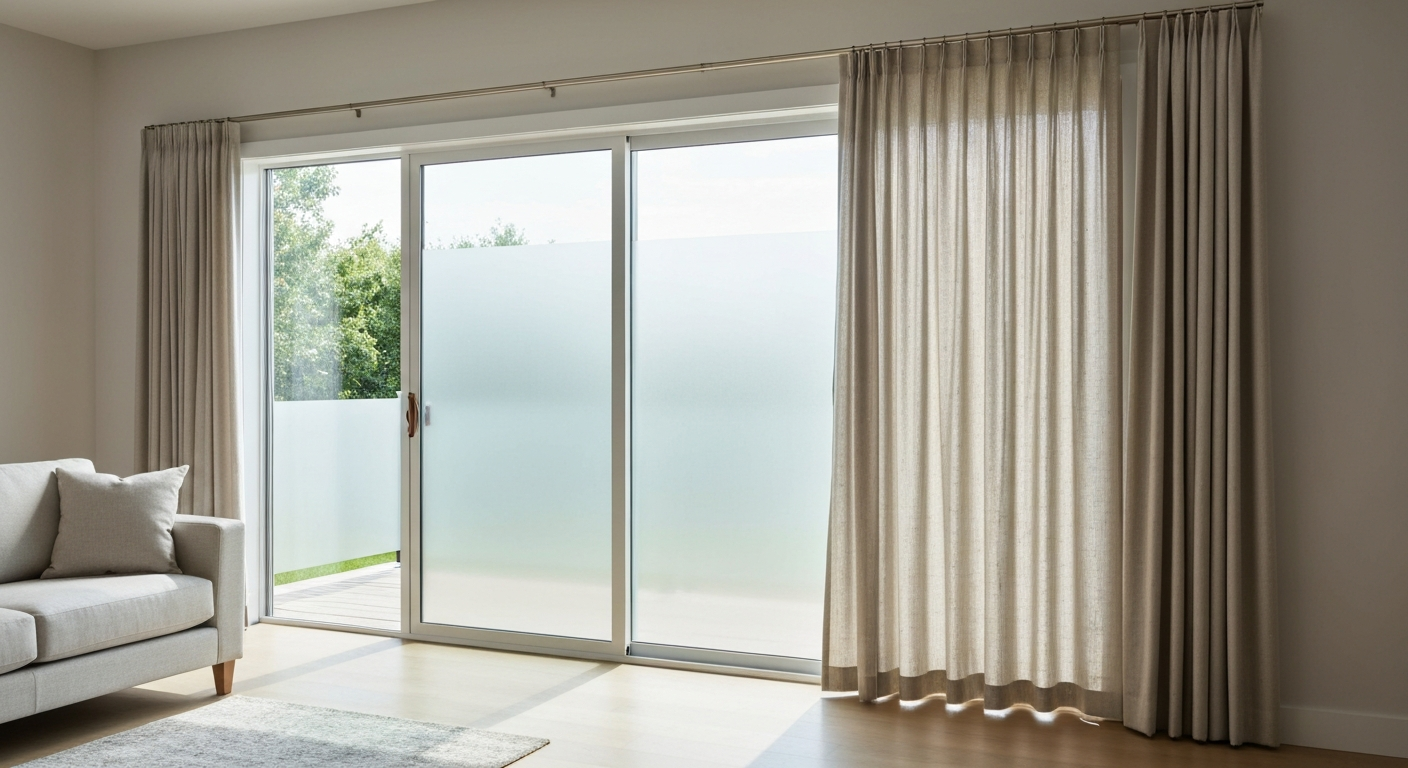
You can make patio doors private with solutions ranging from a $15 tension-rod curtain panel you hang in an afternoon to a permanent frosted glass replacement that costs $300–$800 or more. The right pick depends on how much privacy you need, whether you want to keep natural light, how long you plan to stay, and how comfortable you are with basic DIY work. Most homeowners land somewhere in the middle: adhesive or static-cling frosted film, interior panel-track blinds, or a set of lined curtains cover the vast majority of situations without any structural work.
How to Make Patio Doors Private: DIY Privacy & Security

Jamie Archer
12 Jul 2026
What this guide covers
This guide walks through every practical privacy option for patio doors, from quick temporary fixes to permanent glass changes. You'll find a tools and materials checklist up front, then sections on temporary, semi-permanent, and permanent solutions, each with step-by-step installation notes, honest pros and cons, and rough cost ranges. There's a dedicated section on blackout solutions and light/ventilation tradeoffs, a comparison of how each approach works on sliding glass doors versus screen or hinged (French) doors, and a short decision guide at the end to help you match a solution to your situation. Security and weatherproofing notes are woven in throughout where they're relevant. If you're also thinking about replacing aging doors entirely, the end-of-life and disposal questions are touched on near the close. If you're wondering what to do with old patio doors, see the end-of-life and disposal section near the close for reuse, recycling, and disposal options.
Assess your door and your privacy needs first
Before you buy anything, spend five minutes evaluating what you're actually working with. The solution that works perfectly on a standard 6-foot sliding glass door may be awkward or impossible on a French hinged door or an outswing patio door with a screen.
Measure accurately
Measure the glass pane width and height (not the door frame), the full door opening width and height, and the depth of any interior trim or casing. For inside-mount blinds or shades, you need the exact inside-frame width and height to the nearest 1/8 inch. For curtain rods mounted to the wall, measure how far the glass extends beyond the frame on each side so you know how wide your panels need to be to cover fully when closed. Write everything down before ordering.
Identify your door type
Sliding glass doors have a fixed panel and a sliding panel in a shared frame; they typically open to a track system and have a multi-point or hook latch. Hinged patio doors (French doors) have one or two panels that swing in or out on hinges. Screen doors are a separate, lighter panel in their own track, usually with a mesh or retractable screen. The privacy solution that mounts cleanly to a sliding glass door's header may need a completely different bracket approach on a French door with multiple panels and no single wide header.
Define your goals: visibility, light, ventilation, and security
- Visibility: Do you need total opacity (no silhouettes at all), diffused light with obscured view, or just reduced visibility from a specific angle like a neighbor's second floor?
- Light: Do you want to keep natural daylight coming through, or are you willing to block it for full privacy?
- Ventilation: Can you leave the door open with a screen for airflow, or does the privacy solution need to work with the door closed and locked?
- Security: Is the lack of privacy also a security concern? If people can see inside, they can also see what's worth stealing, which means a combination of privacy film plus a secondary door lock or anti-lift pin is worth considering.
- Permanence: Renters need reversible solutions. Owners planning a long-term stay can invest in more permanent options.
Tools and materials checklist
Most privacy projects are light DIY work. Here's what you'll typically need across the solutions covered in this guide. Not every item applies to every project, so skim the relevant section before shopping.
General tools (keep these on hand for most projects)
- Tape measure and pencil
- Level (a 24-inch level covers most bracket work)
- Drill with Phillips and flathead bits
- Stud finder
- Utility knife or box cutter with fresh blades
- Squeegee or credit card (for film application)
- Spray bottle with soapy water (1–2 drops dish soap per quart)
- Microfiber cloths and glass cleaner
- Step ladder
- Painter's tape
Per-solution materials
- Curtains/panels: tension rod or wall-mounted curtain rod, rod brackets, curtain panels (width 1.5–2x the opening for fullness), curtain hooks or rings
- Window film: adhesive or static-cling frosted film (sized to your glass dimensions), low-tack masking tape, hard-card squeegee, trim knife
- Interior blinds or shades: panel-track system or roller shade sized to door width, inside or face-mount brackets, small shims if trim conflicts
- Permanent frosted glass: replacement glass pane (tempered, safety-rated to local code), glazing compound or setting blocks, appropriate caulk, putty knife
- Fitted shutters: plantation shutter panels sized to opening, shutter hinges, level, screws rated for the door material
- Security additions: secondary patio door lock or foot bolt, anti-lift pins or Charlie bar, weatherstripping if drafts are present
Safety gear
- Safety glasses (required whenever cutting glass or drilling near glass)
- Cut-resistant gloves when handling glass panes
- Dust mask if sanding or working near weatherstripping adhesive
- Knee pads for floor-level track work
Temporary privacy solutions
Temporary solutions are the right starting point for renters, anyone unsure of their long-term preference, or anyone who needs privacy this weekend. They're fast, affordable, and fully reversible.
Tension-rod curtain panels
A tension rod fits inside the door frame without any drilling. Buy a rod rated for the span of your opening (most tension rods extend up to 72 inches; longer openings need a heavier telescoping rod or two rods side by side). Hang panels wide enough to cover the glass fully when closed. For a 72-inch sliding door, two panels each 54 inches wide give enough gather. Installation takes 10–15 minutes. Removal is equally fast: collapse the rod, slide off the panels, done. Downside: tension rods can slip or sag on wider spans, and you can't slide the door open without pushing the curtains aside manually.
Wall-mounted curtain panels
If you're willing to put a few screw holes in drywall, a wall-mounted rod is more stable and gives you a cleaner look. Mount brackets at least 4–6 inches above the door frame and 6–8 inches wider than the opening on each side so panels stack off the glass when open. Use a stud finder to hit framing where possible; drywall anchors work for lighter panels. Cost: $25–$80 for the rod and brackets, $30–$150 for curtain panels depending on fabric and length.
Removable privacy screens and clip-on shades
Freestanding room divider screens can be positioned in front of a patio door with no mounting at all. They're especially useful if the wall on either side of the door doesn't have good anchor points. Clip-on shades with suction cup or adhesive strip mounts attach directly to the glass or frame and peel off cleanly. Both options are best for short-term or apartment use. Freestanding screens: $40–$150. Clip-on shades: $20–$60 per panel.
| Solution | DIY Difficulty | Approx. Cost | Privacy Level | Reversible? |
|---|---|---|---|---|
| Tension-rod curtains | Very easy | $30–$100 | Full when closed | Yes |
| Wall-mounted curtains | Easy | $55–$230 | Full when closed | Yes (minor holes) |
| Freestanding screen | None | $40–$150 | Moderate | Yes |
| Clip-on/suction shades | Very easy | $20–$60 | Moderate to full | Yes |
Semi-permanent privacy solutions
Semi-permanent options stay in place for years but can be removed or reversed if your situation changes. This is the most popular category for homeowners who want a clean, built-in look without committing to permanent glass changes.
Adhesive frosted window film
Adhesive frosted film (products like blank" rel="noopener noreferrer">3M FASARA or equivalent) is a polyester film that bonds to glass using a pressure-sensitive adhesive. It diffuses light and blocks direct views while still letting good amounts of natural light through. Visible Light Transmission (VLT) varies by pattern: a light frost film might transmit 70–80% of light, while a heavier opaque film might transmit 30–50%. For most patio door privacy applications, a mid-range frost with 50–70% VLT is the sweet spot. Expected service life for indoor vertical applications is roughly 5–20 years depending on product quality and sun exposure.
- Clean the glass thoroughly with glass cleaner and a microfiber cloth. Any dust, grease, or residue will cause bubbles.
- Cut the film to size, leaving about 1/4 inch extra on all edges. You'll trim flush after application.
- Mist the glass generously with the soapy water solution (this is a wet application; the soap prevents the adhesive from bonding immediately so you can reposition).
- Peel the backing off the film and mist the adhesive side lightly as well.
- Align the film to the glass and press it on. Start from the top center and work outward.
- Use a squeegee or hard card to push out bubbles and water, working from center to edges in overlapping strokes.
- Trim the excess film along the edges with a utility knife held flat against the glass or frame.
- Allow 24–72 hours to fully cure before judging the final result; small bubbles often disappear as residual water evaporates.
To remove adhesive film: score the corner gently, peel from one edge slowly, and use a plastic scraper and adhesive remover (Goo Gone works well) to clean residue. Cost: DIY material runs about $1–$5 per square foot. Professional installation for decorative and privacy films typically runs $7–$24 per square foot installed.
Static-cling film
Static-cling film (like Gila's 20% VLT privacy film) uses no adhesive at all. It clings to glass by static electricity alone, making it fully removable and repositionable. Application is the same wet process as adhesive film, but it's more forgiving. The tradeoff is that it's less durable on high-traffic doors where the edge gets knocked or peeled back repeatedly. Static-cling film is the best choice for renters or anyone who wants to test a frosted look before committing. Cost: $1–$3 per square foot for materials.
Interior blinds: panel-track systems
Panel-track blinds are purpose-built for wide openings like sliding patio doors. They use 12–24 inch wide fabric panels that slide on a ceiling or header-mounted track and stack neatly to one side when the door is open. They require 1–2 inches of clearance at the mounting point and need solid anchoring: screw into the header framing or use rated drywall anchors. If door handles or trim conflict with bracket placement, add shims or offset brackets. Installation takes about an hour for two people. Cost: $80–$400 depending on size and fabric.
Roller shades and roll-up shades
Roller shades are available in blackout, light-filtering, and solar (view-through) fabrics. For inside-mount on a sliding glass door frame, measure the inside width to the nearest 1/8 inch: most shades are factory-cut to size. Face-mount (mounting to the wall above the door) gives more flexibility but requires accurate bracket placement. A shade wider than the glass by 2–3 inches on each side prevents light gaps at the edges. Installation follows the same bracket and mounting process as panel-track systems. Cost: $30–$200 per panel depending on width and fabric.
Permanent curtain tracks
Ceiling-mounted or wall-mounted curtain tracks give a clean, hotel-style look and handle heavy panels better than rod systems over wide spans. Tracks run on a ceiling-flush channel and use gliders that allow smooth panel movement. For a 6-foot sliding door, a track extending 8–10 feet total (4–5 feet on each side) lets panels clear the door entirely. Ceiling mount requires drilling into framing; use a stud finder and 3-inch screws for a solid hold. Cost: $60–$200 for the track, plus panels.
Permanent privacy solutions
Permanent solutions are the cleanest aesthetically and the most maintenance-free long term, but they involve the most cost and complexity. Some are feasible as DIY projects; others genuinely warrant a professional.
Frosted, obscure, or etched glass replacement
Replacing clear glass with frosted or obscure glass is the most permanent and lowest-maintenance privacy solution. The glass is integral to the door; there's nothing to open, close, adjust, or clean beyond normal glass cleaning. Acid etching and sandblasting are true glass-surface treatments that micro-roughen the glass permanently, and they're typically done in a fabrication shop, not on site. DIY chemical etching using hydrofluoric acid-based products carries serious health and environmental hazards (the EPA classifies hydrogen fluoride as acutely toxic) and is not recommended for homeowners. The practical DIY approach is to order a pre-made tempered frosted or obscure glass pane from a glazing supplier and swap it into the door frame.
Whether DIY glass replacement is feasible depends on the door. Some sliding glass doors use single-pane glass set in a removable frame channel with glazing compound; these are straightforward to re-glaze. Most modern patio doors use insulated glass units (IGUs, double or triple pane) that are sealed at the factory and must be ordered as a complete unit from the door manufacturer or a glass shop. Larson maintains an online instruction directory with downloadable installation, owner’s, and troubleshooting PDFs for screen doors, retainer strips, rollers, and door-slab measuring specific to Larson models (LARSON Instruction Directory). Swapping an IGU involves removing the door panel from the track, pulling the glazing stops or clips, lifting out the old unit, setting the new one on the correct setting blocks, and reinstalling the stops. It's manageable for a careful DIYer on a single-panel door but requires two people for anything over 60 inches wide.
- Order the replacement IGU or single-pane glass from your door manufacturer's parts system or a local glass shop. Get the exact model and glass unit dimensions from the door label (usually inside the frame edge).
- Remove the door panel from the track: lift it up into the upper track channel, then swing the bottom out and lower it off the track.
- Lay the panel flat on a padded surface (moving blankets on sawhorses work well).
- Remove glazing stops, clips, or beads around the glass perimeter using a putty knife.
- Lift out the old glass using suction cup handles (required for large panes); wear cut-resistant gloves.
- Clean the frame channel and install new setting blocks at the correct positions (typically at the 1/4 and 3/4 points along the bottom).
- Set the new glass unit into the frame, seat it on the setting blocks, and reinstall all glazing stops.
- Rehang the door panel on the track and test operation before finishing.
- Apply a thin bead of compatible caulk to exterior joints if required by the manufacturer.
Cost: a custom tempered frosted IGU for a standard 6-foot sliding door typically runs $300–$800 for the glass unit alone. Professional installation adds $150–$300. When to hire a pro: anytime the door is impact-rated (common in hurricane zones), structural framing is involved, or the door is under warranty.
Fitted plantation shutters
Plantation shutters mounted on a patio door frame give full adjustable privacy with a classic look. For a sliding glass door, shutters are typically mounted on a bypass track that mirrors the door's own operation. For French doors, shutter panels are hinged directly to the door frame or to each door panel. Shutters allow you to tilt louvers open for light and airflow while still blocking direct sightlines. Custom shutters cost $200–$600 per door panel installed. DIY installation is feasible with basic carpentry skills; the frame must be square and plumb, so check and shim if needed before mounting.
Fixed privacy panels
A fixed privacy panel installed in front of a patio door (a frosted polycarbonate or glass panel in a simple frame) provides permanent obscuring without touching the door itself. This approach works well for French doors where inside-mount blind options are limited. Cost varies widely by material and framing, typically $150–$500 DIY for polycarbonate sheet in a simple wood frame.
| Solution | Permanence | Approx. Cost (DIY) | Light Preserved? | When to Hire a Pro |
|---|---|---|---|---|
| Frosted IGU replacement | Permanent | $300–$800+ (glass only) | Yes (diffused) | Impact glass, IGU warranty work |
| Acid/sandblast etching | Permanent | Not DIY-recommended | Yes (diffused) | Always |
| Plantation shutters | Semi-perm to permanent | $200–$600 installed | Yes (adjustable) | Out-of-square frames |
| Fixed privacy panel | Permanent | $150–$500 | Yes (diffused) | Structural attachment needed |
Blackout solutions and the light/ventilation tradeoff
Full blackout and privacy are not the same thing. Privacy means people outside can't see in; blackout means no light passes through at all. If you need both, you need a true blackout fabric. If you just need privacy, a semi-transparent frost film or solar shade may be enough. Here's how to navigate the tradeoff. For step-by-step methods and product recommendations on how to blackout patio doors, see how to blackout patio doors.
Blackout curtains
Blackout curtains use a tightly woven or foam-backed fabric with near-zero light transmission. For a patio door, they work the same way as room curtains, but you need panels long enough to reach the floor and wide enough to overlap the frame by at least 2–3 inches on each side and at the top to prevent light gaps. The tradeoff: when curtains are closed, the door might as well not be there from a light perspective. When open, there's no privacy at all. For a bedroom adjacent to a patio, this is often the right call. Cost: $40–$150 per panel.
Dual-roller shades
Dual-roller shades are the most versatile solution for balancing light and privacy. They mount two separate roller shades on a single headrail: one sheer or solar-screen fabric for daytime privacy with light, and one blackout fabric for full coverage at night. You operate them independently by pulling each shade down to the level you want. Installation follows the same bracket process as a single roller shade, but the headrail is deeper (typically 3–4 inches), so confirm inside-frame depth before ordering. Cost: $80–$250 per unit.
Adjustable louvers and ventilated screens
If ventilation is the priority, adjustable exterior louver panels or interior louvered shutters let you control airflow and sightlines simultaneously. You can angle louvers downward to block views from street level while still allowing air to pass. Ventilated privacy screens (mesh fabric panels on a frame) placed in front of an open screen door give airflow with reduced visibility, though they don't provide full privacy. One-way or reflective window film is another option during daylight hours: it creates a mirror effect on the outside while remaining fairly transparent from inside. However, this effect reverses at night when interior lighting is brighter than outside, so it doesn't provide 24/7 privacy on its own.
Quick reference: privacy vs. light vs. airflow
| Solution | Privacy Level | Light Transmission | Ventilation Possible? |
|---|---|---|---|
| Blackout curtains | Full (closed) | None (closed) | Only when open |
| Dual-roller shade (blackout layer) | Full (closed) | None (closed) | No |
| Dual-roller shade (sheer layer) | Daytime only | High | No |
| Frosted film (50–70% VLT) | Daytime only | Moderate–high | No |
| One-way reflective film | Daytime only | Moderate | No |
| Adjustable louver shutters | Full (angled) | Partial | Yes |
| Ventilated privacy screen | Partial | High | Yes |
How each solution works on sliding glass doors vs. hinged and screen doors
The door type changes more than you might expect about which solutions are practical and how to mount them.
Sliding glass doors
Sliding glass doors are the most common patio door type, and most privacy products are designed with them in mind. The wide, flat glass panel is ideal for film application. The header above the door frame is a solid mounting point for panel-track blinds and roller shades, though you need to check for handle clearance on the sliding panel: some handles project 1–2 inches from the face and will conflict with inside-mount shade brackets. If that's the case, use a face-mount bracket positioned above the frame, or add a 1/2-inch spacer shim behind the bracket to clear the handle path. Common pitfalls: forgetting that the sliding panel moves means your shade or blind needs to stack entirely clear of the opening path; panel-track systems handle this well by design, but a shade that only rolls up to 12 inches won't clear a 6-foot opening.
Hinged (French) patio doors
French doors present more complexity. Each door panel is a separate unit that swings open, so any window treatment must either move with the door or stay clear of the swing path. Options that work well: frosted film applied directly to each glass pane (the film moves with the door, so it's always in position), hinged shutters mounted directly to each door panel, or café-style curtains on a rod that spans just the lower half of the door. Options that don't work well on French doors: full-length roller shades or panel-track systems that mount to the wall or ceiling, because they block the swing path when the door is open. If you want a ceiling-mounted solution, the track needs to extend far enough to the side to allow both panels to swing fully open unobstructed.
Screen doors
Screen doors are separate panels, usually aluminum or fiberglass framed, with mesh inserts. They provide ventilation but almost no privacy on their own. You can add a privacy screen panel (a denser mesh or fabric insert in a clip-on frame) to a screen door to reduce visibility while maintaining airflow. Film does not apply to screen mesh. For security, a screen door adds very little protection; the lock on the primary glass door is what matters. If your screen door has a faulty latch or bent frame that prevents it from sealing, that's worth fixing separately as a maintenance issue before adding any privacy treatment.
Security and weatherproofing notes
Privacy and security often go together. If people can't see into your home, they also can't case it from outside. But privacy film or curtains don't make the door more secure on their own. A few practical upgrades worth adding when you're already working on the door:
- Anti-lift pins: drill a hole at a downward angle through the interior sliding panel frame into the fixed frame and insert a removable pin or bolt. This prevents the sliding panel from being lifted out of the track from outside, which is a common entry method.
- Charlie bar or foot bolt: a secondary locking bar braced against the door frame or floor adds resistance to forced entry even if the main latch is compromised.
- Weatherstripping: if you notice drafts when the door is closed, the weatherstripping around the frame has likely compressed or torn. Replace it before installing any film or window treatment, since peeling and re-doing film work around bad weatherstripping is annoying.
- Track maintenance: a sliding door that's hard to operate puts stress on the lock and rollers. Clean the track of debris, apply a silicone-based lubricant (not WD-40, which attracts dirt), and adjust the roller height screws if the door drags. A well-running door is also a more secure door.
What to do with an old patio door you're replacing
If you're upgrading to a door with built-in obscure glass or just replacing aging equipment, the old door doesn't have to go to landfill. For specific guidance, see our page on where to dispose of old patio doors. For step‑by‑step options and local disposal tips, see how to get rid of old patio doors. Functional doors in decent condition can be donated to Habitat for Humanity ReStores or similar building material reuse organizations. Glass panels in good shape sometimes interest salvage yards, architectural salvage dealers, or theatrical/prop outfitters. If the door is beyond reuse, glass and aluminum frames are recyclable at most metal recycling centers, though you'll want to call ahead about separated materials requirements. For doors with broken or hazardous glass, check with your local waste management authority about acceptable disposal methods, since large glass panels often require special handling rather than curbside pickup.
Pick the right solution for your situation
Here's a direct decision guide based on the most common homeowner scenarios.
| Your Situation | Best Solution | Approx. Cost | DIY Friendly? |
|---|---|---|---|
| Renter, need privacy now | Static-cling film or tension-rod curtains | $20–$80 | Yes |
| Want light but no direct views | Adhesive frosted film (50–70% VLT) | $30–$150 DIY materials | Yes |
| Need full blackout (bedroom patio) | Blackout curtains or dual-roller shade | $50–$250 | Yes |
| Want clean built-in look, no hardware | Frosted IGU glass replacement | $450–$1,100+ | With experience |
| French doors, want adjustable privacy | Frosted film per pane or hinged shutters | $50–$600 | Yes |
| Sliding door, want to keep using it freely | Panel-track blinds or ceiling curtain track | $100–$400 | Yes |
| Security is also a concern | Film + anti-lift pins + secondary lock | $50–$200 | Yes |
| Budget is the main constraint | Static-cling film or tension-rod curtains | $20–$60 | Yes |
| Permanent solution, professional finish | Frosted/obscure IGU or plantation shutters | $400–$1,000+ | Hire a pro for glass |
The vast majority of homeowners will find that adhesive or static-cling frosted film, a panel-track blind system, or a quality curtain setup solves the problem completely without any structural work. Save the glass replacement and shutter projects for situations where you're doing a broader door renovation or the door genuinely needs new glass anyway. And if you're at the point of replacing the door entirely, that's a separate project worth its own planning, including decisions about what to do with the old unit.
FAQ
What core topics and sections must the article include to be complete and useful for DIY homeowners?
Include: overview of privacy goals (temporary, semi‑permanent, permanent) and differences for sliding vs hinged/screen doors; specific privacy solutions (films, shades/blinds, panels, curtains, frosted glass, etching, laminated/security glass); step‑by‑step installation and removal instructions for each solution; tools and materials lists per method; pros/cons, light/ventilation tradeoffs and blackout options; rough cost ranges (materials and pros vs DIY); troubleshooting tied to door issues (stuck tracks, rollers, faulty locks, drafts); security upgrades (locks, anti‑lift devices, bars); weatherproofing and seasonal maintenance; end‑of‑life choices (replace, donate, recycle, salvage, disposal) and local disposal options; decision guide mapping privacy need, permanence, budget and skill to recommended solutions; when to call a pro (glass replacement, structural or security work). Also add authoritative sources and safety notes for permanent/chemical methods.
What authoritative sources and manufacturer references should be cited or used for accurate technical guidance?
Use door manufacturers’ install/owner manuals for model‑specific guidance: Pella (sliding & hinged patio doors), Andersen (installation guide configurator), Milgard (installation/standards guidance) and Larson (screen door/troubleshooting docs). For films and finishes cite 3M (FASARA/Crystal specs), LLumar (film specs), Gila (static‑cling consumer films) and window‑film retailers/installers (Window Film Depot) for cost benchmarks and practical tips. Use trade/home‑owner resources such as This Old House and Fine Homebuilding for measuring and retrofit steps. For health/safety/legal concerns about chemical etching cite EPA guidance on hazardous chemicals (e.g., hydrofluoric acid).
What specific privacy solutions should be covered and how to categorize them by permanence?
Temporary: static‑cling films, removable curtains, tension rods, temporary blinds, adhesive removable frosted film, removable panels — quick install/remove, low cost. Semi‑permanent: professionally installed window film (adhesive), roller shades/vertical blinds/panel track systems, installed curtains with brackets — removable but more substantial, months to years. Permanent: acid etching/sandblasting, factory‑frosted insulating glass replacement, laminated or obscured glass panes — durable and irreversible or long‑term. Also include security‑oriented permanent upgrades like replacing glazing with laminated/security glass and installing reinforced locks/anti‑lift devices.
What step‑by‑step installation and removal guidance is required for common DIY options (privacy film, roller shades, panel track, curtains)?
Provide concise stepwise instructions for each: - Privacy film (static or adhesive): measure pane + add overlap; clean glass with alcohol solution; dry completely; for adhesive film use wet‑application mix (water + 1–2 drops dish soap), peel backing, position top edge, spray glass and film, squeegee from center outward removing bubbles, trim edges; cure time per manufacturer (24–72 hrs). Removal: heat with hair dryer/heat gun low, peel slowly from corner, use adhesive remover for residue. - Roller shades/vertical blinds/panel track: measure height/width for inside or face mount; gather drill, anchors, level, screws, brackets; mark bracket locations, pre‑drill if needed, install brackets, install headrail and panels, adjust stops and bottom weights; removal: unclip headrail, remove brackets. - Curtains (rod): measure, choose inside/face mount, install tension rod or drill brackets, hang curtain; removal: lift off and store. - Curtains for sliding doors with header: use wraparound tracks or traverse rods allowing door operation; ensure clearance for handles. Include safety note: work from stable ladder and check manufacturer clearance for hardware.
What tools and materials lists should be provided for each method?
Provide per‑method lists. Example summaries: - Window film (DIY static/adhesive): film, spray bottle, dish soap, razor blade, squeegee/soft card, measuring tape, lint‑free cloth, hair dryer/heat gun, utility knife. - Roller shades/panel track: shade/panel kit, drill, screws/anchors, level, tape measure, pencil, screwdriver, ladder, shims. - Curtains/rods: rod/track, brackets/screws/anchors, drill, level, measuring tape. - Permanent glass (replacement/etching): safety gear, glass removal tools, glazing tools, sealant, structural fasteners — recommend hiring pro for glazing. - Security/weatherproofing: anti‑lift pins, reinforced deadbolt/foot bolt, door bar/auxiliary lock, weatherstripping, threshold sweep, silicone sealant, caulk gun. Include PPE: safety glasses, gloves, respirator for dusty work or chemical adhesives/etching.
What rough cost ranges should readers expect (DIY materials vs professional installation)?
Provide ranges: - DIY film (static cling): $1–$5/ft² material cost. - Adhesive decorative/privacy film (DIY): $2–$7/ft² materials; professional install $7–$24/ft² depending on film and difficulty. - Panel track systems/panel blinds: DIY kit $100–$400 per door; professional install $150–$600+. - Roller shades/vertical blinds: $50–$300 DIY per door depending on quality; professional custom shades $200–$800. - Security window film (thicker, professionally installed): $8–$25/ft² installed. - Glass replacement (tempered/insulated/frosted): $300–$1,200+ per pane depending on size, glass type and labor; laminated/security glass and impact glazing cost more. - Etching/sandblasting (professional): $200–$1,000+ depending on area and complexity; chemical etching for DIY is not recommended due to hazards. State that regional labor and material prices vary and installer quotes should be obtained.
Next Article
How to Protect Patio Door from Rain: DIY Fixes, Steps & Costs
How to protect patio door from rain: step-by-step DIY fixes, tests, tools, seasonal tips, and when to call a pro.