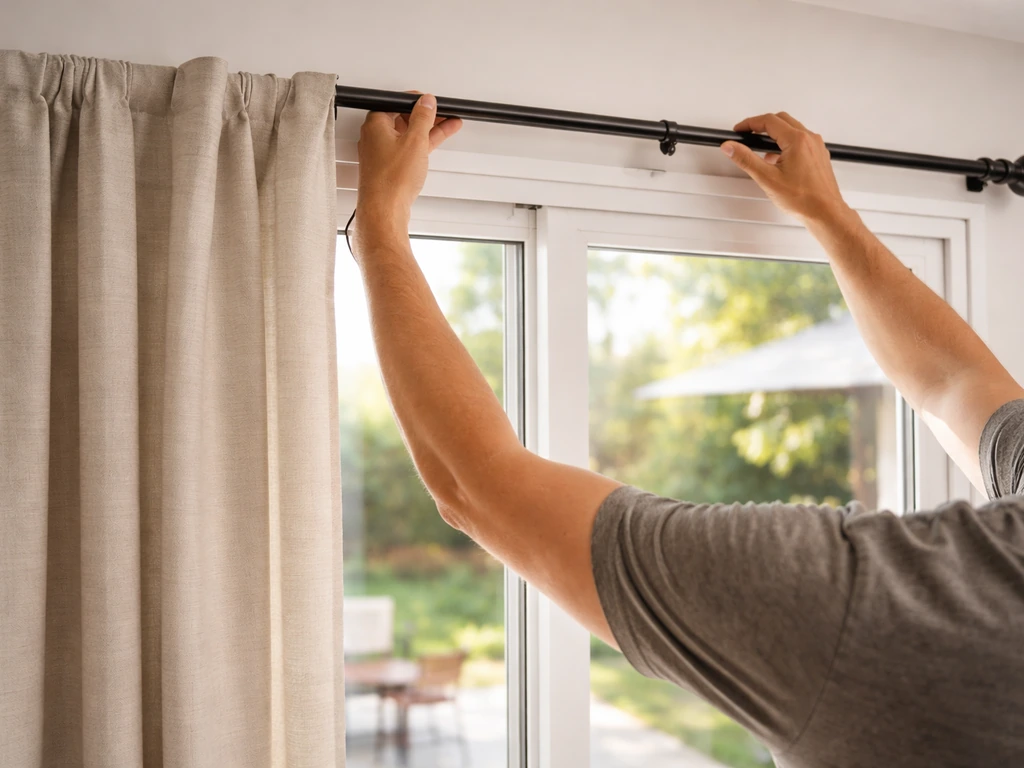
A Frost King patio door insulation kit installs in about 30 to 45 minutes using the included double-sided tape and a hairdryer you already own. You apply the tape around the door frame, press the clear shrink film onto it, then heat the film until it pulls tight and smooth. Done right, it cuts drafts noticeably and can reduce heat loss that windows and doors contribute, which Frost King puts at 25 to 30 percent of a home's heating energy. The tricky parts are getting the tape to stick in cold conditions and keeping the film wrinkle-free, both of which are very fixable once you know what to expect.
Frost King Patio Door Insulation Kit Instructions: DIY Install

Jamie Archer
4 Jul 2026
Choosing the right Frost King patio door insulation kit
Frost King makes more than one product that targets patio door drafts, and picking the wrong one is the most common early mistake. If you're looking for more ways to cover patio doors beyond the shrink film kit, consider pairing insulation film with weatherstripping for gaps that drafts can slip through. Before you buy anything, figure out which problem you're actually solving.
The main kit most people are looking for is the shrink-to-fit film kit, sold as model V76H (also listed at Home Depot as V8618 under the 'Heavy Duty Patio Door Shrink Kit' label). It covers an 84-inch by 110-inch opening, which fits most standard single-panel or double-panel sliding glass doors. This kit comes with double-sided tape and one large sheet of clear plastic film. It creates an air buffer between the film and the glass, which is where most of the insulating value comes from.
The second product worth knowing about is the Frost King Patio Door Weatherstrip, sometimes labeled the center post weatherstrip. This is a separate foam or vinyl strip product designed specifically to eliminate the gap between the two glass panels on a sliding door, right where they meet in the middle. If your draft is coming from that center seam rather than the frame perimeter, the weatherstrip is the right tool, not the shrink kit.
| Product | What it solves | Best for | Key detail |
|---|---|---|---|
| Frost King V76H / V8618 Shrink Kit | Drafts around the entire door frame perimeter | Overall heat loss, large frame gaps, thin glass | 84 in. x 110 in.; comes with double-sided tape and film |
| Frost King Patio Door Weatherstrip | Gap between sliding panels at the center post | Drafts specifically at the door panel meeting point | Downloadable instructions on Frost King product page |
| Frost King Double Draft Stop (DDS1) | Bottom door gap, floor-level drafts | Uninsulated door bottoms and threshold gaps | Foam tube design sized to fit standard door gaps |
Measure your door opening before purchasing. If your frame width or height exceeds 84 by 110 inches, a single kit won't cover it. You'll need to buy two kits and plan seams carefully, which adds complexity. Most standard US sliding glass patio doors fall within the kit's coverage, but oversized or custom doors can be wider.
Tools, prep work, and identifying your door type
You don't need much. Gather these before you start so you're not hunting mid-project.
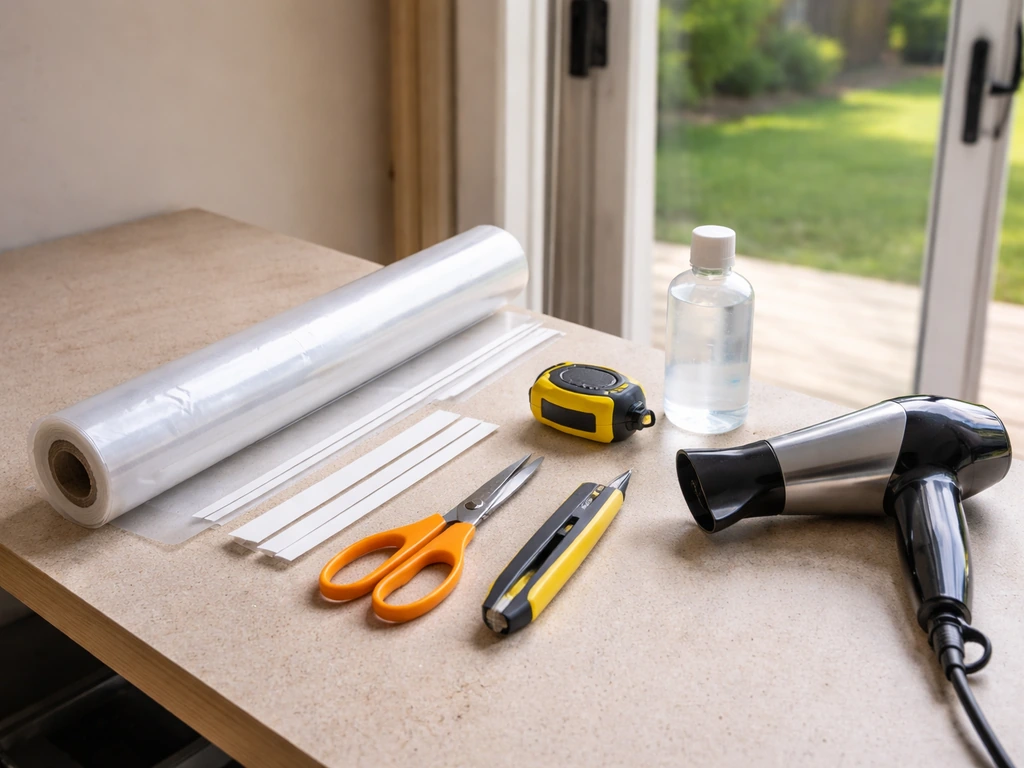
- The Frost King kit (tape and film included inside the box)
- A hairdryer with a high heat setting
- Scissors or a utility knife
- A tape measure
- Rubbing alcohol or a mild soap-and-water solution in a spray bottle
- Clean dry cloths or paper towels
- A helper (optional but useful for large film pieces)
Sliding glass door vs. screen door: what changes
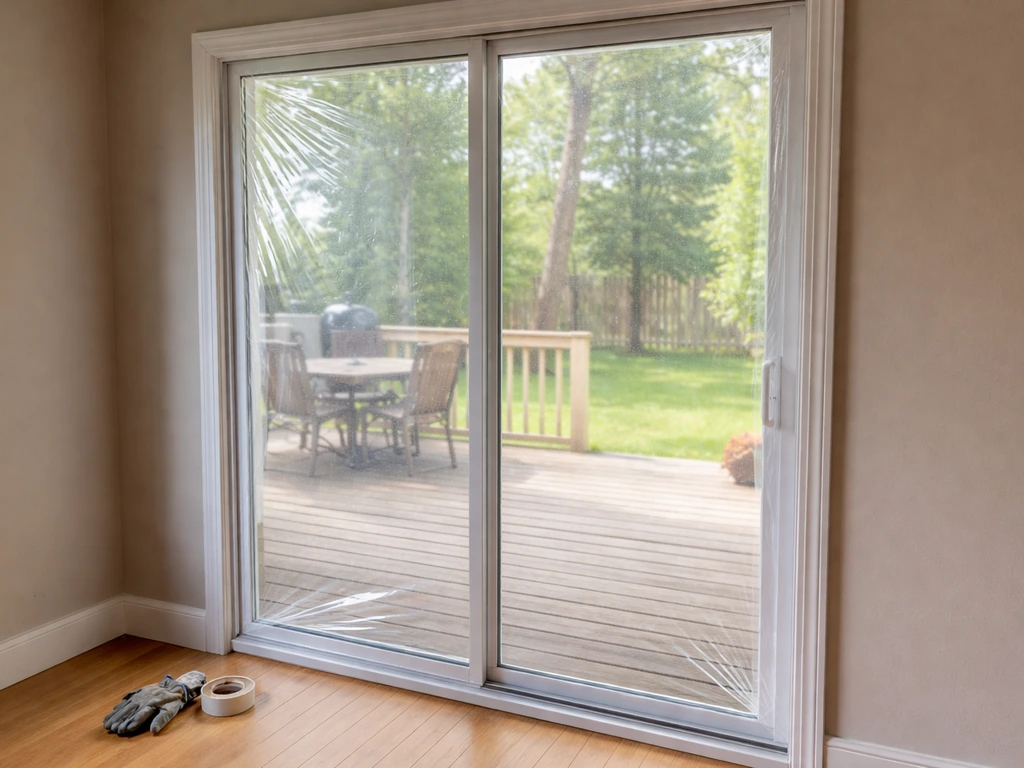
If you have a sliding glass patio door, the shrink kit installs on the interior side of the door frame, covering the glass and the frame as a single unit. You are not attaching anything to the door panel itself. The film goes over the entire opening from the fixed interior frame.
If you also have a screen door on the exterior track, the shrink kit does not interact with it at all. The screen door stays on its own separate exterior track and continues to operate normally. The film is installed entirely on the inside of the home. These two things don't conflict.
Prep work that actually matters
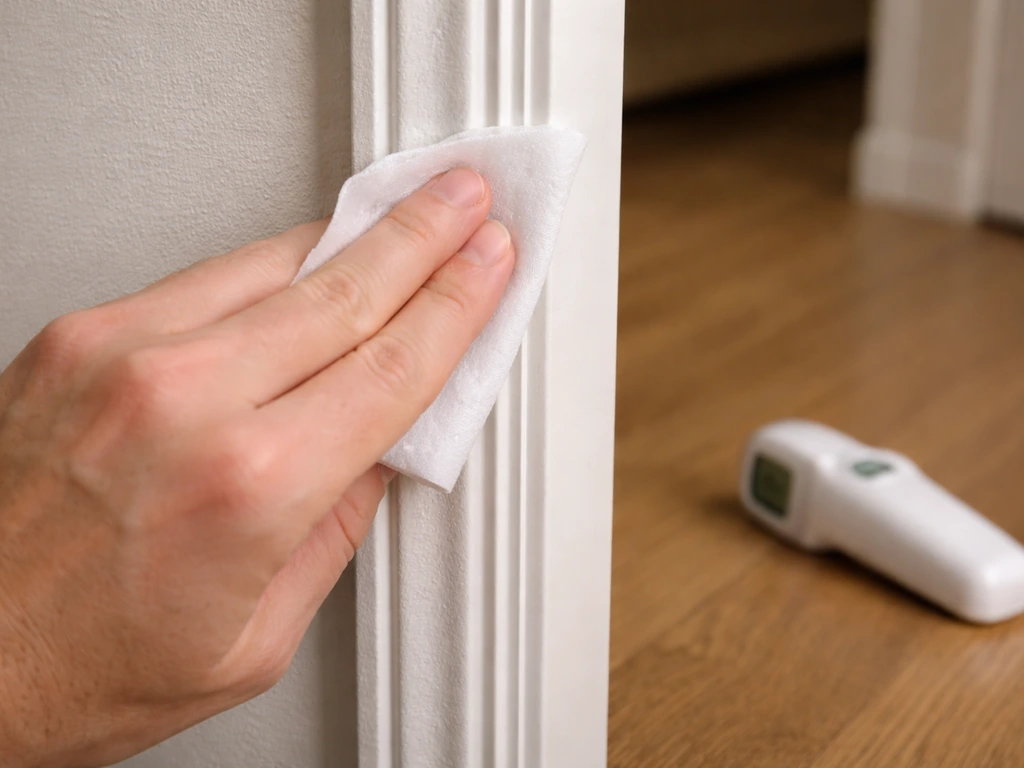
Clean the frame thoroughly before you do anything else. The double-sided tape in this kit needs a clean, dry, oil-free surface to hold properly. Hiatt Hardware also recommends making sure the surface is completely dry before applying double-sided tape around the frame perimeter. Wipe the interior door frame (the flat trim surface where the tape will go) with rubbing alcohol or soap and water, then let it dry completely. Any dust, grease, old caulk residue, or moisture under the tape will cause it to fail, usually within a day or two of installation. This step takes five minutes and prevents the most common failure.
Also check the frame temperature. If the room has been cold (below about 50 degrees Fahrenheit), the tape adhesive will be stiff and won't bond well. Run the hairdryer over the frame surface for 30 to 60 seconds before applying the tape. This is not just a nice-to-have; cold adhesive is the single biggest reason these kits fail in winter installations.
Step-by-step installation instructions (general patio door kit)
This section covers the general installation approach that applies to any patio door shrink-film kit. The Frost King-specific details follow right after. If you're working with a Frost King kit, read both sections.
- Measure the door opening width and height. Note the measurements so you know how much film you'll need and whether any trimming is required.
- Clean and dry the interior door frame trim surface completely. Use rubbing alcohol for best results. Wait until the surface is fully dry, not just damp.
- Warm the frame surface with a hairdryer if the room is below 50 degrees Fahrenheit.
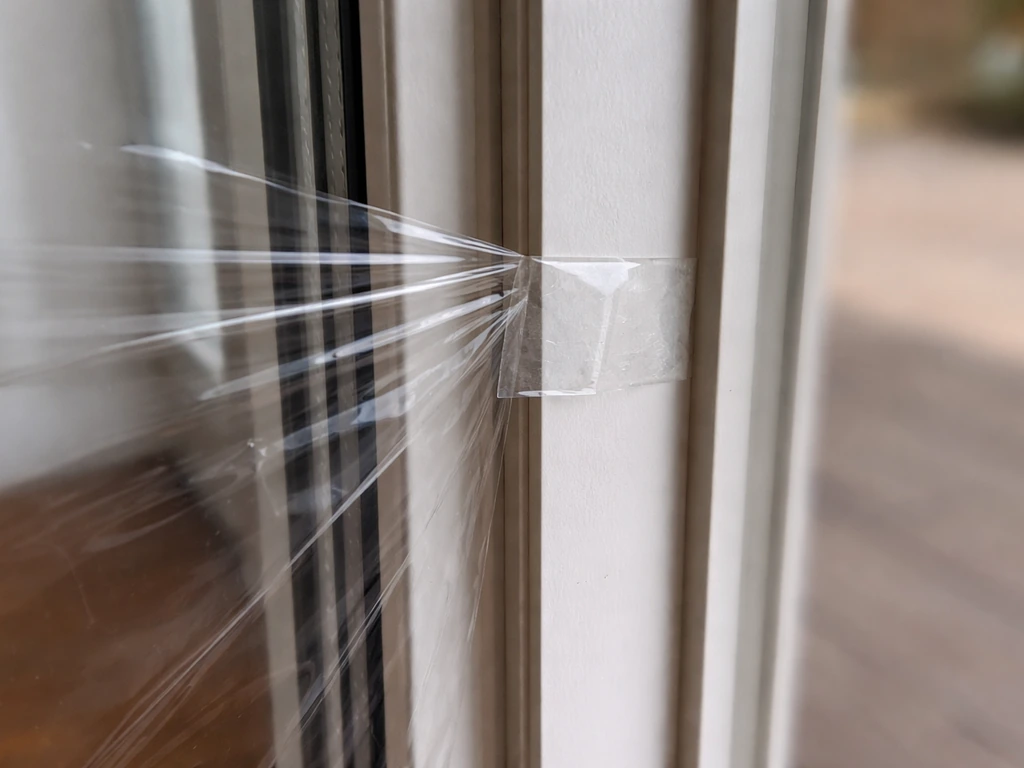
- Apply the double-sided tape around the entire perimeter of the door frame, starting at a top corner and working your way around continuously. Keep the tape flush with the inner edge of the frame so the film will cover the full opening. Do not leave gaps at corners; overlap the tape slightly at each corner turn.
- Cut the plastic film to size if needed. For a standard patio door the kit film should be close to the right size, but trim it with scissors to leave about 1 inch of overlap onto the tape on all four sides.
- Peel the backing off the tape on one side only (start at the top), press the film edge firmly onto that tape, then work your way around pulling the backing off and pressing the film as you go. Keep light tension on the film to avoid wrinkles.
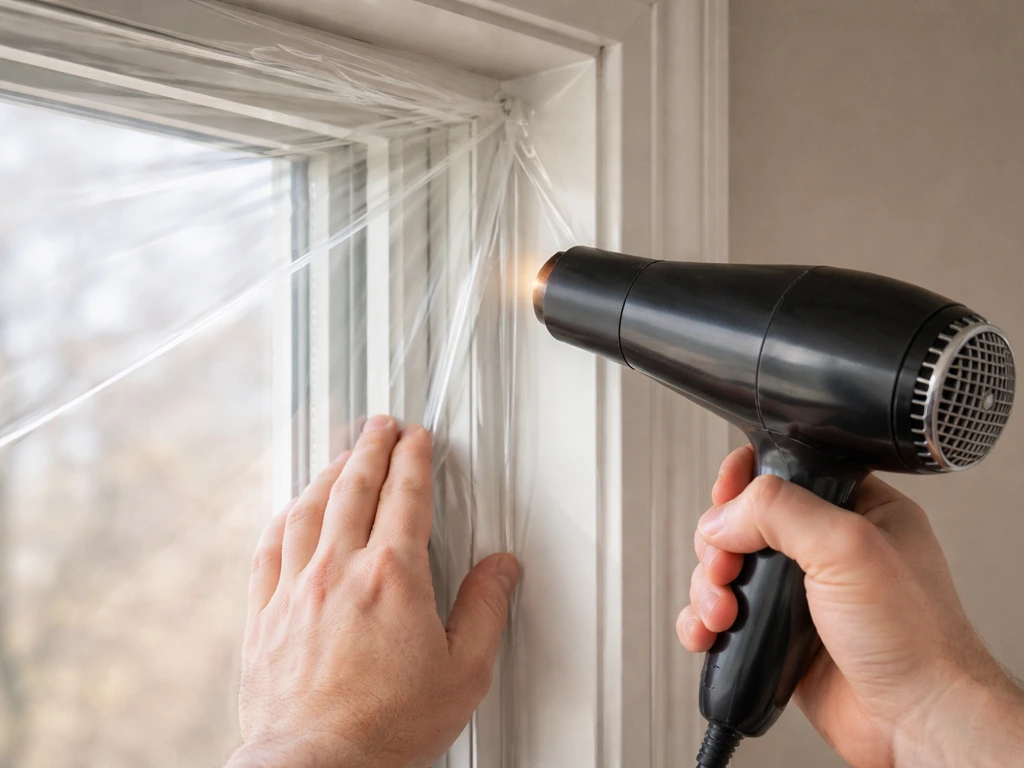
- Once the film is attached on all sides, run the hairdryer across the entire film surface using slow, sweeping passes about 2 to 3 inches away from the film. The film will begin to pull tight and wrinkles will disappear.
- Trim any excess film that extends past the tape using scissors. Leave the tape line itself covered.
Step-by-step installation instructions (Frost King-specific details)
- Frost King recommends warming the tape roll itself with a hairdryer before you unroll it if the room is cold. The adhesive is temperature-sensitive, and warming the roll before application makes a real difference in how well it sticks.
- Apply the tape on the outermost flat edge of the window trim, not on the wall surface or the door frame channel. On a patio door, this means the tape goes on the flat interior casing trim that surrounds the door opening.
- When attaching the film, Frost King's process calls for pressing the film into the tape before peeling the tape backing. You press the film against the backing-on tape to position it, then carefully lift corners and peel the backing out from between the film and the tape. This approach reduces the chance of a misaligned first press.
- After the film is attached on all sides, use the hairdryer on a medium-to-high setting and move it in slow circular or sweeping passes. Start from the center of the film and work outward. Frost King's guidance is to shrink outward from the center to avoid trapping wrinkles at the edges.
- Do not hold the dryer stationary in one spot. Concentrated heat will melt or distort the film. Keep the dryer moving at all times.
- Once shrunk, press the film edges firmly against the tape with your fingers to reinforce the bond. Let it cool for a few minutes before testing.
If you're dealing with the center post gap on a sliding door (the draft between the two glass panels), the Frost King Patio Door Weatherstrip is a separate product with its own instruction sheet downloadable from the Frost King product page. That strip attaches to the door panel itself, so it moves with the door when you slide it. Frost King's instructions for similar weatherstrip products emphasize sizing the strip to match the door panel height and pressing the adhesive backing firmly along the door panel edge, not the fixed frame.
Common installation mistakes and how to fix them
The tape won't stick or peels off within a day
This is almost always a surface prep or temperature problem. If the tape is failing, peel it off, clean the frame again with rubbing alcohol, let it dry for at least 10 minutes, then warm the frame and the tape roll with the hairdryer before reapplying. One practical workaround from installers who've fought this in cold rooms: briefly warm the tape roll in your hands or use the hairdryer directly on the tape strip right before pressing it down, section by section.
Wrinkles that won't shrink out
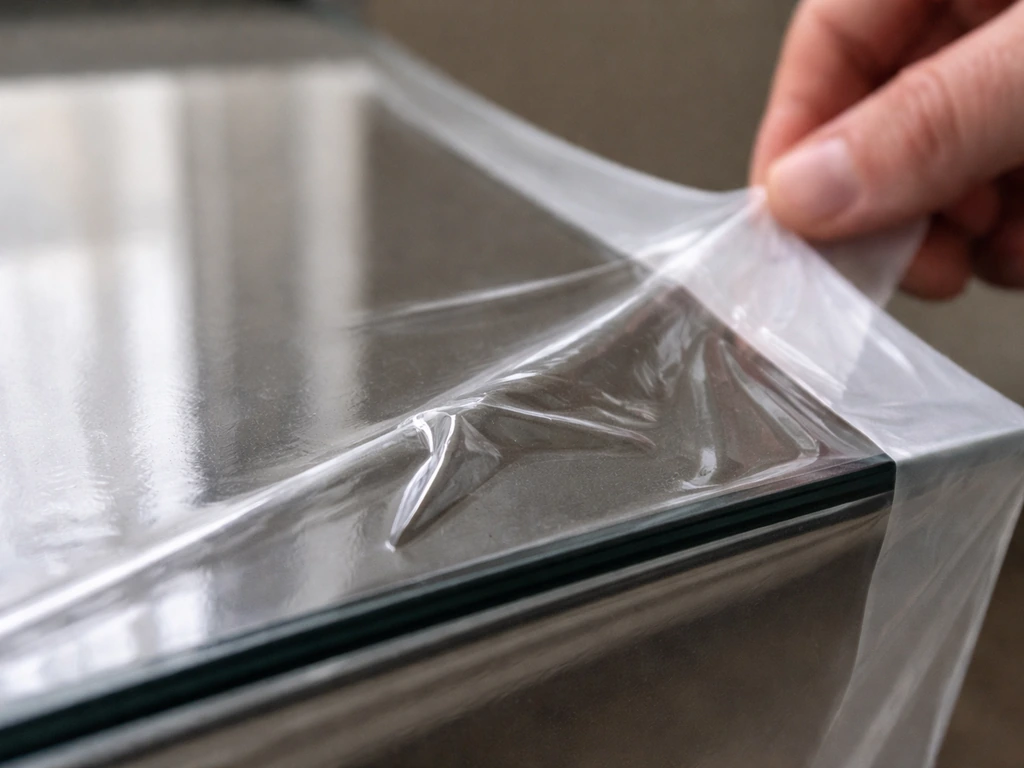
Large wrinkles that survive the hairdryer usually mean the film was applied with uneven tension. Minor wrinkles almost always shrink out completely. If you have a big fold that won't budge, your best fix is to carefully peel that section of film off the tape, re-smooth, and reheat. If the tape has lost its tack, replace that section with new tape. Do not try to fix a major wrinkle by overheating the film; you'll melt it.
Gaps at the corners
Corner gaps happen when the tape doesn't continue fully into the corner or the film pulls away from a sharp corner. Apply a small extra piece of tape at each corner before you start, slightly overlapping the perimeter tape. When attaching the film, press the corner sections down firmly with your finger before shrinking.
Film interfering with the door handle or lock
The shrink film installs on the fixed interior frame and should sit entirely outside the door's sliding path. If the film is blocking the handle or lock, the tape was placed too far inward (toward the door panel rather than on the outer frame casing). Reposition the tape further toward the room side of the frame. On some door frames this clearance is tight, so measure carefully before applying tape. The film should not contact the moving door panel at any point.
Uneven seal compression or one side pulling loose
If one side of the film keeps losing contact with the tape, press that edge down firmly and add a second layer of tape over the top edge of the film on that side for reinforcement. On wide patio doors, the film can have more tension on one side if it was attached unevenly. In those cases, a second person holding the far side of the film while you attach the near side makes a big difference.
How to test for drafts and adjust for seasonal performance
After installation, do a simple draft test before calling the job done. Wait until there's a temperature difference between inside and outside (a cold day is ideal, but even a mild day works if you turn up the AC).
- Hold the back of your hand about an inch from the film perimeter edge and move it slowly along all four sides. You should feel no cold air movement.
- Do the same along the bottom of the door frame and the center post area between the glass panels. These are the two highest-risk spots on sliding patio doors.
- Light a stick of incense or use a thin strip of tissue paper near the edges. Any draft will visibly move the smoke or tissue.
- Check the corners last. Corner gaps are the most common spot for a draft to sneak through even when the rest looks sealed.
If you find a draft at the bottom of the door itself (not the frame), the shrink film won't fix that. That's a door panel gap, best addressed with a foam draft stop or the Frost King Patio Door Weatherstrip depending on where exactly the gap is. Understanding how to insulate sliding glass patio doors more comprehensively and how to insulate patio doors for winter in general can help you layer multiple solutions together if a single kit isn't enough. Understanding how to insulate sliding glass patio doors beyond a shrink kit can help you choose the right combination for your specific draft source.
For seasonal adjustment: the shrink film is an interior winter solution. In summer you'll want to remove it to restore airflow and full door visibility. Frost King's kits are designed for seasonal removal and reapplication. When you remove the film in spring, peel it off carefully and clean the tape residue from the frame with rubbing alcohol. Leaving the tape on all summer will degrade both the tape and the frame finish.
Maintenance tips and when to replace or upgrade the kit
Keeping the kit in good shape during winter
Once installed, the shrink film needs very little maintenance. If it gets dusty, wipe it gently with a barely damp cloth. Do not spray cleaners directly on the film; most household cleaners will cloud or wrinkle it. Avoid pressing or leaning against the film. The tape bond holds fine under normal conditions but is not designed for physical pressure.
Check the perimeter seal every few weeks in the first season, especially after any significant temperature swings. If you notice a section pulling away from the frame, press it back down and reinforce with a small extra piece of tape. Catching this early prevents the whole edge from releasing.
When to replace the kit
Frost King's shrink kits are single-season products. Once you peel the film off in spring, the film itself is done. The tape may also leave residue or lose tack after one season. Budget for a new kit each fall; at the price point these kits sell for, reusing old materials just adds frustration for minimal savings.
Replace the kit immediately (don't wait until next fall) if you see any of these during winter: visible condensation or frost between the film and the glass indicating a compromised seal, large sections of tape pulling away from the frame, or tears or holes in the film that have grown beyond a small pinhole.
When to upgrade beyond a shrink kit
If you've installed the shrink film correctly and you're still feeling significant drafts, the problem is likely at the door panel itself, not the frame. This is where a Frost King Patio Door Weatherstrip for the center post gap, or a brush-style bottom seal attached to the door panel so it drags with the door's movement, becomes the right next layer. The key rule for any sliding door weatherstrip is to attach it to the moving door panel, not the fixed track. A strip attached to the track will bind the door and wear out fast; a strip attached to the door panel maintains contact pressure as the door slides.
For more severe situations like a door with warped frames, broken rollers, or a badly misaligned panel, weatherproofing products are only a partial fix. At that point the underlying door mechanics need addressing first. Covering patio doors with insulating panels or thermal curtains is also a useful supplement if you want to go beyond what a shrink kit can do, especially for older single-pane sliding glass doors. If your main goal is privacy, thermal curtains are an easy option for blocking views while still helping with insulation Covering patio doors with insulating panels or thermal curtains.
FAQ
Can I install the frost king patio door insulation kit instructions shrink film over old caulk, paint, or residue?
Not reliably. The shrink-film kits are designed for a clean, dry, oil-free surface. If you have existing silicone caulk, flaking paint, or sticky residue where the tape will land, it can prevent the adhesive from bonding and cause the film to peel within days. Remove loose material and wipe with rubbing alcohol, then let the frame fully dry before applying tape.
What should I do if part of the tape is no longer sticking after winter weather?
You should remove it and replace it, at least for the problem section. When a visible air leak is caused by tape that has lost tack, reapplying the same tape usually won’t restore the seal. Peel back the loose edge, clean with rubbing alcohol, dry, warm the frame and the tape area, then apply fresh tape to that section before reheating the film.
Why do I still have wrinkles after heating the film, and can I fix them?
Film that’s too loose or unevenly heated will usually end up wrinkled. Minor wrinkles often tighten after additional controlled heating, but large folds that stay “stuck” usually mean the film was applied with uneven tension. Peel that section, resmooth it, then reheat gradually, keeping the nozzle moving so you don’t overmelt one spot.
Can I leave the frost king shrink film up all year, or reinstall it next winter on top of the old tape?
Yes, but do it carefully because the tape bond can fail if the film is left in place while it’s covered by moisture or dirt. In spring, peel the film off slowly, then clean remaining tape residue with rubbing alcohol. If you leave tape on through summer, it can lose tack and degrade the frame finish, making next winter’s install harder.
My shrink film is touching the sliding door or blocking the handle, what went wrong?
Typically no, the shrink kit is meant for the interior fixed frame, not the sliding panel. If you placed the tape too far toward the moving door, the film can interfere with the handle, lock, or the panel’s travel. The fix is to reposition the tape further toward the room side of the fixed frame so the film stays completely outside the sliding path.
If I still feel drafts, how can I tell whether it’s from the frame seal or the door panel gap?
If you feel a draft at the bottom of the door itself, the shrink film won’t address that gap because it seals the frame opening, not the moving door bottom. Use a bottom draft stop or the appropriate weatherstrip that attaches to the door panel so it drags with the door as it moves.
How often should I check the seal after installation, and what signs mean I should repair immediately?
Inspect the perimeter seal and corners every few weeks in the first heating season, then again after major temperature swings. Look specifically for edges pulling away, gaps at corners, and any fogging or frost forming between film and glass. If you catch edge lift early, pressing and reinforcing with a small extra tape patch usually prevents a full release.
Do I really need to warm the door frame in cold weather before applying the tape?
If the room is below about 50°F, warming the frame is strongly recommended because the tape adhesive becomes stiff and bonds poorly. A quick hairdryer pass to warm the surface for 30 to 60 seconds before you apply tape often prevents winter failures.
What does condensation or frost between the shrink film and the glass mean, and should I keep it installed?
Mostly you cannot salvage it. Condensation or frost between the film and the glass indicates the seal is compromised, usually due to improper surface prep, lifted edges, or damage. Replace the kit promptly rather than waiting, since ongoing moisture can worsen the failure and make the film harder to reapply cleanly.
Is it worth having a second person during installation, and when does it make the biggest difference?
It helps. If the door is wide or you notice tension imbalance, having a second person hold the far edge of the film while you apply tape to the near side makes it easier to keep the film evenly seated. Even tension reduces wrinkles and makes shrink heating more uniform.
Next Article
How to Cover Patio Doors for Privacy: DIY Options
DIY guide to cover patio doors for privacy with curtains, blinds, film, and screens, with secure, snag-free installation