You can stop most patio door drafts this weekend with weatherstripping, a new door sweep or threshold seal, and a few hardware tweaks. The key is finding exactly where the cold air is getting in before you spend money on materials, because sliding glass doors and hinged patio doors leak in different places and need slightly different fixes. This guide walks you through the whole process: diagnosing the leaks, sealing them fast, and checking the underlying hardware problems that keep letting cold air back in.
How to Insulate Patio Doors for Winter: DIY Steps

Jamie Archer
19 May 2026
Find Where the Cold Air Is Actually Coming From
Before you buy anything, spend 10 minutes diagnosing the door. Most homeowners patch one spot and still feel a draft because they missed two others. There are five common leak points on patio doors, and you can check all of them quickly.
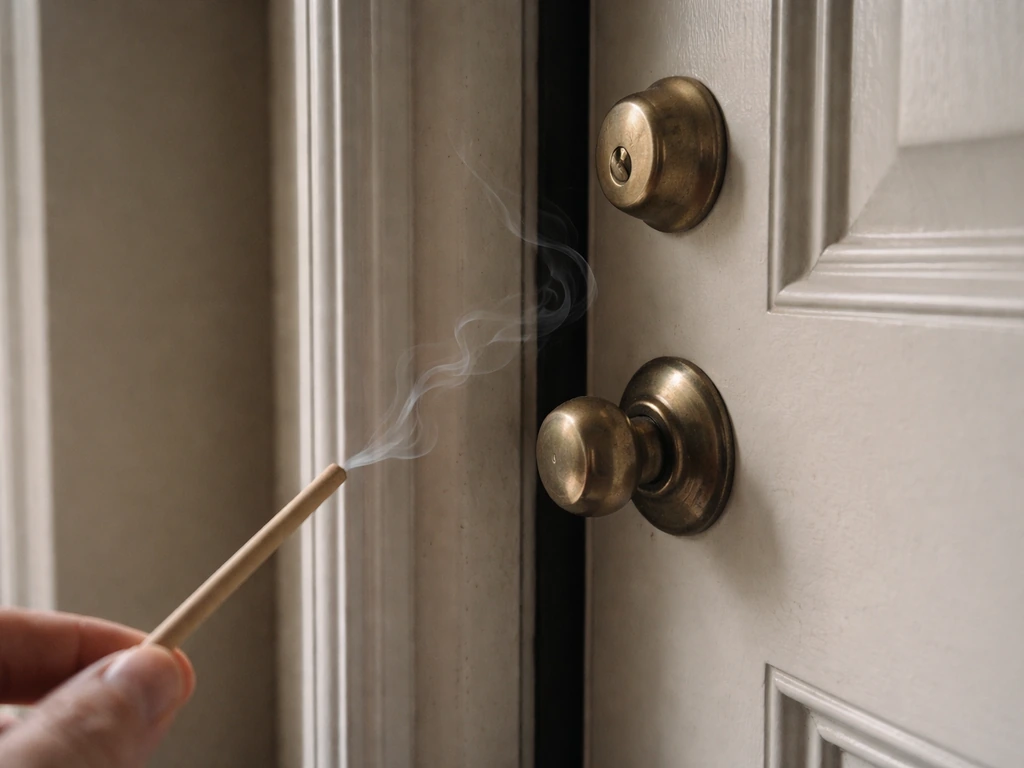
The candle or incense stick test is the most reliable DIY method. On a cold, windy day, close the door and slowly move a lit candle or incense stick around the entire perimeter, the bottom sweep, the track, and the lock. Anywhere the flame flickers or smoke pulls sideways is a leak. Mark those spots with painter's tape so you don't forget them.
Here are the five spots to check on every patio door:
- Weatherstripping along the sides and top: Look for compression seal that's flattened, cracked, torn, or has gaps. If you can slide a piece of paper through the closed door, the seal is failing.
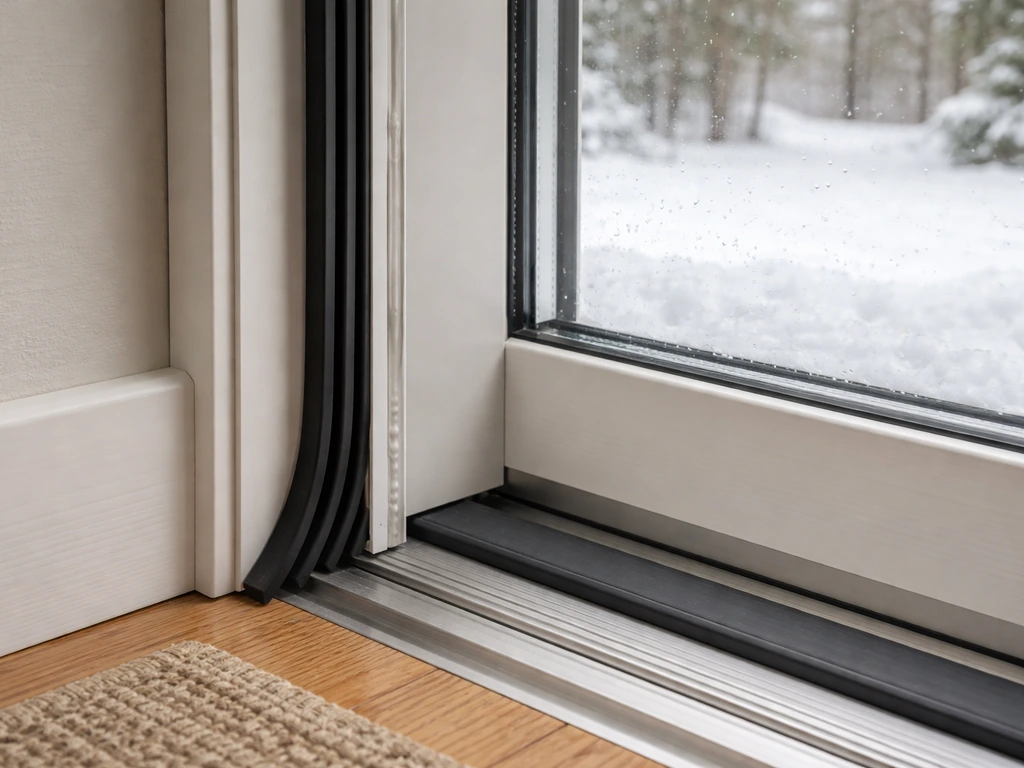
- Bottom sweep and threshold: The gap between the door bottom and the threshold is the single most common entry point for cold air and wind.
- Frame-to-wall gap: Check the exterior edge where the door frame meets the siding or stucco. Caulk here shrinks and cracks over time, especially on the exterior corners.
- Track area on sliding doors: The track channel itself can let air through, especially if the door panel sits too low and isn't seating fully against the frame seal.
- Lock and latch alignment: A misaligned latch or lock that doesn't fully pull the door closed leaves a visible gap along the strike side. This is more common than most people realize.
Write down every spot you find. Fixing them in order (worst leak first) makes the biggest difference fastest.
Quick Wins That Make a Patio Door Noticeably Warmer Right Away
If winter has already arrived and you need relief today, these three things take under an hour and cost almost nothing. They're not permanent fixes, but they work immediately while you plan the full repair.
- Roll up a door draft stopper (or a tightly rolled towel) and press it against the bottom of the door on the interior side. This instantly blocks the threshold gap that's typically responsible for the most noticeable draft.
- Apply self-adhesive foam tape along any side or top weatherstripping channel where you felt airflow. Press it firmly so it contacts the door face when closed.
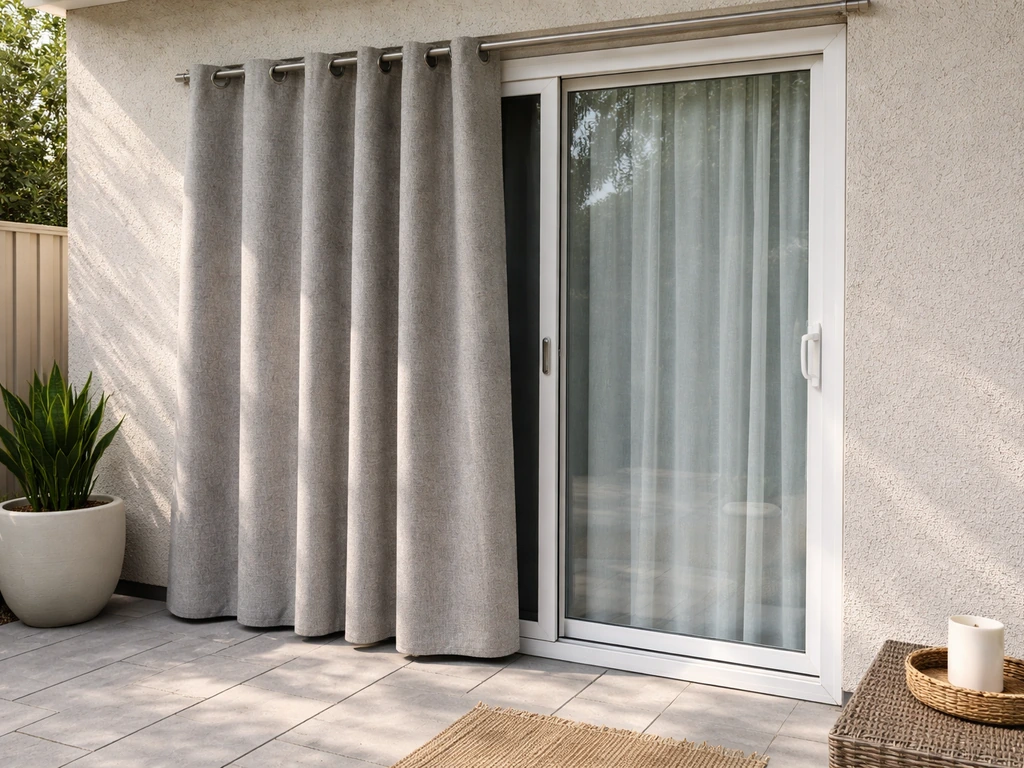
- Hang insulating curtains or a heavy thermal panel over the entire door. A good set of thermal blackout curtains can reduce heat loss through the glass significantly and costs $30 to $80.
These won't replace proper weatherstripping or a threshold seal, but they cut drafts fast while you gather materials for the real fixes below.
Insulation Options That Actually Work
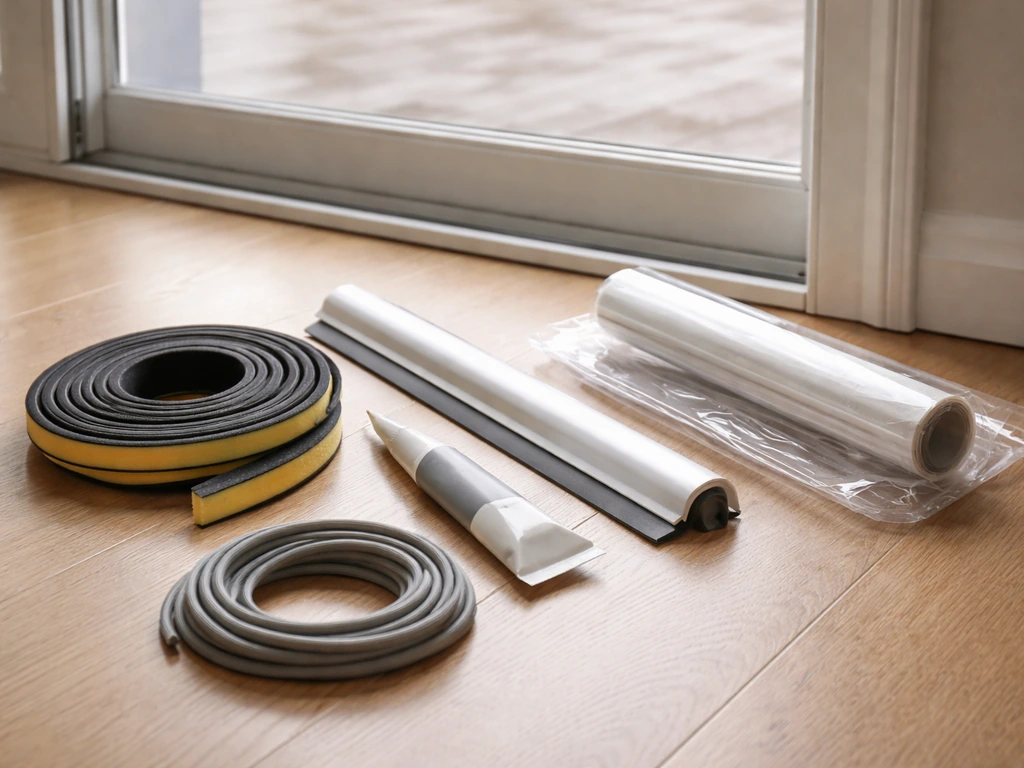
There are five main materials used to insulate patio doors for winter. Each targets a different type of gap or surface. Using the right one for each location matters, so here's what each is good for and what to skip. If you want a ready-made option, follow Frost King patio door insulation kit instructions as a related walkthrough for choosing the right material by location.
Weatherstripping
Weatherstripping seals the perimeter where the door panel meets the frame. The DOE specifies that it should compress to form a complete seal when the door is closed but not create so much friction that the door is hard to operate. For patio doors, the most useful types are foam tape (cheap, easy to install, good for low-traffic doors), vinyl bulb seal (durable and handles compression well on sliding doors), and V-strip or tension seal (works well on the side channels of both sliding and hinged doors).
Door Sweeps and Threshold Seals
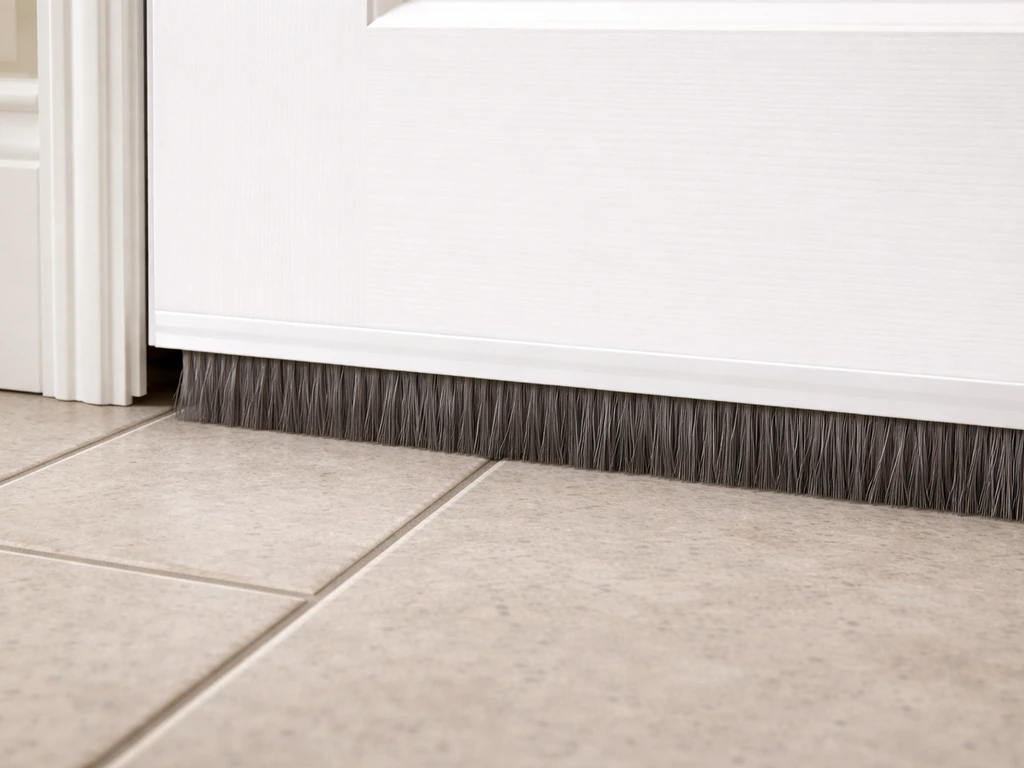
A door sweep mounts to the bottom of the door panel and drags or presses against the threshold to block airflow underneath. For sliding glass doors, look for a pile or brush-type sweep that fits the bottom of the panel without creating drag on the track. For hinged patio doors, an automatic door sweep (one that lifts when the door opens and drops when it closes) is the cleanest solution because it doesn't wear out from dragging across the floor. Threshold seals go on the floor sill itself and work in tandem with the sweep for a complete seal.
Caulk
Caulk is for stationary gaps, meaning anywhere that doesn't move. The DOE describes it as the right material for cracks and gaps less than a quarter inch wide between fixed building components. On patio doors, that means the exterior gap between the door frame and the wall framing, gaps at the top corners of the frame, and around trim on both sides. Do not caulk anything that moves, like the door panel itself or the track area of a sliding door.
Foam Backer Rod and Expanding Foam
For larger gaps in the frame-to-wall joint (anything over a quarter inch), stuff foam backer rod into the gap first to fill the bulk of the space, then caulk over it. For very large voids behind door trim or inside the rough opening, a minimal-expanding foam sealant (not the aggressive expanding kind) is appropriate. The aggressive formulas can actually warp door frames by pushing too hard against the framing.
Insulating Window Film
Shrink film kits work by creating a still air gap between the film and the glass, which adds an extra layer of insulation. They're effective, especially on older single-pane sliding glass doors, and they're easy to remove in spring. They do block your view somewhat and make the door non-operable for the winter, so they work best for rarely used doors or as part of a broader insulation strategy alongside proper weatherstripping.
Step-by-Step: How to Insulate Sliding Patio Doors vs. Hinged Patio Doors
The process differs enough between these two door types that it's worth walking through each separately. Sliding glass doors have a track, rollers, and a specific seal geometry. For sliding glass patio doors, insulation is often a combination of the right weatherstripping, a properly fitted door sweep, and a solid threshold seal insulate sliding glass patio doors. Hinged patio doors are closer to an exterior entry door and share more weatherstripping approaches with standard doors.
Sliding Glass Patio Doors
- Clean the track and frame channels thoroughly. Dirt and debris compact into the channels and prevent the door from seating flush against the perimeter seals. Use a stiff brush and vacuum, then wipe with a damp cloth.
- Inspect the existing pile weatherstripping inside the vertical frame channels on both sides of the door opening. If it's compressed, matted, or missing sections, pull it out and replace it with matching pile or foam-bulb strip.
- Check the bottom sweep on the sliding panel. Most sliding doors have a pile-type strip along the bottom edge. If it's worn thin, remove the panel (lift up and tilt the bottom out) and replace the sweep using the existing groove.
- Replace or add track seal foam along the horizontal bottom track. Self-adhesive closed-cell foam cut to fit in the track channel reduces air movement through the track itself.
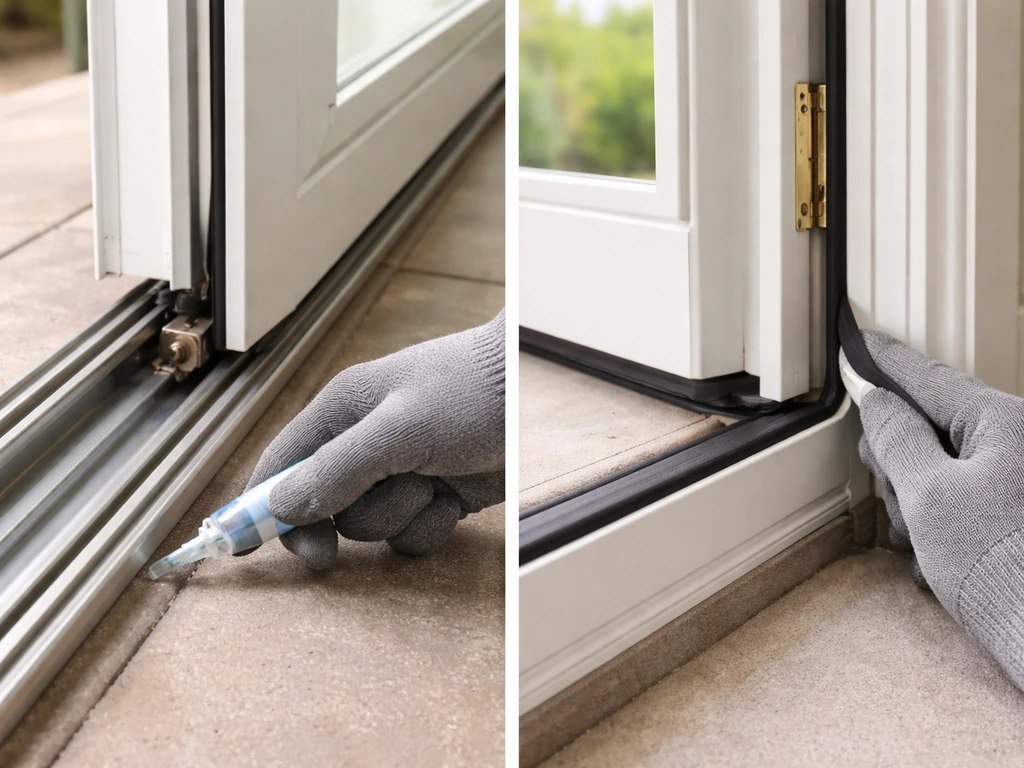
- Apply exterior caulk to the frame-to-wall joint on the outside. Use a paintable silicone or siliconized acrylic caulk rated for exterior use.
- Re-check the door closure by running the candle test again after all materials have cured or been installed.
Hinged Patio Doors
- Check the existing door stop weatherstripping around the top and sides of the interior frame. Press the door closed and look for light or airflow on any side. Replace with compression foam, bulb, or Q-lon foam tape as needed.
- Install or replace the door sweep along the bottom. For an active sweep that lifts automatically, trace the door width, cut to fit, and screw the mounting plate to the door face (not the frame). Adjust the drop height so it creates light contact with the threshold.
- Replace or adjust the threshold seal. Many hinged patio door thresholds have an adjustable vinyl or rubber gasket that can be raised with a screwdriver. If the gasket is missing or cracked, replacement pieces are available at hardware stores.
- Caulk the exterior frame-to-siding gap. Remove old cracked caulk with a putty knife, clean the surface, apply backer rod if the gap is deep, then apply exterior-grade caulk smoothly with a caulk gun.
- Check and tighten hinge screws. Loose hinges let the door sag, which creates uneven gaps along the latch side. Tighten all screws; replace with longer screws if the holes are stripped.
- Test the latch engagement after weatherstripping is added. New weatherstripping adds thickness and can sometimes prevent the latch from catching fully. Adjust the strike plate position if needed.
Fix the Hardware Issues That Keep Letting Cold Air In
This is the part most insulation guides skip, and it's why some doors stay drafty even after weatherstripping. If the door panel doesn't sit flush against its seals, no amount of foam tape will fully fix the problem. The three most common mechanical causes of patio door drafts are worn rollers, lock misalignment, and a damaged threshold.
Adjusting Sliding Door Rollers
When rollers wear down or their height adjustment drifts, the sliding panel drops lower in the frame. A panel riding too low sits below the perimeter seals and creates a gap around the entire top edge. Milgard's guidance for roller adjustment involves inserting a putty knife under the bottom of the panel to take some of the weight off, then using a #3 Phillips screwdriver through the access hole in the bottom of the panel to turn the adjustment screw. Turning clockwise typically raises the panel. Adjust both roller access points evenly and check that the door glides smoothly without binding at the top.
Wear gloves when handling the panel edge, as the glass edge and frame corners can be sharp. If the rollers are cracked or broken (not just out of adjustment), they need replacement, which involves removing the panel and swapping the roller cartridges. It's a manageable DIY job, but it takes about 45 minutes and requires a second person to safely handle the panel.
Lock and Latch Alignment
On sliding glass doors, the latch hook engages a strike keeper on the fixed panel. If the hook doesn't fully seat, the door can sit slightly ajar even when you think it's closed. Check by pushing the door firmly against the frame while the latch is engaged and seeing if you can create any play. If the hook is misaligned with the keeper, loosen the keeper screws, shift it to align with the hook travel, and retighten. On hinged patio doors, a door that's settled or has sagging hinges will show misalignment the same way. Adjust the strike plate and re-tighten hinges before installing new weatherstripping.
Threshold Gaps and Track Damage
The threshold on a sliding door takes constant foot traffic and wears down over time. A warped or damaged aluminum threshold no longer gives the bottom sweep something to press against. If the threshold is bent or has high and low spots, you may need to replace it rather than just add a sweep. Threshold replacement kits are available for most standard door widths. On the track itself, accumulated debris, corrosion, or physical damage can prevent the panel from gliding all the way to the frame wall, leaving a small but consistent gap on the fixed-panel side. Clean, repair, or replace the track as needed before adding seals.
Interior vs. Exterior Add-Ons: What Actually Helps in Winter
Once the door itself is sealed, there are add-ons on both sides that can meaningfully improve warmth and comfort. Here's how they compare and when each makes sense.
| Add-On | Where It Goes | Best For | Cost Range | Trade-Off |
|---|---|---|---|---|
| Storm door | Exterior, in front of main door | Hinged patio doors, adding a buffer air space | $150–$400 installed | Requires frame space; not practical for sliding doors |
| Insulating window film / shrink film | Interior, over glass | Single-pane or older doors, rarely-used doors | $15–$40 per kit | Blocks view, makes door inoperable for winter |
| Thermal curtains / insulated panels | Interior, over door | Any patio door, easy seasonal use | $30–$120 | Must be opened to use the door; adds privacy too |
| Exterior door sweep or threshold cap | Exterior, door bottom | Hinged doors with large threshold gaps | $20–$50 | Must be compatible with threshold height |
| Door insulation kit (foam tape + film combo) | Interior perimeter and glass | Apartment renters, renters who can't modify doors | $10–$25 | Temporary; not as effective as permanent seals |
A storm door is the most effective exterior add-on for a hinged patio door because it creates a sealed air buffer, but it only works with hinged doors that have a standard frame. Sliding glass doors don't typically accept a storm door. For sliding doors, insulating film and thermal curtains are the best interior add-ons after the weatherstripping and track work is done. Thermal curtains can also help with privacy by limiting what people can see through the glass from outside. Covering patio doors for both privacy and thermal performance is a related strategy worth exploring if the door faces a north or northwest exposure.
Materials List, DIY Steps, and Troubleshooting Checklist
What to Buy Before You Start
- Self-adhesive foam tape (3/8-inch and 1/2-inch widths) for perimeter weatherstripping gaps
- Pile weatherstripping replacement (match the width of your existing track channel, typically 5/16 or 3/8 inch)
- Door sweep appropriate for your door type (brush pile for sliding, automatic drop sweep for hinged)
- Exterior-grade siliconized acrylic or silicone caulk plus a caulk gun
- Foam backer rod (1/2-inch diameter works for most frame gaps)
- Minimal-expanding foam sealant for large voids behind trim
- Insulating window film kit if you want the glass covered
- #3 Phillips screwdriver (specifically needed for Milgard-style roller adjustment)
- Putty knife
- Utility knife and scissors for cutting weatherstripping
- Stiff brush and vacuum for track cleaning
- Work gloves
The Full DIY Sequence
- Do the candle or incense draft test and mark all leak points with painter's tape.
- Clean tracks, channels, and frame surfaces before installing anything.
- Fix hardware problems first: adjust rollers, realign the latch/strike, tighten hinge screws.
- Replace perimeter weatherstripping along sides and top of the door frame.
- Install or replace the door sweep along the bottom of the door panel.
- Check and adjust or replace the threshold seal.
- Apply caulk to all exterior frame-to-wall joints and corners.
- Add interior add-ons (film, curtains) if desired.
- Run the draft test again and re-mark any remaining spots.
- Address remaining leaks by adjusting materials or investigating underlying frame issues.
Troubleshooting Checklist for Persistent Drafts
If you've done the steps above and still feel cold air, use this checklist to find what's still wrong:
- Still cold at the bottom: The sweep isn't making full contact with the threshold. Check for gaps at the ends of the sweep, or a warped threshold that needs replacement.
- Still cold along one side: The door panel isn't pressing fully against the frame seal. Check roller height on sliding doors or hinge tightness on hinged doors. The latch may not be fully pulling the door closed.
- Still cold at the top corners: The weatherstripping isn't reaching the corner fully, or the door frame has settled and is no longer square. Fill corner gaps with a small bead of caulk.
- Cold coming through the glass, not the frame: This is a glazing or glass insulation issue, not a gap issue. Film kits and thermal curtains help here. If the glass is single-pane, upgrading to double-pane is the only permanent fix.
- Cold even with all gaps sealed: Check behind the door trim on the interior. If the rough opening around the frame was never insulated during installation, cold air can travel through the wall cavity and enter around the trim. Removing trim and adding foam or backer rod in the gap between the door frame and framing lumber is the fix.
- Frost or condensation on the interior door frame: This indicates significant temperature differential and possible air movement inside the frame assembly itself. Worth calling a door installer to assess whether the frame has a thermal break issue.
- Sliding door hard to open after adding weatherstripping: The new material is adding too much friction. Either trim it back slightly or switch to a lower-profile pile strip in the affected channel.
Most patio door drafts are genuinely fixable by a capable DIYer in a few hours and for under $60 in materials. The jobs that warrant calling a pro are frame replacement, full threshold replacement on a door with an unusual sill configuration, and anything that requires pulling the door frame out of the rough opening. If your door has multiple mechanical failures alongside the weatherstripping issues, such as broken rollers plus a damaged track plus a failing latch all at once, it may be worth having a door technician assess whether the door is worth repairing or approaching end of life.
FAQ
How do I tell whether my patio door leak is from seals or from the door being out of alignment?
If you can feel drafts after sealing, re-run the candle test along the lock area, then the top corners, then the track ends. Many doors leak at the perimeter even when weatherstripping looks new, because the panel is not sitting flush due to roller height, latch misalignment, or a threshold that is uneven.
What order should I insulate patio doors for winter in, so I do not waste money?
Start with the perimeter weatherstripping, then the bottom sweep and threshold, then the stationary frame gaps (caulk). Save expensive or messy work like backer rod, foam sealant, or shrink film until you confirm those first three are actually airtight, since foam and film will not compensate for a major gap at the sweep or lock.
How tight should weatherstripping be on a patio door for winter?
Use weatherstripping that compresses when the door is closed but does not bow the door or make it hard to lock. A simple check is to close the door and attempt to lift it slightly at the center, if you feel movement or the latch requires extra force, the seal may be too thick or installed in the wrong location.
Can I caulk around a sliding patio door track or anywhere the door touches?
Do not install caulk where the door moves, like across the sliding track or where the panel contacts the sweep. Caulk in moving joints can crack quickly, bind the door, and create new leak paths when the door cycles.
Will shrink film help even if my door still has drafts at the perimeter?
Yes, but only on the glass itself, or where the kit specifies an air-gap creation. Avoid applying film over poorly sealed perimeter gaps, because the trapped air can pull cold air in around the edges and you will still feel drafts near the lock and bottom.
What are the best quick fixes if I need warmth immediately but do not have parts yet?
For a temporary improvement, use an interior draft blocker, like a snug-fitting foam or brush snake along the bottom while you work. For a quick “get through the night” fix, painter’s tape can hold a small perimeter patch while you schedule the correct weatherstripping, but remove it before installing permanent pieces to avoid residue.
What should I do if the door becomes hard to close after adding weatherstripping?
If the door sticks after installing new seals or the latch won’t fully seat, stop and adjust. Most of the time this is due to the seal being installed too thick or too far inward, or the door panel sitting low. Fix mechanical issues first (rollers and latch) before adding more seal material.
Why does my patio door still leave a gap after installing a new sweep and seal?
Clean the track and remove debris before you adjust rollers or replace seals. Even small grit can keep the panel from gliding fully to the frame wall, leaving a consistent gap on the fixed side and making it look like the weatherstripping “didn’t work.”
When should I replace the threshold instead of just adding a new door sweep?
If you see high and low spots on an aluminum threshold, a new sweep may never press evenly, so replacement is usually the right move. As a quick diagnosis, run a thin strip of paper under the sweep in multiple spots, if it slides freely at certain sections, the threshold is not flat enough.
Do thermal curtains or insulating curtains replace the need for weatherstripping?
Interior thermal curtains help most when they fully cover the glass and overlap the frame area, and they perform best at night. Pair them with airtight perimeter seals, since curtains mainly reduce heat loss through the glass rather than stopping drafts from gaps.
When is it worth calling a pro to insulate patio doors for winter?
If multiple failures are present, like worn rollers plus a damaged track plus a latch that will not seat, the cost of repeated DIY adjustments can exceed a technician visit. A professional is especially worth it when adjusting does not bring the panel flush within a reasonable range or when the frame shows signs of sagging or damage.
Next Article
How to Cover Patio Doors: Sliding and Window Options
Step-by-step guide to cover sliding patio doors and window glass for privacy, insulation, light control, and security.