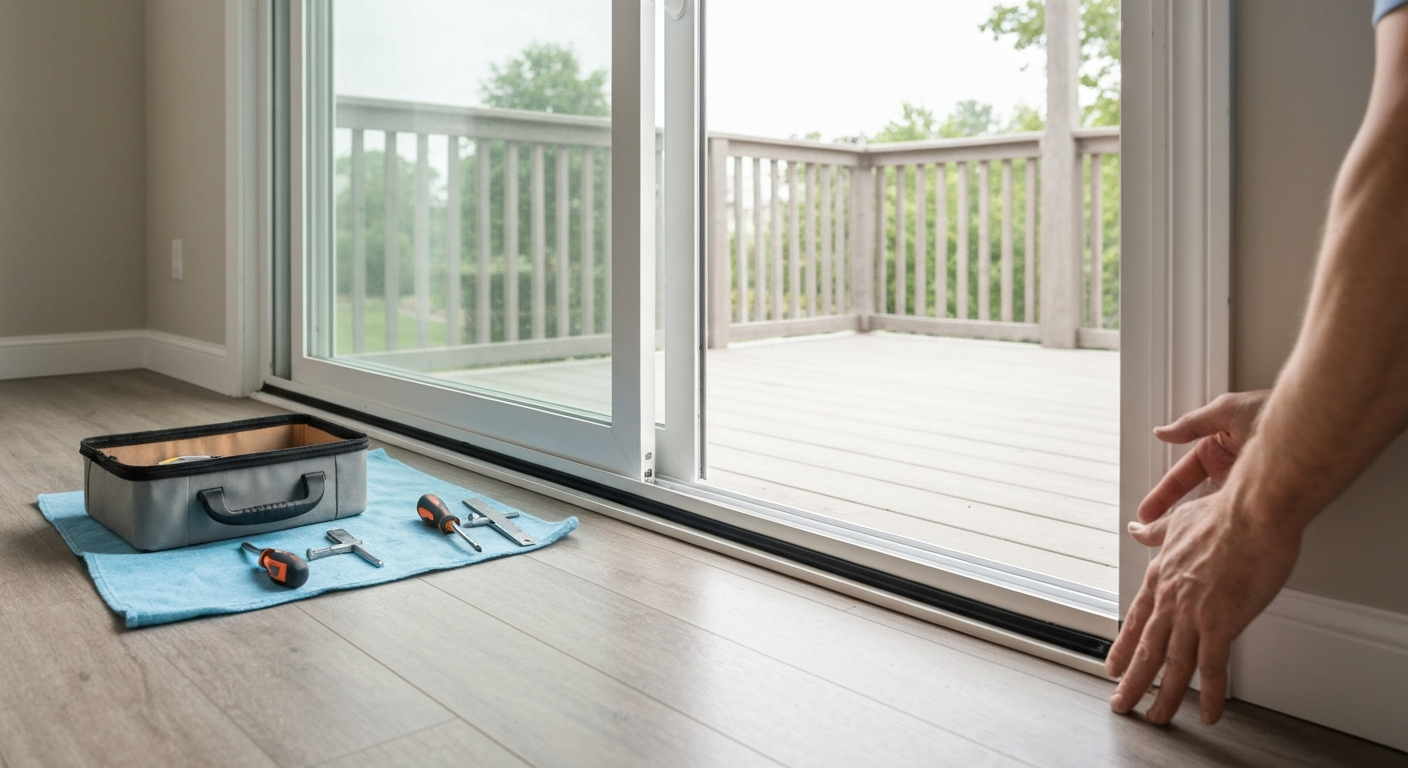
A patio door that has 'dropped' is sitting lower in its frame than it should, the bottom edge scrapes the track, the panel drags when you slide it, the lock no longer lines up with the strike, or there's a visible gap at the top corner. blank" rel="noopener noreferrer">Pemko product catalog (weatherstripping & door seals) notes that Weatherseal and threshold fixes: common residential seals include pile (brush) seals, compression/bulb gaskets (EPDM/silicone), adhesive foam and door sweeps; manufacturers (Pemko catalog) document how different profiles install (kerf, surface mount, retainer) and which materials (EPDM, silicone, vinyl) are recommended for exterior thresholds. In the vast majority of cases the fix is a roller adjustment that takes under 20 minutes, or a roller replacement that takes a couple of hours. This guide walks you through every step: diagnosing the cause, adjusting or replacing rollers, removing and rehanging the panel, and knowing when the problem is bigger than the rollers. For a concise step-by-step overview of how to repair a patio door, consult the dedicated repair guide.
How to Fix Patio Doors That Have Dropped: DIY Repair Guide

What 'dropped' actually means for a patio door
The term 'dropped' describes a sliding door panel that has sagged downward relative to the frame. On a bottom-rolling slider (by far the most common residential type), the panel rides on roller assemblies in the bottom rail. When those rollers wear down, their housings collapse, or the adjustment screws back out over time, the panel loses height. You end up with a door that grinds along the track, a lock that misses the keeper by a few millimetres, or a top corner that rattles because it's no longer properly guided. Less commonly, the problem isn't the rollers at all, it's a bent or corroded track, a rotted sill, or a racked frame pushing the panel out of square. This guide covers all of those scenarios.
This article is written for homeowners tackling the repair themselves. You don't need to be a tradesperson, but you do need to be comfortable with basic hand tools and, for the removal steps, a second set of hands. If you're hiring a pro and just want to understand what they should be doing, this guide covers that too.
Quick diagnostic checklist
Run through these tests before touching a tool. They'll tell you how severe the problem is and steer you to the right section of this guide.
- Slide the door fully open and fully closed. Does it grind, stick, or require noticeably more force than it used to? (Roller wear or dirty track.)
- Look at the gap between the top of the door panel and the top of the frame as the door moves. Is the gap uneven or does one side dip lower? (Panel has dropped on one or both roller assemblies.)
- Try the latch or lock. Does the hook miss the strike, engage partially, or require lifting the door handle to latch? (Door has dropped enough to misalign the strike.)
- Crouch down and look along the bottom track. Is the panel sitting on the track surface rather than riding above it on rollers? (Roller failure or total collapse.)
- Check the corners of the glass panel for cracking, and the bottom rail for visible bowing or buckling. (Structural panel damage — see the 'bent panels' section.)
- Press a flashlight flat against the track and look for deep gouges, raised dents, corrosion pitting, or standing water. (Track damage or blocked weep holes.)
- Probe the wood sill or subframe below the threshold with a flathead screwdriver. If it sinks in with moderate pressure, you have rot. (Structural sill issue — this is a separate repair that must happen before roller work.)
- With the door closed, hold a lit candle or incense stick near the bottom edge and corners. Drifting smoke means weatherseal failure alongside or caused by the drop.
| Symptom | Likely Cause | Severity |
|---|---|---|
| Door drags but still slides | Worn rollers or dirty track | Low — quick fix |
| Lock misses strike by < 10 mm | Roller adjustment needed | Low — 15-minute fix |
| Panel visibly lower on one side | One roller collapsed | Medium — roller replacement |
| Panel scrapes track continuously | Both rollers failed or track dented | Medium — rollers + possible track |
| Bottom rail rests on track surface | Complete roller failure | Medium-High — full removal needed |
| Lock misses strike by > 15 mm | Rollers plus possible frame shift | High — assess frame |
| Screwdriver sinks into sill wood | Sill rot | High — structural repair first |
| Frame visibly racked or bowed | Foundation movement or rot | High — professional assessment |
Safety, tools, materials, and replacement parts
Personal protective equipment
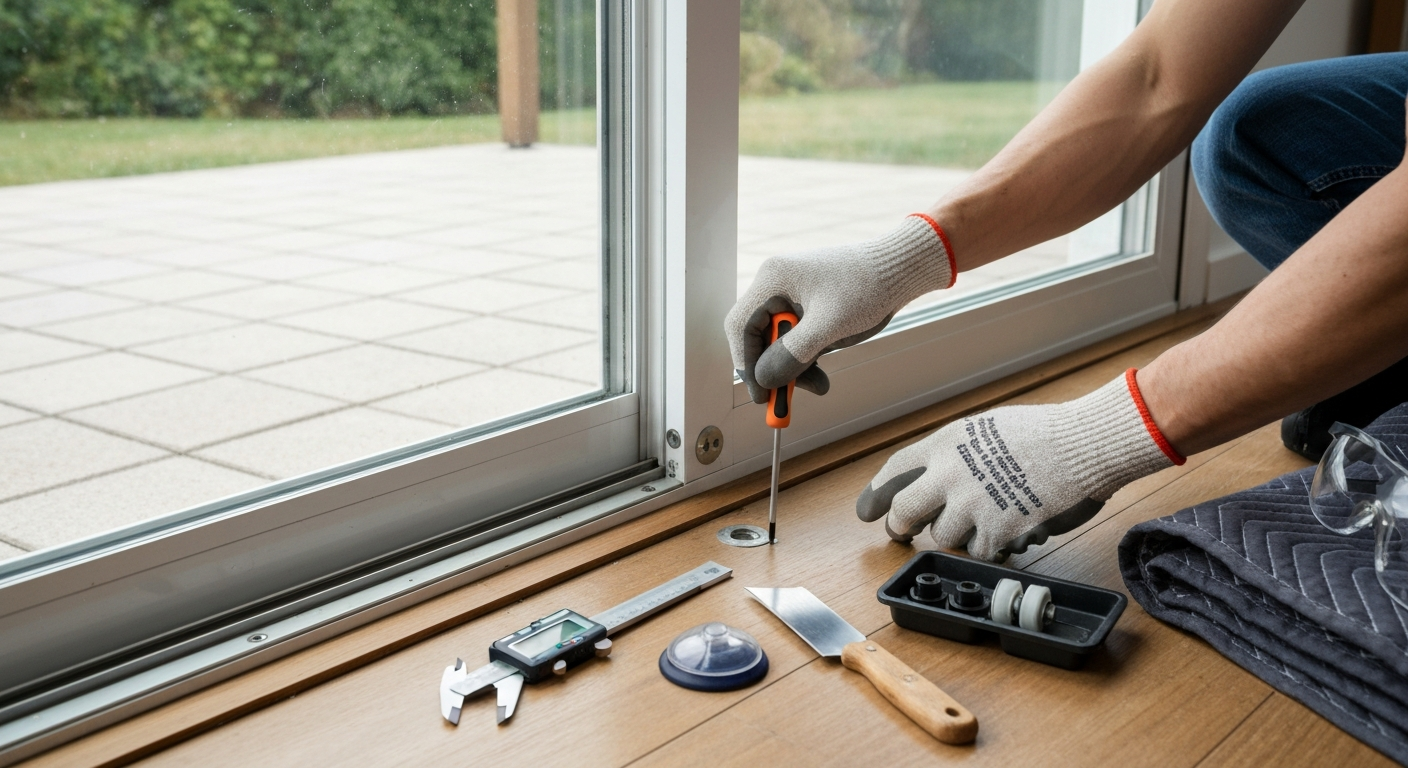
Residential sliding door panels typically weigh between 80 and 200 lb depending on glass thickness, panel size, and frame material. That's not a one-person lift, and glass failure during handling is a real hazard. At minimum: cut-resistant gloves (not standard work gloves, proper glass-handling gloves rated to cut resistance level A4 or higher), safety glasses, and closed-toe shoes. If you're working on a large or older panel where the glass seal integrity is uncertain, add a hard hat. Never handle a sliding panel alone.
Tools
- Phillips and flathead screwdrivers (multiple sizes — roller screws vary by brand)
- Pry bar or wide putty knife (for lifting the panel during removal)
- Suction cup handles or panel lifting straps (critical for safe panel handling)
- Tape measure
- Digital calipers (for measuring replacement roller diameter and width)
- Utility knife
- Wire brush and stiff nylon brush (track cleaning)
- Vacuum with crevice nozzle
- Silicone spray or dry PTFE lubricant (not WD-40 — it attracts dirt)
- Needle file or flat mill file (for minor track dents only)
- Cordless drill (for sill or frame repairs — not for roller adjustment screws on most brands)
- Level (18-inch or longer)
- Marker or pencil (for scribing reference lines on frame before removal)
Replacement parts, what to measure before you order
The single biggest mistake in roller replacement is ordering the wrong part. Before you remove anything, photograph the existing roller assembly from multiple angles. Measure the wheel diameter, the wheel width, the overall housing height, and note whether it uses a C-tab (a clip that locks into a slot in the bottom rail) or a screw-mount housing. Also note the wheel material: nylon/composite wheels are quieter and resist corrosion, making them the better choice for most residential doors; steel wheels handle heavier panels but can corrode and mark aluminum tracks over time. Most manufacturers recommend replacing both rollers on the panel at the same time even if only one has failed, mismatched wear creates uneven loading on the new roller.
- Replacement roller assemblies (matched pair — same diameter, width, housing style, and tab/screw type as originals)
- Replacement top guides if originals are cracked or missing
- Threshold weatherseal or door sweep (pile/brush seal for sliding doors; EPDM bulb gasket or silicone compression seal for the frame sides)
- Track lubricant: dry PTFE or silicone spray
- Epoxy wood consolidant and filler (for minor sill rot repair only — significant rot requires sill replacement)
- Sill pan flashing tape (if reinstalling after sill work)
Inspecting and diagnosing the actual cause
Rollers and roller housings
Remove the interior trim plug or access cover at the bottom corner of the door panel, it's usually a plastic cap that pops out with a flathead screwdriver. You'll see the roller adjustment screw. Turn it clockwise slowly while watching the bottom of the door: if the door lifts, the roller mechanism is intact and you may just need an adjustment. If the screw turns freely with no resistance, or the door doesn't move at all, the roller housing has failed, replacement is needed. On panels with two access holes (one at each end of the bottom rail), check both. A door that has dropped only on one side indicates a single roller failure; a uniform drop across the full width suggests both have worn.
Bottom track
Slide the door fully open and inspect the entire length of the track. A clean, smooth aluminum track with no visible damage and clear weep holes at the outer edge is fine. Small surface scratches are normal. What you're looking for is raised metal from an impact dent (which the roller rides over and drops into, creating a dead spot), corrosion pitting that roughens the surface, or a section of track that is visibly bent upward or downward. Very minor dents can be carefully filed flat with a mill file, work slowly and check with your finger that the surface is flush. Deep gouges, raised lips, or any bending of the track profile means track replacement, which on most doors requires removing the threshold section. Also check weep holes: blocked weep holes cause water to pool and accelerate corrosion. Clear them with a wire or compressed air.
Top guide rail
Open the door and look up into the top frame channel. There should be a plastic guide or low-friction strip that keeps the top of the panel from kicking inward or outward. If this guide is missing, broken, or the channel is packed with debris, the panel can lean and appear to have dropped on one side even when the rollers are fine. Clean the channel and replace cracked or missing guides before concluding you need roller work.
Frame and sill
Check the outer frame for visible racking, the frame should be square, not parallelogram-shaped. A framing square held in the corner is the easiest check. If the frame has shifted, no amount of roller adjustment will make the door operate correctly. This is a structural issue caused by foundation movement, failed fasteners, or rot in the rough opening framing. Similarly, use the screwdriver probe test on the wood sill and subframe. Soft, punky wood cannot support the door's weight and will allow the panel to drop regardless of roller condition. For step-by-step instructions on repairing a shifted or damaged patio door frame, see how to repair patio door frame. Sill rot repair needs to happen before any roller work, a rotted sill is also the most common source of leaks under a patio door. For step-by-step instructions on repairing rot under the threshold, see how to fix rotted wood under patio door.
Weatherseals
A dropped panel compresses or misaligns the weatherseal at the bottom and sides. Once the door is back at the correct height, check whether the existing seals still make full contact. Pile (brush) seals on the bottom of the panel wear down over years of use and often need replacing as part of this repair. Compression gaskets on the frame sides may only need the door height corrected to work again. If you found air infiltration during the candle test, plan to address seals after the structural fix is done.
Adjustment vs. replacement vs. calling a pro
Most dropped sliding doors need one of three things: a roller adjustment (15-30 minutes, no parts cost), a roller replacement (1-3 hours, $15-$60 in parts for a pair), or a combination of roller replacement plus track cleaning or minor track filing (add 30-60 minutes). For a quick answer to whether can patio doors be repaired and what repairs are typical, see can patio doors be repaired. Those are all solid DIY projects. Here's where to draw the line:
| Situation | DIY or Pro? | Notes |
|---|---|---|
| Roller adjustment screw responds and lifts door | DIY | Adjustment only — 20 minutes |
| Roller housing collapsed, wheel cracked or missing | DIY | Roller replacement — 1-3 hours |
| Track has minor surface dents, weep holes blocked | DIY | Clean + file + clear weeps |
| Track deeply gouged, bent, or corroded | DIY/Pro depending on access | Track section replacement; varies by door brand |
| Sill wood rot — shallow, localised | DIY | Epoxy consolidant + filler method |
| Sill rot extends to structural subframe | Pro | Requires carpentry, flashing, and re-installation |
| Frame is visibly racked or out of square | Pro | May indicate foundation or structural issue |
| Panel is bent or glass is cracked | Pro | Panel replacement needed — glass handling risk |
| Door is older than 20-25 years and multiple systems failing | Consider replacement | Cost of repairs can approach door replacement cost |
Step-by-step: adjusting rollers to lift a dropped sliding door
Try this first. It costs nothing and fixes the majority of dropped sliding doors. You don't need to remove the door for this procedure.
- Slide the door to the middle of its travel and prop it open with a wedge or have a helper steady it. You need access to both bottom corners.
- Locate the roller access holes at each end of the bottom rail. They're usually covered by a plastic plug. Pop the plug out with a flathead screwdriver and set it aside.
- Identify the adjustment screw inside the hole. On most doors it's a Phillips head. Some brands use a hex key. Do not use a power drill — the adjustment is small and stripped screws are a significant hassle.
- Lift the panel slightly at one end using a wide putty knife or a second person pulling up on the frame — this takes the weight off the roller and lets the screw move freely. Milgard's own installation instructions specifically call this out: adjust under reduced panel load.
- Turn the adjustment screw clockwise (on most brands this raises the door). Make no more than three to four full turns before re-checking. Watch the bottom of the door relative to the track as you adjust.
- Repeat on the opposite end. Aim for even height on both sides — use a consistent gap between the bottom of the door frame and the track surface as your reference (typically 1/8 to 3/16 inch).
- Slide the door open and closed. It should move with light, even effort. If it still drags in one spot, check the track at that location for a dent or debris.
- Test the lock. Close the door and engage the latch. If the hook now meets the strike cleanly, you're done. If it still misses, see the lock adjustment section below. Replace the access hole plugs.
After adjustment: check the lock and strike
Raising the door often realigns the lock automatically, but if the hook still doesn't engage fully, check whether the strike/keeper on the door frame is adjustable. On most Pella, Andersen, and Milgard doors the strike is held by two screws and has a small amount of vertical play, loosen the screws, reposition the strike until the lock hooks cleanly with no lifting or forcing, and re-tighten. Pella's installation guide documents lock/strike adjustments and recommends verifying lock engagement after roller or height adjustments blank" rel="noopener noreferrer">Pella's installation guide documents lock/strike adjustments and recommends verifying lock engagement after roller or height adjustments.. Always verify the lock engages under normal hand pressure before considering the job done.
Step-by-step: removing the door and replacing rollers
If the adjustment screw turns with no effect, the roller housing has collapsed. You need to pull the door out and swap the assemblies. This takes about 1.5 to 3 hours for someone doing it for the first time. Have your replacement rollers on hand before you start, ordering them after removal leaves you without a door.
- Order the correct replacement rollers first. Photograph both ends of the bottom rail from below, measure wheel diameter and housing height with calipers, and note the C-tab or screw-mount style. Match all dimensions. Get a matched pair, not a single roller.
- Clear the area on both sides of the door of furniture. Lay a moving blanket or thick cardboard flat on the floor inside the door opening — this is where you'll set the panel down.
- Lower the existing roller adjustment screws counterclockwise as far as they will go. This drops the rollers to their lowest position, giving you maximum clearance to lift the panel out of the track.
- Locate and remove the top guide or anti-lift tab. On most residential sliders there's a small screw-in guide in the top channel that prevents the panel from being lifted out accidentally. Remove the screw. On some doors the guide is a spring-loaded clip — press it inward while lifting.
- Get your helper positioned on the opposite side of the door. Both of you should be wearing cut-resistant gloves. Agree on a lift signal before you start.
- Grip the door firmly — suction cup handles on the glass are ideal and strongly recommended for any panel over 80-100 lb. Lift the panel straight up until the bottom rollers clear the track rail. You typically need 1-2 inches of upward travel.
- Once the rollers are clear, tilt the bottom of the panel toward you and lower it off the track. Move together. Set the panel down flat on the padded surface — never lean it against a wall unsupported.
- Inspect the old roller assemblies in place before removing them. Note which direction the tab faces and how the housing sits in the rail slot. Take a photo.
- Remove the old roller assemblies: on C-tab types, press the tab inward while sliding the housing out of the bottom rail slot. On screw-mount types, remove the retaining screws. Some housings have an additional locking tab — check your photos.
- Slide the new roller assemblies into position in the same orientation. Click or screw them firmly into place. Confirm they are fully seated — a housing that is only partially engaged will fail immediately under the panel's weight.
- Raise the rollers to mid-range by turning the adjustment screws several turns clockwise before re-installing the door. This gives you room to fine-tune height in both directions after re-hanging.
- Re-install the panel: with your helper, lift the panel, tilt the top in first, insert the top rail into the top guide channel, then lower the bottom rollers onto the track. Make sure both rollers land on the track surface, not beside it.
- Re-install the anti-lift guide or top tab. Test that the door cannot be lifted out from the outside — this is a security feature as well as a retention feature.
- Adjust roller height as described in the previous section until the door glides evenly and the lock engages cleanly.
- Lubricate the track with a dry PTFE or silicone spray. Wipe off excess. Do not use WD-40 or oil-based lubricants — they attract grit and will accelerate roller wear.
Step-by-step: lifting, rehanging, and aligning the door panel
This section covers the rehanging process in detail, including screen doors and the specific challenge of a bent or warped panel.
Standard sliding glass door
- Before rehanging, clean the track thoroughly. Vacuum debris, brush out any rust or grit with a wire brush, clear weep holes with a wire or compressed air, and wipe the track surface. A clean track is essential — new rollers on a dirty or dented track will wear fast.
- With rollers pre-set to mid-range height, lift and insert the panel as described in step 12 of the removal section. Both rollers must land on the track at the same time — lower one side first and you risk the panel tilting and the top corner hitting the frame.
- Once the panel is seated, slide it gently back and forth a few inches to feel for catching or grinding. If it catches at a specific point, mark that spot and inspect the track there for debris or a dent.
- Adjust roller height (clockwise to raise, counterclockwise to lower) at each end incrementally. Check the gap between the bottom of the door and the track surface — you want roughly 1/8 to 3/16 inch uniformly across the full width. Use a business card as a spacer for consistency.
- Close the door and check the perimeter seal. The weatherstrip should compress evenly around the full frame without visible gaps. If you see daylight at a corner, adjust that side's roller slightly.
- Engage the lock and verify full engagement. Adjust the strike if needed.
- Slide the door fully open, fully closed, and half-way, and check that it moves smoothly at all positions and doesn't drift on its own (slight roller height difference causes drift — lower the uphill roller slightly or raise the downhill one).
Screen doors
Screen doors are lighter (typically 15-40 lb) and easier to handle solo, but they're also more easily bent and their rollers are smaller and more prone to popping out of track. The removal and rehang process is the same: lower the rollers, remove any top anti-lift tab, lift the screen panel up and tilt the bottom out, then reverse to rehang. The key difference is alignment: screen door panels are often aluminum and can flex slightly, so check that the frame is square (measure diagonally corner to corner, both diagonals should be equal) before hanging. If the screen panel itself is slightly bent, you can often close a minor bow by adjusting one corner's roller to compensate. A significant bend means replacement, a bent screen door panel lets in insects and weather even when 'closed'.
Handling a bent or warped panel safely
If you suspect a panel is bent before removal, do not attempt to force it back into shape while it's in the frame, that risks cracking the glass or breaking the corner joints of the frame. Remove the panel first following the steps above. Lay it completely flat on a clean, padded surface. Sight down each edge to identify the bend location. For aluminum-framed panels, very minor bowing (under 3-4 mm) along the long edges can sometimes be pulled back by adjusting roller height differentially to compensate, but this is a workaround, not a fix. For any bend that creates a visible gap at the frame, affects glass integrity, or cannot be compensated by roller adjustment, the panel needs to be replaced. Attempting to straighten a bent aluminum or vinyl panel by forcing it risks shattering the glass, the glass acts as a structural component in most insulated units. When in doubt, get a professional assessment before proceeding.
Sill rot, weatherseal, and lock repairs that go alongside this fix
A dropped door is sometimes a symptom of a bigger moisture problem. If you also have water intrusion, see the guide on how to fix a leaking patio door for steps on diagnosing and repairing sill pan, flashing, and drainage issues. If your probe test found soft wood in the sill, that has to be fixed before the rollers will hold their adjustment. For shallow, localised rot confined to the surface of the wood sill, an epoxy consolidant applied to stabilise the fibres followed by an epoxy filler to restore the surface is a legitimate DIY repair. This method works well where the structural integrity of the framing is not compromised. Where the rot runs deep into the subframe, the sill pan is missing or failed, or the rot has spread to the jack studs, you're into a carpentry repair that involves removing the door entirely, cutting out the damaged framing, installing a proper sill pan with drainage, and reinstalling the door with new flashing. That's a pro-level job or a very experienced DIYer with carpentry skills.
For weatherseals: pile (brush) seals on the bottom of the panel are consumable parts. If yours are worn flat, peel them off, clean the channel with a utility knife and acetone, and press in a new pile seal of matching width. Compression gaskets on the frame sides are typically retained in a kerf groove, pull the old one out, clean the groove, and press the new gasket in starting from one corner. Always match the profile (width and height of the bulb or pile) to what was originally there, or you'll either create a gap or prevent the door from closing properly.
Lock and strike alignment almost always resolves once the door is at the correct height. If the lock hook itself is bent, or the lock mechanism is loose within the door panel, that's a separate repair. Most residential sliding door lock hardware is held by two or four screws accessible from the edge of the door panel, remove them, pull the lock body out, and take it to a hardware store or door supplier for an exact match.
How long this takes and what it costs
| Repair Type | DIY Time | Parts Cost | Pro Cost (approx.) |
|---|---|---|---|
| Roller adjustment only | 15-30 minutes | $0 | $75-$150 service call |
| Roller replacement (both) | 1.5-3 hours | $15-$60 per pair | $150-$350 parts + labour |
| Track cleaning and minor filing | 30-60 minutes | $5-$15 lubricant | Included in service call |
| Weatherseal replacement | 45-90 minutes | $10-$40 | $100-$200 |
| Strike plate adjustment | 15 minutes | $0-$15 | Included in service call |
| Sill rot (epoxy repair, shallow) | 2-4 hours | $30-$80 | $200-$500 |
| Sill rot (structural replacement) | 1-2 days | $100-$300 materials | $800-$2,500+ |
| Panel replacement (glass unit) | Half day with pro | $300-$1,200+ | $500-$2,000+ installed |
Keeping the door from dropping again
Roller wear is gradual and largely unavoidable, but you can slow it significantly. Clean and lubricate the track twice a year, spring and fall are natural times to do it alongside other seasonal maintenance. For step-by-step tips on lubricating tracks and eliminating noise, see how to fix squeaky patio door. A clean track means rollers aren't grinding through grit with every slide. Clear the weep holes in the outer track channel every year to prevent water buildup. Check the adjustment screws annually: the vibration from daily use slowly backs them out over time, and catching a small drop early means a two-minute fix instead of a full roller replacement. Check the weatherseals for compression and flexibility each fall, a seal that has gone hard and brittle won't recover and should be replaced before winter.
If you have a large, heavy panel (a wide two-pane slider or a floor-to-ceiling unit), consider upgrading to steel-wheel or tandem (two-wheel) roller assemblies when you do replace them. They distribute the load more evenly and last significantly longer under heavy panels. Tandem rollers are a worthwhile upgrade on any panel over about 150 lb.
FAQ
What does it mean when a patio door has “dropped” and how do I confirm it’s dropped vs. another problem?
A “dropped” patio door sits lower in its frame than it should—scraping the track, failing to latch, or leaving gaps at the top. Confirm by: (1) trying to slide the door—does it bind at the bottom? (2) checking the gap at the top of the panel—larger than the other panel or uneven indicates sag; (3) verifying lock engagement and handle position; (4) visually inspecting rollers and track for debris, dents or corrosion; and (5) testing whether the door lifts slightly to free the binding (if it glides when lifted, rollers/adjustment are likely the issue).
Quick diagnostic checklist: what should I inspect first to determine the cause?
Follow this checklist: 1) Clean track and clear weep holes; 2) Inspect visible rollers/wheel housings from bottom access—look for missing/broken wheels; 3) Check for track dents, deep grooves or corrosion; 4) Verify roller adjustment screws (bottom or C‑tab access) turn and move the door up/down; 5) Look for loose/stripped hinge/track hardware or missing screws; 6) Probe sill/frame wood for rot or soft spots; 7) Check top guides for bent brackets or worn guides; 8) Verify lock/strike alignment; 9) Inspect weatherseal for damage causing binding; 10) If none of the above, remove panel and inspect underside rollers and housings for wear or seized bearings.
Which tools, PPE, and replacement parts should I have ready before starting repairs?
Tools/PPE: screwdriver set (Phillips & flat), 1/8–1/2" nut drivers/ratchet, hex keys, putty knife, pry bar, adjustable wrench, pliers, shop vacuum, wire brush, needle files, hammer, block of wood, suction cup lifter(s), tape measure, level, utility knife, caulk gun, silicone or exterior sealant, gloves (cut‑resistant), safety glasses, knee pads. Parts & materials: replacement roller assemblies (match type—tandem vs single, wheel size/material), roller housings, bottom track/threshold (if needed), weatherstripping (pile/EPDM/silicone), door sweep, screws/fasteners, sill pan or flashing (if doing sill repair), epoxy consolidant/patch or new sill lumber for rot repairs, lock/strike kit. Optional: replacement track sections, replacement panel hardware, suction cups or lifting straps.
How do I safely lift and remove a sliding patio door panel (for roller access or replacement)?
Safety first: know panel weight—residential panels commonly 80–200 lb and may need two people. Wear cut‑resistant gloves and eye protection. Procedure: 1) Open door to mid position and locate bottom roller access (small holes or C‑tab). 2) Back out roller adjustment screws to lower the panel slightly. 3) With a helper and suction cups, lift bottom of panel straight up to clear track (a slight tilt may be required to free top guide). 4) Pull bottom out and set panel on a padded, protected surface (carpet, foam) on edge—never lay glass flat unprotected. 5) Use lifting straps or mechanical lifts for heavy/large panels. Manufacturer guides warn against solo lifting on large panels—if unsure, call a pro.
How do I adjust rollers to raise a dropped sliding door (step‑by‑step)?
1) Clean the track and vacuum out debris and weep holes. 2) Locate the roller adjustment screws (usually bottom of the door in access holes or near the C‑tab). 3) Use the correct screwdriver/hex key; turn clockwise in small increments (¼–½ turns) to raise—most manuals say clockwise raises the door. 4) After each increment, test by sliding the door and checking latch engagement. 5) Repeat until door glides freely and locks securely. 6) If adjustment screws spin freely or have no effect, the hardware may be stripped or broken—proceed to roller replacement. Note: lift the door slightly before adjusting on some models to remove weight from rollers (follow manufacturer guidance).
When and how should I replace roller assemblies instead of just adjusting them?
Replace rollers if wheels are cracked, missing, heavily worn, seized, or the housing is bent/loose; also replace if adjustment screws no longer change height (stripped). Steps: 1) Remove the panel per safety steps. 2) Protect the panel and work area. 3) Unscrew and remove the bottom rail/vinyl cover or housing retainer (varies by model) to access rollers. 4) Photograph and measure old rollers—wheel diameter, width, C‑tab/slot style, mounting screw positions—so you order exact replacements. 5) Remove old roller housings and install new ones (many guides recommend replacing both rollers on the panel). 6) Rehang the panel, then adjust rollers to final height. Allow 1–2 hours per panel for a DIY replacement if you have parts and a helper.
Can Patio Doors Be Repaired? DIY Fixes, Costs & When to Call
Can patio doors be repaired? Practical fixes, DIY steps, costs, tools, and when to call a pro.