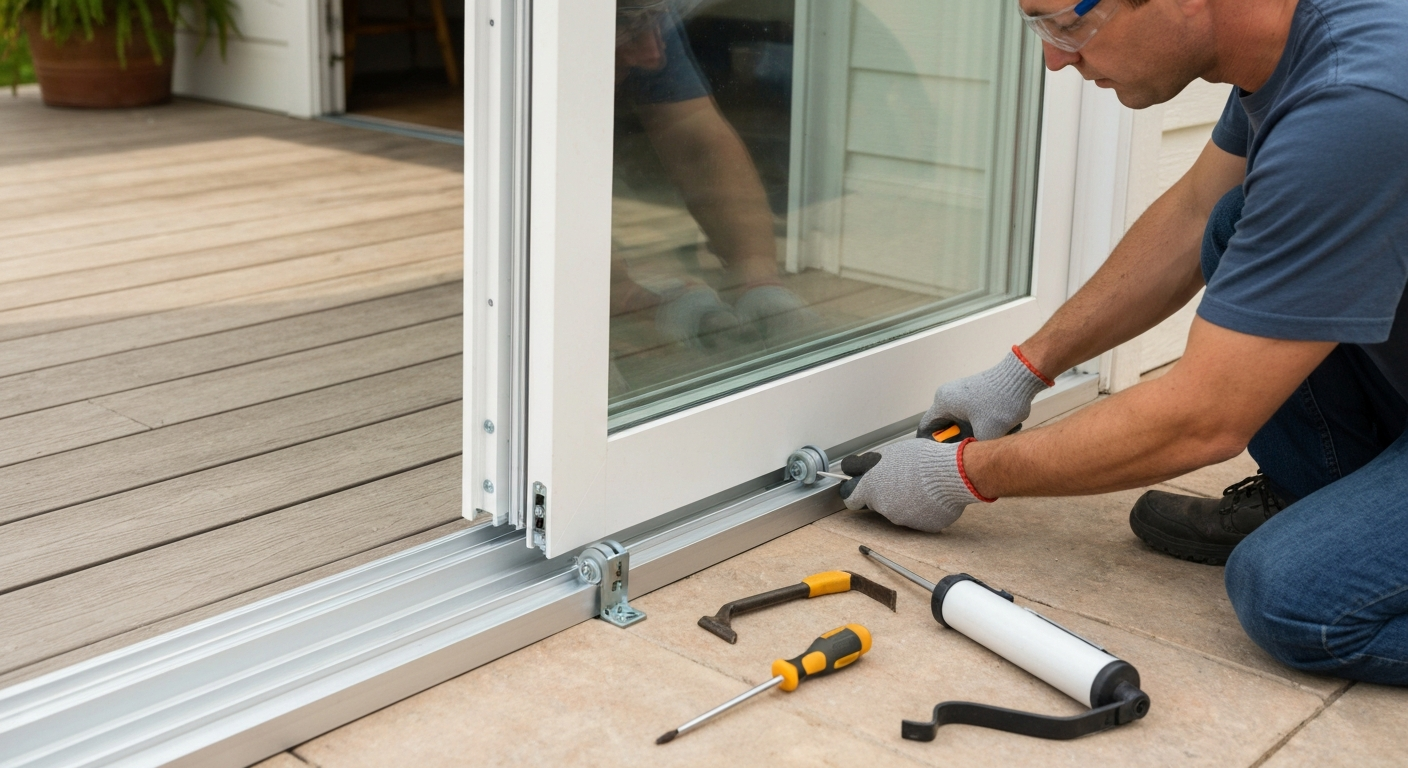
Yes, most patio doors can be repaired. Stuck tracks, broken rollers, dropped panels, drafty seals, faulty locks, and damaged screens are all fixable with standard tools and inexpensive parts. Full replacement is only necessary when the frame is structurally warped, rot has spread through load-bearing members, or parts simply no longer exist for an obsolete unit. In the vast majority of cases, a bit of diagnosis and a weekend afternoon will get your door working like new.
Can Patio Doors Be Repaired? DIY Fixes, Costs & When to Call

Jamie Archer
26 Jul 2026
Which patio doors this guide covers
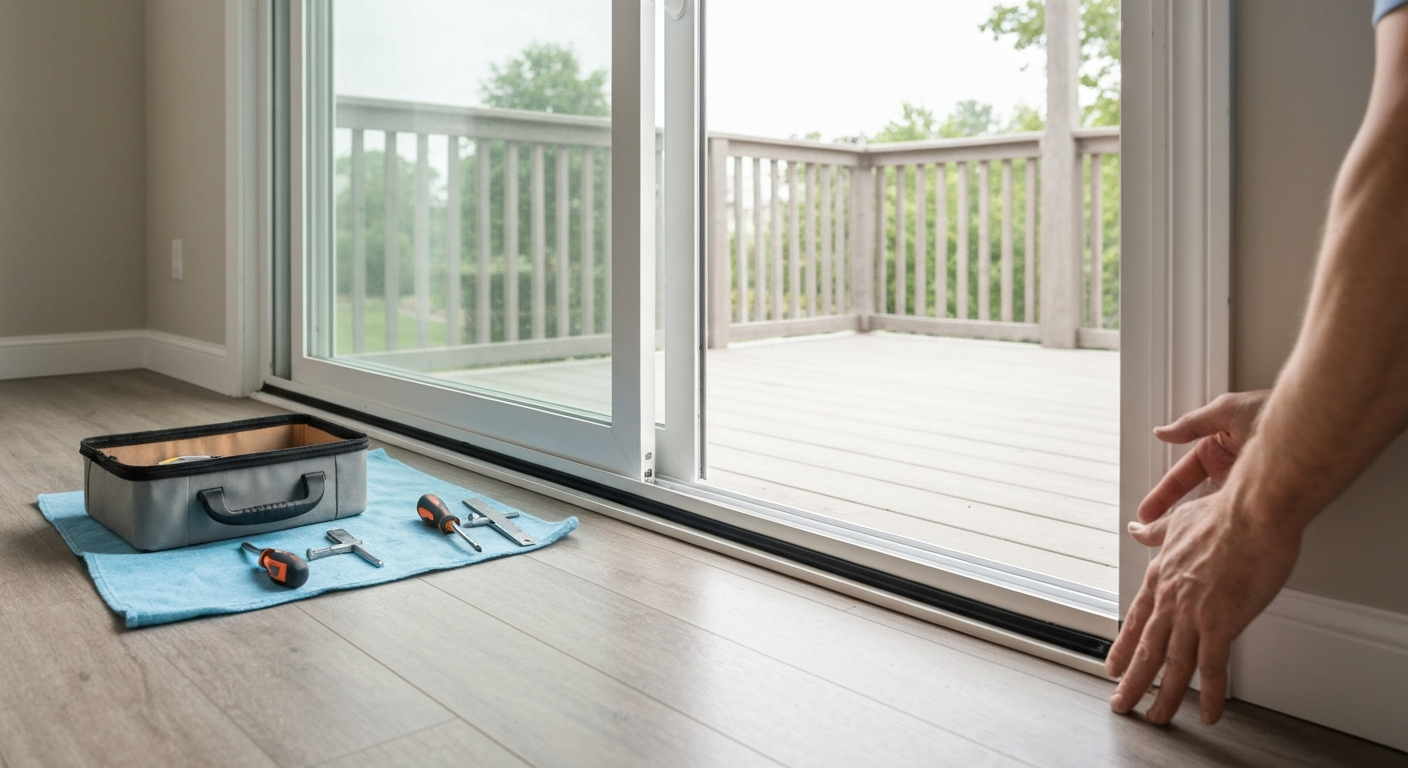
This guide covers the three most common residential patio door types: sliding glass doors (the most frequently repaired, with roller and track issues dominating), hinged French-style patio doors (where dropped panels, weatherstripping failure, and hardware problems are the usual culprits), and sliding or hinged screen doors (which suffer torn mesh, bent frames, and worn rollers of their own). The repair logic for sliding glass doors and screen doors overlaps heavily, so most of the step-by-step sections apply to both. Hinged door repairs are called out where the approach differs. If you're dealing with a specific problem like a door that's dropped in the frame or one that leaks around the edges, there are dedicated guides on those topics linked throughout this article.
Diagnosing your patio door problem
Before you order parts or pick up a screwdriver, spend five minutes reading the symptoms. Most patio door problems point directly to one component, and correctly identifying it saves you from fixing the wrong thing.
| Symptom | Most likely cause | Secondary cause to check |
|---|---|---|
| Door is hard to slide or sticks | Dirty or damaged track | Worn or flat-spotted rollers |
| Door drags or scrapes the track | Dropped panel / rollers not adjusted | Bent or dented track |
| Lock won't engage or latch is misaligned | Panel has dropped, roller height off | Lock hardware worn or broken |
| Drafts around edges or corners | Weatherstrip worn, shrunk, or missing | Door out of square in frame |
| Water leaks at bottom or corners | Failed threshold seal or weatherstrip | Blocked weep holes, caulk gaps |
| Squeaking or grinding noise | Dry or debris-clogged rollers/track | Loose hardware or hinges |
| Visible soft, crumbling wood at sill | Wood rot from moisture infiltration | Failed flashing or drainage under door |
| Cracked or fogged glass panel | Impact damage or failed IG seal | Thermal stress in older units |
One quick diagnostic shortcut: lift the door panel slightly by its handle while trying to slide it. If it suddenly moves much more freely, your rollers are worn down and the panel is riding on the track instead of the wheels. If lifting makes no difference, the track itself is the problem. For hinged doors, check whether the door drags at the top or bottom of the frame, which tells you which hinge has shifted.
Common problems and whether they're repairable
Here is a straight yes/no breakdown for every major patio door problem. Use this as your decision point before committing to a repair or a replacement.
| Problem | Repairable? | DIY-friendly? | Notes |
|---|---|---|---|
| Dirty or clogged track | Yes | Yes | Cleaning and lubrication; often free to fix |
| Worn or broken rollers | Yes | Yes | Aftermarket replacements available for most brands; cost is tens of dollars |
| Dropped or misaligned door | Yes | Yes | Roller adjustment screws fix most cases in under an hour |
| Leaking door (water infiltration) | Usually yes | Yes | Weatherstrip, threshold seal, or weep hole fix; see separate guide for complex leaks |
| Drafts around edges | Yes | Yes | Weatherstrip or door sweep replacement |
| Faulty lock / latch not catching | Yes | Yes | Often just a roller height adjustment; lock cartridge replacement if hardware is worn |
| Squeaking or grinding | Yes | Yes | Cleaning and lubrication resolves most cases |
| Rotted wood at sill / sub-threshold | Sometimes | Moderate | Epoxy filler works on shallow rot; structural rot or >10-20% cross-section loss needs professional sill or frame replacement |
| Damaged or bent frame | Sometimes | Moderate to no | Minor dents can be filled; warped or structurally compromised frames typically require professional work or unit replacement |
| Cracked or fogged glass panel | Fogged: yes; Cracked: replacement needed | No | IG unit replacement is a professional job due to weight and safety; a cracked pane is not a DIY repair |
Repairing patio door rollers
Roller replacement is the single most common patio door repair and it's very achievable for most homeowners. The job takes about one to two hours the first time. Rollers are the small wheeled assemblies mounted in the bottom rail of the sliding panel. When they wear down, go flat, or seize up, the door stops gliding and instead drags or grinds. Replacing them brings the door back to near-new operation.
What you'll need
- Flathead and Phillips screwdrivers
- Pry bar or putty knife (to remove head stop trim)
- Tape measure and calipers (to measure old roller wheel diameter and housing)
- Replacement roller assemblies matched to your door brand and model
- Vacuum and stiff brush (track cleaning while door is out)
- Silicone-based lubricant spray
- Sawhorses or padded work surface to lay the door panel flat
- A second person for lifting the panel (most panels weigh 50 to 100 lbs)
Finding the right replacement rollers
This step matters more than people expect. Roller assemblies vary by wheel diameter (common sizes are 1-1/4 inch and 1-1/2 inch), housing dimensions, and mounting style (single wheel, tandem, flat-tab bracket). The best approach is to remove the old roller first, measure it carefully, and either cross-reference the part number with your door manufacturer or bring the old assembly to a window and door parts supplier. Major brands like Andersen, Pella, and Milgard have OEM parts available, and Prime-Line and similar aftermarket suppliers cover most other doors. Ordering the wrong size is the number one reason roller jobs stall mid-project.
Step-by-step roller replacement
- Open the door fully and locate the roller adjustment screws on the bottom edge of the panel, usually visible as Phillips head screws at each end. Turn them counterclockwise to retract the rollers upward, which lowers the panel and gives you clearance to remove it.
- Remove the head stop: this is the horizontal trim piece at the top of the door frame that keeps the panel from tipping out. It's typically held by two to four screws. Set it aside carefully.
- Tilt the top of the door panel toward you and lift it out of the bottom track. This usually requires two people. Lay the panel flat on padded sawhorses so the bottom rail faces you.
- Locate the roller housings in the bottom rail. They may be exposed or covered by a small cap. Remove the retaining screw or clip and slide or pry the roller assembly out.
- Compare the old roller to your replacement to confirm it's a match, then install the new assembly and secure the retaining screw or clip.
- Stand the door upright, tilt it back into the frame, seat the bottom edge in the track, then push the top into the frame and replace the head stop.
- Turn the adjustment screws clockwise in small increments to raise the door to the correct ride height. The panel should clear the track by about 1/8 inch and the lock should engage smoothly. Adjust both ends evenly.
- Spray a light coat of silicone lubricant along the track and test by sliding the door several times.
Roller repair: costs and time
| Item | DIY cost | Pro cost | Time estimate (DIY) |
|---|---|---|---|
| Replacement roller assemblies (pair) | $10 to $40 | Included in labor quote | — |
| Silicone lubricant spray | $5 to $10 | — | — |
| Total DIY job | $15 to $50 | $100 to $250 labor + parts | 1 to 2 hours |
| First-time roller job | — | — | Allow 2 hours; faster next time |
Troubleshooting rollers
- Door still drags after new rollers: the track itself may be scored or bent — inspect closely and see the track cleaning section below
- Adjustment screws won't turn: they may be corroded in place; apply penetrating oil and wait 10 minutes before trying again
- New rollers don't fit the housing: recheck wheel diameter and housing width — even 1/8-inch discrepancies prevent proper seating
- Door feels stiff even with rollers up: check for debris in the track or a dent in the track lip
Cleaning and repairing a stuck sliding door track
A dirty or damaged track is the most overlooked fix in patio door repair. Grit, leaves, pet hair, and old dried lubricant build up over time and create enough resistance that even good rollers can't overcome it. In many cases, a thorough track cleaning is all that's needed before you ever consider replacing rollers or any other part. For step-by-step instructions on eliminating noise specifically, see our guide on how to fix a squeaky patio door. How to Repair Sliding Patio Doors - Doornmore (summarizes Family Handyman procedures) recommends routine cleaning, vacuuming, brushing with soapy water, clearing weep holes, and lubrication, to restore smooth operation of sticking patio doors.
What you'll need
- Vacuum with narrow crevice attachment
- Stiff nylon brush (an old toothbrush works well for the channel corners)
- Mild dish soap and warm water
- Clean rags or paper towels
- Flathead screwdriver or thin pick (for clearing weep holes)
- Silicone-based lubricant (not WD-40, which attracts more dirt over time)
- Snap-on stainless steel track cap/repair cover if the track groove is scored or worn through (available at home improvement stores, cut to length, adhered with silicone)
Step-by-step track cleaning and repair
- Vacuum the entire track channel to remove loose debris, paying attention to the corners where buildup concentrates.
- Scrub the track with a stiff brush and soapy water, working in the direction of the channel. Rinse with a damp cloth and dry thoroughly.
- Locate and clear the weep holes: small slots on the outer face of the bottom track that drain water. Poke each one with a pick or screwdriver to confirm they're open. Blocked weep holes are a common hidden cause of water pooling and accelerated track corrosion.
- Inspect the track channel for burrs, dents, or scoring. Minor burrs can be carefully smoothed with a fine metal file. Do not use abrasive chemicals or bleach, which accelerate aluminum corrosion.
- If the track groove is worn through or deeply scored, fit a snap-on stainless steel track cap over the existing track. Clean the surface, cut the cap to length with tin snips or a hacksaw, apply a thin bead of silicone adhesive in the channel, and press the cap in place. Allow to cure per manufacturer instructions before using the door.
- Apply a light, even coat of silicone spray to the clean track. Avoid oil-based lubricants; they collect debris and make future cleaning harder.
- Slide the door several times to distribute the lubricant and confirm smooth operation.
Track repair: costs and time
| Item | DIY cost | Pro cost | Time estimate (DIY) |
|---|---|---|---|
| Cleaning supplies (brush, soap) | $0 to $5 | — | — |
| Silicone lubricant spray | $5 to $10 | — | — |
| Stainless steel track cap (if needed) | $15 to $30 | Parts + labor varies | — |
| Full track clean and cap install (DIY) | $0 to $40 | $75 to $150 | 30 to 90 minutes |
Troubleshooting stuck doors after cleaning
- Door still sticks after track is clean: move on to roller inspection and replacement
- Track has a visible dent or bend: a dent can sometimes be carefully tapped back with a block of wood and hammer, but a badly bent track section may need professional replacement
- Track cap won't stay down: track surface was not fully cleaned and dried before applying silicone adhesive; remove, reclean, and re-adhere
- Water still pools in track after clearing weep holes: check that the door threshold and exterior caulk lines are intact — a separate leaking door guide covers this in more detail
Fixing a dropped or misaligned patio door
When a sliding door drops in the frame, the symptoms cascade: the panel scrapes the track, the lock won't engage because the latch and strike plate no longer line up, and the door may feel like it's about to jump the track. The good news is that in most cases this is a simple roller height adjustment, not a structural problem. You can often fix it without even removing the door from the frame.
Adjustment steps
- Identify the adjustment screws on the bottom edge of the door panel. On most sliding doors there is one at each end, accessible from the face of the door or through small holes in the bottom rail. Some brands require removing a small cover plug first.
- Turn the adjustment screw clockwise to raise that corner of the door. Work in quarter-turn increments and test the door between adjustments. If one side is lower than the other, raise the lower side first, then fine-tune both sides to level.
- Check the gap between the top of the door panel and the head stop. It should be even from left to right (typically around 3/16 to 1/4 inch). An uneven gap means the panel is still tilted.
- Test the lock. If roller height was the issue, the latch should now engage the strike plate cleanly. If it's still off by a small margin, most strike plates have slotted mounting holes that let you shift the plate up or down by 1/4 inch without any drilling.
- If the door still drags after maxing out the adjustment screws, the rollers are worn past their adjustment range and need replacement — follow the roller replacement steps above.
Hinged patio doors drop differently. On a hinged door, a sagging panel is almost always a hinge issue: the screws in the door frame or the door itself have pulled loose, letting the hinge leaf shift. Start by tightening all hinge screws. If the screw holes are stripped, fill them with wooden toothpicks and wood glue, let them cure overnight, then reinstall the screws into the reinforced holes. If the hinge itself is bent, replacement hinges for standard residential French doors are widely available. A dedicated guide on how to fix patio doors that have dropped covers the full hinge repair and shimming process in detail.
When adjustment isn't enough
If you've replaced the rollers and the door still doesn't sit level, or if the frame itself looks out of square (gaps that are wider at one corner than another), the problem may be in the rough opening or the door frame rather than the door panel. This is less common but does happen in older homes where the structure has settled. At that point, shimming and re-squaring the frame is a job best handled by a professional, or at minimum requires a solid understanding of door frame installation.
Dropped door repair: costs and time
| Scenario | DIY cost | Pro cost | Time estimate (DIY) |
|---|---|---|---|
| Roller height adjustment only | $0 | $75 to $150 | 15 to 30 minutes |
| Roller replacement + adjustment | $15 to $50 | $150 to $250 | 1.5 to 2.5 hours |
| Strike plate repositioning | $0 to $5 | Included above | 15 minutes |
| Hinge screw repair (hinged door) | $0 to $5 for toothpicks/glue | $75 to $125 | 20 minutes + overnight cure |
Weatherstripping and seal repair to stop leaks and drafts
Drafts and minor water intrusion around patio doors are almost always a weatherstripping or threshold seal problem, and both are straightforward to fix. The U.S. Department of Energy specifically identifies exterior door weatherstrip replacement as one of the most cost-effective home energy improvements available, so this repair pays back quickly in reduced heating and cooling costs.
Types of weatherstripping and when to use each
| Type | Where it's used | Best for | Durability |
|---|---|---|---|
| V-strip (tension seal) | Side jambs of sliding or hinged doors | Tight gaps, high-traffic doors | Good (metal lasts longer than foam) |
| Bulb / tubular gasket | Door frame perimeter, meeting rails | Larger or irregular gaps | Good for wet locations |
| Foam tape (adhesive-backed) | Irregular gaps, temporary repairs | Quick fixes, rarely-opened doors | Low; needs frequent replacement |
| Door sweep (bottom) | Bottom edge of door panel | Bottom gap seal | Good; replace when rubber wears flat |
| Threshold seal / fin seal | Threshold on sliding doors | Bottom track water intrusion | Moderate; replace every 5 to 10 years |
What you'll need
- Tape measure
- Utility knife or scissors
- Flathead and Phillips screwdrivers
- Replacement weatherstripping matched to the type and gap size
- Replacement door sweep (if the bottom gap is the issue)
- Mild cleaner and rags (to prep the surface before adhesive weatherstrip)
- Exterior caulk and caulk gun (for gaps in the frame that weatherstrip won't cover)
- A candle, incense stick, or smoke pen (to locate drafts before and verify the fix after)
Step-by-step weatherstripping replacement
- Locate the draft source: run a candle or incense stick slowly around the door perimeter with the door closed. Flickering smoke indicates where air is getting through. Do this on a windy day for the clearest result.
- Remove the old weatherstripping. For adhesive-backed foam or V-strip, peel it away and clean off any residue with a mild cleaner. For compression gaskets that are stapled or tacked into a kerf (slot) in the door stop, pry them out with a flathead screwdriver.
- Measure each section carefully before cutting your replacement. Cut slightly long rather than short; you can trim, but you can't add back length.
- Install the new weatherstripping. For V-strip, insert the folded edge into the kerf or press it flat against the jamb with the open side of the V facing outward. For adhesive-backed types, press firmly from one end to the other without stretching the material. For compression gaskets, press the bulb into the kerf groove until it seats fully.
- Replace the door sweep if the bottom gap is an issue. Most door sweeps attach with two screws on the interior face of the door bottom. Adjust the height so the sweep just contacts the threshold without creating drag that makes the door hard to close.
- For sliding doors, inspect the pile weatherstrip (the fuzzy material) along the meeting rail and the door frame edges. This is usually a push-in or screw-in strip and can be replaced by pulling out the old pile and pressing in new material of the same width.
- After installation, test again with the candle or smoke source and confirm the draft is gone. Also close the door and check for even contact: the weatherstrip should compress consistently around the whole perimeter with no gaps.
If you're dealing with water coming in at the bottom or corners rather than just drafts, the repair goes a bit deeper. Blocked weep holes in the track, failed caulk at the exterior frame-to-wall joint, or a degraded threshold seal are the usual causes. A guide dedicated to how to fix a leaking patio door covers those scenarios in full detail, including caulk line inspection, flashing checks, and threshold seal replacement.
Weatherstripping repair: costs and time
| Item | DIY cost | Pro cost | Time estimate (DIY) |
|---|---|---|---|
| Foam tape weatherstrip (full perimeter) | $5 to $15 | — | 20 to 30 minutes |
| V-strip or compression gasket (full perimeter) | $10 to $30 | $75 to $150 labor + parts | 30 to 60 minutes |
| Door sweep replacement | $10 to $25 | Included in labor quote | 15 to 20 minutes |
| Full door weatherstrip kit (DIY) | $20 to $60 | $100 to $200 | 1 to 1.5 hours |
Rotted wood at the sill: repair or replace?
Wood rot at the patio door sill or sub-threshold is one of the more serious repairs, but it's not automatically a full door replacement situation. The key question is how deep and how widespread the rot is.
Shallow rot that hasn't penetrated the structural substrate can be stabilized and rebuilt with epoxy repair products. The process involves cutting away all soft, crumbling material until you reach solid wood, allowing the area to dry to below 15 percent moisture content (use a moisture meter if you have one), applying a liquid epoxy consolidant (like Abatron LiquidWood or PC Petrifier) to harden the remaining wood fibers, and then filling and shaping the void with a two-part epoxy filler (PC-Woody, Abatron WoodEpox). Sand, prime, and paint when cured. This repair is durable when done correctly and on properly dried wood. For a detailed walkthrough of this process including the right products and how to address the underlying moisture source, see the guide on how to fix rotted wood under a patio door.
When rot has reached the structural framing, affects more than roughly 10 to 20 percent of the sill cross-section, or spans multiple adjacent members, epoxy patching is not a long-term solution. Partial or complete sill replacement is the right call, and if the flashing or drainage that caused the rot hasn't been corrected, even a new sill will fail within a few years. At that point, you're in professional territory: a carpenter or door installer who can replace the sill, re-flash the rough opening, and reinstall or replace the door unit.
Frame repairs and cracked glass
Minor frame damage like small dents in aluminum or superficial gouges in vinyl or wood can be cosmetically repaired with appropriate fillers or trim pieces. However, a warped or structurally compromised frame is a different matter. If the frame has twisted out of square, no amount of roller adjustment or weatherstripping will fully correct the symptoms. This typically requires professional assessment and either frame reattachment to the rough opening, shimming, or full unit replacement. If you notice the frame has pulled away from the wall or there are cracks in the surrounding drywall or exterior cladding, treat this as a structural issue and bring in a professional. A guide on how to repair a patio door frame covers the more moderate repair scenarios in detail.
Cracked glass in a patio door panel is not a DIY repair. Modern patio door glass is tempered safety glass, often as a laminated insulated glass (IG) unit, and the panes weigh anywhere from 50 to over 100 pounds for a standard panel. Replacement requires removing the glazing, handling heavy tempered glass safely, and correctly resealing the new IG unit. This is a job for a glass company or door installer. Do not attempt to patch cracked tempered glass with adhesive; it will fail and poses a safety risk.
When to call a professional
Most of the repairs in this guide are genuinely DIY-friendly. But there are clear situations where calling a professional is the right move, either for safety, structural, or practical reasons.
- Structural rot in the sill, framing, or subfloor that goes beyond surface-level decay
- A frame that is visibly warped, out of square, or pulling away from the wall
- Cracked or shattered glass panels (tempered glass, IG unit replacement)
- Lock or security hardware on a high-security or multi-point locking system where incorrect installation compromises the door's security function
- Doors covered under a manufacturer's warranty — DIY work can void the warranty, so check before you start
- Any repair that requires permits in your jurisdiction (rare for door repairs, but relevant for full replacements)
When you do hire a professional, expect them to inspect the full door system, not just the reported symptom. A good door technician will check roller condition, track, frame square, weatherstripping, and lock alignment in a single visit. Be cautious of any contractor who immediately quotes full door replacement without first testing whether roller replacement and adjustment would resolve the problem. In most cases, repair is the correct answer. See the full guide on how to repair a patio door for step-by-step instructions, parts lists, and troubleshooting tips.
Seasonal maintenance checklist
The best way to avoid most patio door repairs is a consistent maintenance routine. Two quick service sessions per year (spring and fall) will catch problems before they become expensive.
| Task | Frequency | Time required |
|---|---|---|
| Vacuum and clean track channel | Spring and fall | 10 minutes |
| Clear weep holes | Spring and fall | 5 minutes |
| Lubricate track and rollers with silicone spray | Spring and fall | 5 minutes |
| Inspect weatherstripping for cracks, compression loss, or gaps | Spring and fall | 5 minutes |
| Check and tighten all visible hardware screws | Annually | 10 minutes |
| Inspect exterior caulk at frame-to-wall joint | Annually | 10 minutes |
| Test lock engagement and adjust roller height if needed | Annually | 10 to 20 minutes |
| Inspect sill and threshold for soft wood or moisture staining | Spring | 5 minutes |
| Check door sweep for wear and replace if rubber is flat | Annually | 15 minutes |
FAQ
Can patio doors be repaired?
Yes. Most common issues with sliding glass and screen patio doors are repairable: worn rollers, dirty or damaged tracks, misalignment, failed weatherstripping, broken locks, torn screens, and minor wood rot or frame damage can usually be fixed. Full replacement is typically needed only when the frame or sill is structurally warped/rotten, insulated glass units (IGUs) have irreparable seal failure and cannot be replaced separately, or parts are unobtainable for an older model.
Which common patio door problems are repairable (yes/no) and when is replacement likely?
Stuck/sluggish door: Yes — usually cleaned tracks or new rollers. Broken rollers: Yes — replace roller assemblies. Dropped/misaligned door: Yes — adjust rollers/track. Leaking/water infiltration: Yes if weatherstrip/threshold repair; No if frame flashing is failing or structural rot. Drafts: Yes — replace weatherstripping/threshold. Faulty locks: Yes — replace lock/strike or adjust alignment; No if frame is bowed and can’t hold secure hardware. Squeaky doors: Yes — clean and lube or replace worn parts. Rotted wood under door: Sometimes — small, shallow rot can be epoxied; replace sill/frame if structural or widespread. Damaged frames (warped/bent): Often No — full frame or unit replacement usually required.
How do I replace worn rollers (DIY step-by-step)?
Tools/parts: screwdriver/ratchet set, pry bar, wood blocks, replacement roller assemblies (measure old unit), work gloves, safety glasses. Steps: 1) Open door and locate roller adjustment screws; back them out to lowest setting. 2) Remove interior stop/top trim (usually screws or clips). 3) Tilt and lift the door panel out of the bottom track onto wood blocks laid on the floor. 4) Lay panel face-down on protected surface. 5) Remove old rollers from bottom rail (usually fastened with screws or rivets — drill rivets if needed). 6) Install matched replacement rollers and set initial adjustment height. 7) Rehang panel into top track and lower onto rollers. 8) Adjust roller screws incrementally until the door rides level and latch aligns. Time/cost: 1–3 hours; parts $15–$60 per roller depending on type.
How do I clean and repair tracks (DIY step-by-step)?
Tools/parts: vacuum with crevice tool, nylon brush, shop rag, mild detergent or soapy water, plastic scraper or putty knife, fine file or emery cloth (for burrs), silicone lubricant, optional track cap/repair strip, caulk. Steps: 1) Remove debris and vacuum weep holes. 2) Clean track with soapy water and brush; rinse and dry. 3) Remove surface corrosion or burrs carefully with file; avoid deep grinding. 4) If track lip is worn/scored, fit a snap‑on stainless repair cap cut to length and adhere per instructions. 5) Apply a thin coat of silicone lubricant to the track (not petroleum) and test operation. Time/cost: 1–2 hours; cleaning materials <$20; track cap $20–$80 if needed.
How do I fix drafts and failed seals (weatherstripping and threshold)?
Tools/parts: replacement weatherstripping (V‑strip, bulb gasket, foam tape), door sweep, adhesive, scissors/utility knife, measuring tape. Steps: 1) Identify where drafts occur (use smoke or hand). 2) Remove old weatherstripping and clean surfaces. 3) Measure and cut new strips; install per manufacturer order (jambs before head). 4) Install or adjust the threshold and door sweep for bottom seal. 5) Check operation to ensure strips don’t bind. Time/cost: 30–90 minutes; materials $10–$60 depending on products.
How do I repair or replace a screen mesh?
Tools/parts: spline roller, flat screwdriver or spline tool, new screen mesh, replacement spline, utility knife, work surface clamp. Steps: 1) Remove screen frame from door. 2) Pry out old spline and remove mesh. 3) Lay new mesh over frame with ~1" overlap. 4) Use convex wheel to seat mesh, then roll new spline with concave wheel into groove. 5) Trim excess mesh and reinstall frame. Time/cost: 30–60 minutes; materials $10–$40.
Next Article
How to Repair Patio Door Frame: DIY Guide, Costs & Tips
Learn step-by-step DIY fixes for patio door frames: tracks, rollers, leaks, rot, costs, and when to call a pro.