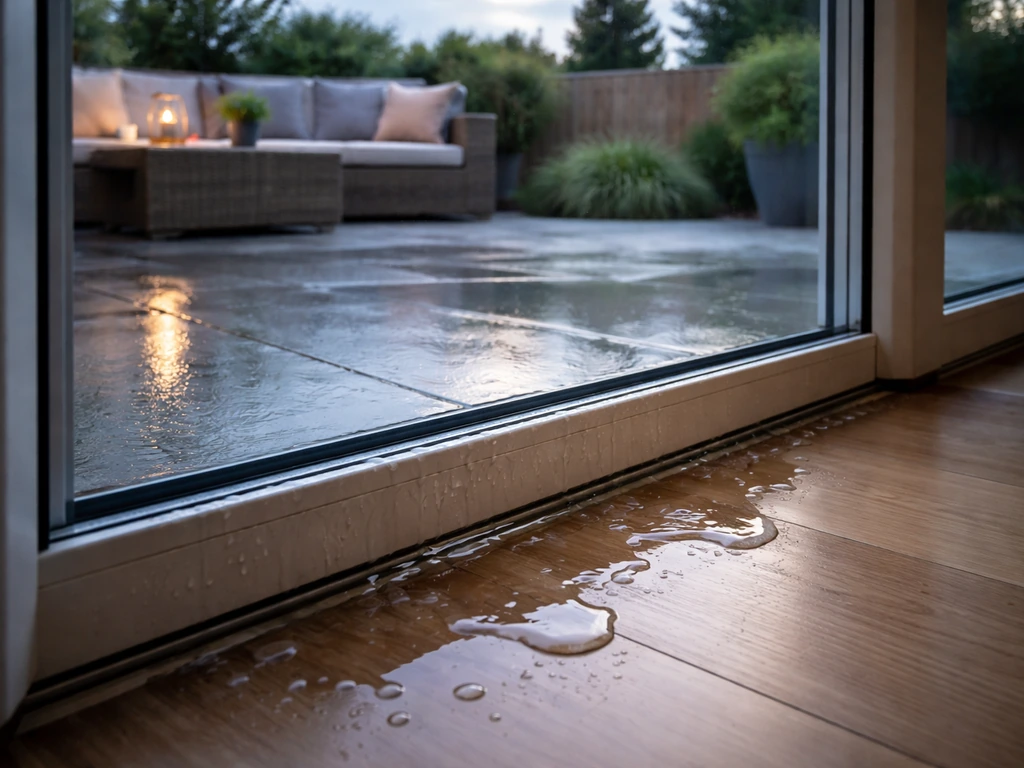
Title: How to Repair a Patio Door Frame: A Complete DIY Guide
How to Repair Patio Door Frame: DIY Guide, Costs & Tips

Jamie Archer
17 Jul 2026
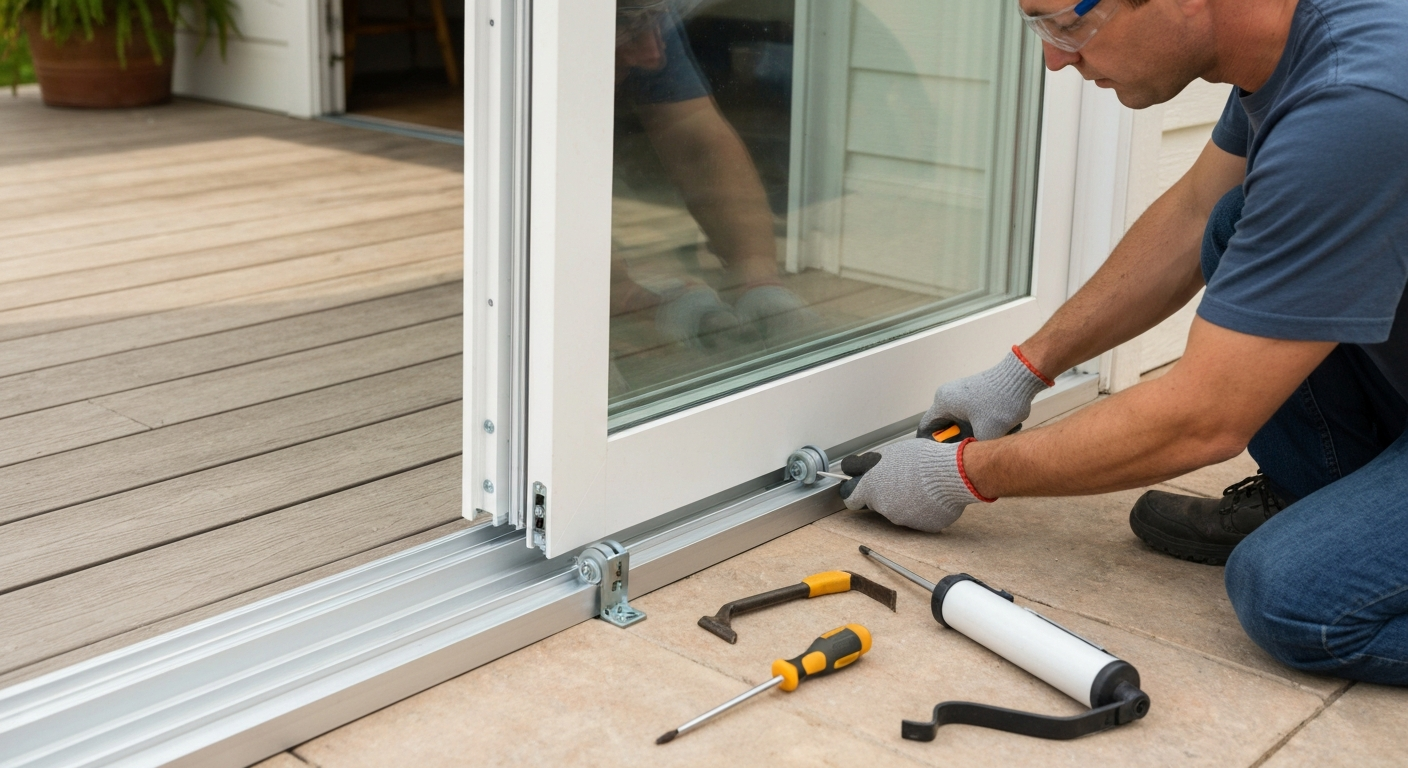
Meta description: Learn how to repair a patio door frame yourself, stuck tracks, broken rollers, rot, drafts, and more. Step-by-step fixes with costs and when to call a pro.
Most patio door frame problems come down to four things: a dirty or bent track, worn rollers, degraded weatherstripping, or rotted wood at the sill. Fix any one of those and you solve 80 percent of the complaints homeowners have with sliding glass and screen doors. This guide walks you through diagnosing the problem quickly, getting the right parts in hand, and making the repair safely, whether you're dealing with a door that drags, drops, leaks air, or has soft wood around the frame.
What this guide covers and who it's for
This guide is built for homeowners who want to fix their own patio door rather than immediately calling a contractor. It covers sliding glass doors and screen doors in aluminum, vinyl, and wood frames. You'll find a fast diagnosis checklist, a tools and materials list, step-by-step instructions for the most common repairs, a rough cost and time table, and honest guidance on when a DIY fix is enough versus when the frame or panel needs professional attention or full replacement. If you're dealing with a door that has already dropped noticeably or one that leaks water around the frame, specific sections here address both of those in detail. For step-by-step instructions on how to repair a patio door, see this detailed guide.
Safety before you start
Sliding glass door panels are heavier than they look. A standard single-pane panel runs 50 to 75 pounds; a double-pane insulated panel is typically 80 to 120 pounds or more depending on size. Handling one alone is a recipe for a dropped panel, a cracked glass unit, or a back injury. Get a second person before you lift anything out of the frame.
- Wear cut-resistant gloves any time you handle glass panels or trim sharp aluminum track edges.
- Use safety glasses when chiseling, grinding, or cutting frame material.
- Wear a dust mask or N95 respirator if you're sanding or cutting old painted wood (potential lead paint in homes built before 1978).
- Keep the work area clear — panels need a clean, flat surface to rest on; use moving blankets or cardboard to protect the glass.
- Never lean a glass panel unsupported against a wall at an angle; lay it flat or have someone hold it vertical while you work.
- If you're working at threshold height with tools, keep power cords away from the door opening to avoid tripping.
- When using epoxy consolidants or polyurethane sealants, work in ventilated conditions and follow the manufacturer's temperature minimums — most require air and surface temperatures above 40°F (4°C) for proper cure.
Tools and materials checklist
Gather everything before you start. Running to the hardware store mid-repair with a glass panel propped against a wall is not a good afternoon. The list below covers the full scope of repairs in this guide; you won't need every item for every job.
Tools
- Flathead and Phillips screwdrivers (multiple sizes)
- Cordless drill with bit set
- Pry bar (small, 12-inch)
- Rubber mallet
- Utility knife
- Stiff-bristle brush and shop vacuum
- Level (2-foot minimum)
- Tape measure
- Putty knife
- Oscillating multi-tool or chisel (for wood rot repair)
- Caulk gun
- Hacksaw or oscillating saw (for threshold cuts if replacing a section)
- Safety glasses, cut-resistant gloves, N95 mask
Parts and materials to have on hand
- Replacement door rollers matched to your brand and model (roller kits typically run $5–$20 at Home Depot or Lowe's; bring the old roller or note the brand, model, and roller diameter)
- Replacement weatherstripping or door sweep sized for your door width
- ASTM C920-rated elastomeric sealant (polyurethane or silicone — polyurethane adheres to more substrates and stays paintable; silicone lasts longer on glass-to-frame joints)
- Backer rod (foam rope, sized to joint width) for any gap over 3/8 inch before caulking
- Epoxy wood consolidant and filler (such as LiquidWood and WoodEpox from Abatron) for soft or rotted wood at sill or jamb
- Silicone-based track lubricant spray (avoid WD-40 — it attracts dirt)
- Replacement threshold insert or threshold gasket if the existing one is cracked or compressed
- Shims (cedar or composite — not wood that will compress)
- Stainless-steel or galvanized screws for any exterior wood repair (standard steel rusts and stains)
- Sandpaper (80 and 120 grit) and exterior primer/paint if finishing wood repairs
Fast diagnosis: figure out what's actually wrong
Before you pull anything apart, spend five minutes doing a quick inspection. Most frame and door problems announce themselves pretty clearly once you know what to look for. Work through this checklist from top to bottom.
- Slide the door open and closed slowly. Does it drag at the same spot every time, or does it drag throughout the full travel? A single drag point usually means debris or a dent in the track. Drag throughout means rollers or a frame alignment issue.
- Look down at the bottom track. Is there visible debris, pet hair, grit, or a bent section of track? Even a small pebble can lock up a roller.
- Lift the door panel slightly while sliding. If it moves freely when lifted 1/4 inch, worn or failed bottom rollers are the culprit.
- Check the gap between the door panel and the frame all the way around. A gap that's wider at the bottom than the top (the door looks tilted or 'dropped') points to a roller height adjustment or a broken roller.
- Press on the wood around the sill and lower jamb. Does it feel soft, spongy, or give under light pressure? That's rot and it needs addressing before any other repair will hold.
- Run your hand along the inside edge of the frame with the door closed. Feel any cold air or drafts? That's a weatherstripping or threshold seal failure.
- Check the door lock. Does the latch engage with normal force, or do you have to lift or push the panel to get it to latch? A door that needs to be lifted to lock has dropped rollers.
- Inspect the frame corners and any visible caulk joints around the exterior perimeter. Cracked or missing caulk is the most common cause of water intrusion and should be fixed even if the door operates fine.
Use your findings to prioritize. Rot and structural damage come first, no point lubing rollers in a frame that's moving because the sill is soft. Roller and track repairs come next. Weatherstripping and sealing come last, once the door operates correctly.
How to remove sliding glass and screen door panels safely
You need to remove the panel for roller replacement, deep track cleaning, and most frame repairs. The process is similar for both sliding glass doors and screen doors, though screen doors are lighter and easier to manage solo.
Removing a sliding glass door panel
- Open the door to the midpoint of its travel so you have access to the full panel.
- Locate the roller adjustment screws — they're usually on the bottom rail of the panel, accessible through small holes or slots in the frame. Turn them counterclockwise to retract the rollers upward, giving the panel more clearance off the track.
- Tilt the bottom of the panel inward slightly. Most sliding glass doors have a small clearance at the top of the frame (the top guide channel) that allows for this tilt. Have your helper hold the panel while you do this.
- Once the bottom clears the track, lift the panel up so the top edge clears the upper channel, then bring the bottom out and lower the panel onto your prepared flat surface.
- Lay the panel glass-side down on moving blankets or stacked cardboard. Do not rest it on a hard surface without protection — the glass seal can crack.
Removing a screen door panel
- Slide the screen door to the center of the opening.
- Find the tension adjustment screw on the bottom roller housing (usually a Phillips screw on the bottom corner of the door). Back it out slightly to retract the roller.
- Lift the panel upward while tilting the bottom edge inward — the same tilt-and-lift motion as the glass door, but with far less weight.
- Set the screen door aside against a wall (it won't break from leaning like a glass unit) or lay it flat if you're replacing the screen mesh as well.
One thing worth noting from Larson's installation and troubleshooting documentation: screen door rollers and their adjustment screws vary by model. If your screen door has a pull handle rather than a latch, the roller access point is often at the very bottom corner of the stile. If you can't find the adjustment screw, check both bottom corners before assuming the roller is fixed.
Stuck tracks and misaligned frames: cleaning, alignment, and minor repair
A dirty or slightly bent track is the most common reason a patio door sticks, and it's usually the easiest fix. Do this before replacing rollers, you might not need to. For step-by-step guidance on eliminating noise and sticking, see our how to fix a squeaky patio door guide.
Deep-cleaning the track
- Remove the door panel as described above.
- Use a stiff brush to break up compacted debris in the track channel. Work the full length of both the bottom track and the upper guide channel.
- Vacuum out all loose debris with a shop vacuum and a narrow nozzle.
- Wipe the track channel with a damp cloth to remove any remaining grit or film. For built-up grease or old lubricant, use a small amount of rubbing alcohol on the cloth.
- Inspect the track closely. Look for bent sections, raised edges, or sections where the track profile has been crushed (this sometimes happens near the latch side where people kick the door).
- If the track has a minor dent or raised section, use a flat-head screwdriver and a rubber mallet to carefully tap it back to the correct profile. Work slowly — aluminum track bends easily but also creases if you apply too much force at once.
- Once clean and repaired, apply a thin coat of silicone track spray. Don't use grease-based lubricants; they collect debris and make the problem return faster.
Checking and correcting frame alignment
If the track is clean but the door still binds, the frame may be out of square. This often happens in older homes where the rough opening has shifted with settling, or where the door was installed without adequate shimming. Use a 2-foot level on the interior face of each jamb and on the head of the frame. A frame that's more than 1/4 inch out of plumb over its height will cause the door panel to bind regardless of roller condition.
- Remove the door panel and any interior trim casing that covers the shim space between the frame and the rough opening.
- Identify which corner is high or low by checking the level readings on each jamb.
- Access the shim points behind the jamb — these are typically at the hinge side and latch side near the top, middle, and bottom of each jamb, secured by the installation screws.
- Back out the installation screws slightly at the low points, tap in new composite shims to raise the frame to level/plumb, then re-tighten the screws.
- Re-check with the level, reinstall the door panel, and test operation before replacing trim.
- If the frame is aluminum or vinyl and has moved because the anchoring screws have pulled out of deteriorated framing, this is a structural issue that typically requires professional repair — the rough opening framing itself needs to be addressed.
Broken rollers and dropped doors: replacing rollers and reseating the panel
Rollers fail gradually, they don't always snap cleanly, they just wear down, develop flat spots, or their axle pin corrodes until they no longer turn freely. If lifting the door while sliding it makes it move better, or if you can hear clicking or grinding from the bottom of the panel, the rollers are the problem. This is one of the most common patio door repairs and also one of the most satisfying, a fresh set of rollers on a clean track can make a 20-year-old door feel new.
A note on panel weight and safe lifting
Before you start: get a second person. Andersen's roller replacement service guide specifically notes the need to support the panel safely during removal and reinstallation, and for good reason. A dropped glass panel doesn't just crack, it can shatter into large, dangerous shards. Have your helper hold the panel while you work on the rollers, or lay the panel fully flat on a protected surface.
Step-by-step roller replacement
- Remove the door panel using the steps in the panel removal section above. Lay it flat on moving blankets.
- Locate the roller housing on the bottom rail of the panel. On most sliding glass doors, there is one roller assembly at each bottom corner, accessed by removing a small cover plate (usually one or two Phillips screws).
- Remove the cover plate and back out the adjustment screw fully. The roller assembly should now slide out of the housing slot — some require a flathead screwdriver to pop the housing clip.
- Take the old roller to the hardware store, or photograph both the roller assembly and any brand/model markings on the door stile before ordering. Roller diameter, axle pin size, and housing width must match. Milgard's guidance emphasizes confirming the correct roller type before ordering — installing the wrong diameter will put the door at the wrong height and cause binding.
- Slide the new roller assembly into the housing, re-engage the clip or cover plate, and snug the adjustment screw down without tightening it fully (you'll adjust height after the door is back in the frame).
- Repeat for the second roller on the opposite corner.
- Reinstall the door panel: tilt the top edge into the upper guide channel first, then lower the bottom onto the track.
- With the panel resting on the track, turn the roller adjustment screws clockwise (to extend the rollers downward) until the panel lifts to the correct height — the gap between the panel and the track frame should be even across the width, and the door should clear the threshold insert smoothly.
- Test the door through its full travel. It should slide with light, consistent force and no dragging. The latch should engage without lifting or pushing the panel.
- Once the operation is correct, apply silicone spray lubricant to the track and test again.
Milgard's guidance makes a good point that's easy to overlook: try adjusting the existing rollers before assuming they're failed. Rollers that have been cranked up too high (to clear a rough track) will cause the door to drag on the upper guide rail. Back the rollers out and readjust height first, you might avoid a parts run entirely.
Resetting a door that has dropped
A dropped door, one where the panel sits visibly lower on one side, or where you have to lift the panel to engage the lock, is almost always a roller height issue or a broken roller. After replacing or adjusting rollers as above, check the gap at the latch side of the door. If it's uneven top to bottom (wider at the bottom), the latch-side roller needs to be extended further. Make small adjustments (a quarter turn of the adjustment screw at a time) until the panel is plumb in the frame. See our guide on how to fix patio doors that have dropped for detailed, step-by-step instructions.
Sealing drafts and stopping air leaks
Cold air coming in around a closed patio door is a weatherstripping or threshold seal problem the vast majority of the time. Once the door operates and sits correctly in the frame (rollers good, alignment correct), address the seals.
Replacing weatherstripping
- With the door closed, identify where the draft is entering. Hold a lit candle or incense stick near each edge of the closed door — movement in the smoke shows the leak point.
- Most patio door weatherstripping is a pile (brush-like) seal or a foam-backed wipe seal that slides into a kerf channel in the door frame. Pull the old strip out of the channel — it should slide or peel out without adhesive.
- Measure the length needed and cut the new strip to fit. Slide or press the new strip into the kerf channel. It should seat with light thumb pressure.
- For the meeting stile (the vertical edge where the sliding panel meets the stationary panel), a pile seal insert is common and replacement strips are available at most hardware stores by the foot.
- Test by closing the door and running your hand around the perimeter. No draft should be detectable at normal room pressure.
Threshold and door sweep
The threshold insert, the vinyl or rubber gasket strip running across the bottom of the door opening, compresses and hardens over time. When it no longer makes firm contact with the bottom rail of the door, air and water get underneath. Most threshold inserts snap or screw in place and can be replaced in under 20 minutes. If the threshold itself (the aluminum or wood base) is cracked or has been cut at the wrong height, note that the IRC and IBC have specific provisions for threshold heights on egress doors, consult your local code before raising or changing the threshold profile, particularly if the door serves as a required egress. See the 2021 International Building Code (IBC) – Chapter 10 Means of Egress (threshold/egress exceptions) for permitted threshold heights and exceptions for exterior doors, including provisions that may allow nonraised thresholds or specific maximum riser heights for egress doors.
Fixing leaks and failed caulk joints
Water that gets past the exterior caulk joints around the frame will eventually rot wood framing, damage flooring, and cause mold. For step-by-step instructions on stopping water intrusion and sealing frame joints, see how to fix a leaking patio door. The fix is straightforward but the sealant choice matters. ASTM C920 is the standard specification that categorizes elastomeric joint sealants by performance class, a sealant labeled Class 25 or Class 50 tells you how much joint movement it can accommodate. For a patio door frame perimeter, use a Class 25 or better polyurethane sealant. blank" rel="noopener noreferrer">ASTM C920 – Standard Specification for Elastomeric Joint Sealants (and related ASTM fenestration test standards E547/E1105/E283) defines laboratory and field test methods and acceptance criteria used to evaluate sealant performance and installed window/door water and air performance. Polyurethane bonds well to aluminum, vinyl, wood, and masonry; it stays flexible; and it can be painted once cured. Silicone is better for glass-to-frame joints but doesn't accept paint.
- Remove all old caulk from the joint using a utility knife and putty knife. Don't apply new sealant over old — it won't bond properly and will fail quickly.
- Clean the joint surfaces with rubbing alcohol or a solvent wipe to remove dust, oil, and chalky residue. Let dry completely.
- If the joint gap is wider than 3/8 inch, press foam backer rod into the gap first. Backer rod controls the sealant depth and prevents three-point bonding, which causes sealant to tear under movement.
- Apply the polyurethane sealant in one smooth pass with a caulk gun. Tool the bead immediately with a wet finger or plastic tool to press it into the joint and create a concave profile.
- Follow the manufacturer's temperature guidance — both 3M polyurethane construction sealants and Loctite PL Premium specify application temperatures above 40°F (4°C). Applying below that threshold prevents proper adhesion and cure.
- Keep the joint dry for the full cure time (typically 24–72 hours depending on temperature and humidity) before exposing it to rain.
At the head of the frame, verify that the existing flashing or drip cap is intact and directs water away from the frame rather than into the joint. NRCA guidance on door head flashings emphasizes that the flashing must lap over the exterior caulk joint, not be caulked over. If you find that a previous repair has covered the flashing with caulk that bridges into the wall, that caulk needs to be removed and the flashing reinstated correctly.
Repairing rotted wood at the sill or jamb
Soft, dark, or punky wood at the sill plate or lower jamb is common in patio doors that have had even minor water infiltration over years. If the rot is confined to the surface layer, you can probe it with a screwdriver and the wood is soft in a zone less than about 1 inch deep but firm underneath, epoxy consolidant and filler is a reliable, cost-effective repair. For a detailed step‑by‑step walkthrough on how to fix rotted wood under a patio door, see this guide for techniques, materials, and when to call a pro. If the probe sinks easily more than 1–2 inches or the framing lumber beneath the sill plate is compromised, that's a structural repair that typically requires a carpenter.
Epoxy rot repair step-by-step
- Remove all loose and punky wood with a chisel or oscillating tool. You don't need to cut back to perfectly sound wood — the consolidant will stabilize partially degraded wood — but remove anything that breaks away with light pressure.
- Let the area dry completely. Epoxy consolidants require dry wood to bond and cure correctly. If the area has been wet recently, give it 48–72 hours of dry weather or use a heat gun on low to drive out surface moisture.
- Apply LiquidWood (or equivalent epoxy wood consolidant) to the repair area per the manufacturer's instructions. It soaks into degraded wood fibers and hardens them into a stable base for the filler. Apply multiple coats if the wood is very porous, waiting for each coat to become tacky before applying the next.
- Once the consolidant is set but still slightly tacky, mix WoodEpox (or equivalent two-part epoxy filler) per instructions and press it firmly into the repair cavity, overfilling slightly.
- Shape the filler with a putty knife while it's workable — it has roughly 30–45 minutes of open time at 70°F. Smooth as close to final shape as possible now; cured epoxy filler is hard to sand.
- Once fully cured (typically overnight), sand to final shape and profile. Prime with an oil-based exterior primer before painting — epoxy fillers must be primed to accept topcoat paint.
Abatron's own documentation notes that LiquidWood and WoodEpox are rated for exterior exposure and are compatible with most paints and stains when properly primed. This type of repair, done correctly, is durable and structural, it's not just a cosmetic patch.
Repair vs. replace: how to decide
Not every patio door problem is worth repairing. Sometimes the economics or the scope of the damage pushes toward replacement. Here's a straightforward way to think about it. For a quick decision guide on whether to fix or replace, see can patio doors be repaired.
| Condition | Repair | Replace |
|---|---|---|
| Worn or broken rollers | Yes — roller kits are $5–$20 and the job takes 1–2 hours | No |
| Dirty or slightly dented track | Yes — cleaning and minor reshaping, under 1 hour | No |
| Failed weatherstripping or threshold insert | Yes — inexpensive parts, 30–60 minutes | No |
| Failed caulk joints (no rot) | Yes — $10–$25 in materials, 1–2 hours | No |
| Surface rot at sill, less than 1 inch deep | Yes — epoxy repair, $30–$60 in materials, half-day | No |
| Deep rot into structural framing or sill plate | No — framing repair required before any door work | Frame repair + possible door replacement |
| Frame badly out of square (over 1/2 inch) | Possibly — depends on cause; settling vs. rot | Often yes if underlying structure is failing |
| Fogged or cracked insulated glass unit | Glass unit replacement only (not a frame issue) | Replace glass unit; keep frame if sound |
| Multiple failed seals, repeated roller failures, door over 20–25 years old | Marginal — ongoing repair costs add up | Consider full replacement for efficiency gains |
| Frame cracked, bent, or corroded through | No | Yes |
Fine Homebuilding's guidance on patio door performance is worth internalizing here: look at the pattern of failures, not just the current problem. A door that has needed repeated roller replacements, has visible frame flex, and shows condensation between the glass panes has reached the end of its practical service life. A new door with low-friction rollers, a multi-point lock, and a proper pressure/design (PG/DP) rating will outperform a heavily repaired older unit in energy performance and security.
Rough cost and time guide
| Repair type | DIY parts cost | DIY time estimate | Pro cost estimate |
|---|---|---|---|
| Track cleaning and lubrication | $5–$10 (lubricant) | 30–60 min | $75–$150 labor |
| Roller replacement (both rollers) | $10–$40 | 1–2 hours | $100–$250 |
| Weatherstripping replacement | $10–$30 | 30–60 min | $75–$150 |
| Threshold insert replacement | $15–$40 | 20–40 min | $75–$150 |
| Exterior caulk joint reseal | $15–$30 | 1–2 hours | $100–$200 |
| Epoxy sill rot repair (surface only) | $30–$70 | Half day (plus cure time) | $200–$500+ |
| Frame realignment (shimming) | $5–$15 (shims) | 1–3 hours | $150–$400 |
| Full door panel replacement | $300–$1,200+ (panel) | Half to full day | $500–$2,000+ |
When to call a professional
Most of the repairs in this guide are genuinely DIY-friendly. But some situations call for a professional and trying to push through them alone creates safety risks or makes the problem worse.
- Structural rot in the floor framing, sill plate, or king studs around the rough opening — this needs a carpenter before any door work.
- A frame that is out of square because the house has settled or shifted (not just an installation shimming issue) — the root cause needs to be evaluated.
- Any change to threshold height or landing dimensions on a door that serves as a required means of egress — local IRC/IBC code compliance must be verified.
- Cracked or failed head flashing that requires removal of exterior cladding to access and reinstall correctly.
- Any glass panel that is cracked, broken, or has a failed seal in a double-pane unit — glass replacement involves specific tools and handling risks beyond most DIY projects.
- A full door or frame replacement, particularly in a load-bearing wall or where the rough opening needs modification.
Seasonal maintenance checklist
The best way to avoid a major patio door repair is a 20-minute inspection twice a year, once in the fall before cold weather and once in the spring. Here's what to do each time.
Fall (before cold weather)
- Clean the bottom track thoroughly and apply fresh silicone spray lubricant.
- Inspect weatherstripping on all four edges of the door panel — look for compression set, gaps, or tears.
- Check the threshold insert for cracks or hardening; replace if it no longer springs back when pressed.
- Run your hand around the closed door perimeter to feel for drafts; mark any spots with tape for caulk repair.
- Inspect all exterior caulk joints and reapply where cracking or separation is visible.
- Probe the sill and lower jamb wood with a screwdriver; any softness indicates the start of rot — address it before winter moisture makes it worse.
- Test the door lock — it should engage without lifting or forcing the panel.
Spring (after winter)
- Clean the track again — winter brings in grit that accelerates roller wear.
- Lubricate rollers and track.
- Inspect the exterior frame for any caulk that cracked under winter freeze-thaw cycles and reapply as needed.
- Check the door panel for any new signs of fogging between the glass panes (seal failure) — this is best caught early.
- Reinstall or inspect screen door: clean screen door track and check screen door rollers for wear.
- Look at the head flashing above the door after the first spring rain — any water staining on the interior head jamb means flashing or caulk failure that needs immediate attention.
Keeping up with this routine twice a year adds years to a patio door's service life and means you catch small problems, a cracked caulk joint, a beginning-stage roller wear pattern, before they become a weekend repair project.
FAQ
What primary manufacturer resources should be consulted to ensure correct repair procedures and safety warnings for specific patio door brands and hardware types?
Use manufacturer service guides and installation manuals (Andersen, Pella, Milgard, Larson) for brand-specific roller removal/adjustment, sash removal, track repair, and lock replacement steps and safety warnings. These documents provide correct fastener types, adjustment ranges, and any product-specific cautions that prevent voiding warranties or causing glass breakage.
Which building codes and regulatory sources are required to decide when a repair vs full-frame/threshold replacement is needed?
Check the International Residential Code (IRC) and International Building Code (IBC) (and local amendments) for egress, threshold height, and landing requirements. These codes determine allowable threshold changes and when a retrofit/replacement must meet different egress or barrier standards.
What water‑management and flashing references are needed for leak and sill repairs?
Reference NRCA flashings and water‑control guidance plus manufacturer flashing details to design or verify sill pans, jamb flashings and head flashings. Proper flashing details are critical to stop leaks and to ensure a repaired or replaced door won’t cause water intrusion.
Which material standards and sealant/adhesive datasheets should be reviewed before specifying sealants and fillers?
Consult ASTM standards for sealants and fenestration testing (ASTM C920, E547, E1105, E283) for performance expectations, and technical data sheets from major manufacturers (3M, Loctite/PL Premium) for application temperatures, cure times and substrate compatibility when selecting sealants and adhesives.
What rot‑repair products and procedures are authoritative for repairing rotted wood sills and jambs?
Use epoxy consolidant and filler product data/instructions (e.g., Abatron LiquidWood and WoodEpox) and manufacturer application guides for structural wood repairs. Combine these with best-practice steps from trade publications to ensure repairs restore structural capacity and paintable surfaces.
Which trade publications and how‑to home sites should be used for practical diagnostic steps and DIY best practices?
Incorporate step‑by‑step diagnostic and adjustment procedures from trusted trade and consumer outlets (This Old House, Fine Homebuilding). These sources offer installer-tested sequences, decision points for replacement vs repair, and photos/diagrams helpful to homeowners.
Next Article
How to Fix a Leaking Patio Door: DIY Step-by-Step
Step-by-step DIY to stop leaks in a patio door: check seals, rollers, threshold drainage, alignment, and fix fast.