Most leaking patio doors can be fixed in a single afternoon once you know where the water is actually getting in. If you want, you can use these same checks and fixes as a step-by-step guide for how to repair a patio door. The four culprits to check, in order, are: clogged weep holes in the track, worn or missing weatherstripping, a misaligned door that isn't compressing its seals, and a cracked or failed perimeter caulk/flashing joint between the frame and the wall. Get the diagnosis right first, and the fix becomes obvious.
How to Fix a Leaking Patio Door: DIY Step-by-Step

Jamie Archer
26 Jun 2026

What you'll need before you start
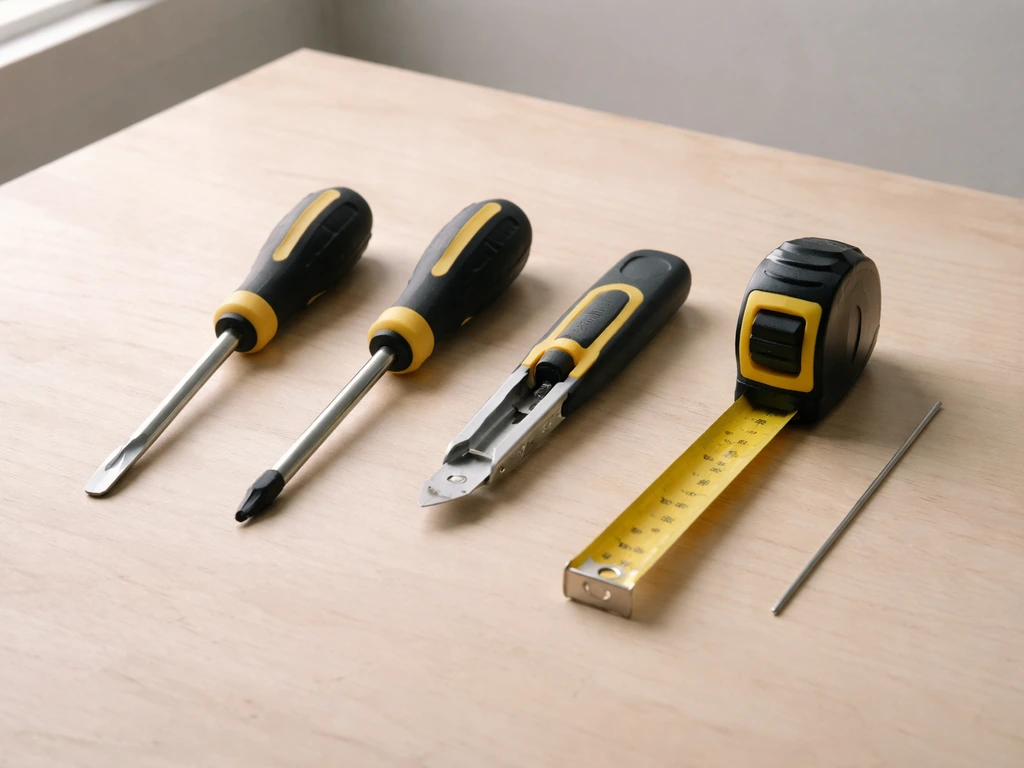
Grab these before you get on your knees in the track, because you'll almost certainly need them regardless of what you find.
- Flathead and Phillips screwdrivers
- Utility knife
- Tape measure
- Pipe cleaner, straw brush, or a straightened paper clip (for weep holes)
- Bucket and water for drainage testing
- Exterior-grade silicone or polyurethane caulk + caulk gun
- Replacement weatherstripping (bulb/T-slot type, or door sweep — measure your channel width before buying)
- Dry silicone or PTFE spray lubricant (not oil-based)
- Flashlight
- Old towels or a sponge
Quick diagnosis: where is the water actually coming from?
Before you replace anything, spend five minutes figuring out the source. Water that appears on the interior sill can have traveled from several different entry points, and fixing the wrong one wastes your whole afternoon. Here's how to narrow it down fast.
Get a garden hose and run it slowly over each zone while a second person watches inside, or go section by section on your own. Start at the bottom and work up so you don't create false positives.
| What you see | Likely entry point | Section to jump to |
|---|---|---|
| Water pooling in the track, then spilling inside | Clogged weep holes or blocked drainage | Weep holes and drainage |
| Water along the door bottom edge or threshold | Worn threshold seal or misaligned door | Weatherstripping and threshold |
| Water at the door sides or top corners | Damaged perimeter weatherstripping or frame seal | Weatherstripping and threshold |
| Water at the latch/lock side of the door | Door not closing fully due to roller or latch misalignment | Hardware: rollers, tracks, latch |
| Water running down the interior wall near the frame | Failed caulk or flashing at the frame-to-wall junction | When to call a pro |
One more check: look at the corners of the interior frame for discoloration, soft drywall, or paint bubbling. If you find those signs, the leak has been going on longer than you think, and there may be hidden damage behind the wall that needs professional attention.
Common causes and fixes for a leaking patio door
Here are the real-world causes that account for the vast majority of patio door leaks, along with a plain-language fix for each.
Clogged weep holes
This is the number-one cause of water spilling into the home during heavy rain. The bottom track of a sliding patio door is intentionally designed to collect water, but it relies entirely on small weep holes (usually on the exterior face of the track frame) to drain that water back outside. When those holes clog with dirt, dead bugs, or debris, the track fills up and overflows inward.
The fix is quick: push a pipe cleaner, straw brush, or straightened paper clip in and out of each weep-hole opening to clear the blockage. [After cleaning, pour a cup of water directly into the track and confirm it drains through to the outside. ](https://www. milgard.
com/sites/milgard/files/2023-01/diy_cleanweepholes. pdf) This whole job takes about five minutes. One caution: some doors have small plastic weep-hole baffles or covers. Don't pry those off, they're there to prevent wind-driven rain from blowing back in.
Just clean around and through them gently.
Worn or damaged weatherstripping
The flexible seal that runs along the door edges and frame wears out over time. If yours is cracked, flattened, brittle, or has sections that have pulled away from the channel, air and water will find those gaps every time. The most common types on sliding patio doors are bulb seals (a rounded rubber tube that sits in a T-slot channel) and pile/brush seals (the fuzzy strip you often see on the latch side). Both are replaceable.
Measure the channel width and the door height before you buy. Pull or peel out the old strip, clean the channel, and press or snap the new seal in. Many T-slot seals just press in with your fingers, though a flathead screwdriver can help seat the spine of the seal evenly. Test by closing the door and feeling for any cold air along the seam.
Failed perimeter caulk at the frame-to-wall joint
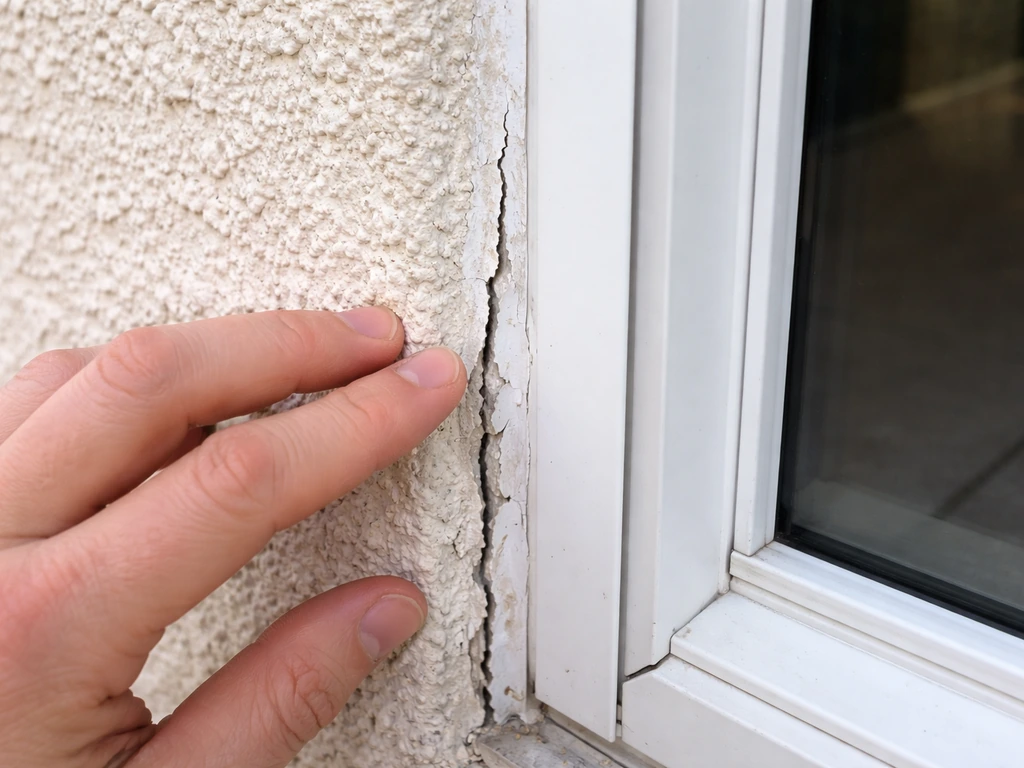
Run your finger along the caulk bead where the door frame meets the exterior siding or stucco. If it's cracked, peeling, or has gaps, water can work its way behind the frame and into the wall. Scrape out the old caulk completely with a utility knife, wipe the surface clean and dry, and apply a continuous bead of exterior-grade silicone or polyurethane caulk. Smooth it with a wet finger and let it cure before testing with a hose. Important note from building science: do not caulk the bottom sill-to-wall joint on the exterior. That gap needs to stay open so any incidental water that gets behind the frame can drain out rather than being trapped and rotting your framing.
Cracked or incorrectly seated threshold
The threshold is the strip at the very bottom of the door opening that the door seals against when closed. If it's cracked, warped, or has separated from the floor, water gets underneath it and into the subfloor quickly, and subfloor damage from a bad threshold can be surprisingly expensive to repair. Check whether the threshold is firmly seated and whether its rubber or vinyl insert (the compressible strip the door panel presses against) is intact. Many thresholds have a replaceable insert that pops out. If the threshold itself is cracked, you'll need to remove and replace it, then re-seal underneath with silicone before screwing it back down.
Adjusting the door for proper seal compression and alignment
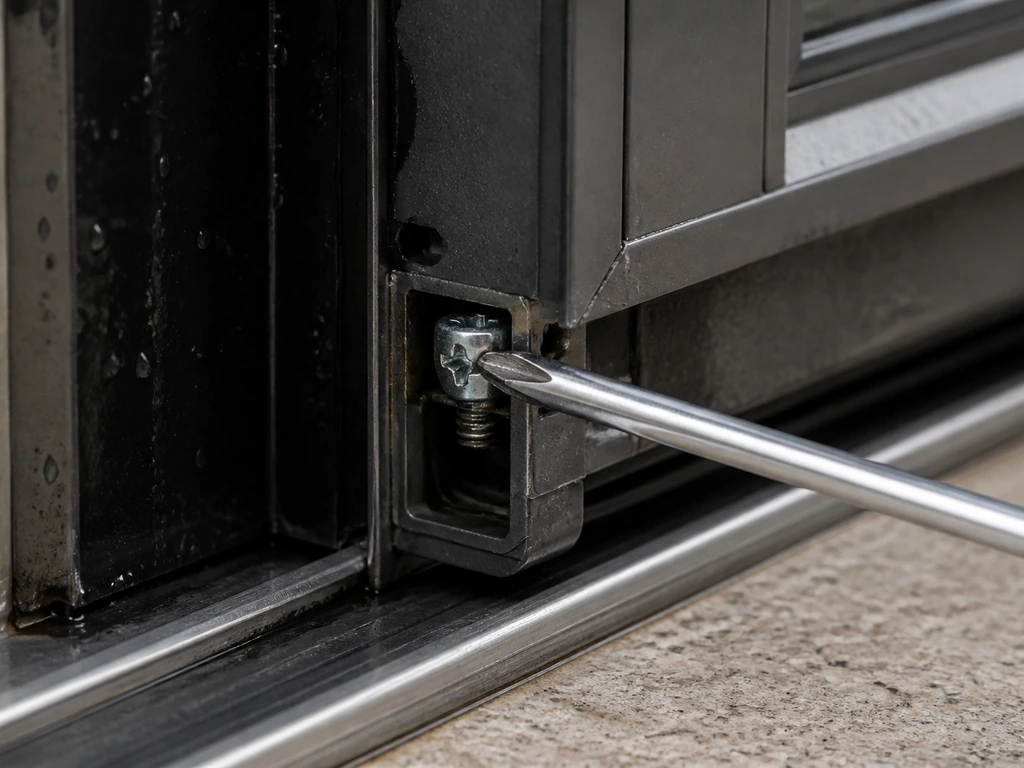
A sliding patio door that sits at the wrong height or hangs at an angle won't compress its weatherstripping evenly, no matter how new the seals are. Getting the door panel back to the correct height and square to the frame is often what makes everything else work. The good news: this is a screwdriver job.
Roller adjustment screws are typically found at the bottom corners of the sliding panel, accessible through small holes or slots. On most doors, turning the adjustment screw clockwise raises that corner of the door; counterclockwise lowers it. The goal is to get the door sitting parallel to the frame with even contact along the entire height of the door, and with the bottom of the panel sitting the correct height above the track (high enough to roll freely, low enough to compress the threshold seal when closed).
- Open the door about halfway and locate the roller adjustment holes at each bottom corner of the sliding panel.
- Insert a Phillips screwdriver and turn clockwise to raise that corner, counterclockwise to lower it.
- Adjust both sides so the top of the door panel runs parallel to the top frame rail — check this by eye or with a tape measure.
- Close and lock the door. Look along the latch side and the top and bottom edges. The gap between panel and frame should be even and the weatherstripping should be visibly compressed.
- If the lock or latch won't engage after adjustment, the strike plate (keeper) may need to shift as well — loosen its mounting screws, reposition it to align with the latch bolt, and retighten.
- Test with your hose. If water still seeps through, recheck the seal compression and readjust as needed.
Uneven roller height is also the reason sliding patio doors sometimes jam or get harder to lock over time. If you've noticed the lock feeling stiff or refusing to engage, misaligned rollers are usually the cause, and fixing the alignment often solves both the leak and the lock problem at the same time. If your door has dropped and become difficult to operate, that's a closely related issue worth addressing alongside the leak repair.
Weatherstripping, seals, and threshold fixes in detail
Replacing bulb or T-slot weatherstripping
Most sliding patio door frames use a rubber bulb seal that sits in a T-shaped channel. To replace it: open the door fully to expose the frame channel, use a flathead screwdriver to work the old seal out of the slot (it usually peels or pulls free once you get a section started), then measure the length you need.
Cut the new seal to length with a utility knife, leaving a couple of extra inches, then press the T-spine into the channel slot firmly from one end to the other. Trim any excess. If the seal keeps popping out, a small amount of weatherstrip adhesive at the ends will hold it in place. For compression-type seals on the door stop, the seal retainer may be screwed in, check before you try to pull it free.
Installing or replacing a door sweep
If water is getting under the door at the threshold, a screw-on door sweep along the bottom of the panel can help. These are aluminum-backed with a brush or rubber wiper and typically attach with two or three screws to the interior face of the panel bottom. Cut the sweep to match the panel width, position it so the wiper just contacts the threshold when the door is closed (not dragging hard, that creates wear), and screw it in. This is a good backup measure even if your threshold seal is intact.
Threshold replacement and re-sealing
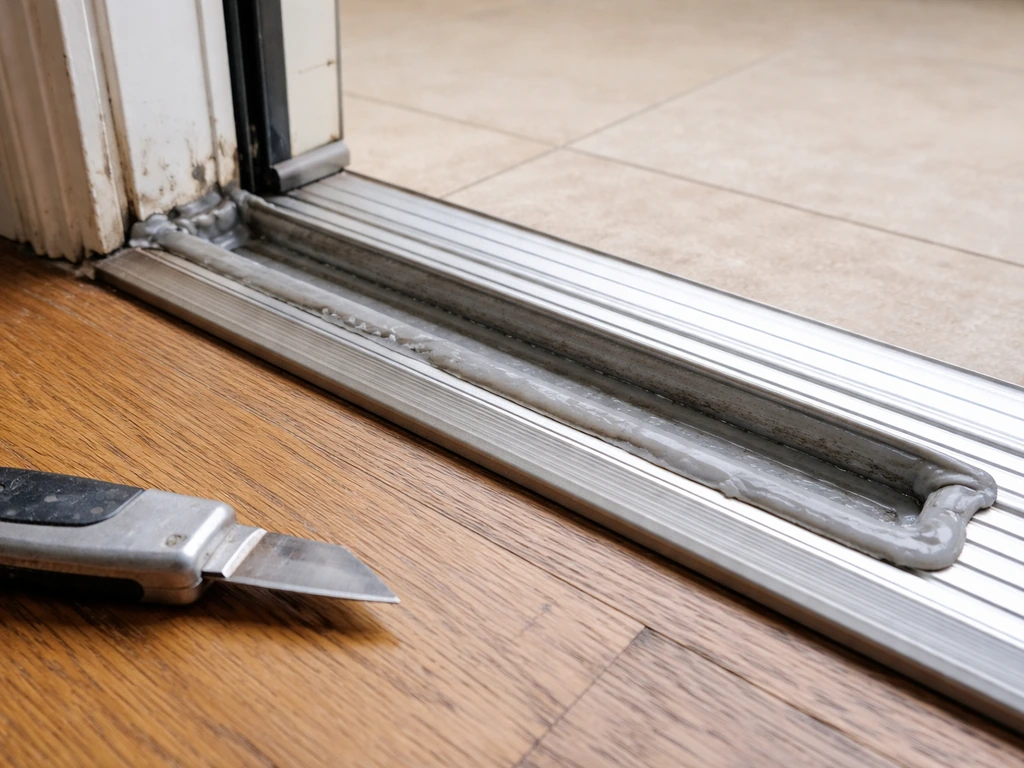
If the threshold insert is worn, pop it out and bring it to a hardware store to match the profile before ordering. If the whole threshold needs replacing, unscrew it from the subfloor, scrape the old sealant off both the threshold and the floor, apply a new bead of silicone underneath along the length, set the threshold back in place, and screw it down. Wipe away any squeeze-out before it skins over. Then re-caulk the joint between the threshold ends and the door jambs on the interior side.
Fixing hardware issues: rollers, tracks, latch and lock alignment
Cleaning and lubricating the track
A dirty or damaged track causes the door to ride unevenly, which in turn opens gaps in the seal. Vacuum out any debris from the track channel, then scrub with a stiff brush and a little warm water. Rinse and dry thoroughly. Once clean, apply a dry silicone spray or PTFE lubricant along the track. If the track is dirty or gunked up, learning how to fix squeaky patio door issues often starts with the same cleaning and lubrication steps. Do not use WD-40 or oily lubricants, they attract dirt and can damage plastic or vinyl components, including weep-hole baffles. Avoid getting lubricant inside the weep holes themselves.
Checking and replacing worn rollers
If you've adjusted the roller screws and the door still won't sit at the right height, or if you feel grinding when you slide the door, the roller wheels themselves may be cracked or worn flat. To inspect them, slide the door to the center of the opening, then look up through the bottom of the frame at the roller carriages.
Replacement rollers are sold by door brand and model, so look for a label on the door edge or frame before ordering. Replacing rollers means removing the door panel from the track entirely: tilt the top of the panel inward off the top guide, then lift and roll the bottom up and out of the track. Have a helper for this, a full glass patio door panel is heavy.
Fixing a latch or lock that won't fully engage
If your door doesn't fully latch when closed, it isn't compressing the seal at the latch side, and that gap is a direct water entry point every time it rains. The latch failing to catch almost always means either the door is sitting too high or low (fix rollers first) or the strike plate is positioned wrong. Loosen the strike plate screws, shift it up, down, or outward until the latch bolt catches cleanly, then retighten. After any roller or strike adjustment, close and lock the door and do a full seal-compression check by running your fingers around the inside perimeter of the closed door. You shouldn't feel any airflow.
Don't miss these troubleshooting checks
- Test from outside with a hose, section by section, from bottom to top — it's the only reliable way to isolate the exact entry point before you start replacing parts.
- Check weep holes from the outside, not the inside. They're on the exterior face of the track frame, and they're easy to miss.
- Look at the door frame corners inside for soft drywall, paint bubbles, or staining — these are signs water has been getting in longer than you realized.
- After any repair, re-test with the hose and watch for a full two minutes per zone before moving on.
- If you have a screen door, check that its frame isn't channeling rainwater inward — a warped or poorly fitted screen frame can direct water toward the main door's track.
When to call a pro, and what to do about insurance
Most of what's covered above is genuine DIY territory. If you are wondering can patio doors be repaired, the answer is often yes, but it depends on whether the issue is with the seal, track, or frame can be repaired. But there are a few situations where pulling in a professional is the right call, not the cautious one.
If water is running down the interior wall beside or above the door frame, the problem is likely at the flashing behind the frame rather than at any of the door components themselves. Missing, incorrectly installed, or deteriorated flashing at the head or jambs allows water into the wall assembly, where it can rot the sheathing, framing, and insulation over months. You won't see this damage until it's significant, and re-flashing an installed door frame correctly requires removing trim and sometimes siding. That's a job for an experienced carpenter or window installer.
Similarly, if the rough-opening sill pan beneath the door is missing, failed, or improperly sloped (a common installation shortcut), water will pool under the sill and soak into the subfloor. You may notice soft or springy flooring near the threshold, or water staining on the subfloor. Fixing a sill pan on an existing installation is invasive, the door typically needs to come out.
If you're also seeing rotted wood at or under the door frame, that's a related structural repair that's worth addressing before putting new weatherstripping on top. If you’re dealing with rotted wood under the patio door, focus on stopping the leak first, then replace any soft framing or subfloor before reinstalling weatherstripping rotted wood at or under the door frame.
On the insurance side: if you've experienced significant water intrusion, wet flooring, wet drywall, visible mold, document everything with photos before you start repairs. Note the date, weather conditions, and affected areas. Report it to your insurer promptly. Delayed reporting can complicate claims, and insurers generally want to see that you took reasonable steps to stop further damage right away. Keep receipts for any materials you buy as part of the emergency fix.
A straightforward roller adjustment, weatherstrip replacement, or weep-hole cleaning is a solid afternoon project with a real and immediate result. But if your investigation turns up wall damage, structural rot, or a badly flashed frame, getting a professional assessment first will save you from fixing the surface while the real problem continues underneath. Related issues like rotted wood at the door frame base or a door that has visibly dropped and no longer sits square are worth looking into alongside any leak repair, since they're often symptoms of the same underlying problem. If you still need more guidance, follow a step-by-step approach to how to repair patio door frame issues like rotting wood, gaps at the jamb, and misalignment.
FAQ
If I replace the weatherstripping, will that always stop the leak?
Yes, but only if you find and fix the specific entry point. If the interior wall shows long-term signs (soft drywall, paint bubbling, staining), replacing weatherstripping alone will not stop the leak because water may be getting behind the frame through failed flashing or a missing sill pan.
How can I tell where the leak actually starts if water shows up on the inside at another spot?
Don’t assume the leak originates where the water lands inside. Water can travel horizontally behind trim and drywall, so run the hose from the bottom up and inspect corners for discoloration or soft spots before you buy parts.
What if the garden hose test doesn’t show the leak right away?
If you get inside discoloration quickly but the hose test shows no leak at the frame, check the track and the door sweep area during the hose test while the other person watches closely at the threshold. Also confirm the door compresses evenly, a door sitting high or low can leave a latch-side gap that only opens under water pressure.
Can I remove the small plastic weep-hole baffles to make cleaning easier?
Some baffles should stay in place. Instead of prying them off, clean around them and through the openings gently (paper clip or pipe cleaner works well). If you remove baffles, wind-driven rain can blow into the track and create new leak paths.
In what order should I do the repairs so I don’t waste parts or time?
Start with the simplest checks, weep-hole drainage, then seal compression and caulk at the exterior frame. Avoid scrambling between steps if the door is still misaligned, because a misaligned panel can make a new seal look defective.
After I clean the track, how do I confirm the water is actually draining outside?
Track cleaning usually improves drainage, but it also matters whether water can exit the track. After cleaning, pour water into the track and verify it drains to the exterior, if it doesn’t, the clog may be deeper or a drain path is blocked.
Is WD-40 okay to lubricate a patio door track?
Yes, but with the right lubricant. Use a dry silicone spray or PTFE lubricant on the track surface, and keep it out of weep holes. Avoid WD-40 and oily products because they attract grit and can swell or damage some vinyl or plastic components.
How do I test that the door seal is compressed correctly after I adjust or replace parts?
A gap check is more reliable than “it feels snug.” Close and lock the door, then run your fingers along the inside perimeter seam. You should not feel drafts, and the latch should catch fully without forcing, otherwise water will enter through the uncompressed section.
If my threshold seal is worn, will adding a door sweep help?
Yes. If water gets under the threshold, a screw-on door sweep can reduce the gap even when the threshold insert is worn. Position it so the wiper contacts the threshold with light contact when closed, dragging hard will speed up wear and may worsen sealing over time.
What caulk should I use, and should I seal around the bottom sill to stop all water?
Use correct exterior-rated sealants and avoid sealing the bottom exterior sill-to-wall joint. That gap is needed for drainage, sealing it can trap incidental water behind the frame and accelerate rot.
My patio door is harder to lock, could that be related to the leak?
A jam can be caused by roller height, but if it’s also difficult to lock, focus on compression at the latch side. Check strike plate position after roller adjustment, because both can affect whether the bolt catches and presses the seal evenly.
When should I replace rollers instead of just adjusting them?
If the door has dropped and rollers are no longer adjusting properly, replacing rollers may be necessary. It’s also a sign you should inspect the track for damage and verify the bottom of the frame is still firmly attached, a loose or damaged base can prevent correct alignment.
Do I need to repair rot before replacing weatherstripping?
If you see rotted wood under or at the door frame, stop after you’ve confirmed the leak source and prevent more water intrusion. Replace soft framing or subfloor before installing new weatherstripping, otherwise the new seal may never compress against a stable surface.
When is this repair not a DIY job?
It depends on the cause, if you’re dealing with flashing or a missing sill pan, that’s often beyond a basic afternoon fix. If water is entering down the interior wall beside the frame, expect a professional to remove trim and correctly restore flashing, because missing or mis-sloped components can be hidden.
What should I do for insurance if I have significant water damage?
For insurance, document before you touch anything, take photos of wet areas, include the date, and note weather conditions. If you can do an emergency mitigation step (like clearing standing water or drying), do it promptly and save receipts, delayed reporting can reduce coverage.
Next Article
How to Repair a Patio Door: DIY Fixes for Common Problems
Step-by-step fixes for patio door issues: diagnose sticking, off-track, rollers, locks, drafts, and weatherstripping for
