Most roll-down bug screen problems come down to one of three things: debris in the track, a misaligned bottom bar, or a spring/roller that has lost tension or broken entirely. In the majority of cases you can fix it in under an hour with basic tools and no replacement parts. The sections below walk you through diagnosing your exact symptom first, then correcting it, so you are not guessing and swapping parts you do not need.
Roll Down Bug Screen for Patio: Fixing a Stuck or Off-Track Screen

Jamie Archer
18 Jun 2026
Quick diagnosis: won't roll down vs. won't roll up
Before touching anything, figure out which direction the failure is happening, because they almost always point to different root causes.
| Symptom | Most likely cause | Where to start |
|---|---|---|
| Screen won't pull down at all | Pull bar is latched in retracted position, or spring is wound too tight | Check the pull bar catch; release it and try again |
| Screen pulls down but stops partway | Debris in the track or bottom bar catching on the guide | Inspect and clean side tracks and bottom guide channel |
| Screen goes down fine but won't retract | Spring tension too low or broken, or screen fabric bunched in housing | Tension adjustment first; then inspect housing |
| Screen retracts unevenly or one side drags | Bottom bar is misaligned or end cap is off the guide rail | Realign bottom bar, check end caps on both sides |
| Screen is visibly twisted or has a diagonal crease | Fabric installed off-center or loaded unevenly in the roller | Close fully and redistribute fabric by working it up and down several times |
| Screen rattles but moves | Roller housing is loose, or bottom bar end cap is cracked | Tighten housing fasteners, inspect end caps |
A quick functional test: release the pull bar from its catch, let go of the handle completely, and watch what happens. Genius’s roller-style troubleshooting guide also instructs releasing the pull bar from its catch and letting the screen retract by itself during diagnosis, including checking for rubbing and correct glide of the pull bar end cap on the bottom guide check for rubbing and correct glide of the pull bar end cap on the bottom guide. If the screen retracts on its own but slowly or unevenly, tension and track friction are your suspects. If it does not retract at all, the spring is either wound down or broken. If it retracts fine but pulls hard on the way down, the track has an obstruction or the bottom bar is rubbing.
Tools, safety, and how to reach the roller housing
Gather these before you start. Nothing here is exotic, but being mid-repair and searching for a screwdriver is frustrating.
- Phillips and flathead screwdrivers (both sizes)
- Soft bristle brush or old toothbrush
- Vacuum with a narrow crevice attachment
- Mild dish soap and warm water in a small spray bottle
- Dry silicone spray lubricant (not WD-40 or oil-based products)
- Clean lint-free cloths
- Stepladder if the housing is mounted above head height
- Masking tape or a helper to hold the screen while you work
- Smartphone flashlight or small torch for inspecting inside channels
For safety: the roller spring inside the housing is under tension. Do not pull the housing apart while the screen is still wound under load. Always fully retract the screen (or let it retract as far as it will go naturally) before opening the housing. If the screen is stuck partway and you cannot get it to retract, use masking tape to secure the pull bar to the frame so there is no sudden snap if the fabric releases while you are working. Use a stable stepladder on level ground for any overhead work, and keep your face clear of the housing opening when you first crack it apart.
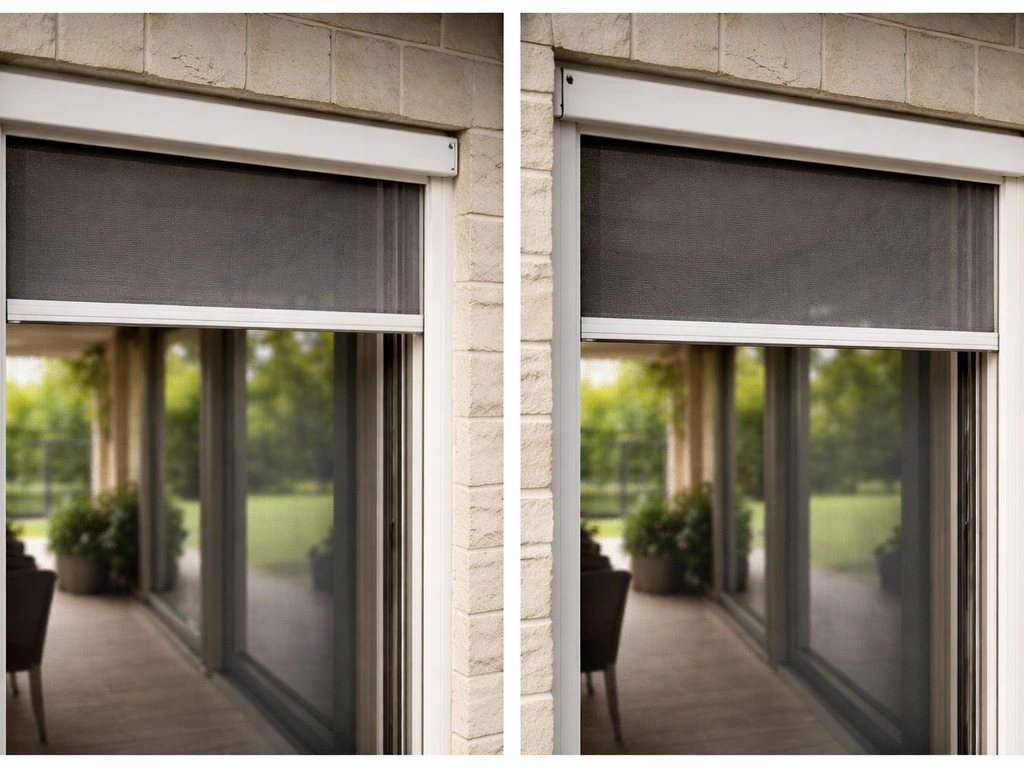
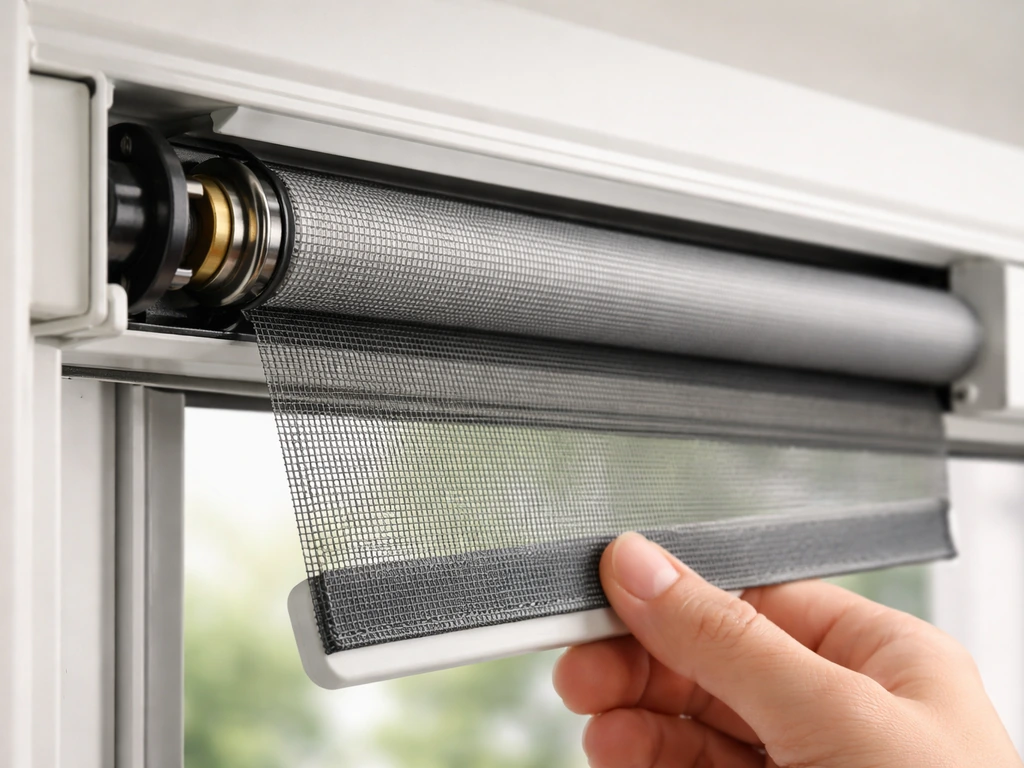
Accessing the roller housing: on most patio roll-down screens the housing is a rectangular cassette mounted at the top of the opening. It is usually held by two to four Phillips screws on the end caps, or it clips into a mounting bracket. Remove the end cap screws first, then slide or pivot the housing out of its bracket. Some brands use a single tension adjustment screw accessible through a small hole in the end cap without requiring full removal. Check your model before fully dismounting the cassette.
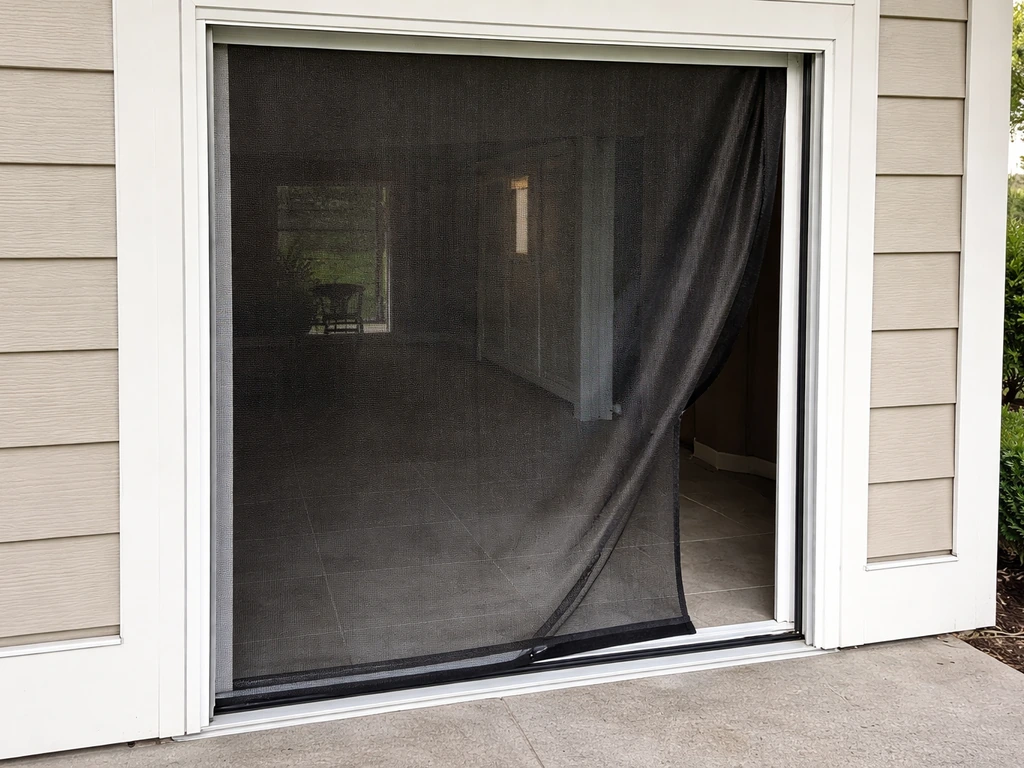
Fixing a stuck or off-track screen and a misaligned bottom bar

This is the most common call I get from readers, and it is almost always fixable without new parts. Here is the process in order. If your issue is specifically a patio net door that will not close smoothly, the “stuck or off-track screen and a misaligned bottom bar” steps below are the most adjacent fix to try first how to fix patio net door.
- Close the screen completely (retract it fully into the housing). This resets the fabric on the roller and is the correct starting position for any track realignment.
- Inspect both vertical side tracks visually from top to bottom. Look for the screen edge (the zip edge or beaded edge) sitting properly inside the track channel. If you can see the fabric seam riding outside the channel or bunched at one point, that is your problem.
- If the fabric is out of the channel, do not force it. Retract the screen a bit more until the off-track section clears the track mouth, then re-feed the edge back into the channel and slowly deploy the screen downward, guiding the edge with your fingers.
- Work the screen up and down three to five full cycles. This distributes the fabric evenly across the roller and seats the edges properly. Pergolux specifically recommends this step when the fabric seam is visible inside a ZIP-style track.
- Check the bottom bar alignment. With the screen pulled fully down, stand back and look at whether the bottom rail is level. If one side hangs lower than the other, the bottom bar end caps are not riding on the guide rails evenly.
- To correct the bottom bar, release tension on the screen by retracting it slightly, then lift the low end of the bar and reseat the end cap into the bottom guide channel. It should click or slide smoothly into place.
- If you have Andersen-style gliding insect screen hardware and the bottom rail appears taller than the top rail (a sign of misalignment), locate the adjustment screw at the bottom of the screen frame. Turning it clockwise raises the screen and corrects the imbalance.
- Once realigned, do a full close and open cycle to confirm the bar travels evenly on both sides without rocking or catching.
Cleaning tracks, guides, and removing obstructions
Dirt and debris in the tracks are responsible for more stuck roll-down screens than any mechanical failure. If you are troubleshooting a bug net for patio door that will not retract or retracts unevenly, start by checking the tracks for dirt and debris stuck roll-down screens. The fix is low-tech but you have to be thorough. A Reddit commenter on r/fixit suggests vacuuming the bottom track and making sure nothing is stuck in the upper track before inspecting how the pull bar engages the top track blank" rel="noopener noreferrer">vacuuming the bottom track and checking the upper track.
- Vacuum the bottom track channel first using the crevice attachment. Dried leaves, grit, and insect debris collect at the base and act like a wedge under the bottom bar. A Reddit-sourced tip that actually works: vacuum the full length of both vertical side tracks as well, not just the bottom.
- Follow up with a soft brush dipped in warm soapy water. Scrub inside the track channel, paying attention to the corners where the vertical track meets the bottom guide.
- Rinse with a damp cloth, then dry the track completely before lubricating. Wet tracks attract more dirt.
- For the side guide channels (zip track or bead track): spray a small amount of dry silicone spray along the full length of each channel. Do not use WD-40, white grease, or any petroleum-based lubricant. These attract dust and eventually make the problem worse. Dry silicone stays slick without collecting grime.
- Check the bottom guide rail for any bent sections, raised screws, or debris caught under the rail itself. Run your finger along it. Even a small piece of hardened grit can cause the end cap to skip and the bar to go off-track.
- Wipe down the pull bar itself. If the bar has a coating of grime on its side edges where it contacts the track, clean it with a damp cloth. The pull bar rubbing against the track wall is a common cause of resistance on the way down.
After cleaning, test the screen through three full cycles before moving on to any other repairs. In many cases the problem disappears completely at this stage.
Roller and tension problems: getting smooth travel and proper retraction
If the screen moves freely in the tracks but still will not retract properly (or retracts sluggishly), the problem is in the spring tension. If it retracts fine but pulls hard against you when deploying, the roller is binding rather than a tension issue.
Low tension: screen barely retracts
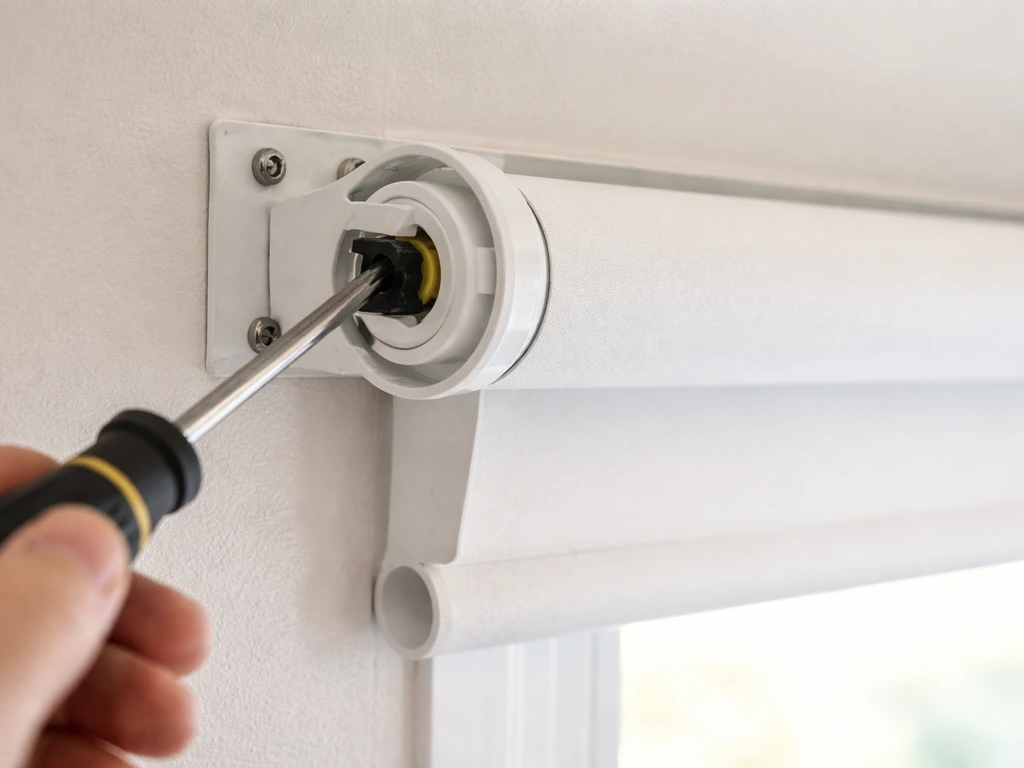
Most roll-down screen rollers use a clock-type coil spring inside the tube. Tension is added by winding the spring, which is typically done by inserting a flathead screwdriver into the tension adjustment slot on the end cap and rotating it a set number of clicks (usually three to five half-turns). Check your brand's spec, but the general process is: retract the screen, hold the roller so it cannot turn, locate the tension slot, and add three half-turns in the direction that tightens (usually the direction opposite to how the screen unrolls). Deploy and retract the screen to test. Repeat in increments of two to three turns until retraction is snappy but not so aggressive that the screen slaps back.
No retraction at all: the spring is probably broken
Here is the diagnostic fork Pella's service documentation lays out: if adding tension turns (winding the spring as described above) produces no improvement whatsoever, the spring is broken, not just unwound. You will know because a broken spring has no resistance when you turn the adjustment slot. A healthy but low-tension spring will feel like it is winding something even when adding the first turn. A broken spring feels like turning in air. At that point, tensioning is not your fix, and you need to replace the roller assembly or the spring cartridge.
Roller binding: screen is hard to pull down
If deploying the screen takes real effort, and the tracks are already clean, the roller bearings may be dry or the fabric may be wrapped unevenly on the tube. Open the housing and inspect the roller ends where they sit in the bearing clips. A small amount of dry silicone spray on the bearing points is usually enough to restore smooth unwinding. If the fabric is visibly bunched or wrapped at an angle on the tube, you need to unroll it, lay it flat, and re-roll it evenly before reinstalling. If the fabric seam inside the ZIP track is visible, Pergolux notes the screen may be installed incorrectly and recommends moving the screen up and down several times to distribute the fabric evenly.
Repair or replace: identifying damaged parts and finding what you need
Most components on a roll-down patio bug screen are replaceable individually, which is good news because full screen assemblies are not cheap. Here is how to triage what actually needs replacing.
| Component | DIY replaceable? | Signs it needs replacing | Typical cost range |
|---|---|---|---|
| Spring cartridge / roller spring | Yes, on most brands | No tension improvement after winding; spring turns freely | $15 to $40 for spring only |
| Full roller tube assembly | Yes | Roller visibly bent, cracked end caps, damaged bearing seats | $30 to $80 depending on width |
| Screen fabric | Yes, with some patience | Tears, holes, frayed edges, or fabric that will not lay flat | $20 to $60 per roll for standard mesh |
| Bottom bar / pull bar | Yes | Bent bar, cracked end caps, broken latch mechanism | $10 to $30 |
| Track or guide channel | Harder but doable | Bent channel, cracked channel wall, warped guide rail | $15 to $50 per side |
| Housing / cassette | Yes | Cracked or broken cassette that won't hold roller | $40 to $100+ |
To source replacement parts: photograph your screen's housing, end caps, and any visible brand markings before ordering anything. Measure the screen width and housing depth precisely because roller tubes are sized to the opening. Many homeowners find success sourcing parts directly from the screen manufacturer's website, from dedicated retractable screen suppliers, or from patio enclosure specialty retailers. Big-box stores rarely carry the correct parts for roll-down cassette systems, though they sometimes stock generic mesh fabric that can be cut to width.
When to call a pro: if the housing mounting track itself is damaged (common after storm or impact damage), the spring is broken and you cannot identify the replacement part number, or the fabric has separated from the roller tube at the attachment point, those are jobs where a screen installer will save you time and frustration. Otherwise, everything listed in this guide is genuinely DIY-friendly for someone comfortable with basic tools.
It is worth noting that pull-down bug screens and roll-down bug screens are closely related products with similar failure modes. If your screen deploys manually by pulling a bar rather than being wind-driven, the track cleaning, bottom bar alignment, and fabric redistribution steps in this article apply equally. Pull-down bug screens, including patio versions, often use the same roller and track components, so the same troubleshooting steps help. The main difference is in the tension system, which on a purely manual pull-down screen is typically a friction brake rather than a coil spring.
Final adjustments, testing, and keeping it running season to season
Once you have made repairs, do not skip the test-and-adjust phase. A screen that works at room temperature in still air may behave differently on a hot, humid afternoon when the cassette expands slightly or the track swells.
- Run five full deploy-and-retract cycles. Watch the bottom bar travel, listen for any rubbing or clicking, and confirm the bar is level at full extension on every cycle.
- Check that the pull bar latch engages its catch cleanly when fully retracted. If it misses the catch, adjust the latch position slightly or the tension is slightly too high and snapping the bar past the catch point.
- Verify tension feels consistent from start to finish on retraction. If the screen retracts fast at first and then slows near the housing, add one more half-turn of tension. If it snaps up violently, reduce by one turn.
- Inspect the bottom bar end caps one more time after the test cycles. They should be riding flush on the guide rail without rocking.
- Spray a final light coat of dry silicone on the vertical tracks and the bottom guide channel.
Seasonal maintenance schedule
This takes about 20 minutes twice a year and prevents most of the problems described above from ever developing.
- Spring (before bug season): vacuum all tracks, wipe down with soapy water, dry thoroughly, apply dry silicone spray to all channels, test tension, and inspect fabric for any winter damage or cracking at the edges
- Fall (before storing or winterizing): clean the tracks again, retract the screen fully, and if you are in a cold climate consider removing the housing and storing it inside to prevent the spring from becoming brittle
- Year-round: never leave the screen partially deployed in high wind; the fabric and the pull bar end caps take the most punishment from side-to-side wind load, and this is the single most common cause of premature track wear
- After any major storm: inspect the bottom guide rail for debris and the track channels for any impact damage before operating the screen
- Every two years: check spring tension even if the screen seems to be working fine; springs gradually lose tension and adding a turn or two proactively is easier than diagnosing a screen that barely retracts
If you are dealing with a conventional sliding patio screen rather than a roll-down cassette style, the approach is different enough that the specific roller and track hardware for sliding bug screen doors deserves its own look. Replacing or tuning a sliding patio screen door bug seal can also help if you are seeing airflow or debris getting past the screen edges. Roll-down systems are their own category, but the cleaning and lubrication principles carry across almost everything with a screen fabric and a track.
FAQ
My roll-down bug screen retracts, but it is hard to deploy. Should I tighten the spring?
If the screen only jams on the way down (deployment) but retracts normally, look for binding at the bottom bar contact points and any fabric bunching on the roller tube. Do not keep adding spring tension in this scenario, because extra tension can worsen rubbing and make the bottom bar gouge the track.
How do I know I actually cleaned the track well enough?
Dust and pollen can pack into the track even when it looks “clean.” Use a flashlight along the track and wipe both sides thoroughly, then re-test through three full cycles before making any mechanical adjustments.
My screen retracts unevenly to one side. What should I check first?
If the screen retracts unevenly, check that the bottom bar is level and that both roller ends sit fully in their bearing clips. A partially seated roller end can make one side lag, even with an otherwise clean track.
Can I use WD-40 or a similar spray to fix a sticking patio roll-down bug screen?
Yes, but use it sparingly and only on bearing points and track interfaces where metal contacts metal. Avoid spraying the mesh fabric or flooding the track, because residue can turn into a sticky film that attracts more dirt.
What does it mean if the tension adjustment feels like it turns in air?
If turning the tension adjustment slot feels like “air” (no resistance) from the first click, the spring is likely broken. In that case, keep stops simple and do not keep winding, because you can strip the adjustment mechanism or damage the roller tube.
My screen is stuck partway. Is it safe to open the cassette to inspect it?
Do not split the housing while the spring is still under load. If you cannot fully retract it, secure the pull bar to the frame with masking tape to prevent a sudden release, then open only enough to inspect the roller ends and fabric wrap.
How do I prevent over-tensioning after I add a few turns?
If you tighten in small increments but the screen becomes snappy and then starts slapping back, back off by removing a small number of half-turns. Also confirm the bottom bar is not rubbing, because binding can mimic “too much tension” symptoms.
The screen fabric looks bunched on the roller tube. Can I just add tension and keep going?
If the fabric looks uneven on the roller tube, unroll it completely, lay it flat, then re-roll evenly before reinstalling the housing. When the fabric is wrapped at an angle, even a correctly tensioned spring can cause hard deployment and jerky retraction.
What measurements or photos should I collect before buying a replacement roller or cassette parts?
In most cases, take photos and note the exact brand markings plus the housing dimensions (width and depth) before ordering parts. Roller tubes are sized to the opening, so using the wrong tube depth can prevent the cassette from seating or cause persistent binding.
Is one test after repair enough to confirm the problem is fixed?
Do not rely on a one-time test. Do at least three full cycles after cleaning and after any adjustment, then re-check after the first day of normal use to confirm the bottom bar is tracking level under real movement.
What if my screen problem seems mechanical, but the track itself might be damaged?
If the mounting track in the opening is bent, the screen can stay crooked even with a perfect roller and clean tracks. Storm or impact damage is the most common cause, and it is also when a pro is most likely to be worth it.
I have a manual pull-down patio screen, not a wind-driven roll-down. Does the same troubleshooting apply?
For a manual pull-down screen, the “spring tension” part may not apply. The friction brake can be too tight or too dirty, so focus on track cleaning, bottom bar alignment, and roller fabric redistribution first, then inspect the brake mechanism if those do not resolve it.
Next Article
How to Seal a Patio Door for Winter: Step-by-Step
Step-by-step how to seal sliding or screen patio doors for winter: adjust, add sweeps and weatherstripping, stop drafts,