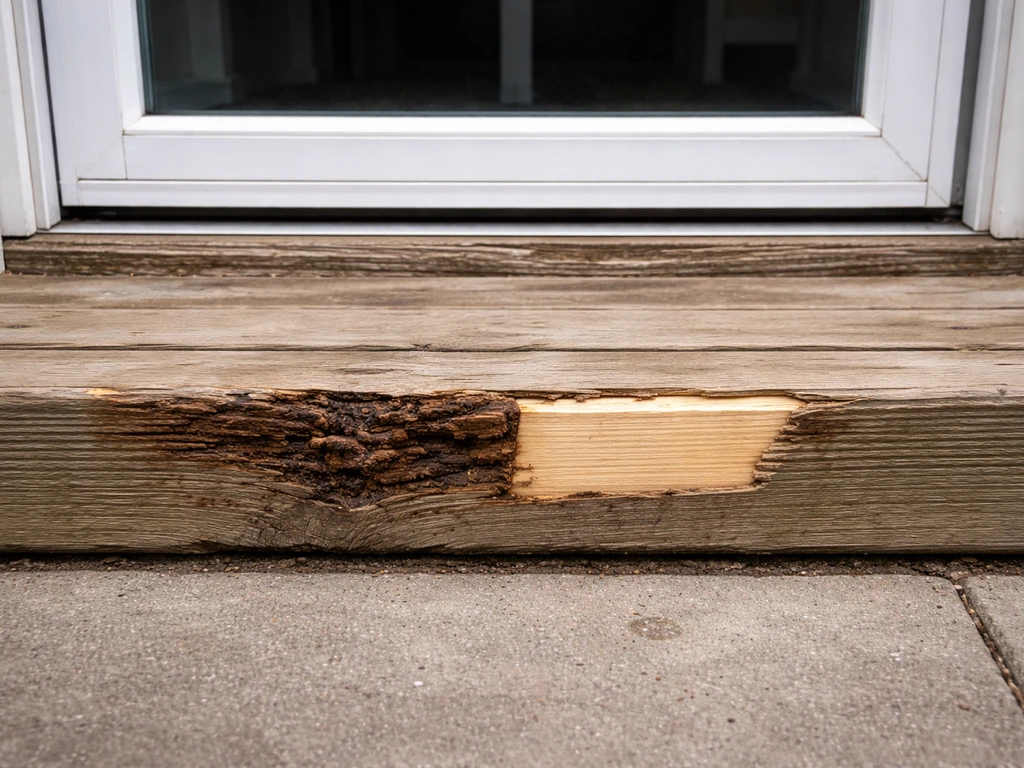
Building patio door steps yourself is a solid weekend project if you plan it right. If you are planning your patio door steps, a patio door guide can help you measure your threshold and clearance correctly before you start building. The key is getting the landing height correct before you touch a shovel, because if the finished step surface sits too high or too low relative to your door threshold, you'll either block the door from opening or create a gap that funnels rain straight into the track. Get that measurement right first, then everything else falls into place.
Patio Door Steps DIY: Plan, Build, and Troubleshoot

Jamie Archer
8 Jul 2026
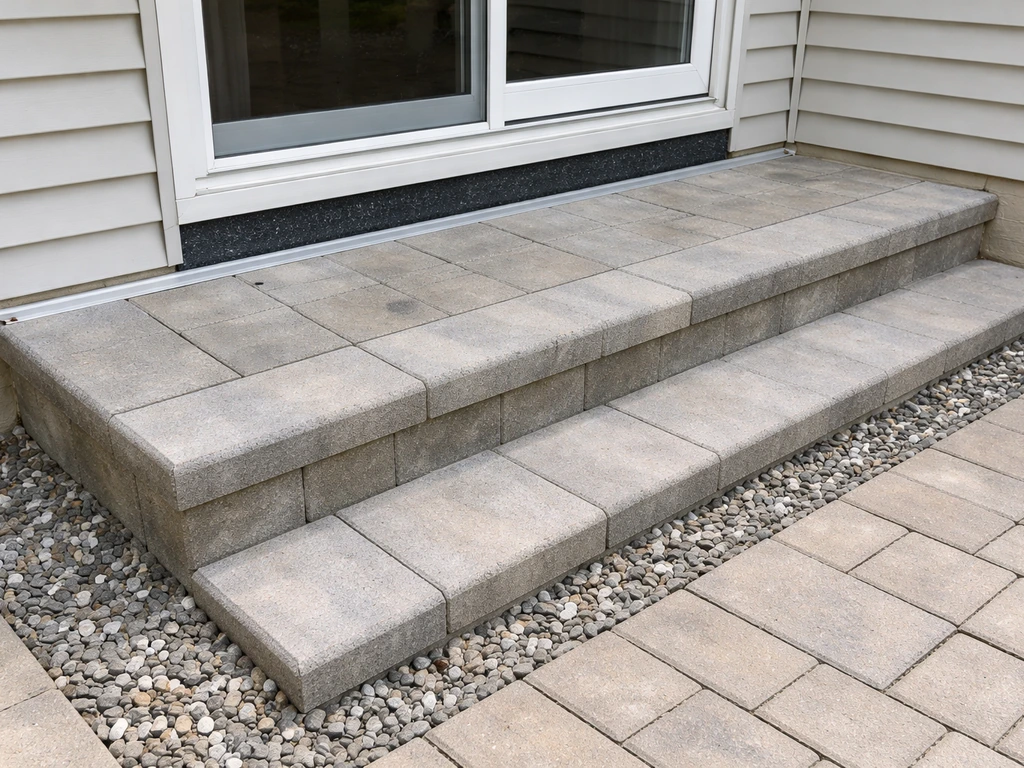
What kind of steps do you actually need?
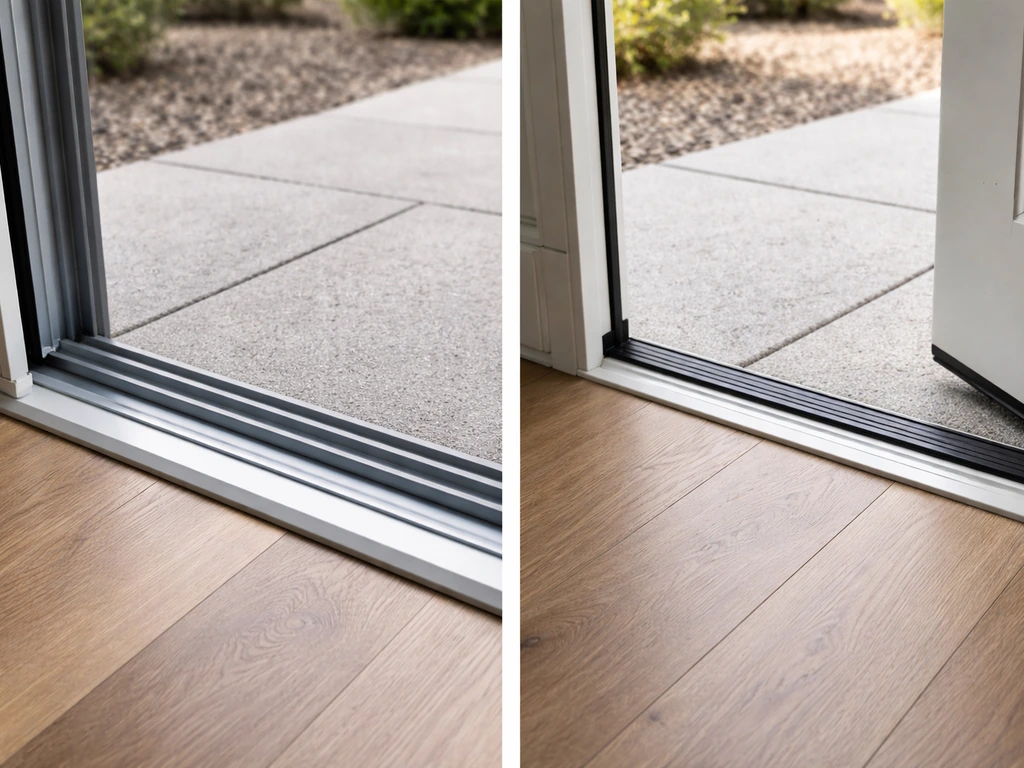
Start by identifying your door type, because it changes everything about the build. A sliding patio door has a raised track along the bottom that the panel rolls over, and that track typically sits 20mm or more above the sill. A hinged French door or single hinged patio door swings outward, so the door panel itself sweeps over the step landing as it opens. Mess up the clearance on either one and you've got a door that binds, drags, or won't seal properly.
For a sliding door, the critical measurement is the height from the floor inside your home down to the external ground level. You need the step landing to finish at a level that lets the door track drain freely and doesn't redirect water back into the threshold. If you are looking for patio door steps ideas in the UK, focus on getting the threshold height and drainage right first, then choose materials that suit your door type step landing. For a hinged door, you need enough clearance below the door's sweep arc so the panel clears the step surface when it opens. A door that swings outward over a step needs at least 50mm of clearance between the bottom of the door and the top of the step, and you'll want to verify this before you set your step height in stone.
Also think about how many steps you actually need. Measure the drop from your internal floor to the external ground level. A typical riser height of 150mm to 180mm is comfortable and aligns with general safe stairway design principles (Approved Document K covers these principles for England and Wales if you want to check compliance). For patio door steps, regulations can affect step height, clearance, and compliance checks, so plan for them before you start building patio door steps regulations. Divide the total drop by your target riser height and round to a whole number to get your step count. If your drop is 300mm, that's two comfortable steps. If it's under 200mm, a single generous step or a small platform may be all you need.
Width and landing size
Make the steps at least as wide as the door opening, and ideally wider. A step that matches only the door frame width feels cramped and creates an edge-catching hazard when you're carrying things through. A landing of at least 900mm deep at the base of the door gives you room to step back as the door opens without falling off the edge. If the steps form part of an accessible route to the door, Approved Document M gives useful diagrams on external step and stair design that are worth checking even if you're not legally required to comply.
Measure and plan before anything else
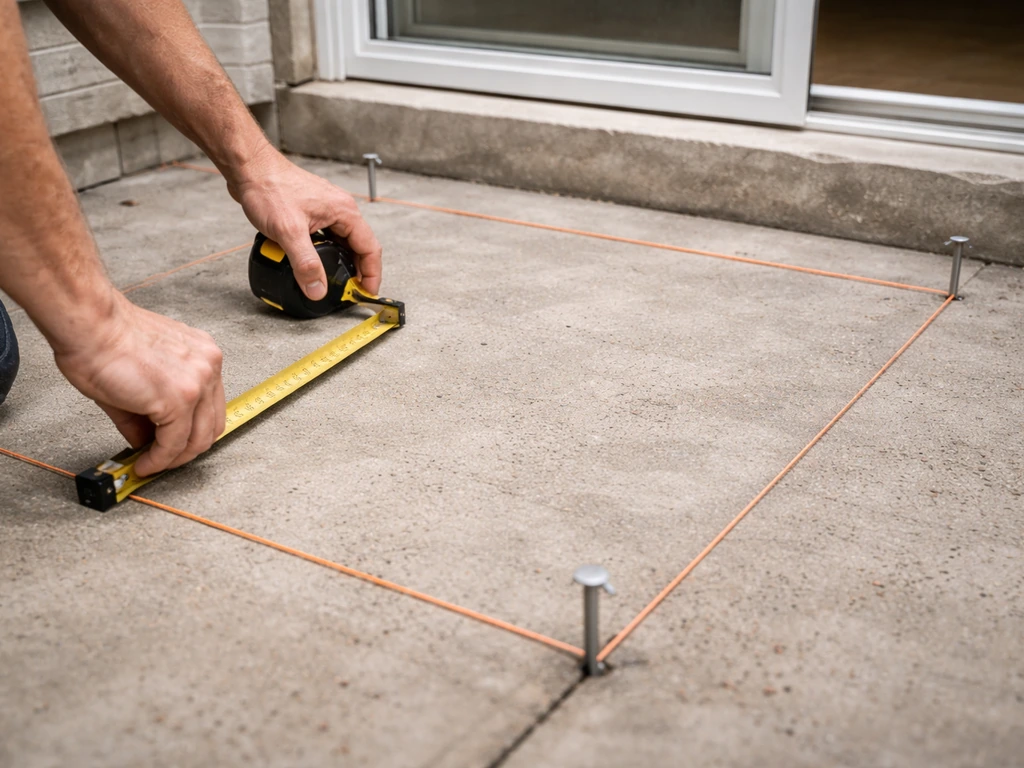
This is where most DIY step projects go wrong, so take your time here. You need three measurements before you design anything: the threshold height (from outside ground level up to the underside of your door threshold), the door swing clearance (for hinged doors), and the distance out from the house wall where you have firm ground or can compact a stable base.
- Threshold height: measure from existing ground level up to the threshold sill, not the track. Write this number down, it drives your riser calculation.
- Door sweep clearance (hinged doors only): open the door fully and measure from the ground to the lowest point of the door panel at its widest swing arc. Your step surface must sit below this point.
- Sliding door track height: note the height of the bottom track above the sill. This is typically 20mm to 25mm on modern low-threshold PVCu sliding doors. Your landing should not push debris or water back into this track.
- Distance from wall: measure how far out from the house wall you can build. Each step needs a tread depth of at least 250mm (going) for comfortable footing. Multiply by step count and add the landing depth to get your total projection.
- Ground slope: use a level and a tape measure to check whether the ground falls away evenly or at an angle. A cross-slope means one side of your base will need more excavation than the other.
Sketch this out on paper before you order materials. A rough scale drawing catches problems like a step that would sit directly over a drain, a landing that crowds a gate, or a build depth that eats into a lawn more than you want. It also tells you how much concrete, how many pavers, or how much timber you need to buy.
Choosing your materials
The three realistic options for most homeowners are concrete, natural stone or paving slabs on a concrete base, and treated timber. Wood patio door steps can work well too, but the base, drainage, and finishing need extra attention to prevent rot and movement. Each has a different build process, lifespan, and cost profile. Here's a straightforward comparison.
| Material | Typical lifespan | Relative cost | DIY difficulty | Best for |
|---|---|---|---|---|
| Concrete block/poured | 30+ years | Low | Medium | Permanent, high-use steps on stable ground |
| Pavers on concrete base | 20-30 years | Medium | Medium | Good looks, easy to relay if settling occurs |
| Pressure-treated timber | 10-15 years | Low-Medium | Lower | Temporary, rental properties, or raised situations |
| Natural stone | 30+ years | High | Medium-High | Premium finish, period properties |
For most homeowners doing a permanent single or two-step build directly off the back of the house, poured concrete or concrete blocks with a paving slab top is the most practical combination: durable, low maintenance, and easy to add anti-slip finish to. Timber is perfectly fine for a raised deck scenario or a temporary solution, but it needs more maintenance over time and must be kept clear of the door frame to prevent moisture wicking. Wood patio door steps have a separate set of design considerations worth looking at if you're planning a timber build specifically. If you are looking for inspiration, patio door steps ideas can help you choose the right layout, materials, and finish for your entrance Wood patio door steps.
Whatever material you choose, think about drainage from day one. The surface should pitch away from the house at a minimum gradient of 1:60 (about 16mm fall per metre) so water runs away from the threshold rather than pooling at it.
How to build patio door steps: the full process
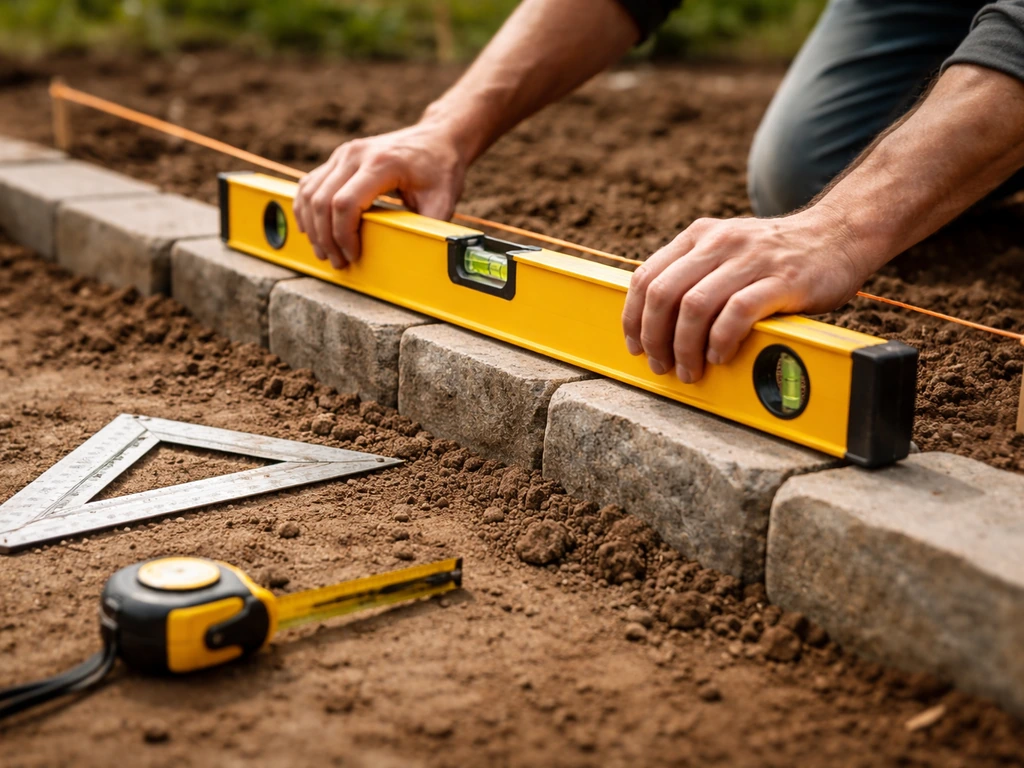
Tools and safety kit to have ready
- Spade and garden fork
- Spirit level (at least 1m long) and a shorter torpedo level
- Tape measure and builders square
- String line and pegs
- Rubber mallet and lump hammer
- Bolster chisel (for cutting pavers or blocks)
- Angle grinder with masonry disc (optional but useful)
- Mixing tub or electric cement mixer for larger pours
- Safety glasses, work gloves, and knee pads
- Dust mask when cutting masonry
Step 1: Site preparation
Mark out the full footprint of your steps using string lines and pegs. Excavate the area to at least 150mm below your intended finished surface level, and deeper if you're in an area with soft ground or significant frost. Remove all grass, roots, and topsoil. You want to be working on firm subsoil or compacted hardcore. Compact the base with a plate compactor or by hand-tamping with a heavy post if the area is small. Any soft spots should be dug out and filled with compacted hardcore (crushed stone or MOT Type 1) rather than left.
Step 2: Laying the base
Lay a minimum 100mm layer of compacted hardcore across the entire footprint. Compact it thoroughly in layers of no more than 75mm at a time. For a poured concrete base, mix a general-purpose concrete (typically a C20 mix or equivalent bagged ready-mix concrete) and pour it over the compacted hardcore to a depth of at least 100mm for a step base. If your steps will be larger than about 1.2m wide or carry heavy loads, add reinforcement mesh or rebar at mid-depth. The key with reinforcement is to keep it properly embedded within the concrete depth, not sitting at the surface where it won't do anything and will rust.
For a concrete block step build, you can form each step riser using standard concrete blocks laid on mortar on top of your concrete base slab. Use a 4:1 sand-cement mortar mix and check every course for level before the mortar sets. Once the block risers are built up to your step heights, you can fill the core of each step with compacted hardcore and concrete, then finish the tread surface with paving slabs or a brush finish concrete topping.
Step 3: Forming and finishing the steps
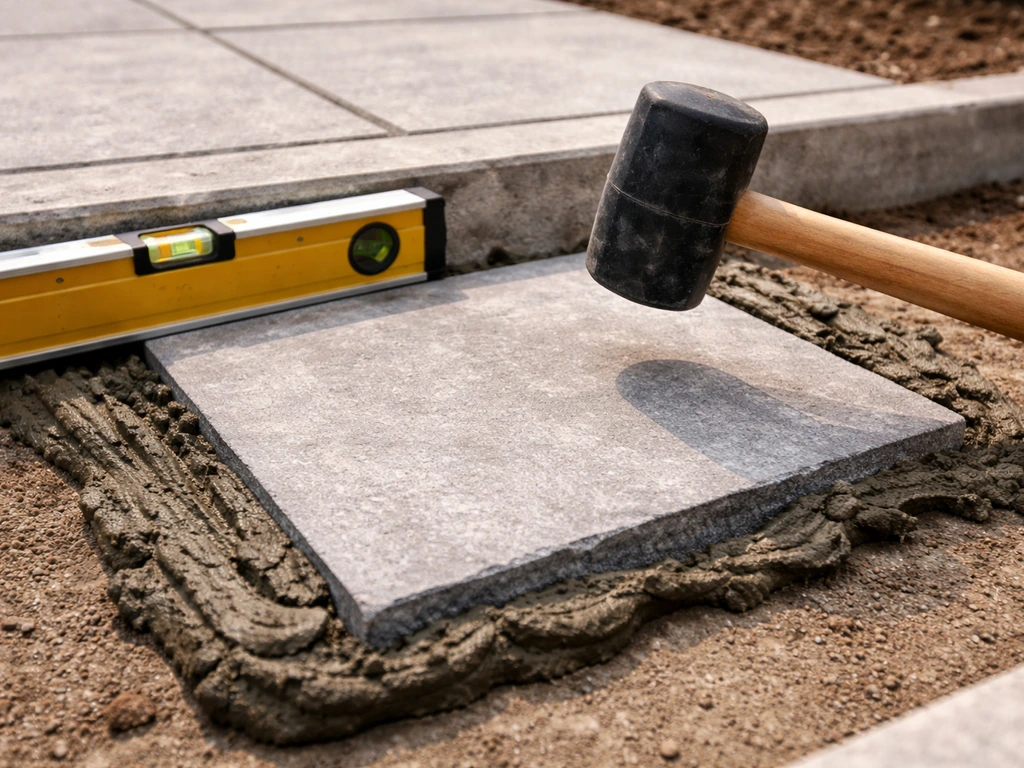
Set your paving slabs or tread surface on a full bed of mortar (5 parts sharp sand, 1 part cement). Tap each slab level using a rubber mallet and check with your spirit level constantly. Each tread should be laid with a slight fall away from the house: 5mm to 10mm over the tread depth is enough. Point the joints with a firm mortar mix once slabs are set, and leave joints of at least 10mm between slabs to allow for thermal movement and prevent the cracking that follows freeze-thaw cycles. If you're building multiple steps, work upward from the lowest step to the top landing.
The top landing slab, which sits immediately outside the door threshold, is the most important one to get right. If you are using timber, choose pressure-treated boards that will resist rot where the steps meet the door threshold wooden steps for patio door. It should finish at or slightly below the bottom of the door sill, never flush with or above it. For a typical low-threshold sliding patio door with a 20mm track height, the landing surface should sit at least 20mm below the internal floor level. This gives the track room to drain and prevents surface water from being forced back under the door.
Weatherproofing, drainage, and slip resistance
Once the steps are built, your job isn't done. Getting the weatherproofing right is what separates steps that stay functional for 20 years from ones that cause problems by the second winter.
Sealing the gap between steps and the house wall
Never mortar the joint between your new steps and the house wall solid. Thermal movement will crack it within a year. Instead, leave a 10mm movement joint and fill it with a flexible exterior-grade sealant (a good polyurethane or silicone-based product rated for external masonry use). Rake out any mortar that accidentally went into this joint and replace it with sealant. This joint should be checked and re-done every few years as part of routine maintenance.
Protecting the door threshold and weep holes
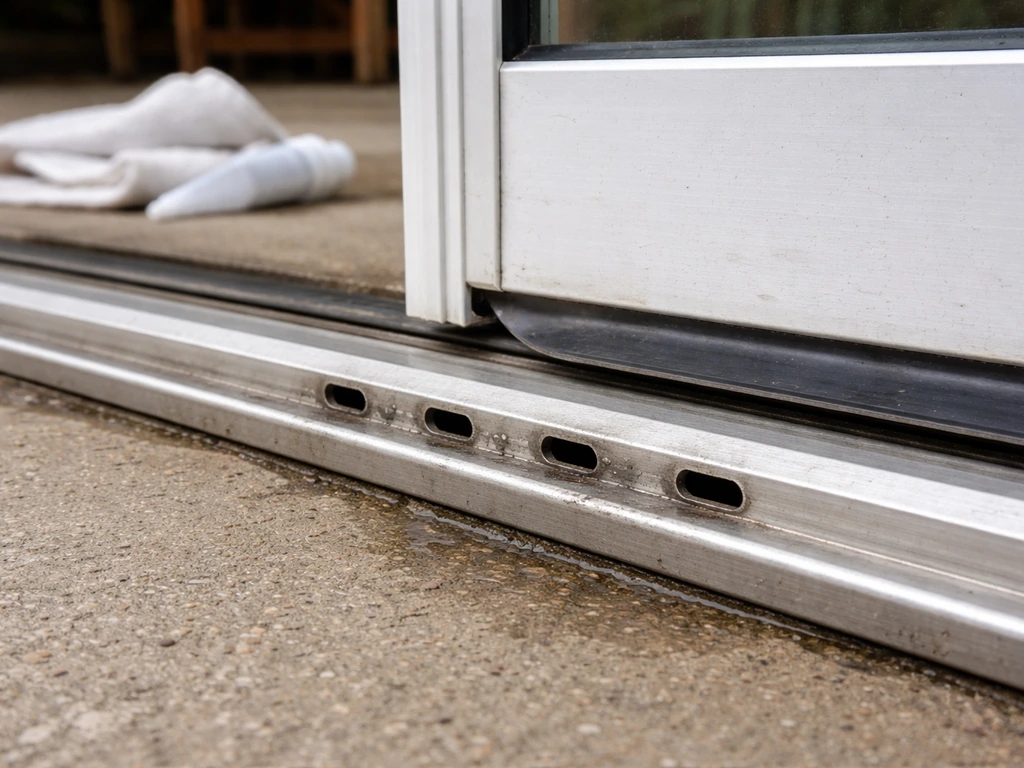
This is the part most DIYers miss, and it's critical for sliding patio door owners especially. Sliding patio door frames have weep holes along the bottom track, usually small slots or holes at the outer edge of the threshold, that allow any water that gets into the track to drain out. A technical bulletin notes that open weep hole joints provide the best drainage and supports the idea of proper membrane overlap behind water-resistant layers at cladding or masonry interfaces. When you build steps right up against the door, debris from the construction, mortar smears, and grit from the step surface can block these holes. Blocked weep holes are one of the most common causes of water leaking into the house through a sliding patio door, so before you call your project done, crouch down and confirm every weep hole in the bottom track is clear and unobstructed.
If your door has a drain pan or recessed threshold system beneath the sill (more common on properly installed modern doors), check that the pan can still drain freely to the outside. The landing surface around the threshold should direct water laterally away from the door, not across the weep holes. If you have sill flashing or a drip edge at the base of the door frame, make sure it overlaps the top of the step surface and isn't buried under mortar.
Anti-slip finish
Smooth concrete and polished pavers become dangerously slippery when wet. Apply an anti-slip treatment before the steps go into regular use. Options include a brush-finish texture applied while concrete is still green (simply drag a stiff-bristled brush across it), proprietary anti-slip coatings applied to cured concrete or stone, or choosing a naturally textured paving slab from the start. Adhesive anti-slip strips are a quick retrofit but tend to lift after a season or two outdoors. A textured finish built into the surface is far more durable.
Check the door itself once the steps are in
New steps change what's happening at your door threshold, so always do a proper door check once the build is complete and the mortar has cured (wait at least 48 hours for mortar, longer in cold weather). This is especially important if you adjusted the ground level significantly or worked close to the door frame during construction.
Sliding patio doors
Open and close the door several times. It should glide without effort. If it's suddenly harder to move than before, the most likely causes are debris in the track from the build (grit, mortar dust, or stone chips), or a roller that's been knocked out of adjustment. Clean the entire track with a stiff brush and wipe it down before checking rollers. Rollers on most sliding patio doors are adjusted via small screws accessible through holes in the bottom of the door panel, usually covered by plastic caps. Turn these screws to raise or lower the panel until it glides freely and the bottom of the panel sits parallel to the track. If the door doesn't seal well at the top or sides after your step work, the door may have shifted slightly; check the alignment and use the roller adjusters to correct it.
Hinged patio doors and French doors
Check that the door opens and closes without catching the step surface or the new landing edge. If the bottom of the door sweeps close to the top slab, double-check your clearance measurement. A door that scrapes the step is a problem you need to fix now, not later, either by planing the door bottom, adjusting the hinge positions, or in the worst case reducing the height of the top slab by a course. Also check that the door still compresses the weatherstripping evenly around the frame when closed. New steps can subtly change the load on a door frame; if you see daylight or feel a draft at the bottom after the build, adjust the threshold seal or check the door's hinge adjustment screws.
The threshold itself
While you're down at ground level, inspect the threshold seal at the base of the door frame. Look for any cracking, compression failure, or gaps in the flexible seal between the door frame and the sill. If the weatherstripping looks crushed, dried out, or torn, replace it now rather than after the first rainy season. Also confirm the sill flashing or drip edge is intact and directing water onto the step surface rather than behind it.
Troubleshooting and keeping things in good shape long term
Even a well-built set of steps needs a quick inspection every year. Here are the most common problems that show up after a patio door step build and what to do about them.
Water getting in under the door
If you're seeing water on the internal floor near the door after rain, work through this in order: first, check the weep holes in the bottom track and clear any debris. This is the most common cause and takes five minutes to fix. Second, check that the step landing is still sloping away from the house and hasn't settled flat or toward the door. Even a small amount of settlement can redirect water toward the threshold. Third, inspect the sealant joint between the steps and the house wall for cracks and re-seal if needed. Fourth, check the weatherstripping and threshold seal for damage. If you've worked through all of these and still have water ingress, the issue is likely with the door's original flashing or pan detail above the step level, which may need professional attention.
Sliding door stiff or won't glide
Clean the track first. Grit and mortar dust from the step build are the most likely culprits. If cleaning doesn't fix it, adjust the rollers to re-level the door panel in the track. If the panel still binds after cleaning and roller adjustment, check whether the track itself has been physically damaged or deformed during construction. A bent or compressed track section can be gently reshaped with a wooden block and mallet in mild cases, but a badly damaged track needs replacement.
Steps cracking or sinking
Surface cracks in mortar joints are normal after the first winter freeze-thaw cycle and are easy to repoint. Larger structural cracks running through slabs or blocks, or visible sinking at one corner, usually mean the base wasn't compacted thoroughly enough or a soft spot was missed during excavation. Minor settling (a few millimetres) can be corrected by lifting the affected slabs, adding mortar, and resetting. Significant sinking that affects the door alignment needs the affected section dug out and rebuilt from the base up.
Gap developing between steps and the house
This is normal over time and is exactly why you left a movement joint rather than mortaring it solid. Clean out the joint annually, check for any debris that might be holding it open unevenly, and reseal with fresh exterior flexible sealant. If the gap is growing year on year, the steps are settling away from the house, which means the base needs attention. Settlement-induced gaps at the threshold are one of the more common causes of drafts and water ingress reported by homeowners after patio step builds, so don't ignore it.
Annual maintenance checklist
- Clear the sliding door track of leaves, grit, and debris; verify weep holes are unobstructed
- Check the step surface slope hasn't changed (use a level) and clear any moss or algae that's reducing slip resistance
- Inspect and re-seal the movement joint between steps and house wall if cracked or open
- Check weatherstripping and threshold seal for compression damage or tears
- Test the door opens and closes smoothly; adjust rollers if it's stiffer than usual
- Look for surface or joint cracking and repoint as needed before water gets into cracks and freezes
- Confirm sill flashing/drip edge is intact and not buried under debris
A patio door step project done right is genuinely low maintenance for many years. The build itself is straightforward if you respect the threshold height measurement, set a proper compacted base, and keep the weep holes clear. Get those three things right and the rest is just finishing work.
FAQ
How do I measure the landing height correctly if my patio ground is uneven or slopes?
If you have a sliding door with an internal raised floor, measure the threshold height from the outside ground to the underside of the sill, then confirm the landing is at least slightly below that sill level (not flush). A practical check after you pour or set the top slab is to tape a straightedge across the sill and verify you can still see the drainage gap, even after mortar joints settle.
Can I slope the whole step run to drain water, or do I need separate falls on each tread?
Use a slope gauge or long spirit level across the tread, not just “by eye.” Aim for a small fall away from the house on each tread, typically 5mm to 10mm over the tread depth, and keep the landing near the door level requirement. If you only slope the whole structure but the landing at the threshold ends up too high, you will still create track drainage problems.
What if I want to add or extend patio door steps later, after the original landing or patio area is already there?
Yes, but plan for two different priorities: structural stability and door operation. If adding steps later, you must match your top landing elevation to the sill, keep the weep holes unobstructed, and leave the required movement joint at the wall so the new work does not crack the old mortar. Before you build, test the door closure and sealing with the area cleared, then redo the door check again after cure.
Why can my step-to-house joint crack even if I built it carefully and used mortar?
Avoid mortar or concrete poured directly against the door wall line without a movement joint, and do not fill the gap with rigid grout. When the joint is tight at first, thermal expansion still pushes it open later, which can crack the masonry or create new water paths. Rake out any rigid material in that joint and replace it with exterior flexible sealant.
What’s the best way to stop patio door steps becoming slippery, and what should I avoid?
For anti-slip, prefer a finish that is “built in” to the surface (brush-textured concrete while green, or naturally textured paving). If you retrofit with adhesive strips, expect higher failure risk because they can lift under freeze-thaw and when grit gets trapped underneath. After any anti-slip product is applied, let it fully cure before you let the door area get heavy foot traffic.
After installing steps, how can I confirm the weep holes issue is actually fixed (not just improved)?
Do a two-part test: first water test, pour a controlled amount or hose lightly across the landing for a few minutes, then check inside at the same spots you normally see dampness. Second door test, after the track area is dry, open and close several times. If water appears inside even when the weep holes are clear, the issue is likely door flashing, sill pan drainage, or water being directed across the threshold rather than away.
Are concrete block step builds as reliable as poured concrete, and what extra care do they need?
Yes, but only if you address drainage under the block and around the tread. Concrete block steps with a paving top still need correct hardcore depth, thorough compaction, and a sloped tread fall, otherwise you can get settlement that throws off door clearance. Also keep joint widths consistent (at least about 10mm between paving slabs) so freeze-thaw movement does not push blocks out of alignment.
If my sliding patio door binds after the steps are built, should I fix the masonry or the rollers first?
Don’t ignore roller height or track alignment. If the door becomes harder to move right after the step build, clean first, then adjust the roller screws until the bottom panel sits parallel to the track and glides freely. If weatherstripping no longer compresses evenly or you see daylight, adjust alignment using the roller adjusters before you do any further masonry changes.
What does it mean if my movement joint near the house keeps growing each year?
A small gap is common after cure as things settle, but widening over time is a red flag. Keep checking the movement joint and confirm the base is not settling away from the house. If the top slab edge starts to drop relative to the sill, you may need to rebuild that section from the base up rather than endlessly resealing.
Can I test door clearance before I finalize the top landing slab?
Yes, and it’s safer to do a “dry fit” test before you finalize the top slab. Place the intended final surface height material temporarily (or measure a board equivalent height), then confirm the door can sweep or roll without scraping, and that weatherstripping still compresses around the frame. If it scrapes, it is much easier to adjust before the final pour or mortar set.
How should I change the subbase approach for soft ground or heavy frost areas?
If your property is soft ground or you expect frost, excavate deeper and use properly compacted hardcore layers, instead of relying on a thicker top pour. Frost and poor compaction create differential settlement that can cause drafts and water redirecting back toward the door. A good practical indicator is if you can press a spade or get noticeable give during subbase prep, you still need additional excavation and compaction.
Next Article
Wood Patio Door Steps Repair Guide: Fix Rot and Drafts
Step-by-step wood patio door steps repair to fix rot, drafts, and misalignment, with DIY replacement and waterproofing t