For most patio doors, you need between one and three steps down to the exterior, with each riser sitting between 6 and 7 inches tall and each tread at least 11 inches deep. Add a landing at the top if your door swings outward, and slope everything at least 1/4 inch per foot away from the house for drainage. If you want a door-specific walkthrough, use this patio door guide to match your step layout to how your door swings and drains. Those basics cover 90% of setups, and the rest is just picking materials and finishes that fit your budget, climate, and look.
Patio Door Steps Ideas: Layout, Sizing, Materials, DIY

Jamie Archer
3 May 2026
Choosing the right layout for your patio door steps
Start by measuring the drop from your interior floor to the ground outside. That number tells you how many steps you need and whether a landing is necessary. A typical patio door threshold sits anywhere from 8 to 24 inches above grade, so you might be looking at one generous step, two comfortable steps, or three steps with a small landing platform at the top.
The door type matters here. Sliding glass doors and screen doors do not swing outward, so they do not require a top landing from a code standpoint. Under IRC guidance, blank" rel="noopener noreferrer">if you have two or fewer risers and the door does not swing over the stairway, a top landing is not required. But if you have an outswinging hinged patio or French door, you need a landing at the top that is at least as wide as the door and deep enough for the door to clear you while you stand there, typically 36 inches minimum. Skipping that landing with an outswinging door is a genuine safety problem, not just a code technicality.
For layout direction, straight steps directly out from the door are the most common and easiest to build. L-shaped or wraparound designs work well on wider openings or when you want the steps to flow toward a path or garden area at an angle. If your patio door opens onto a deck and the steps are at deck's edge, a wraparound or side-exit layout often feels more natural and keeps traffic away from the door swing zone.
How many steps do you actually need?
Divide your total rise (floor to ground, in inches) by your target riser height. Comfortable outdoor risers are 6 to 7.5 inches. If your drop is 14 inches, two risers at 7 inches each is clean and simple. If the drop is 21 inches, three risers at 7 inches works well. Avoid going over 7.75 inches per riser for exterior steps, and keep tread depth at 11 to 12 inches minimum so there is enough room to place a full foot. For UK builds, Approved Document K caps domestic risers at 220 mm (about 8. For more patio door steps ideas UK homeowners use, focus on how your step proportions, materials, and drainage details will work with your outdoor conditions Approved Document K. 5 inches) and requires a minimum going of 220 mm, but in practice, staying closer to 175 mm rise and 280 mm tread makes for a much more comfortable outdoor step.
Budget-friendly patio door step ideas
You do not need to pour a full concrete staircase to get a solid, good-looking entry. Some of the most practical solutions cost under $300 and can be installed in a weekend.
- Precast concrete steps: The fastest budget option. A single precast step runs roughly $100 to $200 installed, and a two-step precast unit sits in the $250 to $500 range depending on size and your area. You set it on a compacted gravel bed and it is done. Not glamorous, but extremely durable and code-compliant.
- Concrete block or retaining wall block steps: Stacking large concrete landscape blocks (like 4x8x16 inch CMU or retaining wall caps) is a genuine DIY option. Materials cost $3 to $8 per block, and a two-step entry can run under $150 in materials. They look clean when you use smooth-faced cap blocks on the treads.
- Pressure-treated lumber platform steps: A simple box-frame step built from 2x8 or 2x10 PT lumber with a solid tread surface is very DIY-friendly. You can deck the treads with composite decking for a finished look. Total materials for a 4-foot-wide two-step entry often come in under $200.
- Paver landing with one step: If your door is only one step up, a simple mortared or dry-set paver landing at the base does the job. Use bullnose pavers for the step edge so you get a clean, finished look without extra framing.
- Gravel landing with timber risers: For a very informal back-door setup, pressure-treated timber risers (4x6 or 6x6 landscape timbers) staked into the ground with a compacted gravel surface are low cost, drain well, and take about three hours to install.
If budget is your primary constraint, the precast concrete unit is almost always the smartest call. It is engineered for outdoor use, requires no formwork, and you are done the same day. The wood frame options look great initially but require more maintenance over time, especially in wet climates. If you are going with wood, make sure the treads and landing are pressure-treated and sealed for weather resistance.
Design details: landing, risers, tread style, and flow

A good patio door step design is not just about getting from A to B safely. It should feel like a natural extension of the door and patio, not an afterthought bolted to the side of the house. Here is how to think through each element.
Landing size and placement
For any outswinging door, the top landing needs to be wide enough to stand on while pulling the door open. That means matching or slightly exceeding the door width (most patio doors are 60 to 72 inches wide) and allowing at least 36 inches of depth measured from the door frame outward. If you have accessibility in mind, a 60-inch by 60-inch landing at the top lets a wheelchair user approach and operate the door without reversing. The exterior landing surface can sit up to 7.75 inches below the door threshold when the door does not swing over it, which gives you useful flexibility in how you grade the adjacent ground.
Riser and tread proportions
The classic comfort formula for outdoor stairs is: 2 x riser height + tread depth = 26 inches. So with a 7-inch riser, you want an 11-inch tread (2x7 + 11 = 25, close enough). For a more generous, relaxed outdoor step, use a 6-inch riser with a 12 to 14-inch tread. This wider, shallower step feels more like a natural walkway and works well when you are carrying things through a patio door. Avoid deep overhanging nosings on outdoor steps; they collect water and become slippery. Keep the nosing to half an inch or less, or go with a square-edged tread on exterior concrete or stone.
Visual flow and matching your door
Sliding glass door setups benefit from wide, low steps that mirror the horizontal emphasis of the door. Think broad treads, low risers, and a step width that matches or exceeds the door width. French door or hinged patio door setups often look better with a more defined landing and a slightly narrower stair run leading down. If your patio floor is already a specific material, matching the step material to the patio surface creates a seamless look. When they cannot match exactly, choose a complementary tone or texture rather than a completely contrasting one.
Materials and weatherproofing (slip resistance, drainage, durability)

Material choice is where most homeowners either get it right for 20 years or regret it after the first hard winter. The key factors are slip resistance when wet, how well the surface drains, and whether the material can handle freeze-thaw cycling without cracking or heaving.
| Material | Slip Resistance (Wet) | Freeze-Thaw Performance | Maintenance Level | Cost Range (DIY Materials) |
|---|---|---|---|---|
| Broom-finished concrete | Good (texture adds grip) | Excellent with proper sub-base | Low | $4–$8/sq ft |
| Concrete pavers | Good (textured faces) | Good with sand-set base and drainage | Low-Medium | $3–$10/sq ft |
| Natural stone (slate/bluestone) | Variable (honed = slippery) | Good if sealed and properly installed | Medium | $8–$20/sq ft |
| Pressure-treated wood | Moderate (add grip strips) | Fair (can warp/crack over time) | Medium-High | $2–$5/sq ft |
| Composite decking treads | Good (most have slip texture) | Good | Low | $5–$12/sq ft |
| Precast concrete units | Good (ribbed or brushed finish) | Excellent | Very Low | $100–$350/step installed |
Slip resistance specifics
A broom-finished concrete surface is the most reliable DIY slip-resistance solution. The texture created by dragging a stiff broom across fresh concrete adds meaningful grip without any extra products or coatings. For pavers and natural stone, the UK slip resistance framework uses pendulum test values (PTV, tested to BS 7976-2): a PTV above 36 is considered low slip risk in wet conditions, while smooth polished finishes often fall below 25 PTV when wet, which is classified as high risk. The UK Slip Resistance Group’s BS 7976-2 pendulum guidance/FAQs uses a PTV of 36 or higher to classify a surface as having a low risk of slip and notes that test conditions matter a PTV above 36 is considered low slip risk in wet conditions. In practical terms, avoid polished granite or smooth honed stone on outdoor treads. If you love a polished stone look, restrict it to vertical riser faces and use a textured or sawn-finish surface on the horizontal tread.
Drainage: slope, sub-base, and weep holes
Every horizontal surface in this build needs to shed water. The minimum standard is 1/4 inch of drop per foot of run, directed away from the house and door threshold. That means a 36-inch-deep landing should drop at least 3/4 inch from back to front. For poured concrete, build this slope into your formwork. For pavers, set the sand bed at the correct grade before laying. Under any paved surface, the sub-base should be 4 to 6 inches of compacted crushed stone, laid in layers no deeper than 150 mm at a time with compaction between layers. In wet or expansive-soil areas, lay a non-woven geotextile fabric directly on the compacted soil before placing your crushed stone base. This keeps the stone layer from migrating into the soil over time and is one of the most overlooked details in DIY paver and step projects.
If your step assembly is built against the house foundation or has enclosed sides, include weep openings at the base (minimum 12 mm or 1/2 inch wide) so water that gets in can also get out. Trapped water in a closed masonry assembly is how you get spalling and frost damage within two or three winters.
Freeze-thaw durability
If you are in a climate with freezing winters, the sub-base is your most important investment. Frost heave happens when water in the soil freezes, expands, and pushes the structure up. A well-drained, compacted crushed stone base interrupts this process by removing the water before it can freeze in place. For poured concrete steps, use air-entrained concrete rated for exterior exposure (typically 4,000 PSI minimum, 6% air entrainment) and seal the finished surface once cured. Air-entrained concrete is designed to improve workability and significantly increase durability and resistance to freezing-and-thawing in climates subject to freeze-thaw cycles air-entrained concrete rated for exterior exposure. For pavers, the sand-set system actually handles freeze-thaw better than rigid mortar beds because individual units can shift slightly and re-settle without cracking.
DIY build approach and safety basics
Most patio door step projects are genuinely DIY-friendly, especially precast units, paver landings, and pressure-treated wood platforms. Poured concrete steps require a bit more commitment but are still very achievable over a weekend for someone comfortable with basic formwork.
What to measure and check before you start
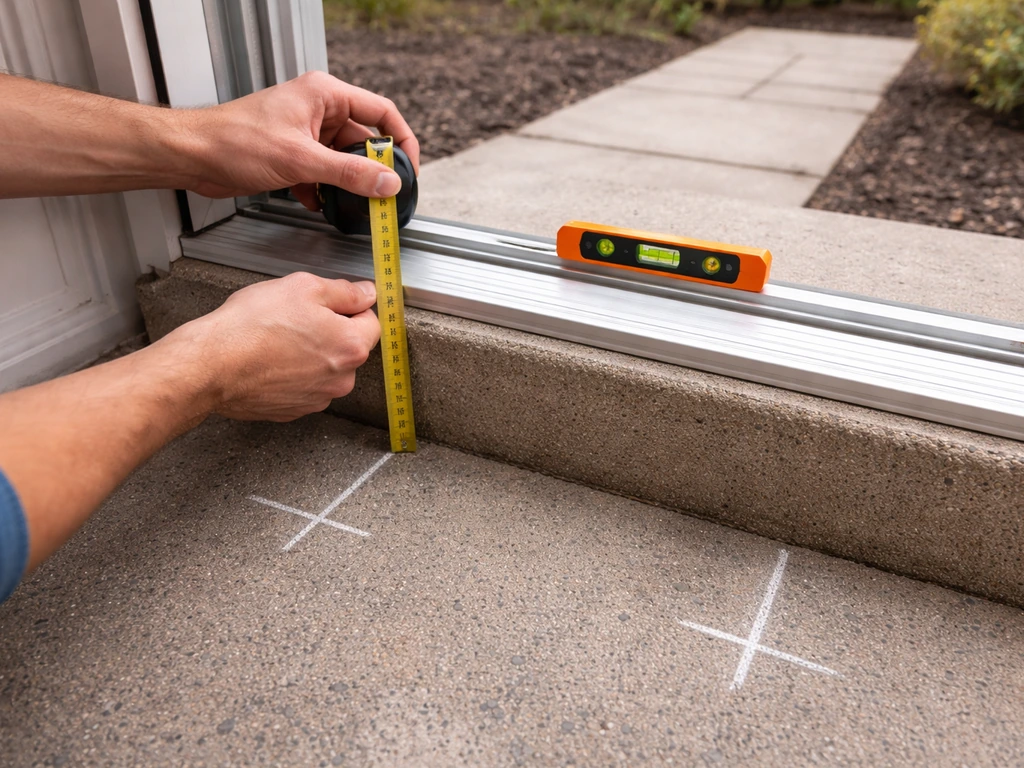
- Total rise: Measure from the top of your door threshold to the finished grade level at the base of where the steps will land. Do this at multiple points because ground is rarely perfectly level.
- Door swing: Determine if your patio door swings outward (hinged/French) or slides. This decides whether you need a top landing and how much space to reserve.
- Step width: Measure the door opening width plus any casing. Steps should be at least as wide as the door, and for a generous look, extend 6 to 12 inches beyond the door frame on each side.
- Underground obstructions: Check for irrigation lines, drainage pipes, or utility lines before digging your sub-base area. Call 811 (US) or 0800 96 96 96 (UK) to have lines marked.
- Local code check: Most jurisdictions require a permit for attached masonry steps. A quick call to your building department takes 10 minutes and tells you if you need one.
Basic build sequence
- Excavate the footprint to a depth of 6 to 8 inches below finished grade (more in freeze-thaw climates). Remove all organic material.
- Lay geotextile fabric on the compacted subgrade, then add crushed stone base in 150 mm layers, compacting each before adding the next.
- Install edge restraints if using pavers, or build your formwork if pouring concrete.
- Set your drainage slope at 1/4 inch per foot directed away from the house before placing any finished materials.
- For poured concrete, mix to the correct specification, pour in a single session to avoid cold joints between steps, and finish the tread surfaces with a broom stroke perpendicular to the direction of travel.
- Cure poured concrete for at least 7 days before loading it with foot traffic, and a full 28 days before sealing.
- For precast units, set on a 2-inch compacted gravel bed and check for level side to side and correct front-to-back slope before walking away.
Safety on the job site
Concrete work and masonry cutting involve real hazards. Wear safety glasses or a face shield whenever cutting pavers or stone with an angle grinder or wet saw, and remove jewelry and loose clothing before using any power tools. Concrete mix is caustic: wear chemical-resistant gloves and avoid prolonged skin contact. When mixing bags by hand, work in a well-ventilated area and consider a dust mask rated for silica. For wood cutting, clamp your workpieces rather than holding them freehand. Heavy precast units often weigh 200 to 400 pounds and require two people and proper lifting technique, or a hand truck rated for masonry loads.
Finishing touches: lighting, handrails, and accessibility
Once the steps are in, a few finishing details separate a functional entry from one that is genuinely pleasant to use at any hour and in any condition.
Lighting
Exterior stairs need artificial lighting near the top landing, and this is reflected in most residential codes. The practical options are step riser lights (low-voltage LED units mortared or recessed into the riser face), post lights on each side of the landing, or a wall-mounted fixture next to the door frame. Step riser lights are the most elegant solution and are widely available in both hardwired and solar versions. Solar riser lights require no wiring and take about 20 minutes to install with masonry anchors. For wired options, a simple low-voltage landscape lighting transformer and wire run is a half-day DIY project. Good lighting also creates a strong visual contrast at the edge of each tread, which reduces trip risk after dark.
Handrails: when you actually need one
Under IRC, a handrail is generally required on residential stairs with four or more risers. For a typical two or three-step patio door entry, a handrail is not code-required, but it is often worth adding anyway. If anyone in your household has mobility limitations, if the steps are used heavily, or if the patio door entry is on a north-facing shaded side of the house (where frost accumulates), a single post with a grab rail on one side makes a real safety difference. For a clean look, a simple 1.5-inch diameter round aluminum or stainless post with a matching rail, set in a post anchor mortared into the step, is unobtrusive and very durable. Avoid wood posts set directly in concrete without a standoff base because end-grain wood in concrete is a rot accelerator.
Accessibility and contrast
Even if you are not building to full ADA or Part M standards, thinking about accessibility pays off in daily usability. Keep the path from the patio door to the step edge as direct and level as possible. Use a contrasting color or material at the step edge so the transition is immediately visible, especially for older users or in low light. A simple band of dark stone or a contrasting paver color at the front edge of each tread achieves this without any extra hardware. For a completely accessible entry, ramp rather than steps is the right solution, but a well-designed two-step entry with a wide landing and handrail handles most practical needs.
Edge restraints and final sealing
If you used pavers, make sure your edge restraint system (plastic or aluminum paver edging spiked into the sub-base) is fully installed around the entire perimeter before you sweep in joint sand and compact the surface. Missing or loose edge restraints let pavers creep and gap over time, which is both an aesthetic problem and a trip hazard. For poured concrete or natural stone, apply a penetrating concrete or masonry sealer once fully cured. This is especially important in climates with road salt exposure, as salt-contaminated runoff is the number one cause of surface spalling on exterior concrete steps.
If you are working through the full project from scratch, it is worth getting familiar with the broader patio door guide for your specific door type, since the step design should complement how the door threshold, track, and screen are configured. If you want a quick starting point, this patio door steps DIY guide can help you choose the right layout, materials, and finishing details. For UK-specific builds, the regulations around step dimensions and materials have some meaningful differences covered in dedicated patio door steps regulations guidance. And if your ideal solution involves timber, the wood patio door steps and wooden steps for patio door topics go deeper on species selection, joinery, and finish options that are worth reading before you buy lumber.
FAQ
What’s the easiest way to tell whether I should build 2 steps or 3 steps for my patio door steps ideas layout?
Measure the total rise from your interior floor to the exterior grade, then divide by your planned riser height. If you end up needing a riser taller than about 7.75 inches, switch to the next step count so each riser stays in the 6 to 7.5 inch comfort range. This prevents “one awkward step” that feels steep and increases slip risk when wet.
Do I need a landing if my patio door opens outward but has only one step?
A landing is most critical when the door swing puts you into the step area where you could lose footing while operating the door. Even if your riser count is small, if the door opening area overlaps the tread where you would stand, treat it like an outswing situation and include a top landing sized to the door width and enough depth for clearance while standing (commonly at least 36 inches deep).
How do I decide between a straight, L-shaped, or wraparound step layout when space is tight?
Pick the layout based on where you want foot traffic to travel, not just aesthetics. If your patio door sits at the end of a walkway, an L-shape can move the downslope path away from the door swing zone. In narrow frontages, a straight run is often safer, because it reduces sharp turns and gives you a simpler drainage pathway to slope away from the house.
Can I use pavers on exterior steps without a full concrete stair substructure?
Yes, but plan for a proper compacted base and restraint system. Use a crushed-stone sub-base with layered compaction, set the paver sand bed to the final grade, and install edge restraints around the entire perimeter before joint sand. Without restraints, pavers shift, gaps form, and the step edge becomes a trip hazard.
What’s the best way to prevent standing water on a patio door landing?
Slope every horizontal surface away from the house and door threshold, aiming for at least a 1/4 inch drop per foot. For example, a 36-inch landing should drop about 3/4 inch from the back edge to the front. Also avoid low spots at the junction between the landing and the first tread by checking grade before installing finishes.
Should I match the step material to my patio exactly, or is complementary better?
Match if you can, but prioritize safety and drainage over perfect visual continuity. When matching is not practical, choose a complementary tone or texture rather than a strong contrast that can reduce visibility of the tread edge in low light. If you can’t match color, keep the tread edge surface texture similar for consistent wet traction.
Are pressure-treated wood treads safe for freezing climates?
They can be, but you must use exterior-rated pressure-treated lumber and protect it with a quality sealer or stain that’s appropriate for freeze-thaw exposure. The bigger risk is often end grain and joints, so seal the landing and tread faces thoroughly and keep water from pooling on top surfaces by maintaining the required slope away from the house.
What concrete finish gives the most slip resistance for patio door steps ideas?
A broom finish is one of the most reliable DIY options because it creates texture without extra coatings. Keep the nosing minimal (about 1/2 inch or less) so water is less likely to collect on overhangs. If you use any coating, verify it’s meant for exterior, wet-use traction, because many “clear sealers” can reduce grip when they haze over time.
Is a handrail worth adding for only two or three steps?
It’s not always code-required, but it’s often worth it. If anyone in the home has mobility limitations, if the steps are heavily used, or if your entry is shaded and stays frosty, adding a single post with a grab rail can reduce falls. Also consider that lighting improves perceived safety, but it doesn’t replace a stable support during ice or carrying groceries.
How can I improve visibility of each tread edge at night?
Use lighting that highlights the tread edge, such as riser lights recessed or mortared into the riser face, or a low-voltage fixture near the landing. Combine this with a contrasting tread-edge band (dark stone or contrasting paver color) so the step boundary is visible even when headlights are blocked by the door frame.
What’s the safest way to handle the step nosing so it doesn’t become a slipping hazard?
Avoid deep nosings and water-catching overhangs on exterior steps. Keep the nosing projection small (roughly 1/2 inch or less) or choose square-edged treads. This reduces puddling and the “glossy lip” effect that often causes slips after rain or freeze-thaw cycles.
When do I need weep openings for patio door steps or a landing built against the house?
If the step assembly is enclosed on sides or built tightly against masonry where water can enter and stay trapped, include weep openings at the lowest points. The goal is to allow water to exit as well as drain inward, typically using openings at least around 1/2 inch wide. Trapped water leads to spalling and frost damage after repeated wet winters.
Can I install outdoor steps without air-entrained concrete if I live in a mild climate?
In mild climates, risk is lower, but you still benefit from exterior-rated materials. If you get any freeze-thaw, air-entrained concrete (and proper curing plus sealing) helps prevent cracking and surface scaling. If you’re unsure, choose air-entrained exterior concrete and seal once fully cured to better handle unexpected cold snaps and winter de-icing residue.
How do I choose between solar and wired riser lights?
Solar is easiest when you want zero wiring and you have adequate sun exposure near the landing. Wired options usually provide more consistent brightness during long cloudy periods. If the entry is shaded most of the day, plan on wired or low-voltage lighting, because solar units can dim significantly in winter.
What’s the most common DIY mistake that causes paver steps to fail early?
Skipping edge restraints and relying only on sand bedding. When restraints are missing or loosely installed, pavers creep, joint sand washes out, and gaps form. Install edging around the full perimeter before joint sand, then compact the surface carefully so the pavers lock together.
Do I need separate drainage planning for the first few feet near the patio door threshold?
Yes, because water management changes right at the door threshold. Make sure the landing and the first tread transition maintain the downward slope away from the house, and don’t create a low lip where runoff can pool. Also consider grading so water leaves the landing area without flowing back toward the door track or frame.
Next Article
How to Seal a Patio Door for Winter: Step-by-Step
Step-by-step how to seal sliding or screen patio doors for winter: adjust, add sweeps and weatherstripping, stop drafts,