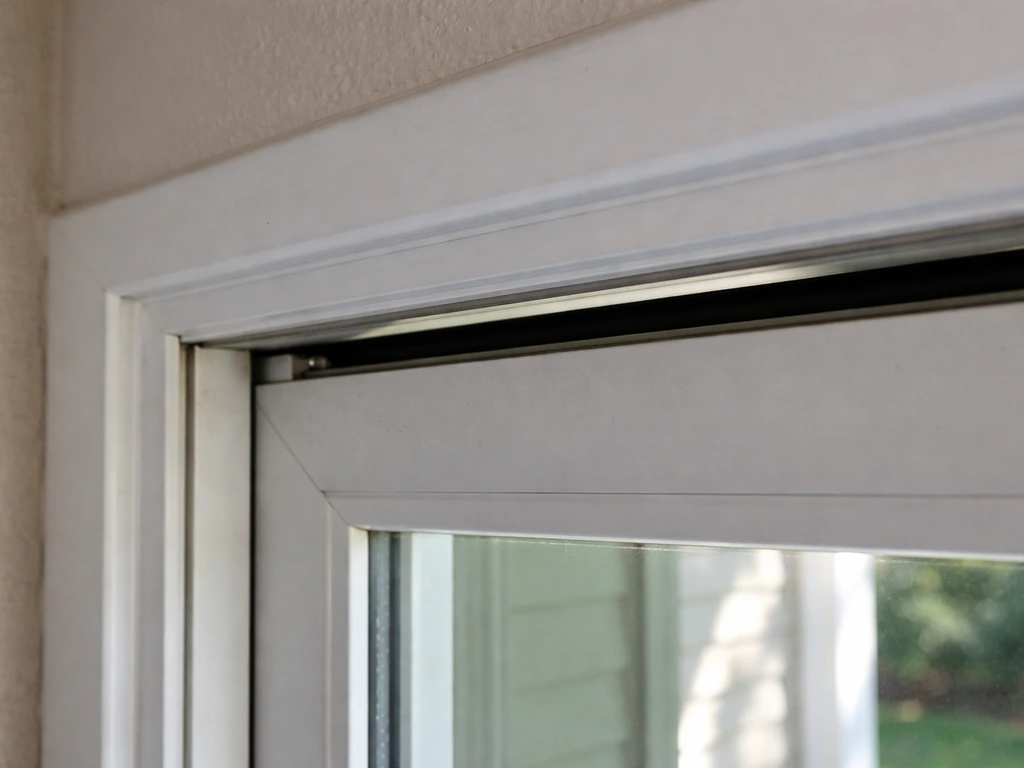
Most patio door problems come down to a handful of familiar culprits: dirty or worn rollers, debris-packed tracks, failed weatherstripping, misaligned frames, or a lock that's been stiff for so long nobody remembers when it started. Most sticking or binding causes are mechanical or dimensional, worn/collapsed rollers, debris or corrosion in the bottom track, bent or warped track, door/frame sag, swollen wood jambs from moisture, or thermal expansion changing clearances (see Sliding Door Maintenance: Keep Your Door Smooth, Treasure Coast Sliding Door Repair) Sliding Door Maintenance: Keep Your Door Smooth — Treasure Coast Sliding Door Repair. The good news is that the majority of these issues are well within DIY territory if you know what you're looking at and have an hour or two to spare. This guide walks you through every stage, from a fast first inspection to full roller replacement, track straightening, draft sealing, and screen repairs, with honest notes on when it's smarter to pick up the phone instead of the screwdriver.
Patio Door Problems: DIY Fixes, Inspections & When to Call

Who this guide is for
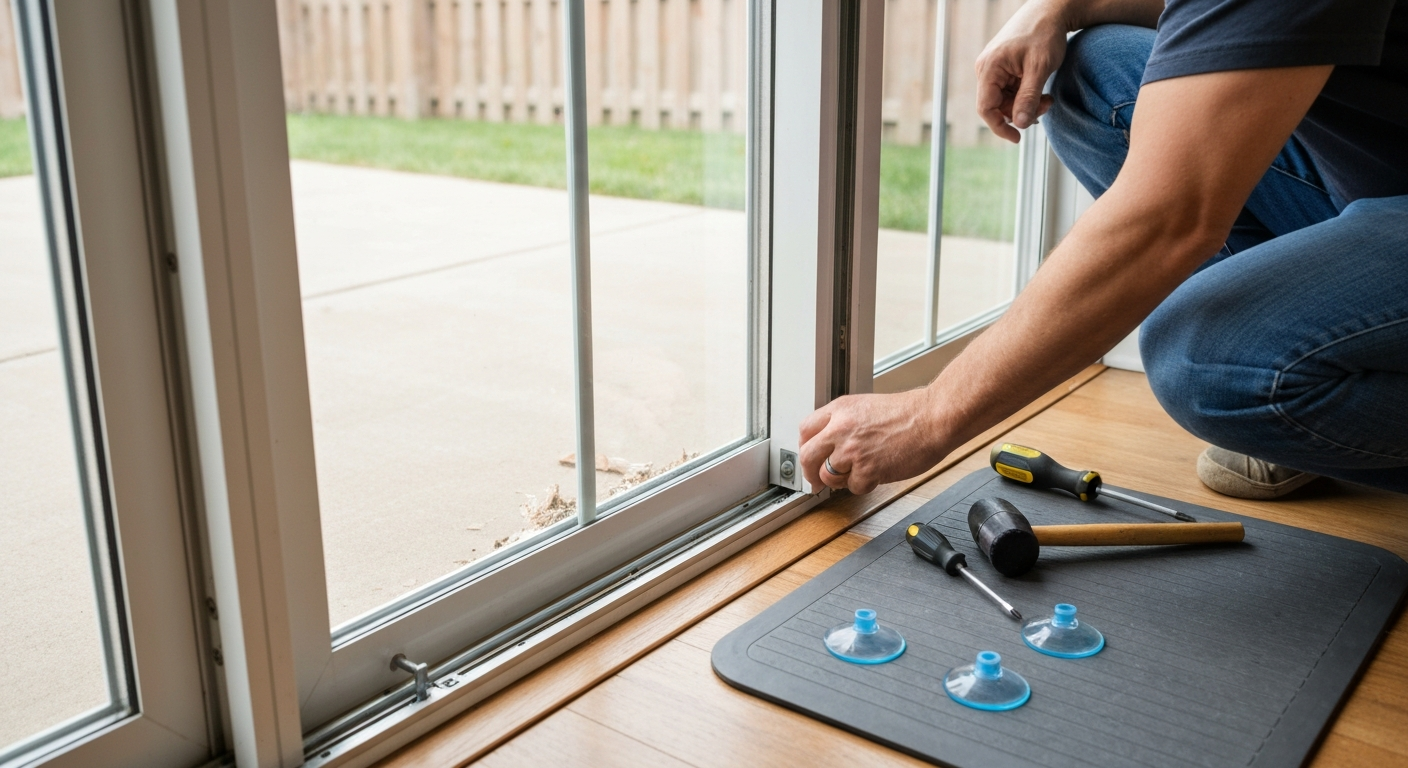
If you own a sliding glass patio door or a sliding screen door and something has gone wrong, you're in the right place. This covers aluminum-framed, UPVC-framed, and wood-framed sliding doors. You don't need to be a tradesperson. You do need to be comfortable with basic hand tools, willing to get on your hands and knees to inspect a track, and honest with yourself about whether a problem is a quick clean-and-lube or something bigger. Each section is organized by symptom so you can jump straight to your specific problem.
Quick inspection: is it stuck, drafty, noisy, or leaking?
Before you take anything apart, spend five minutes doing a fast first pass. This will tell you which category your problem falls into and save you from chasing the wrong fix.
- Slide the door open and closed one full cycle. Note where it binds, catches, or feels heavy. A door that sticks at the same spot every time usually has a track or debris problem at that location.
- Kneel down and look along the track and sill. Visible debris, corrosion, or a visibly bent rail section tells you most of what you need to know immediately.
- Grip the door frame and try lifting the panel slightly while sliding. If it moves more freely when lifted, the rollers are worn or the adjustment screws have dropped them too low.
- Locate the roller adjustment screws (usually visible on the bottom of the door stile, one at each end) and note whether they are accessible.
- Grab the lock handle and turn it through a full cycle. A lock that needs two hands or a shoulder-lean to engage is either misaligned or corroded internally.
- On a windy day, or with a lit incense stick held near the perimeter seal, check for airflow around the top, sides, and bottom of the closed door. Drafts will deflect the smoke immediately.
- From outside, use a garden hose on the top rail and watch the interior corner seals and sill for water entry. This pinpoints leaks faster than waiting for rain.
Complete inspection checklist
Once you have a rough idea of the problem category, go through this systematic checklist. Work top to bottom and outside to inside. Take photos as you go, especially of part numbers, roller housings, and any damage, because you'll need them when ordering replacement parts.
Track and sill
- Check for debris buildup, grit, pet hair, or hardened grease in the bottom track groove.
- Look for visible bends, kinks, or crushed sections in the aluminum rail. Run a finger along the groove profile to feel for deformation.
- Inspect the sill slope: water should drain outward, not pool inside. A flat or reverse-sloping sill can cause chronic water ingress.
- Locate the weep holes or weep channels in the sill. These small slots drain water out through the frame. Block them with a pencil; if they're already packed with debris, clear them now.
- Check the top guide channel. It should hold the door without binding; if it's cracked or the lip is bent, the door may jump the track.
Rollers
- Look through the adjustment-screw access holes for the roller wheel profile. A flat, chewed, or cracked wheel needs replacement, not lubrication.
- Wobble the door sideways gently: any radial or axial play suggests a failed bearing.
- Note whether the housing itself is cracked or deformed at the mounting points.
Weatherstripping and seals
- Run your fingers along the full perimeter pile or foam seal. Compressed, torn, or missing sections are the most common source of drafts.
- Check the door's interlock seals where the sliding panel meets the stationary panel. This vertical seal compresses when the door closes; if it's hard or cracked, it no longer seals.
- Inspect the head seal at the top of the frame for separation or compression damage. A gap at the top is a common UPVC-specific leak point, and persistent leaks at the head often involve failed header flashing that requires professional attention.
- Look at the bottom of the door where it meets the threshold. Any visible daylight indicates a gap issue.
Frame and threshold
- Check the frame corners for separation or cracking, particularly on UPVC doors where corner welds can fail.
- Inspect the threshold for wear, cracks, or missing sections. A worn threshold lets cold air and water in under the door.
- On wood-framed doors, look for swelling or staining around the bottom rail and stiles, which indicates moisture intrusion.
Lock, handle, and hardware
- Test the lock cam or hook bolt: does it engage the strike plate cleanly without force?
- Check the strike plate position relative to the cam. A door that has dropped on its rollers will misalign the lock.
- Inspect the handle screw covers and mounting screws for looseness.
- On multi-point locking UPVC doors, operate every latch point and confirm each one engages.
Screen door
- Slide the screen door and check for dragging, jumping, or lateral wobble.
- Inspect mesh for tears, pet damage, or pulled-out spline.
- Check the screen rollers or slide pads at the top and bottom.
- Confirm the screen frame is square; a bowed frame won't seal or slide properly.
Tools and parts you'll need
Gather everything before you start. There is nothing more frustrating than having a 60-pound glass panel leaning against your wall while you hunt for the right screwdriver.
General tools for sliding door repair
- Phillips and flat-head screwdrivers (multiple sizes)
- Allen/hex key set (metric and imperial)
- Needle-nose pliers
- Putty knife or flat pry bar (wrapped in tape to protect the frame)
- Tape measure and digital calipers (essential for measuring replacement rollers accurately)
- Vacuum with crevice attachment and a stiff-bristle brush
- Mild dish soap and warm water in a spray bottle
- Silicone-based spray lubricant or PTFE dry lubricant (not WD-40)
- Glass suction cups (one pair minimum; two pairs for heavier panels)
- Safety glasses and work gloves
- A second person for any panel removal
Common replacement parts to have on hand
- Replacement roller assemblies matched to your door model (measure before ordering; see the roller section below)
- Replacement weatherstripping or pile seal in the correct profile and pile height
- Replacement threshold insert or full threshold
- New lock cam, strike plate, or handle set if hardware is corroded or broken
- Screen spline (0.140" for standard mesh, 0.160" for thicker pet-resistant mesh) and a spline roller tool
- Replacement screen mesh (fiberglass, aluminum, or pet-resistant polyester depending on need)
UPVC-specific items
- UPVC-compatible silicone sealant (low-modulus, neutral cure)
- Plastic/nylon pry tools to avoid scratching the UPVC frame
- Replacement UPVC corner-weld repair inserts or frame packers/shims
- Multi-point locking mechanism or gearbox if the lock mechanism is the failure point
- Glazing gasket or wedge gasket if resealing the glass unit in the frame
Safety, prep, and how to support the door before working
Sliding glass panels are heavier than they look. A standard residential sliding glass panel typically weighs between 50 and 100 pounds or more depending on the glass size and profile. Tempered glass can shatter if it impacts a corner or edge at an angle. Never attempt to remove, tip, or reposition a sliding panel alone. Two people is a minimum; three is better for large or heavy panels.
Before you remove the panel, clear a flat, padded area to lay it down, such as two sawhorses with a moving blanket draped over them. Make sure the area is free of foot traffic. Wear safety glasses throughout. If the glass has any existing cracks or chips, do not attempt a DIY removal: stressed tempered glass can shatter unpredictably during panel movement. Call a professional in that case.
To support the door during roller adjustment without full removal: close the door, engage the lock, and place a wooden wedge or a folded rubber mat under the door stile at the bottom to prevent any accidental movement while you're working near the track. If you do need to remove the panel, follow the procedure in the roller section below and keep the glass suction cups attached to the panel face until it is fully laid flat.
Symptom guide: quick troubleshooting map
| Symptom | Most Likely Cause | First Action |
|---|---|---|
| Door sticks or is very hard to slide | Worn/collapsed rollers or debris-packed track | Clean track; try roller adjustment screws |
| Door binds in one spot only | Bent track section or debris at that location | Inspect track at that point; remove debris or straighten |
| Door drops and lock won't engage | Rollers worn down, lowering the panel | Raise panel with roller adjustment screws; replace if worn through |
| Drafts around closed door | Failed weatherstripping, pile seal, or gap at threshold | Inspect and replace perimeter seal; check threshold |
| Water comes in at the bottom | Blocked weep holes, worn threshold seal, or gap under door | Clear weep holes; replace threshold insert or bottom seal |
| Water comes in at the top | Failed head seal, blocked drainage, or bad header flashing | Inspect and reseal head; check UPVC frame drainage; professional if flashing is involved |
| Door makes grinding or squealing noise | Dry or corroded rollers; debris in track | Clean and lubricate; replace rollers if noise persists |
| Door jumps or comes off the track | Worn or broken top guide, bent track lip, or dropped rollers | Inspect top channel and bottom track; adjust or replace rollers |
| Lock stiff or won't engage | Door has dropped misaligning the cam, or corroded lock mechanism | Raise door with roller adjusters; lubricate or replace lock |
| Screen door drags or jumps track | Worn screen rollers, broken tension springs, or damaged track lip | Replace screen rollers; check and straighten track lip |
| Visible gap at top of door | Frame sag, worn head seal, or UPVC frame distortion | Check and replace head seal; repack frame if UPVC |
| Condensation or fogging inside glass | Failed IGU (insulated glass unit) seal | Glass unit replacement required; call a glazier |
Fixing a stuck or hard-to-slide patio door
A door that slides hard is almost always a track or roller problem. Work through these steps in order before ordering any parts, because a thorough clean and adjustment fixes the majority of cases.
Step 1: clean the track completely
- Use the vacuum crevice tool to remove loose debris from the full length of the track groove on both the sill and the top channel.
- Scrub the groove with a stiff brush dipped in mild soap and warm water. Pay particular attention to corners and the ends of the track where grit accumulates.
- Wipe out the track with a damp cloth. Repeat until no visible debris remains.
- Dry the track fully before lubricating. Applying lubricant over wet debris just seals the grit in place.
Step 2: lubricate correctly
Apply a light coat of silicone-based spray or PTFE dry lubricant to the clean track surface and to the top guide channel. Do not use penetrating oils like WD-40 as your primary lubricant. They evaporate quickly, leave a residue that attracts fresh grime, and can swell or embrittle plastic and nylon components on the rollers. Spray, let it sit for a minute, then wipe off the excess so you're not tracking lubricant into the house. Slide the door through several full cycles to work the lubricant in.
Step 3: adjust the roller height
On the bottom of the door stile at each end, you'll find one or two Phillips or hex-head screws. These are the roller adjustment screws. Turning them clockwise raises the door panel (which lowers the roller wheel further into the track); turning them counterclockwise lowers the door. The goal is a door that glides smoothly with 3-6 mm of clearance from the track surface and sits level across its full width.
- Open the door to a comfortable working position.
- Insert your screwdriver into the adjustment screw access hole on one stile.
- Turn clockwise in half-turn increments and test slide after each adjustment.
- Adjust both ends evenly to keep the door level. An uneven door will bind at one corner and gap at the other.
- Once the door slides freely, test the lock. If it engages cleanly, you're done. If not, raise or lower the door slightly until the cam or hook bolt lines up with the strike plate.
Step 4: address track damage
If the track has a visible kink or a localized bent section, you can often straighten minor deformation in place. Place a wood block against the damaged area and tap gently with a rubber mallet to reshape the groove profile. File away any burrs with a flat metal file. Do not over-correct by shimming the track up more than necessary, as this causes its own binding problems. If the track groove is crushed or the profile is significantly distorted over more than a few inches, replace that section of track rather than trying to reshape it.
Temporary fixes when you can't repair immediately
If you're waiting on parts and the door is barely functional, a thorough track clean and a light wax application (a candle rubbed along the clean track) will reduce friction enough to get through a few days. This is a stopgap only. Do not leave a door in this state long-term: worn rollers that are forced will damage the track permanently, turning a straightforward roller swap into a full track replacement job.
Noisy or broken rollers: diagnose, remove, and replace
Rollers are the most commonly replaced component on any sliding door. The job is manageable for one capable person on lighter doors, but you genuinely need a second person for safety on any standard residential glass panel. Budget around two to three hours for your first roller replacement including the clean-up.
Signs that cleaning won't fix it: replace the rollers
Not every stiff door needs new rollers. But if you see any of the following, clean and lubricate won't solve the problem and you're wasting time trying:
- Flat spots or a chewed tread on the wheel (the wheel no longer rolls, it slides)
- Visible crack or split in the nylon wheel
- Radial wobble: the wheel rocks side to side on the axle
- A seized bearing that won't rotate even when the door is off the track
- Broken or cracked roller housing/carrier that no longer holds the wheel at the correct height
- The door is riding directly on the frame bottom with no roller engagement at all
Measure before you order anything
Roller assemblies are not universal. Andersen, Pella, JELD-WEN, Milgard, and other major brands use proprietary housings that often don't interchange even across generations of the same product line. Ordering the wrong roller is the most common mistake in this repair. Before you order, measure and photograph the following on the existing roller (ideally from a roller you've already removed): To order replacement roller assemblies you must measure and record at minimum: wheel/roller diameter, wheel thickness/profile, overall carriage/housing width and height, axle/slot spacing and mounting end‑style, and any visible part numbers or OEM markings, mismatched housing dimensions or end‑styles are the most common compatibility failures measure wheel diameter, wheel thickness/profile, overall housing width and height, axle/slot spacing, mounting end‑style, and note any visible part numbers or OEM markings.
- Wheel diameter (e.g., 1", 1-1/4", 1-1/2")
- Wheel thickness or tread width
- Overall housing/carriage width and height
- Axle or slot spacing and the mounting end-style (flat plate, screw-mount, clip-in)
- Any OEM part numbers or markings stamped on the housing
- The panel's approximate weight if you know it, and the door model if you have the original paperwork
If OEM parts are discontinued, specialist sliding door hardware suppliers offer a photo-and-measure identification service that can match aftermarket assemblies to your existing housing dimensions. Expect minor tolerance differences with aftermarket parts, which may slightly limit adjustability range.
How to remove the sliding panel
- Unlock the door and open it to the midpoint of its travel.
- Turn both roller adjustment screws counterclockwise to retract the rollers and lower the door as far as the adjustment allows. This gives you clearance to lift the panel out.
- Attach glass suction cups to the face of the panel, one at each side at a comfortable grip height.
- With your helper in position on the opposite side, tilt the top of the door panel toward you a few inches until the top edge clears the head channel.
- Lift the panel straight up until the bottom rail clears the bottom track.
- Carry the panel to your prepared flat surface and lay it down carefully, glass face up or leaning against a padded wall. Keep suction cups on until it is fully rested and stable.
Removing and inspecting the old rollers
- With the panel on a flat surface, look at the bottom rail. The roller housings are typically accessed by removing one or two small Phillips screws that hold the housing into the rail pocket.
- Slide or lever the old roller assembly out of the pocket. On some doors the housing slides out the end of the rail; on others it tilts out of a slot.
- Inspect the wheel tread, bearing, and housing for all the failure signs listed above.
- Take measurements and photos now before you discard the old assembly.
- Compare the new roller assembly to the old one for housing width, end-style, and axle position before installation.
Installing the new rollers and rehinging the door
- Slide or clip the new roller assembly into the rail pocket and secure its mounting screws. Do not overtighten; the housing should sit flush without gaps.
- With adjustment screws, raise or lower the rollers to their midpoint before rehinging so you have equal room to adjust up or down once the door is back on the track.
- With your helper, lift the panel, tilt the top into the head channel first, then lower the bottom rollers onto the track.
- Slide the door through its full range and then adjust the roller height at both ends until the door moves freely and sits level.
- Test the lock. Adjust the door height until the lock engages and disengages without force.
- Apply a light coat of silicone lubricant to the track and rollers and cycle the door several times.
Roller types: what's the difference?
| Roller Type | Wheel Material | Best For | Notes |
|---|---|---|---|
| Single-wheel standard | Nylon | Most residential aluminum frames | Most common; widest parts availability |
| Tandem (dual-wheel) | Nylon or steel | Heavy panels, wide doors | Smoother load distribution; wider housing |
| Steel-wheel | Steel | Commercial or heavy-duty residential | Durable but noisier; check track profile compatibility |
| Stainless bearing | Nylon wheel, stainless bearing | Coastal/humid climates | Corrosion resistant; worth the premium near salt air |
| UPVC-specific | Nylon, wider housing | UPVC frames | Often clip-in style; do not substitute aluminum-frame rollers |
Drafts, gaps, and weatherstripping
A drafty patio door is usually a worn or compressed pile seal, a gap at the threshold, or a failed interlock seal between the sliding and fixed panels. If your patio door is drafty, follow the steps below for locating gaps and replacing worn weatherstripping. These are among the easiest and cheapest repairs on the list, and they make an immediate difference to comfort and energy bills.
To find exactly where air is entering, close the door on a windy day and hold a lit incense stick or a thin strip of tissue paper slowly around the full perimeter. Any deflection shows you the gap. For a more systematic approach, a simple box fan placed in a nearby window blowing outward will slightly pressurize the room and make air infiltration points easier to feel by hand.
Replace pile weatherstripping by pulling the old strip out of its kerf groove, noting the pile height and backing width, buying a matching replacement roll, and pressing the new strip into the groove from one end to the other. Foam tape seals are pressed into place after cleaning the surface with isopropyl alcohol. Replacing a full perimeter seal on one door typically takes about 30 to 45 minutes and costs under $20 in materials. If you're dealing with a persistent gap at the bottom threshold, that repair is covered in detail in the guide on how to fill the gap under a patio door. A visible gap at the top of the frame has its own specific causes related to frame settlement or UPVC distortion, which are covered in the guide on patio door gaps at the top. For detailed causes and step-by-step fixes, see the guide on patio door gap at top.
Water leaks: sill, weep holes, and head flashing
Water getting into the house through a patio door almost always enters from one of three places: the sill (via blocked weep holes or a failed threshold seal), the perimeter seal on the sides or top, or the header above the door frame (which is a flashing and building-envelope issue, not a door hardware issue).
Clear blocked weep holes in the sill with a thin piece of wire, a pipe cleaner, or a can of compressed air. They should be cleaned at least once a year, especially if you're in a region with leaves, cottonwood, or sand. Do not paint over or caulk weep holes. They are there deliberately to drain water out of the sill frame, and sealing them creates the exact water-damage problem you're trying to prevent.
If water is coming in at the top of the door frame, you need to identify whether the source is a failed head seal in the door itself or failed flashing above the frame in the wall. Run a hose on the top of the exterior frame and watch where water first appears inside. If water appears at the very top of the interior door frame immediately when you wet the head, a reseal of the top weatherstrip or head gasket is the likely fix. If water appears higher up on the wall or comes through the wall-to-frame junction, the flashing is compromised and that is a professional repair. For UPVC doors specifically, leaks at the top of the frame are often related to drainage paths and seal failures in the frame profile itself, a topic covered in detail in the guide on UPVC patio doors leaking at the top.
Lock and handle problems
The most common lock problem is a door that has dropped on its rollers and shifted the cam bolt out of alignment with the strike plate. Before replacing any hardware, raise the door with the roller adjustment screws as described above and test the lock again. This fixes the problem about half the time.
If the lock still doesn't engage after the door is at the correct height, the strike plate may need to be repositioned. Loosen its mounting screws, move it to align with the cam bolt path, and retighten. For a stiff or corroded lock mechanism, a spray of dry PTFE lubricant into the lock cylinder and operating mechanism usually frees it up. Operate the handle through 20 or 30 cycles after lubricating to work the product into the mechanism.
A lock that is cracked, has a broken cam lug, or simply won't hold the door closed against reasonable pressure needs to be replaced. For single-point hook locks on aluminum doors, replacements are widely available by measurement. UPVC multi-point gearboxes are brand and series specific: you'll need the brand, the backset measurement, the overall gearbox height, and the spindle size before ordering.
Screen door repairs
Screen door issues break down into two categories: the door itself sliding poorly, and the mesh being damaged.
A screen that drags or jumps the track usually has worn bottom rollers or broken tension springs on the roller assembly. Screen rollers are cheap (typically $5-15 for a pair) and replace in minutes. Remove the screen frame from the track, pop out the old roller assembly from the corner pocket (usually with a flat screwdriver), and press or clip the new one in. Adjust the height so the screen rolls within the track without dragging.
To replace damaged mesh, lay the screen frame flat. Use a flat screwdriver or spline puller to pry the old rubber spline out of the groove around the perimeter. Pull out the old mesh. Cut your new mesh at least 2 inches larger than the frame on all sides. Lay it over the frame, hold it taut, and use a spline roller tool to press new spline (and the mesh with it) into the groove, starting at one corner and working around. Use 0.140-inch spline for standard fiberglass mesh and 0.160-inch for heavier pet-resistant mesh like Phifer PetScreen. Trim the excess mesh flush with a utility knife once the spline is fully seated.
| Mesh Type | Material | Best Use | Spline Size |
|---|---|---|---|
| Standard | Vinyl-coated fiberglass (18×14 weave) | General residential use | 0.140" |
| Aluminum | Woven aluminum wire | High-traffic doors; more durable | 0.140" |
| Pet-resistant | Heavy-gauge polyester/vinyl (e.g., Phifer PetScreen) | Homes with dogs or cats | 0.160" |
| Solar/privacy | Dense-weave polyester | Sun control or reduced visibility from outside | 0.160" |
Seasonal maintenance schedule
A consistent maintenance routine prevents the majority of patio door problems before they develop. Most of this takes less than 20 minutes twice a year.
| Task | Frequency | Time Required |
|---|---|---|
| Clean and vacuum track groove | Every 3 months (monthly if near sand/trees) | 5 minutes |
| Lubricate track and rollers with silicone or PTFE spray | Every 6 months | 5 minutes |
| Inspect and clear weep holes | Every 6 months (spring and fall) | 5 minutes |
| Check and replace weatherstripping | Annually (pre-winter) | 30-45 minutes |
| Test and lubricate lock mechanism | Annually | 5 minutes |
| Check roller adjustment and door height | Annually or when lock starts to bind | 10 minutes |
| Inspect frame seals and perimeter caulk (UPVC/aluminum) | Annually | 15 minutes |
| Inspect screen mesh and screen rollers | Annually (pre-summer) | 10 minutes |
When to call a professional
Most of what's covered above is genuinely DIY-friendly. But there are specific situations where calling a professional is the right call, either for safety, because the scope has grown beyond a repair, or because the repair touches the building structure rather than just the door hardware.
- The glass panel has existing cracks or chips: do not attempt removal yourself. Stressed tempered glass can shatter during handling.
- Water is entering through the wall-to-frame junction or through the header: this is a flashing and building-envelope repair, not a door repair.
- The door frame itself is out of square due to foundation movement or structural settlement: no amount of roller adjustment will make a door in a racked frame function correctly.
- The IGU (insulated glass unit) is fogged or has failed: glass unit replacement requires a glazier.
- The UPVC frame has cracked corner welds or significant frame distortion: specialist UPVC repair is needed.
- The door is more than 15-20 years old and multiple systems are failing simultaneously: at this point, replacement typically costs less over five years than ongoing repair.
When you do call a professional, use the information from this guide to describe what you've already checked and ruled out. A contractor who hears 'I've cleaned the track, adjusted the rollers, the door is level, and the lock cam still doesn't reach the strike plate' will diagnose the job faster, quote more accurately, and respect that you know what you're talking about.
FAQ
What is the fastest, repeatable checklist to diagnose common patio door problems?
Start with a short diagnostic run-through: (1) visually inspect and clean the track and sill, removing debris; (2) check visible gaps and weatherstrip condition around head, jambs and sill; (3) try lifting the sliding panel slightly to test roller function; (4) locate and test roller‑adjustment screws (usually at the bottom or edge); (5) operate and test the lock and multipoint latches; (6) run a water/draft test (garden hose while someone watches inside, or smoke/fan method) to locate leaks or air paths. Record what you find before starting repairs.
What tools and parts should I have on hand before attempting most patio door repairs?
Essential tools: tape measure (or digital calipers), Phillips and flat screwdrivers, Allen/hex keys, needle‑nose pliers, soft‑bristle brush and vacuum, putty knife/pry tool, silicone/PTFE spray lubricant, rubber mallet and wood block, spline roller (for screens), utility knife, suction lifter or two strong helpers. Common parts: replacement roller assemblies (housing + wheel), replacement screws, weatherstripping, threshold/threshold seal, screen spline and mesh, silicone sealant, and shims. For accurate roller ordering, measure wheel diameter, thickness/profile, housing width/height, axle spacing and any OEM part numbers.
How can I tell if my rollers need cleaning/lubrication or full replacement?
Clean/lubricate if the door is sticky but wheels spin and show no damage. Signs you can fix: dirt buildup, light wobble that goes away after cleaning, or dry nylon wheels. Replace the full assembly if you see flat/chewed tread, axial/radial play (wobble), cracked or split nylon, seized bearings, broken carrier or deformation—these indicate mechanical failure and will recur if not replaced.
What’s the safe way to remove a sliding patio door panel to access rollers?
Follow manufacturer instructions and always use at least two people or mechanical lifting aids and glass suction cups. Typical steps: unlock and open the panel, retract roller‑adjustment screws to lower rollers, tilt the top inward and lift the panel up until the bottom rail clears the track, then pull the bottom out and set it down vertically on a padded surface. Never tip or drop a panel alone—panels are heavy and glass can break.
How do I measure rollers so I order the correct replacement parts?
Record: wheel diameter, wheel thickness/profile, overall carriage/housing width and height, axle or slot spacing, mounting end style, and any visible part numbers or OEM markings. Some suppliers also ask for panel weight or door model. Take clear close‑up photos of the carriage and mounting ends for supplier ID—mismatched housing dimensions and end‑styles are the most common compatibility failures.
Should I buy OEM rollers or aftermarket replacements?
OEM is best when available because many brands use non‑interchangeable parts. If OEM parts are unavailable, use a specialist replacement supplier who offers photo/measurement ID. Aftermarket can work but expect tolerance issues—measure precisely and be prepared for minor fitment adjustments. If in doubt, consult a supplier with photos and measurements before ordering.
Patio Door Gap at Top: Fix It With Easy Step by Step Checks
Fix a patio door gap at top fast: diagnose drafts, misaligned rollers, track and seal issues, then adjust and replace.