Most patio door leaks come down to one of four culprits: a worn or missing door sweep, compressed-out weatherstripping, blocked weep holes in the sill track, or cracked caulk around the frame. In most cases you can find the exact entry point in under 15 minutes with a garden hose and a flashlight, then fix it the same afternoon with tools you already own.
Patio Door Leaks When It Rains: DIY Fixes Today

Jamie Archer
28 Apr 2026
Quick water-leak diagnosis: where is the water actually coming in?
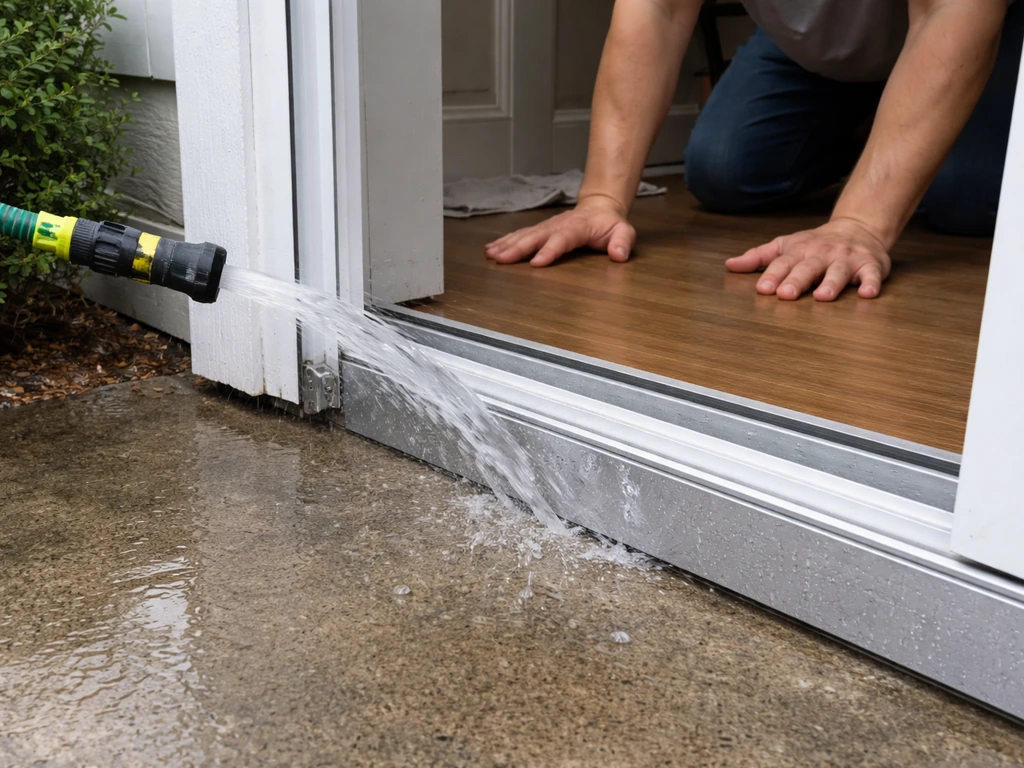
Before you buy a single tube of caulk, you need to know exactly where the water is entering. Guessing wastes time and money. Grab a garden hose and a helper, and do a controlled test: have one person stay inside near the door while the other slowly runs water over the door from bottom to top, section by section. Start at the sill, then move up the sides, then across the top. The moment your helper sees water appear inside, you've found the zone.
The most common entry points on a sliding patio door are the sill/track area (often blocked weep holes or a failed door sweep), the vertical sides of the frame where weatherstripping has worn flat, and the top or corners of the frame where exterior caulk has cracked or separated. Less obvious but equally important: a door that sags or sits slightly out of square won't press evenly against its weatherstripping, leaving a gap that rain drives straight through.
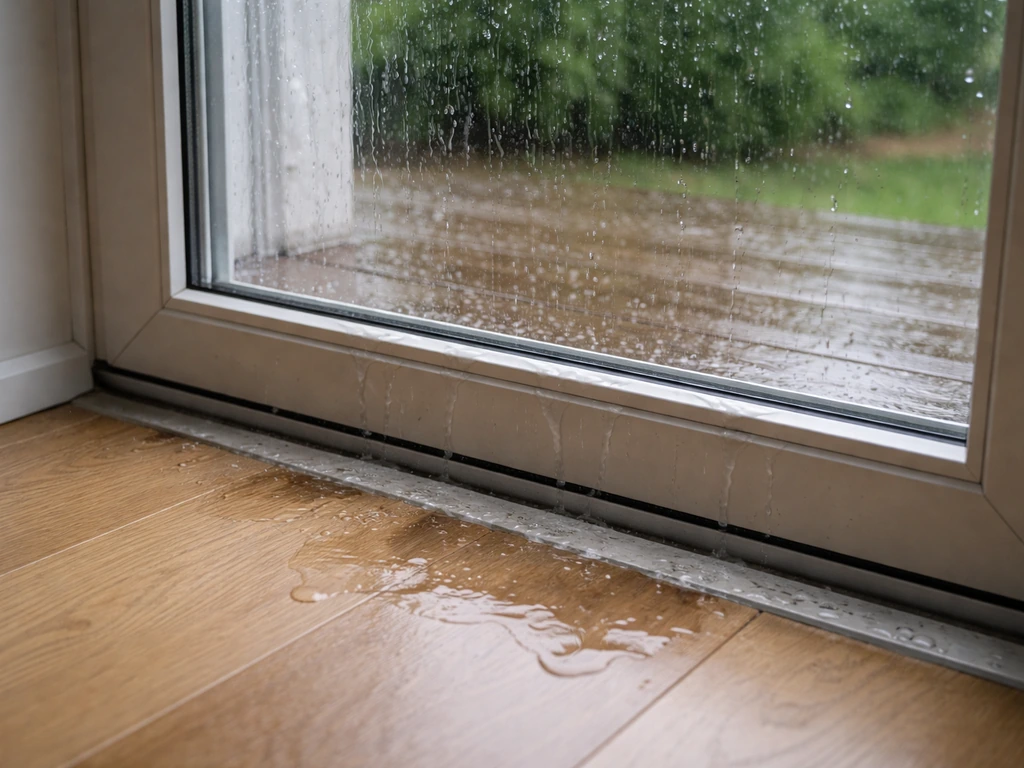
- Water on the floor near the sill track: suspect blocked weep holes, a failed sill sweep, or a pooling drainage problem
- Water running down the interior side of the glass or frame: suspect cracked exterior caulk at the corners or top
- Water seeping in around the door's edges while it's closed: suspect flat or torn weatherstripping or a door that isn't sitting plumb
- Water only during wind-driven rain, not during calm rain: suspect weatherstripping compression or a latch/lock that isn't pulling the door tight
- Water appearing high up on the wall above the door: suspect failed flashing at the header, which is a pro-level fix
Mark the problem zones with painter's tape so you don't forget them once you step back inside. A quick phone video of where the water appears is also worth taking before you start repairs, especially if you eventually need to show a contractor.
Common causes on sliding patio doors: sag, weatherstripping, seals, and caulk
Sliding patio doors deal with a specific set of leak problems that French patio doors don't, mostly because they ride on rollers and move along a track. Over time, those rollers wear down or the door frame flexes slightly, and the door ends up sitting lower than it should. When that happens, the door no longer presses firmly against the weatherstripping pile along its edges, and you get a gap that rain blows right through. This is one of the most underdiagnosed leak causes because the door looks closed and locked from the inside.
Beyond sag, worn weatherstripping is the single most common reason patio doors leak. If the gap is caused by a worn or failed patio door bug seal, replacing the seal can stop drafts and water from sneaking in at the bottom and along the edges patio doors leak. The fuzzy pile strips on the sides of the door frame compress permanently after years of use. Once they're flat, they no longer create a seal. Similarly, the door sweep along the bottom of the moving panel wears through or curls up, letting water pool on the sill and wick inside. Exterior caulk at the frame-to-wall joint cracks as the house moves seasonally, opening channels for water to travel behind the frame. Any one of these problems will cause a leak; often it's two or three of them working together. patio door fix.
Check the basics: tracks, weep holes, and door alignment
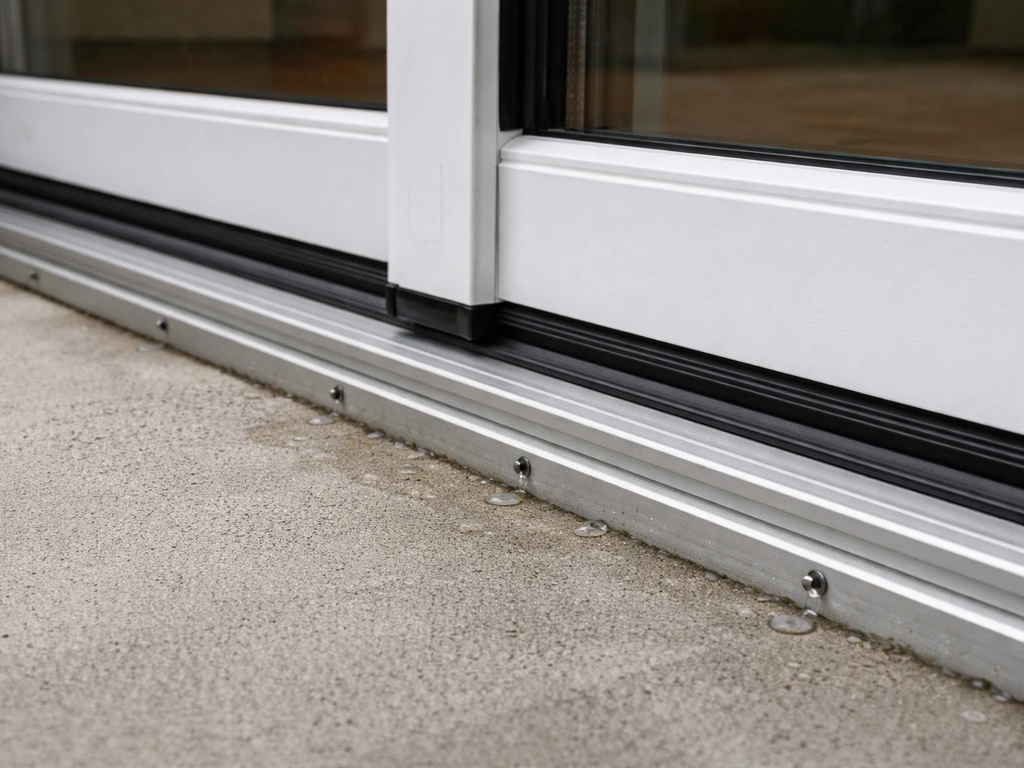
Start with the sill track. Slide the door open and look at the track channel. If you see debris, leaves, dirt, or standing water, that's your first priority. A clogged sill track prevents weep holes from draining, which means rainwater backs up and eventually makes its way inside. Clean the track thoroughly with a stiff brush and vacuum out the debris. Then find the weep holes, which are small slots or holes on the exterior face of the sill track, usually at the ends. Push a pipe cleaner or small drain brush into each one and clear any blockage. After clearing them, pour a cup of water into the sill channel and watch to confirm it drains out through the weep holes rather than sitting and pooling.
Next, check door alignment. With the door closed and latched, run your hand slowly along all four edges where the door meets the frame. You're feeling for drafts or gaps. Pay particular attention to the bottom corners and the latch side. A door that's slightly out of square will have a tight contact on one diagonal and a gap on the other. Also check the screen door if you have one. Screen frames don't seal against water, but a screen door sitting in the wrong position can deflect water toward gaps in the main door's weatherstripping rather than away from them.
Adjust and tune the door: rollers, height, and latch alignment
On a sliding patio door, roller adjustment is the key tuning step. Look along the bottom edge of the door panel for small plugs covering adjustment screws, usually at the corners. Remove the plugs with a flathead screwdriver and you'll find Phillips screws that raise or lower the roller carriages. Turning the screw clockwise typically raises that corner of the door; counterclockwise lowers it. The goal is to lift the door until it runs smoothly in the track and the top edge is parallel to the top of the door frame, with even contact along the weatherstripping on both the latch side and the hinge side. Make small adjustments, a half-turn at a time, and check the gap after each one.
If the adjustment screws spin freely without changing the door height, the rollers themselves are worn out and need to be replaced. This is a moderately easy DIY job: remove the door panel by tilting it out of the frame (lift up, then swing the bottom out), swap the roller cartridges for matching replacements, and rehang the door. Lowe's guidance notes that when roller adjustments don't solve the problem, the rollers themselves need to be inspected and replaced, not just adjusted further.
Don't overlook the latch and lock alignment. When you flip the latch, the door should pull firmly inward against the weatherstripping. If it doesn't, the strike plate is either set too far out or the door hasn't been raised enough by the rollers to engage correctly. Some manufacturers, including Andersen, have specific latch hardware that also adjusts independently of the rollers, so check your door's documentation if standard roller adjustment doesn't get the door pulling in tight. A door that closes but doesn't compress the weatherstripping will leak even if the weatherstripping itself is brand new.
Weatherproof repairs: sweeps, weatherstripping, caulk, and seals
Replacing the door sweep
The door sweep runs along the bottom of the sliding panel and is the first line of defense against water on the sill. If it's torn, curled, stiff, or missing chunks, replace it. Most sweeps for sliding patio doors are either a fin-style vinyl sweep or a pile sweep similar to the weatherstripping on the sides. Measure the door width, bring the old sweep to the hardware store to match the profile, and slide or screw the new one into the door's bottom channel. This is a 20-minute job and makes a noticeable difference immediately.
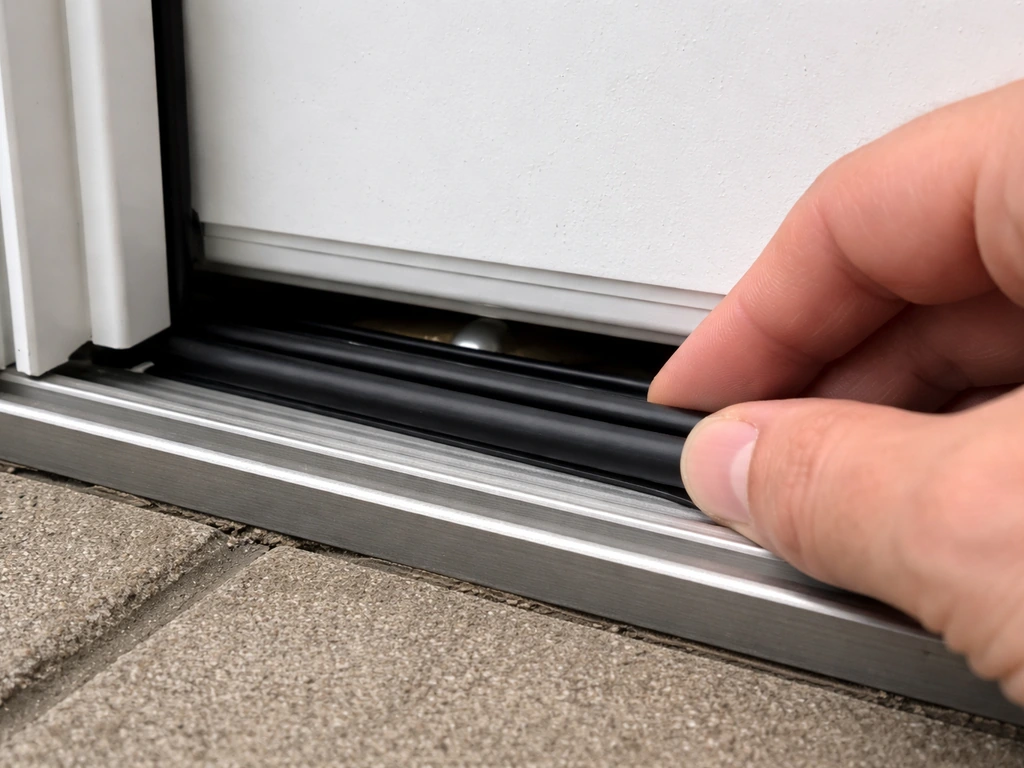
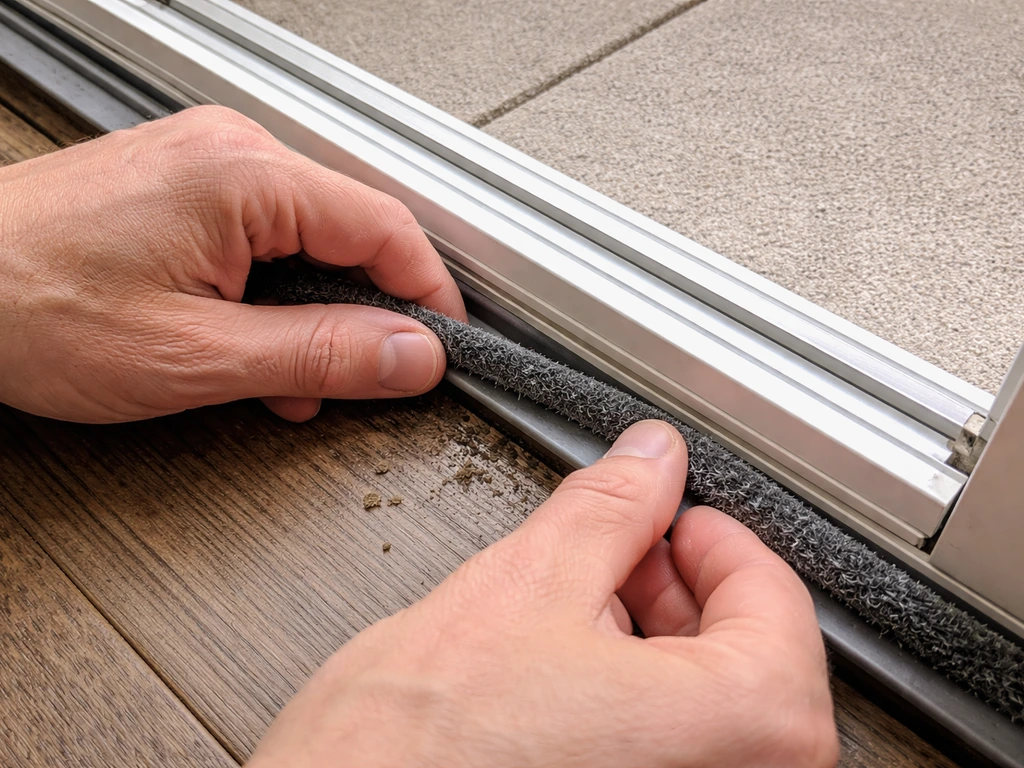
Replacing weatherstripping
Patio door weatherstripping is typically a pile (fuzzy) strip that runs in a groove along the stationary door frame. When it's compressed flat or has gaps, replace it entirely rather than trying to fluff it back up. Pull the old pile out of the groove, clean out any remaining adhesive or debris, and press the new pile strip firmly into the channel. Make sure you have continuous contact all the way to the corners with no gaps. If your door uses a foam or vinyl gasket-style weatherstripping instead of pile, the same approach applies: pull the old out, press the new in, check corners.
Re-caulking the frame
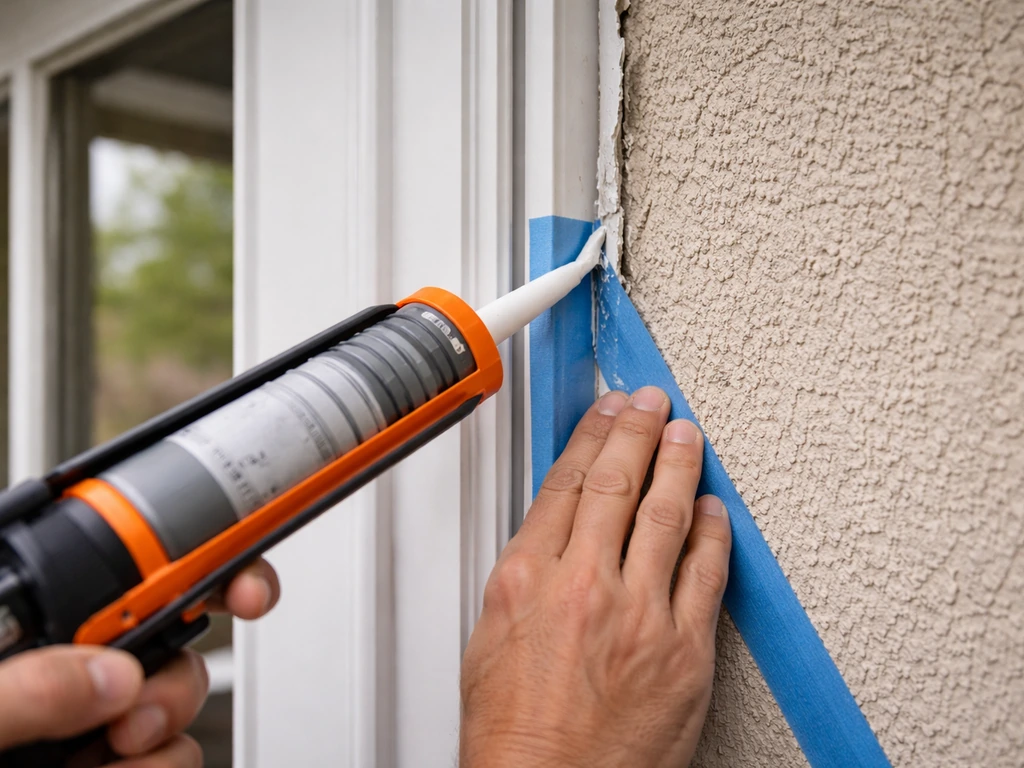
Caulk at the frame-to-wall joint on the exterior is what keeps water from working its way behind the door frame and into the wall cavity. If you see cracks, gaps, or areas where the old caulk has separated from either the frame or the wall, remove all of it before applying new. Use a utility knife or caulk removal tool to cut out the old material, then clean the surface with a dry rag. Apply a paintable exterior silicone or polyurethane caulk (not interior latex) in a single steady bead. Tool it smooth with a wet finger. Don't rely on caulk as the only water barrier: as JLC points out, well-built exterior assemblies use drainage and flashing as the primary defense, with caulk as a secondary seal. That means if your flashing is bad, new caulk alone won't solve the problem long-term.
One important note: eHow research confirms that a door that moves or wobbles due to loose components will cause caulk joints to crack open repeatedly. Fix the door's alignment and roller issues before you re-caulk, or you'll be back doing it again next season.
What to use where: a quick material comparison
| Repair | Best Material | Where to Apply | Typical DIY Cost |
|---|---|---|---|
| Door sweep | Vinyl fin or pile sweep | Bottom of sliding panel | $10–$25 |
| Side/top weatherstripping | Pile or foam/vinyl gasket | Stationary frame channels | $15–$40 |
| Exterior frame caulk | Silicone or polyurethane exterior sealant | Frame-to-wall joint, exterior only | $8–$18 per tube |
| Interior glass seal | Clear silicone | Glass-to-frame edge if glass seal is cracked | $6–$12 per tube |
| Weep hole clearing | Pipe cleaner or drain brush | Sill track weep holes | Under $5 |
Verify the fix with a controlled water test
Before you call the job done, test it. Wait for caulk and sealants to cure fully (at least 24 hours for most exterior silicones), then run the same hose test you used during diagnosis. Have a helper watch from inside while you slowly run water from the bottom of the door upward, holding the hose on each zone for 30 to 60 seconds before moving up. This replicates driven rain more honestly than just letting rain do the work, and it lets you confirm each repair zone specifically.
If water still appears inside after you've replaced the sweep, weatherstripping, and caulk and adjusted the rollers, run the hose directly above the door header and along the top of the frame. If you are dealing with a patio door leaking at top, the hose test above the header helps confirm whether flashing and sealing are the real cause. If that's where water appears, the problem is in the flashing above the door, which lives behind the siding or exterior finish. That's a much bigger job and the territory where calling a pro makes sense.
Prevention and maintenance, plus when to call a pro
Seasonal maintenance checklist
Most patio door leaks are preventable with one short maintenance session per year. Do this every fall before your rainy season or every spring after it, whichever makes more sense for your climate.
- Clear the sill track and flush the weep holes. Use a brush, vacuum, and a cup of water to confirm drainage is working.
- Run your hand along all weatherstripping and check for flat spots, tears, or gaps. Replace anything that no longer springs back when compressed.
- Inspect the door sweep. If it's showing wear or doesn't make firm contact with the sill, replace it before the season starts.
- Walk around the exterior and inspect the caulk joint at the frame-to-wall boundary. Press it with your finger: if it's brittle, cracked, or separating, cut it out and reapply.
- Test the latch by closing and latching the door, then pushing on the glass panel near the edges. There should be no movement. If it rattles or pulls away from the frame, re-tune the rollers and check the strike plate.
- Lubricate the track and rollers with a silicone-based spray (not WD-40, which attracts grime) to keep the door running smoothly and reduce the wear that causes sag over time.
When to stop DIYing and call a pro
There are a few situations where DIY repairs won't be enough. If water is entering from above the door frame, behind the siding, or through the wall around the rough opening, the issue is almost certainly the header flashing or the original installation, and getting to it means removing exterior finish material. Similarly, if you've replaced every piece of weatherstripping and caulk and the door still leaks through the frame itself, the frame may be cracked, warped, or installed out of plumb. If you're seeing water damage in the drywall or subfloor near the door, that's a sign the leak has been going on longer than you realized and there may be structural damage or mold behind the wall that needs to be addressed before any surface repair makes sense.
When you do call a contractor, have your documentation ready: the phone video from your initial diagnosis, photos of where you found the water, a list of what you already repaired, and the results of your hose test. This saves the contractor diagnostic time and ensures they're addressing the actual problem rather than restarting from scratch. If the door itself is more than 20 to 25 years old and the rollers, hardware, and frame are all showing wear, a full door replacement is often more cost-effective than continuing to patch an aging unit.
If you have French-style patio doors rather than a sliding panel, the diagnosis process shares some similarities but the specific failure points are different, particularly around the door-to-door center seal and the sweep at the meeting stile. If your french patio door leaks when it rains, focus first on the door-to-door center seal and the sweep at the meeting stile French-style patio doors. The weatherstripping and caulk steps above still apply, but the roller and track steps don't. Similarly, if your issue is specifically water at the very top of the frame, that warrants its own focused look at flashing and header sealing, which goes deeper than what a standard weatherstripping repair will address.
FAQ
Can I fix a patio door that leaks in the rain by just adding more caulk around the frame?
Usually, no. Caulk is a secondary seal, if the sill track, weep holes, weatherstripping, or door alignment are wrong, new caulk just gets overwhelmed or cracks again. Fix the entry point first, then re-caulk only after the door is pulling in tightly and the gap is gone.
How do I tell the difference between a leak and condensation on the glass?
Condensation typically shows up on the interior side uniformly and often warms or clears when the humidity changes. A true leak appears as a wet path that worsens during or right after the hose test, commonly starting near corners, the sill/track, or the latch side where gaps exist.
What if water gets inside but I cannot see any entry point during the hose test?
Water can travel before it becomes visible. Focus your check on the lowest edge first, then inspect inside surfaces behind furniture or near trim where water may wick. Also try a longer 30 to 60 second hold on each zone, and check the exterior track area and corners even if the door looks sealed.
Why do my weep holes keep clogging after I clean them?
Common causes are debris from landscaping (mulch, leaves), paint or sealant overspray in the track, and standing dirt that dries into a blockage. After cleaning, vacuum the track and keep nearby plants from shedding into the sill, avoid flooding the track with high-pressure water, and confirm the weep holes drain freely in your test.
What should I do if roller adjustment does not change the door height at all?
If the adjustment screws spin freely without lifting or lowering the door, the rollers or their mounting hardware may be worn or stripped. In that case, you generally need to replace the roller cartridges rather than keep turning the screws.
How tight should the door seal contact feel when the latch is closed?
You want firm, even contact all the way around where weatherstripping meets the door, especially at the bottom corners and on the latch side. If the door closes but barely compresses the weatherstrip, rain can still force water through, which means the door is likely not raised correctly, not squared, or the strike/latch needs adjustment.
Can I reuse the old weatherstripping or sweep if it looks mostly intact?
If the pile is visibly compressed flat, has gaps, or the sweep is curled or has missing sections, replacement is the reliable fix. Reusing “mostly fine” material can leave micro-gaps that become leak paths once driven rain pushes against the seal.
Is it safe to remove old caulk and apply new caulk right away?
Only if the surfaces are clean and dry. After cutting out old material, wipe thoroughly with a dry rag and let the area fully dry before applying exterior silicone or polyurethane. If moisture is trapped or the surface is contaminated, the new bead may not bond and can fail early.
What if the leak happens only during wind-driven rain or heavy storms?
Wind increases water penetration through small gaps and can also push water higher along the frame. That makes alignment and compression critical, even if you do not notice leaks on a light rain. Run your hose test in a way that simulates driving water by holding the stream near corners and edges rather than spraying randomly.
How long should I wait before testing after resealing, and what if it rains sooner?
Most exterior silicones typically need about 24 hours to cure before you expose them to heavy water. If rain is expected sooner, your best option is to pause the job until you can protect the area, or at minimum, wait long enough that the caulk does not smear or lift when lightly touched.
When should I stop DIY and call a pro?
Call if water appears above the top of the door, behind the siding, or through the wall around the rough opening, since the root cause is often header flashing or original installation. Also stop if there is soft drywall or subfloor damage near the door, because mold or structural issues may need to be addressed before cosmetic repairs.
What documentation helps most if I end up hiring someone?
Bring the hose-test video showing exactly where water enters, clear photos of the wet location and surrounding track/frame, and a short checklist of what you replaced or adjusted (sweep, weatherstripping, caulk, roller changes). That prevents a contractor from retesting blindly and helps them target flashing, alignment, or frame issues faster.
Next Article
Patio Door Bug Seal Guide: Stop Drafts and Insects
Find the right patio door bug seal, fix the gap, replace it, and tune rollers/track for lasting draft and insect stop.