The fastest fix for a patio door that blows open in the wind is a hardwood dowel or adjustable security bar dropped into the bottom track, that stops the panel moving in under 60 seconds. But if your door keeps blowing open or won't stay latched even in a mild breeze, the real problem is almost always worn rollers, a dirty or bent track, misaligned hardware, or compressed weatherstripping that no longer holds the door snug in the frame. This guide walks you through every level of fix, from a two-minute temporary block to a full roller-and-lock overhaul.
How to Stop Patio Doors Blowing in the Wind - DIY Fixes Tips

Jamie Archer
6 Aug 2026
Who this guide is for and what it covers
If you own a sliding glass patio door or a sliding screen door that blows open, rattles in the frame, or refuses to stay latched when the wind picks up, this guide is written for you. You do not need professional tools or previous door-repair experience to follow most of it. I have structured it in order of effort: start with the diagnostic checklist, apply a temporary fix if you need the door secure tonight, then work through the mechanical repairs at whatever pace suits you. Where a job genuinely requires a contractor, I will say so directly.
The guide covers both heavy sliding glass panels and lighter aluminum or vinyl screen doors, because the failure modes are similar but the solutions differ in detail. It also touches on weatherproofing upgrades that reduce drafts and condensation as a side benefit, and it flags security considerations when a wind-blown door is also a security gap.
How patio and screen doors work: the parts that affect wind behavior
A sliding patio door panel hangs from or rides on a set of roller assemblies (usually two, one at each end of the bottom rail) that run inside a steel or aluminum bottom track. The top rail sits loosely inside an upper track that keeps the panel vertical but does not carry weight. The panel stays closed because a spring-loaded or mortise-style latch hooks into a strike plate on the fixed jamb, and because weatherstripping along the vertical edges and a door sweep or compression seal at the bottom press against the frame. All of these parts interact: if the rollers wear down, the door sits lower, the latch and strike drift out of alignment, and the weatherstripping no longer contacts the frame properly. A wind gust then finds that gap and pushes the panel sideways.
Screen doors are lighter (often 15 to 25 pounds versus 100 to 250 pounds for a glass panel) and ride on smaller, simpler rollers. Their latches are typically spring-loaded surface bolts rather than mortise hardware, and they flex more easily under pressure. That makes them more vulnerable to wind than glass panels, and the latch is more likely to be the direct failure point rather than the rollers.
One often-overlooked cause is the stack effect: the pressure difference between inside and outside air, driven by temperature and height, can push several pounds of lateral force on a large glass panel. Opening a window on the opposite side of the house on a windy day can sharply increase that pressure differential and drag a poorly latched door open. This is not a fault you can repair, but knowing it exists helps you understand why a door that seems fine in calm weather becomes a problem on gusty days.
Common causes of patio doors blowing in the wind
Most wind-blown door problems trace back to one or more of the following. Understanding the cause tells you which repair section to jump to.
- Worn or flattened rollers: the panel sits too low, the latch and strike no longer line up, and the door can drift open under light pressure.
- Dirty, gritty, or seized track: friction holds the door away from the weatherstripping rather than letting it seat fully against the seal.
- Bent or crushed track: a hard impact (furniture, foot traffic) creates a ridge that prevents the door from closing flush.
- Misaligned or sagging panel: the door is not plumb or level, so the latch tongue misses the strike plate even when the handle is turned.
- Damaged or compressed weatherstripping: the foam, pile, or rubber seal along the vertical edges and sill has flattened and no longer provides resistance.
- Worn or broken latch and strike: the latch tongue is bent, the strike hole is enlarged from years of use, or the spring inside the latch has lost tension.
- Threshold gaps or failed sill pan: the door sweep is missing or torn, leaving a gap the wind can push against at the bottom.
- Warped or racked frame: the jamb or sill has twisted out of square, often due to foundation movement, water damage, or wood rot.
- Failed screen-door latch: lightweight spring latches fatigue quickly and are the most common single point of failure on screen doors.
- Indoor pressure differential (stack effect): opening other doors or windows changes the pressure balance and pulls or pushes the patio door.
Diagnostic checklist: find the problem before you start buying parts
Work through this checklist in order before touching any hardware. Five minutes here will save you an hour of guesswork later.
- Identify your door type: sliding glass panel, sliding screen door, or both. Note the frame material (aluminum, vinyl, or wood) because this affects which lubricants and fasteners you can use.
- Reproduce the problem: stand outside on a breezy day and watch which direction the door moves. Does it blow open (latch side moves outward), rattle in place, or creep slowly sideways? Note the wind direction relative to the door.
- Check the latch: with the door closed and latched, pull firmly outward on the handle. If the door moves more than 1/8 inch before stopping, the latch is not fully engaging the strike.
- Measure the gap at the latch side: use a feeler gauge or a playing card. Run it along the full height of the meeting stile where the sliding panel meets the fixed panel or jamb. Any gap wider than about 3mm (1/8 inch) indicates the door is not seating against its weatherstripping.
- Measure the gap at the bottom: slide a business card under the door with it closed. A gap wide enough to pass a card easily means the door sweep or threshold seal is failing.
- Inspect the weatherstripping: run your finger along the pile or foam strips on the vertical edges. Compressed, torn, or missing sections need replacement before any mechanical repair will fully solve the problem.
- Look at the rollers: squat down and peer along the bottom track. The panel should ride at a consistent height, roughly 3 to 6mm above the track surface. If one end sits lower, that roller is worn or retracted too far.
- Check the track: look for debris, corrosion, dents, or ridges. Run your finger inside the channel and feel for high spots. Even a small burr can prevent the door from closing flush.
- Test the frame: use a long level on the head jamb and both side jambs. Out-of-plumb by more than 3mm over the door height is enough to throw off roller height and latch alignment.
- Check for anti-lift screws in the upper track: if the fixed panel can be lifted out from outside, that is also a security gap. Note whether the upper track has any clips or screws limiting upward travel.
- Screen door specific: squeeze the latch mechanism by hand. If the spring feels weak or the latch does not snap back smartly, the latch is fatigued and needs replacement.
Immediate temporary fixes to stop the door blowing tonight
These solutions take minutes and do not require any drilling or permanent modification. Use them while you gather parts for the proper repair.
Hardwood dowel in the bottom track
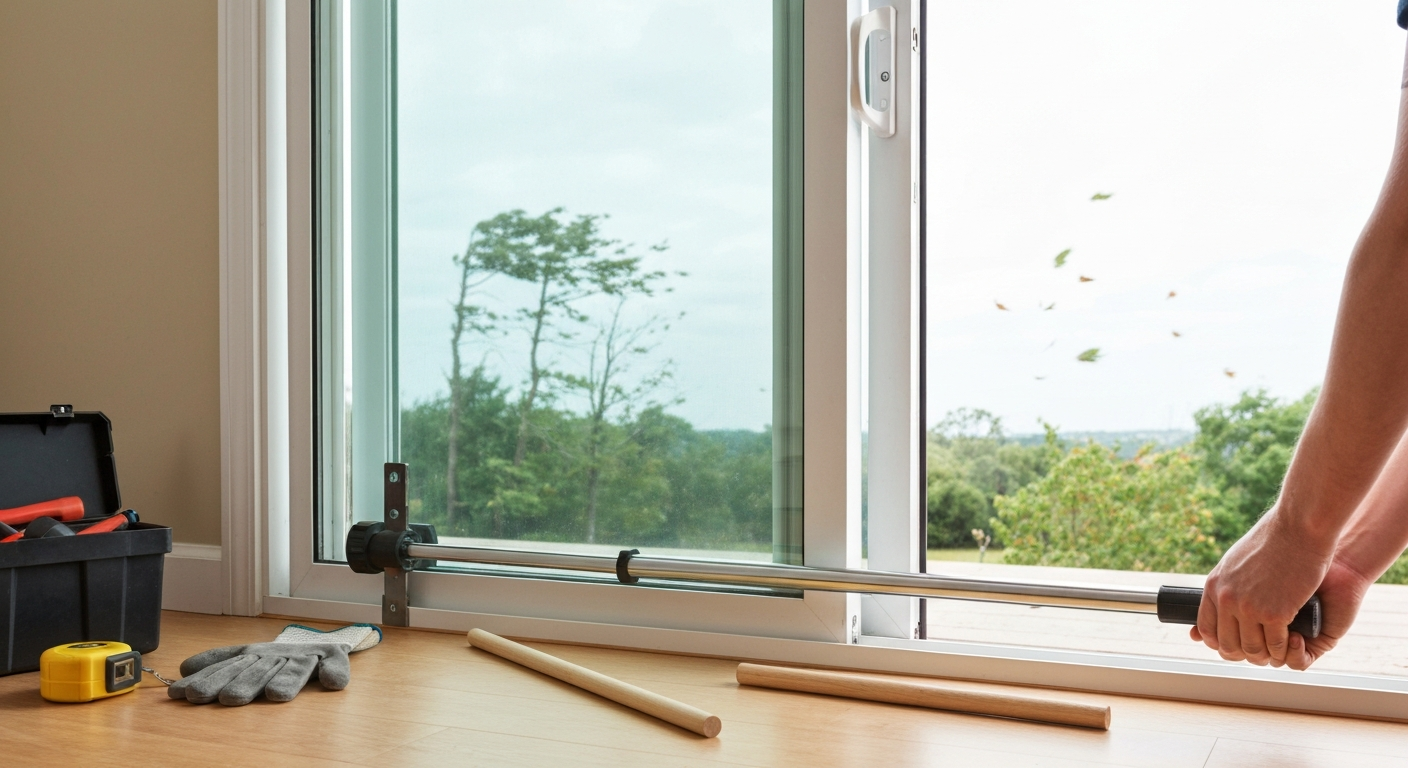
Cut a hardwood dowel (1 inch diameter is common) to fit snugly in the bottom track between the edge of the sliding panel and the far jamb. When the door is closed, drop the dowel in. It physically blocks the panel from sliding open. Cost: $3 to $10 for a length of dowel from any hardware store. The limitation is that it is brittle under a sharp impact and easy to remove if someone lifts the door slightly, so treat it as a wind stop, not a security device.
Adjustable security bar (Charlie bar)
A telescoping metal track bar adjusts to your exact door width and drops into the bottom track or braces between the panel edge and the wall. These are far more robust than a dowel and resist both lateral sliding and moderate flex from wind pressure. Prices run from about $20 to $80 depending on the model and load rating. This is the single best overnight fix if your door is in a high-wind area or if security is a concern alongside wind.
Surface-mounted slide bolts and pin locks
A surface-mounted slide bolt screwed to the top or side rail of the sliding panel, engaging a hole or plate on the jamb, adds a second positive lock point in under 20 minutes. Keyed versions are available if you want to lock the door from outside. These pair well with the security bar: the bar stops lateral movement, the slide bolt stops lift-and-open attempts.
Door wedges and stop alarms
A rubber or wooden wedge placed at the base of the closed door provides light wind resistance without any installation. Door-stop alarms combine a wedge with a contact alarm, useful if you also want to know when the door is breached. These are the weakest temporary fix mechanically, but they work for screen doors where the forces involved are much lower.
Anti-slam catches and wind latches
Wind latches are surface-mounted hook-and-eye or cam-action clips that hold the door closed at a point separate from the main latch. They are particularly useful on screen doors where the factory latch has failed but you have not yet replaced it. Anti-slam catches do the same job from the opposite direction: they grip the door as it closes and prevent it from bouncing back open or slamming. If you are also dealing with a door that crashes shut in the wind, these catches address both problems at once. For guidance on how to stop patio doors slamming shut, see the linked guide covering anti-slam catches and hardware upgrades. A door that slams shut repeatedly can damage the frame, the glass, and the latch hardware, so this is worth attending to even if wind-blown-open is your primary concern.
Tools and parts to have ready before you start repairs
Gather these before starting any of the step-by-step sections below. Nothing is exotic, but stopping mid-job to find a Phillips screwdriver is genuinely frustrating.
| Item | Used for | Approx. cost |
|---|---|---|
| Flat and Phillips screwdrivers | Roller adjustment screws, track screws, latch hardware | $5–$15 if you don't own them |
| Rubber mallet | Panel removal, minor track straightening | $8–$15 |
| Vacuum cleaner with crevice tool | Track cleaning | Already own |
| Stiff nylon brush or old toothbrush | Scrubbing track debris | $2–$5 |
| Mild dish soap and warm water | Track cleaning solution | Already own |
| Plastic scraper | Removing hardened grease or deposits from track | $3–$6 |
| Silicone spray lubricant | Track and roller lubrication (avoid oil-based) | $7–$12 |
| Feeler gauge or thin ruler | Measuring panel gaps | $5–$10 |
| Long level (4 ft or 1.2 m) | Checking frame plumb and door level | $15–$30 |
| Calipers | Measuring roller wheel diameter for replacement matching | $10–$20 |
| Replacement roller assemblies (pair) | Roller replacement | $15–$60 per pair depending on brand |
| Weatherstripping kit (pile or foam) | Sealing gaps at edges and sill | $10–$30 |
| Door sweep | Sealing bottom gap | $10–$25 |
| Safety glasses | Panel removal, track work | $5–$10 |
| Second person (helper) | Lifting and supporting the glass panel | Free |
Step-by-step: cleaning, repairing, and lubricating the track
A thorough track clean resolves a surprising number of dragging and wind-blown door problems without any further work. Cleaning the track as described often resolves many sticky or dragging doors without further repair Before repairing rollers or tracks, clean the track thoroughly: vacuum debris, scrub with mild detergent, remove hardened deposits with a plastic scraper, dry, then inspect for dents or gouges; avoid oil lubricants that attract grit and use silicone spray only if the manufacturer recommends it.. Grit, pet hair, leaves, and old congealed lubricant in the bottom track create friction ridges that hold the door slightly away from the frame and weatherstripping, leaving a gap that wind can push against. This takes about 30 to 45 minutes.
- Vacuum the entire length of both the bottom and top tracks, paying attention to the corners. Use the crevice tool to pull out compacted debris.
- Mix a few drops of mild dish soap into a cup of warm water. Dip your stiff brush into the solution and scrub the inside of the bottom track channel, including the sides and the slot where the rollers run. Work in short sections.
- Use your plastic scraper to lift any hardened deposits or old grease. Do not use metal scrapers on aluminum track — they leave gouges that become new friction points.
- Wipe the track dry with a clean cloth. Repeat the scrub if the cloth comes up heavily soiled.
- Inspect the track carefully now that it is clean. Run your fingertip along the inside of the channel and feel for dents, ridges, or raised burrs. Small burrs from foot traffic or furniture can often be gently tapped flat with a rubber mallet and a block of wood placed inside the channel as a backing support. Work slowly and check frequently.
- If you find a section that is significantly bent, crushed, or corroded through, mark it. Minor dents (less than 2mm deep) can usually be managed with the mallet method. Deep bends or corroded sections mean the sill track needs replacement — that is a larger job and usually the point where calling a professional makes sense.
- Once the track is clean and smooth, apply a thin bead of silicone spray lubricant along the inside of the channel. Wipe off any excess immediately so it does not attract new grit. Do not use WD-40, petroleum oil, or any grease — they attract dirt and cause exactly the problem you just cleaned up.
- Slide the door back and forth several times to distribute the lubricant and test for smooth travel. If it still drags, proceed to the roller inspection below.
Step-by-step: inspecting, adjusting, and replacing rollers
Roller problems are the most common mechanical reason a sliding door fails to latch and becomes vulnerable to wind. This job takes one to two hours for a first-timer, less once you have done it once. You will need a helper for the glass panel removal step.
Adjust the rollers first (no removal needed)
- Locate the roller adjustment screws. On most doors they are on the bottom rail at each end, behind small plastic plugs. Pop the plugs out with a flat screwdriver.
- Turn the adjustment screws clockwise to raise that end of the door (rollers extend downward, lifting the panel) or counterclockwise to lower it. Make small quarter-turn adjustments and test the door after each one.
- Aim for even, consistent travel with the panel riding about 3 to 6mm above the track floor at both ends. Check that the latch engages the strike with light handle pressure once the height is set.
- If the screws turn but the door height does not change, or if turning them requires excessive force, the roller wheels are likely worn or seized and need replacement.
Remove the panel and replace the rollers
- Retract both roller adjustment screws fully counterclockwise to drop the rollers as far as possible and create clearance.
- With your helper standing inside, lift the panel straight up into the top track until the bottom clears the lower track, then tilt the bottom toward you and lower it out. A heavy glass panel can weigh 100 to 250 pounds — never attempt this alone. Lay the panel on padded sawhorses or a blanket-covered table.
- Inspect the roller wheels: look for flat spots, cracking, metal filings or black dust on the axle, visible wobble when you spin the wheel by hand, or seized bearings that will not spin at all. Any of these means replacement, not cleaning.
- Use a screwdriver to remove the roller assembly from the bottom rail. Most assemblies are held by one or two screws. Note the orientation before removing.
- Take the old roller to a hardware store or measure the wheel diameter with your calipers. Match the wheel diameter, width, and axle style exactly. When in doubt, bring the whole assembly. Replace both rollers as a pair even if only one looks damaged — uneven rollers cause the same misalignment problems you started with.
- Install the new assemblies, making sure they click or screw firmly into the bottom rail with no play.
- Re-seat the panel: lift it up into the top track first, then lower the bottom into the bottom track. With your helper holding the panel plumb, adjust the roller screws to raise the door until it travels smoothly and the latch aligns with the strike.
- Replace the adjustment-screw plugs, slide the door several times to confirm smooth operation, and test the latch under a firm pull.
Step-by-step: aligning the door and correcting frame issues
If roller adjustment did not resolve the gap or latch misalignment, the problem may be in the frame itself. This step covers shimming and minor frame corrections. Full frame replacement is a contractor job; this section covers what a homeowner can reasonably do.
- Hold your long level against each jamb (left and right side of the door frame) and then along the head jamb (top). Note any deviation. More than 3mm out of plumb over the door height is significant.
- Check the sill: lay the level across the threshold. A sloped or bowed sill causes the door to drift toward the low end under gravity and wind.
- Inspect all visible fasteners along the jamb and threshold. Loose screws or missing fasteners allow the frame to flex and shift. Re-drive or replace any that are loose, using the appropriate size for the frame material (self-tapping screws for aluminum, wood screws for timber frames).
- If a side jamb is bowed slightly inward or outward, thin plastic or composite shims inserted between the jamb and the rough framing behind it (access is usually available by removing interior trim) can bring it back to plumb. Work from the hinge or fixed side first, then the latch side.
- After shimming, re-test roller height and latch engagement. The goal is a gap of less than 1.5mm between the panel edge and the weatherstripping on the fixed jamb when the door is closed.
- Visible rot in a wood frame, permanent twist in a vinyl or aluminum frame, or a sill pan that leaks water underneath the threshold are all replacement-level problems. If you are finding soft wood, black mold, or standing water in the sill cavity, stop and get a professional assessment before proceeding — water damage behind the frame can extend into the wall structure.
Step-by-step: repairing and upgrading locks, latches, and strikes for wind resistance
A latch that barely catches in calm weather will not hold under wind pressure. This section covers fixing the factory hardware and adding secondary locking devices that meaningfully improve both wind resistance and security.
Diagnose and repair the factory latch
- Open the door and operate the handle mechanism. The latch tongue should extend and retract crisply. If it moves sluggishly or does not spring back, the latch spring is fatigued. Most sliding door latch assemblies are replaced as a complete unit rather than repaired — they are typically held by two or four screws on the interior face of the panel stile.
- With the door closed, watch where the latch tongue contacts the strike plate. If the tongue lands above, below, or to the side of the strike hole, adjust the strike plate position (loosen its screws and shift it) or adjust roller height until the tongue enters the hole cleanly.
- If the strike hole has worn into an oval from years of latch-tongue impact, replace the strike plate. These are inexpensive (usually $5 to $15) and available at any hardware store. Bring the old one to match the screw spacing.
- For screen doors: spring-loaded screen-door latches fatigue typically within five to ten years. Replacement latches are sold by frame width (usually 1 inch or 1-3/8 inch). Unscrew the old one, match the screw spacing and handle profile, and install the new unit. This takes about 15 minutes.
Upgrade to more wind-resistant and secure hardware
The factory latch on most residential patio doors is ANSI/BHMA Grade 3, which is the basic residential rating. For a door exposed to frequent high wind or in an exposed location, upgrading to Grade 2 or Grade 1 hardware is a meaningful improvement. Grade 1 is the highest commercial rating; Grade 2 is the recommended minimum for residential doors where security and weather performance both matter.
- Install an auxiliary keyed slide bolt or pin lock at the top and bottom of the sliding panel. These engage holes drilled in the jamb or track and prevent the panel from moving even if the main latch fails. They take about 30 minutes each to install and cost $15 to $40 per unit.
- Install anti-lift screws or clips in the upper track. These are short screws driven into the upper track at regular intervals that reduce the clearance and prevent the panel from being lifted out. Follow manufacturer recommendations for screw size and spacing so they do not interfere with normal operation.
- Consider a multi-point hook or bolt lock if you are replacing the main handle/latch assembly. These engage the frame at two or three points simultaneously (typically top, middle, and bottom) and are significantly more wind-resistant than a single-point latch. They are more expensive ($80 to $200 installed) but also dramatically improve security.
- For the security bar or Charlie bar: mount the bracket if your model includes one, and test that the bar length is adjusted to fit snugly with zero lateral play. A bar that rattles in place does not fully stop wind pressure.
Weatherstripping, door sweeps, and threshold seals
Replacing worn weatherstripping is the single repair most likely to stop wind noise, reduce drafts, and prevent the door from being pushed open by light wind pressure. For advice on preventing bird collisions with glass, see how to stop birds flying into patio doors. Compressed or missing pile seal along the vertical edges of the sliding panel means the panel can flex a few millimetres under wind load even when the latch is engaged. Replacing it closes that gap, reduces noise, and as a bonus cuts heating and cooling costs. This is also one of the most effective ways to reduce condensation on the door glass, since cold outside air no longer flows in along the edge seal. For more on preventing moisture buildup on glass, see how to stop condensation on patio doors. For practical shading and glazing options that reduce heat and glare, see how to block sun from patio door.
- Remove old weatherstripping by pulling it out of its groove or peeling it off the face of the jamb. Clean the surface with isopropyl alcohol before applying new material.
- Match the pile depth and width to the gap you measured in your diagnostic checklist. Pile (furry brush-type) weatherstripping suits the meeting stile where the two panels overlap. Foam or rubber compression strips suit the head and sill jamb.
- For the bottom gap, fit a door sweep to the bottom rail of the sliding panel. Many sweeps slide into the existing rail groove; others are screwed to the face of the rail. Adjust height so it drags lightly on the threshold when the door moves.
- The threshold itself may need replacement if it is cracked, corroded, or no longer sits flat. A two-piece adjustable threshold lets you fine-tune the height after installation to get a consistent seal across the full width.
- Test by closing the door and holding a lit incense stick near the vertical edges and bottom seal on a breezy day. Any flickering smoke indicates a remaining gap.
Security and pet considerations
A patio door that blows open is also a patio door that is not secure. If wind pressure can move the door, so can a person applying the same force. The combination of a robust auxiliary lock, a security bar, and anti-lift screws in the upper track addresses both problems simultaneously. Law-enforcement home-safety guidance consistently recommends pairing a track bar with anti-lift measures as complementary defenses: the bar prevents lateral sliding, the anti-lift screws prevent the door from being lifted out of its track entirely.
If you have a dog that jumps at the patio door, the repeated impact accelerates wear on the latch, frame, and weatherstripping, and can gradually knock the door off its roller height adjustment. For guidance on installing a pet door through a sliding patio panel, see can you put a dog flap in a patio door. Anti-slam catches help absorb the impact before it reaches the latch, and a surface-mounted kick plate on the lower portion of the panel protects the glass edge. Separately, if you are considering fitting a pet flap into the patio door to reduce how often the door needs to open at all, this can be a practical wind-management strategy as well as a pet convenience measure.
Comparing the main solutions: effort, cost, and how well each works
| Solution | Effort | Approx. cost | Fixes wind problem? | Also improves security? | DIY-friendly? |
|---|---|---|---|---|---|
| Hardwood dowel in track | 5 min | $3–$10 | Yes (temporary) | Partially | Yes |
| Adjustable security bar | 10 min | $20–$80 | Yes (reliable) | Yes | Yes |
| Surface-mounted slide bolt / pin lock | 20–30 min | $15–$40 per unit | Yes | Yes | Yes |
| Anti-slam / wind latch catch | 15–30 min | $10–$30 | Yes (screen doors especially) | No | Yes |
| Track cleaning and lubrication | 30–45 min | $5–$15 | Often resolves dragging that causes gaps | No | Yes |
| Roller adjustment (no removal) | 20–30 min | $0 (no parts needed) | Yes if height was off | No | Yes |
| Roller replacement | 1–2 hours | $15–$60 per pair | Yes (if rollers were worn) | No | Yes, with helper |
| Weatherstripping replacement | 45–90 min | $10–$30 | Yes (seals gaps) | No | Yes |
| Door sweep and threshold seal | 30–60 min | $10–$40 | Yes (seals bottom gap) | No | Yes |
| Multi-point locking system | 2–3 hours | $80–$200 | Yes (very robust) | Yes (best option) | Possible, but complex |
| Frame shimming / re-plumbing | 1–3 hours | $10–$30 (shims) | Yes if frame was cause | No | Intermediate |
| Full frame replacement | Full day+ | $500–$2,000+ pro | Yes | Yes | No — call a pro |
Troubleshooting by symptom
Use this as a quick reference if you already know what is happening and want to jump to the relevant fix.
| Symptom | Most likely cause | Start here |
|---|---|---|
| Door blows open in moderate wind | Latch not engaging strike / rollers low | Roller adjustment, then latch/strike check |
| Door creeps open slowly in light wind | Weatherstripping gap or track slope | Weatherstripping replacement, threshold check |
| Door rattles in frame without opening | Compressed weatherstripping, loose panel | Weatherstripping, then roller height adjustment |
| Screen door blows open | Fatigued spring latch | Replace screen-door latch, add wind latch |
| Door hard to close fully in wind | Stack-effect pressure / door out of level | Check frame plumb; add secondary lock |
| Latch engages but door still moves | Strike worn into oval / secondary lock needed | Replace strike plate, add slide bolt |
| Door rattles after it is latched | Weatherstripping gap at top or sides | Replace weatherstripping on fixed panel stile |
| Door worked fine until recently | Debris in track or roller wear | Track clean first, then roller inspection |
| Door never latched reliably | Frame out of plumb / rollers always low | Frame plumb check, roller height adjustment |
When to call a professional
Most of the repairs in this guide are genuinely within a homeowner's reach. But there are situations where calling a pro is the right call, not the cautious one:
- The sill track is severely bent, corroded, or crushed and needs replacement — this involves cutting the old track out and fitting a new sill assembly, which requires precise measuring and often means opening up the threshold.
- The main frame is rotted, permanently warped, or has water damage extending into the wall structure. This is a structural issue, not a door-hardware issue.
- The glass unit itself is cracked or the seal has failed (you will see fogging between the panes). Glazing work on a large patio door panel requires specialist equipment and handling.
- The door is a very large or custom-size panel (over 200 cm wide or unusually heavy) and you cannot safely remove it with one helper.
- You have completed all the repairs above and the door still will not stay latched — this often means the frame has moved beyond what shimming can correct and the entire door unit needs replacement.
For everything else, work through the steps above in order: clean the track, adjust the rollers, fix the weatherstripping, and upgrade the latch and secondary locks. Most wind-blown patio door problems are resolved by the time you have finished those four steps.
FAQ
What commonly causes patio (sliding glass and screen) doors to blow open in the wind?
Primary causes are wind pressure/pressure differentials (stack effect), worn/flattened rollers, dirty or damaged tracks, bent/crushed sill or track, misaligned or sagging sliding panel, compressed or missing weatherstripping, worn latch or misaligned strike, threshold/sill gaps, warped frame, or faulty screen-door latches. Any combination of these reduces the door’s ability to stay engaged when wind applies lateral force.
How do I run a quick diagnostic checklist to find the root cause?
Checklist: 1) Identify door type (sliding glass vs screen). 2) Reproduce problem in known wind direction and note whether the panel blows past the latch. 3) Measure gaps top/bottom/latch side with a ruler or feeler gauge. 4) Inspect track for debris, dents, corrosion, and for black dust. 5) Check roller location and test for smooth motion and wobble. 6) Test latch engagement and alignment (close slowly and observe strike alignment). 7) Verify fixed panel anti-lift security. 8) Look for frame/sill rot or warping. 9) Note whether problem is intermittent (wind threshold) or constant (hardware/structure). Record findings before starting repairs.
What temporary fixes can I use immediately to stop the door blowing open?
Quick renter/DYI options: 1) Hardwood dowel or properly sized broom handle cut to fit the bottom track. 2) Adjustable track/security bar (Charlie‑bar style) placed in the track or jammed against frame. 3) Surface-mounted slide bolt or removable pin lock at the meeting rail. 4) Wedge or door stop at bottom edge (low force winds only). 5) Temporary surface-mounted wind latches that clamp panel to jamb. Use a dowel/bar rated to fit full opening width; avoid wedging in a way that damages track or glass.
How strong and reliable are dowels versus a security/track bar?
A hardwood dowel is the lowest-cost and renter-friendly option ($3–$10) and effective for light-to-moderate wind; it can fail under heavy force and is visible to intruders. A purpose-built adjustable security/track bar is stronger, adjustable, and generally more secure ($20–$80). Combine with anti-lift measures for best protection.
What step-by-step DIY repairs and adjustments fix doors that blow open?
Order of work: 1) Clean: vacuum track, remove debris, scrub with mild detergent, scrape hardened deposits, dry. 2) Inspect track for dents—small burrs can be smoothed; severe damage needs track/sill replacement. 3) Access roller adjustments: locate adjustment screws (usually behind small plugs at bottom edge). 4) Adjust rollers to raise/level the panel—turn screws to lift slightly so the latch engages fully. 5) If rollers are worn, remove the panel (retract rollers, lift panel out, support on padded sawhorses), remove and replace roller assemblies (replace both sides). 6) Check and realign latch/strike; bend or reposition strike or use shims to ensure full engagement. 7) Install anti‑lift clips or upper-track screws to stop panel removal. 8) Re-test in wind. Repeat adjustments until the door stays latched without forcing.
How do I remove a sliding panel safely to service rollers?
General: unlock and open to access adjustment screws; turn screws to lower rollers just enough to create clearance; tilt and lift the panel up into the top track until the bottom clears; have 1–2 helpers and place the panel on padded sawhorses or blankets. Rollers and bottom rail can then be serviced. Follow manufacturer notes for heavy or tempered panels. Wear gloves and eye protection; glass panels are heavy—use suction cups where available.
Next Article
How to Block Sun from Patio Door: DIY Shading Guide, Steps, Costs & Pros/Cons
How to block sun from patio door: DIY steps, films, shades, awnings, costs, pros/cons & installation tips.