The most effective way to block sun from a patio door depends on what you're actually fighting: raw heat, blinding glare, UV damage to furniture, or lack of privacy. For heat and UV, a spectrally-selective window film or an exterior awning will do the most work. For glare with minimal room darkening, a solar roller shade or sheer vertical blind is usually the right call. For full privacy with maximum sun blocking, blackout curtains or exterior shutters win. Most of these are genuine DIY projects you can finish in an afternoon, and I'll walk you through the best options, how to measure correctly, and exactly how to install them.
How to Block Sun from Patio Door: DIY Shading Guide, Steps, Costs & Pros/Cons

Jamie Archer
5 Aug 2026
Why bother blocking sun from your patio door
A large pane of glass is essentially a solar collector aimed directly into your living space. A standard residential patio door glass unit can have a Solar Heat Gain Coefficient (SHGC) anywhere from 0.2 to 0.8, and older, uncoated glass sits toward the high end of that scale. On a west-facing door on a hot afternoon, that means more than half the solar energy hitting the glass ends up as heat inside your house. Your air conditioner compensates, your energy bill rises, and the hardwood floors and sofa fabric slowly bleach. Beyond heat, intense direct sun through a large sliding door creates glare that makes a room nearly unusable for a good chunk of the day. Blocking or filtering that sun is one of the higher-impact improvements you can make to a room's comfort, and most solutions cost well under $500 installed.
This guide covers every practical method: interior solutions like window film, blinds, roller shades, curtains, and interior shutters, as well as exterior options like awnings, shade sails, exterior screens, and fixed overhangs. For each, I'll tell you what problem it actually solves, give you real measurement guidance, walk through DIY installation, and flag where it's worth calling a professional. I'll also touch on how your shading choice can affect door operation, security, and manufacturer warranties, because those details matter and are easy to overlook.
Interior vs exterior: pick your starting point
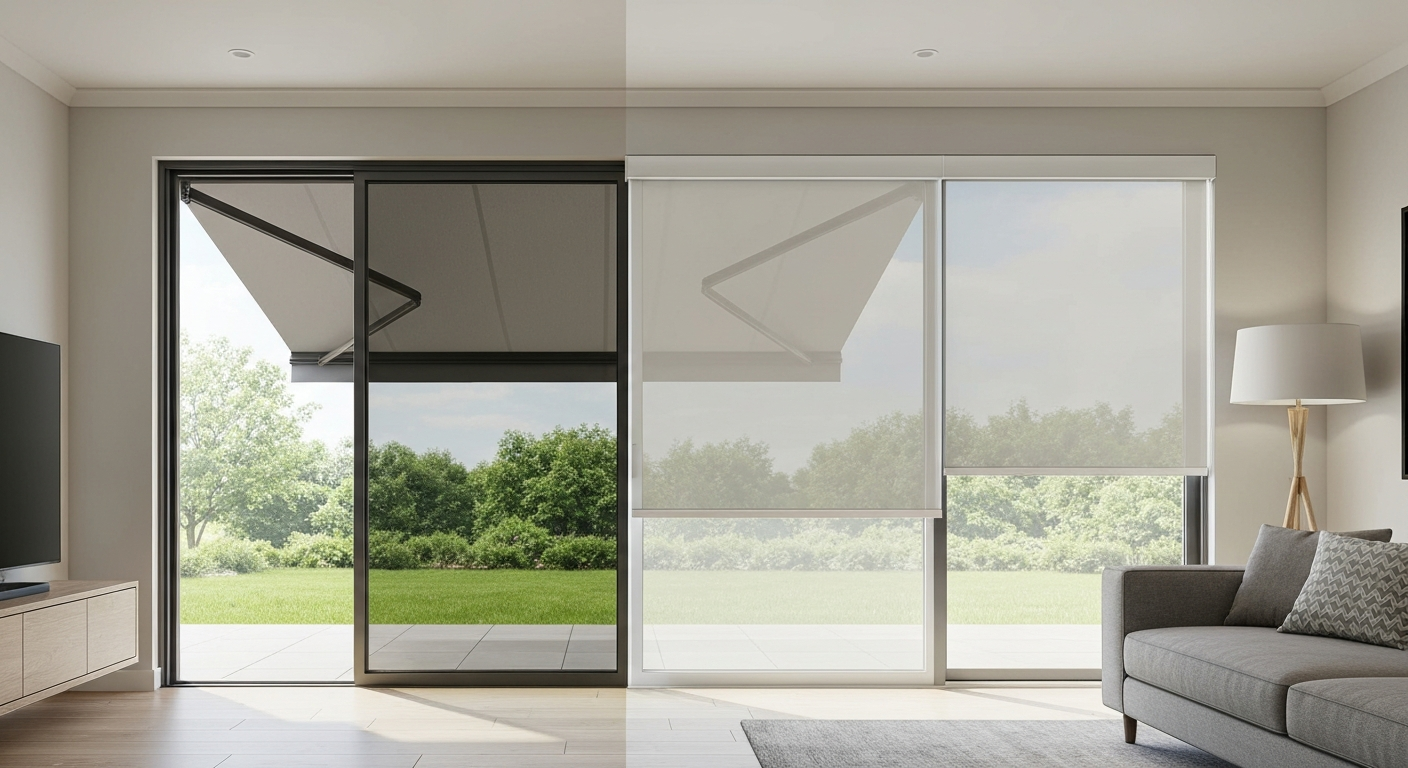
The first decision is whether to work inside or outside. Exterior shading intercepts sunlight before it ever hits the glass, which makes it dramatically more effective at reducing heat gain. Interior shading absorbs or reflects light after it has already passed through the glass, by which point the infrared energy has partly converted to heat inside the room. That said, interior solutions are almost always cheaper to install, easier to adjust or remove, don't require climbing ladders or drilling into exterior masonry, and give you privacy and glare control on demand. Exterior solutions pay off most in climates where cooling costs are the primary concern.
| Solution type | Heat reduction | Glare control | UV blocking | Privacy | DIY difficulty | Typical cost range |
|---|---|---|---|---|---|---|
| Solar/reflective window film | Good (up to 66–77% heat rejected) | Good–Excellent | Up to 99% UV blocked | Moderate (one-way options available) | Moderate | $2–$10/ft² DIY materials |
| Ceramic/spectrally-selective film | Excellent (high NIR rejection) | Good (high VLT) | Up to 99% UV blocked | Low–moderate | Moderate | $5–$12/ft² DIY materials |
| Solar roller shade | Moderate | Good–Excellent | Moderate–Good | Low–moderate | Easy | $80–$300 per panel |
| Blackout roller shade | Moderate | Excellent | Good | Excellent | Easy | $60–$250 per panel |
| Vertical blinds | Low–moderate | Adjustable | Low | Good (adjustable) | Easy | $50–$200 installed |
| Curtains/drapes (thermal-lined) | Moderate | Good–Excellent | Moderate | Excellent | Easy | $50–$300 per panel pair |
| Interior plantation shutters | Low–moderate | Good (adjustable) | Low | Excellent | Moderate–Hard | $300–$700+ per door |
| Retractable awning (exterior) | Excellent | Excellent | Good | Moderate | Hard–Pro | $800–$3,500+ installed |
| Fixed exterior overhang/shade sail | Excellent | Excellent | Good | Low | Moderate–Hard | $150–$800 DIY |
| Exterior roller screen | Excellent | Excellent | Good | Good | Moderate | $300–$1,200 installed |
| Exterior shutters | Excellent (when closed) | Excellent | Excellent | Excellent | Moderate–Hard | $400–$1,500+ installed |
Quick recommendation: if your primary goal is cutting summer cooling costs on a south- or west-facing door, start with a spectrally-selective window film or a retractable awning, those two solutions address heat at the source most effectively. If glare control with flexibility is the goal, a solar roller shade is the easiest and most affordable win. If you want both heat reduction and something you can fully open on cool days, pair a mid-openness solar shade with window film.
Measure first, buy second: getting the numbers right
Getting measurements wrong is the single most common DIY mistake on window and door treatments. Patio doors are large and often have non-standard frame profiles, tracks, and trim, so don't assume standard sizes will fit without checking.
Figuring out your door's orientation
Before you buy anything, know when and from which direction the sun hits your door. Stand outside at the time of day you notice the worst glare or heat, usually mid-morning for east-facing doors and mid-to-late afternoon for west-facing doors. Use your phone's compass to note the bearing you're facing toward the sun. A free tool like SunCalc.org lets you plug in your address and any date/time to get precise solar azimuth and altitude, which helps you understand seasonal variation. South-facing doors in the Northern Hemisphere get sun most of the day year-round at lower angles in winter, making a fixed overhang less effective in winter (which may actually be desirable for passive solar heating). West-facing doors get the harshest afternoon heat in summer, those benefit most from exterior shading or high-performance film.
Measuring the door opening
For inside-mount treatments (film, shades, blinds mounted within the frame): measure the width at three points, top, middle, and bottom of the glass opening. Use the narrowest measurement and round down to the nearest 1/8 inch. Measure the height at the left, center, and right, and use the longest measurement. Also record the frame depth (the reveal), most inside-mount shades need at least 2 to 3 inches of depth clearance, and motorized or valanced products may need more. Check for obstructions: door handles, locks, and sliding door tracks all affect where a shade can hang or travel.
For outside-mount treatments (shades, curtains, shutters mounted on the wall or frame above the door): measure the full opening width you want covered, then add at least 2 to 3 inches on each side to prevent light gaps. Measure the height from where you plan to mount the bracket down to the floor or sill. For curtain rods above patio doors, homeowners commonly mount the rod 4 to 6 inches above the frame and extend the rod 6 to 12 inches past the frame on each side, this lets curtain panels stack off the glass when open, keeping the door fully usable.
Understanding SHGC and VLT for film and glass choices
You don't need to become an energy engineer, but two numbers appear on every window film and glazing product that are worth understanding. SHGC (Solar Heat Gain Coefficient) is the fraction of solar energy that passes through the glass assembly and becomes heat inside, a value of 0.40 means 40% of incoming solar energy turns into interior heat. Lower is better for cooling. For hot or mixed climates, ENERGY STAR targets SHGC below 0.25 to 0.40 depending on your climate zone. VLT (Visible Light Transmittance) is simply how much visible light passes through, higher VLT means a brighter, more natural-looking room but less glare reduction. Visible Light Transmittance (VLT), the Illuminating Engineering Society defines VLT as the fraction of visible light transmitted through glazing Visible Light Transmittance (VLT) — the Illuminating Engineering Society defines VLT as the fraction of visible light transmitted through glazing.. Spectrally-selective films are designed to achieve low SHGC while maintaining high VLT, which is why they're generally worth the extra cost over basic reflective films.
Interior shading options: what's available and when to use each
Window film
Window film is applied directly to the glass and is invisible from the outside (unless you choose a reflective or mirrored finish). It's a permanent-leaning solution that works around the clock without any adjustment. The main categories are: reflective/metalized film (high solar rejection, mirror-like exterior appearance, lower VLT), dyed/absorptive film (budget option, absorbs more heat into the glass itself, can stress certain glass types), ceramic/infrared-rejecting film (high performance, neutral appearance, doesn't interfere with electronics or cell signals), and spectrally-selective film (the premium tier, like 3M's Prestige series, which combines high VLT with strong near-infrared rejection). Most quality films block up to 99% of UV, which is the primary cause of furniture and flooring fade. Heat rejection varies: some exterior-applied reflective films report up to 66 to 77% total solar energy rejection (TSER). For a large patio door glass panel, DIY film runs roughly $2 to $10 per square foot in materials, while professional installation totals around $7 to $20+ per square foot depending on film grade and complexity.
Solar roller shades and cellular shades
Solar shades use an open-weave fabric that filters light without fully blocking the view. The openness factor, typically 1%, 3%, 5%, or 10%, tells you how much of the fabric is open space. A 1% openness shade blocks more light and provides better privacy; a 10% openness shade lets in much more light but less glare control. For a west-facing patio door where afternoon glare is the main complaint, a 3% or 5% openness solar shade is a practical, attractive solution. Cellular (honeycomb) shades offer better insulation due to their air-pocket construction but don't reduce glare as effectively as solar fabrics. Both work as inside-mount or outside-mount. For sliding patio doors specifically, you need to check whether the shade rail will clear the door handle when the shade is raised.
Vertical blinds, panel track blinds, and curtains
Vertical blinds are the classic sliding patio door solution because the vanes travel along the same axis as the door, they stack to one side when you open the door and don't interfere with operation. They're adjustable and inexpensive but offer limited UV or heat protection when partially open. Panel track blinds are a modern alternative: wider fabric panels on a track system that gives a cleaner look and can use solar or blackout fabric. Curtains and drapes are the easiest to install and offer excellent privacy and full blackout options when lined, but on a sliding door you need to account for the door's travel path, the curtain panels need to stack completely clear of the door opening on one side, or split and stack on both sides.
Interior plantation shutters
Interior shutters offer the best combination of privacy, light control, and clean aesthetics, but they're the most expensive interior option and the most complex to install correctly on a patio door. Most installers use a bypass or bifold configuration so the shutters can swing out of the door's path. They do relatively little for heat gain since sunlight still passes through the glass before hitting the shutter. If furniture fading and privacy are the priorities and budget allows, shutters are worth it. For heat reduction, pair them with window film.
Exterior shading options: stop heat before it hits the glass
Retractable awnings
A retractable awning mounted above the patio door is one of the most effective exterior shading solutions available. It intercepts direct sun before it reaches the glass, can reduce solar heat gain through the door by 65% or more on west- and south-facing exposures, and can be retracted in winter to allow passive solar gain or during high winds to avoid damage. Manual retractable awnings start around $300 to $600 for the unit alone; motorized versions run $800 to $3,500 or more installed depending on width and features. Installation involves mounting a wall bracket into structural framing, this is one job where hiring a professional pays off, especially on masonry or stucco exteriors where anchoring correctly matters a lot. If you're already dealing with seasonal weatherproofing around your patio door, an awning also provides some rain protection for the door frame and threshold.
Exterior roller screens
Exterior roller screens (sometimes called solar shades or exterior blinds) mount above the door on the outside and roll down to filter sun. Because they sit outside the glass, they prevent solar energy from entering the room at all, far more effective than the same fabric used indoors. They're popular in Europe and increasingly available in North America. Installed costs run roughly $300 to $1,200 per door depending on size and motorization. They do reduce visibility slightly, and you need to ensure the mounting doesn't interfere with the door's operation or drainage.
Shade sails and fixed DIY sunshades
A shade sail stretched over the patio area adjacent to the door intercepts sun from a broad angle and can be DIY-installed on a weekend. They're not as precise as an awning in targeting a specific window, but they're very affordable ($80 to $400 for the sail itself) and flexible in coverage area. For a more permanent solution, a simple timber pergola or fixed horizontal louvre shade structure over the door can be highly effective and adds visual appeal to the outdoor space.
Exterior shutters
Exterior shutters, whether louvred, solid panel, or Bahama-style, offer the maximum sun and heat blocking when closed, plus security and storm protection. They're most common in hot and hurricane-prone climates. Installation is significant and usually warrants professional help for a patio door given the size and weight involved.
Step-by-step: installing solar or reflective window film
Window film is the highest-impact purely DIY interior solution for heat and UV. The job takes about 1 to 2 hours per patio door panel and the main enemies are dust, bubbles, and rushing. Here's what you need and how to do it right.
Tools and materials
- Solar control window film (measured and cut to size, with ~1 inch extra on each side)
- Spray bottle with application solution (1 tsp baby shampoo or no-tears dish soap per quart of distilled water)
- Hard plastic squeegee with felt-covered edge
- Sharp utility knife or precision razor blade
- Clean lint-free microfiber cloths
- Measuring tape and soft pencil or marker
- Cutting mat or clean flat surface
- Painter's tape (optional, for alignment)
- A helper (strongly recommended for large patio door panels)
Installation steps
- Clean the glass thoroughly: spray with the application solution, then scrub with a clean cloth to remove all dirt, grease, and residue. Any contamination trapped under the film will create bubbles or adhesion failures. Wipe the edges where the glass meets the frame — this area is often neglected and causes edge lifting later.
- Cut the film: roll out the film on a clean flat surface with the liner side down. Measure and mark your dimensions — your measured glass size plus about 1 inch on all sides for trimming after application. Cut cleanly with a sharp blade and straightedge.
- Wet the glass again generously: spray the entire glass surface with application solution immediately before applying the film. The glass should be thoroughly wet — this lets you reposition the film during application.
- Separate the film from its liner: peel back a few inches of the liner, have your helper hold the liner end, and lightly wet the exposed adhesive side as you slowly walk the liner away. Keep the exposed adhesive side wet to prevent it from sticking prematurely.
- Apply the film: starting from the top, lay the film onto the wet glass and let it float into rough position. Work quickly. The solution allows repositioning for 30 to 60 seconds.
- Squeegee out the water: starting from the center and working toward the edges, use firm, overlapping strokes with the squeegee to push water out from under the film. Overlap each pass by about half the squeegee width. Work methodically — rushing this step creates trapped water pockets.
- Trim the edges: use a sharp utility knife against a rigid straightedge to trim the film about 1/16 to 1/8 inch from the frame edge. This small gap prevents the film from lifting as the glass expands and contracts.
- Final squeegee pass: do a final firm squeegee across the entire surface, then blot edges dry with a cloth. Small water blisters visible at this stage typically dry out within 2 to 4 weeks — do not attempt to pop or re-squeegee them.
- Cure time: avoid cleaning the film for at least 30 days. During curing, the film may look slightly hazy — this is normal and clears as residual moisture evaporates.
Common pitfalls and troubleshooting
- Bubbles that don't disappear after 4 weeks: usually caused by surface contamination or applying film in cold temperatures (below 40°F / 4°C slows curing). May require professional re-application.
- Edge lifting: almost always caused by film cut too tight to the frame (it gets pinched) or by skipping the final edge squeegee. Trim slightly away from the frame and ensure the edge is fully pressed down.
- Film applied to tempered, wired, or heat-absorbing glass: absorptive (dyed) films can cause thermal stress cracking on some glass types — always check the film manufacturer's compatibility guidance. Ceramic and spectrally-selective films are generally safer on these glass types.
- Warranty void risk: many patio door manufacturers will void the glass unit warranty if film is applied to double-pane IGUs without written approval. Check your door's documentation before applying film to the interior surface of an insulated glass unit.
- Security film edge attachment: if you're using a safety or security-rated film, the 3M IPA (Impact Protection Attachment) system uses a perimeter adhesive to anchor the film to the frame. Without this, the film provides no meaningful intrusion resistance — don't skip it on security applications.
Step-by-step: blinds, curtains, and roller shades on sliding and hinged patio doors
Installing window treatments on a patio door is mostly like any other window installation, with a few important differences: the door moves, the glass is large and heavy, and the hardware needs to clear the door's operating path. If pets use the door as a play spot, see our short guide on how to stop dog from jumping on patio door for tips that prevent damage to treatments and keep the door functional. Here's how to handle both sliding and hinged configurations.
Tools and materials
- Drill with appropriate bits for your wall material (wood, drywall, or masonry)
- Level (a 4-foot level is ideal for long header installations)
- Tape measure and pencil
- Stud finder
- Screwdriver (manual or powered)
- Wall anchors appropriate for your wall type if studs aren't available
- The shade, blind, or curtain rod and all supplied hardware
- Step stool or ladder
Installing a roller shade or panel track blind
- Decide inside vs outside mount: inside mount gives a cleaner look but requires adequate frame depth (typically 2 to 3 inches minimum). Outside mount is more forgiving and provides better light blockage at the edges.
- Mark bracket positions: for inside mount, measure in from each side of the frame and mark the bracket holes. For outside mount, measure and mark positions above and to the sides of the frame, checking that brackets will hit solid framing or that you have appropriate anchors.
- Check for door handle clearance: with the door in its fully open position, confirm that the shade mechanism (brackets, motor housing, valance) clears the handle. On sliding doors, also confirm the shade doesn't overhang the track in a way that catches when the door slides.
- Drill pilot holes and install brackets: use the correct bit for your material. For drywall without stud backing, use toggle anchors rated for at least 3x the shade weight.
- Snap or slide the shade rail into brackets: most modern roller shades click into mounting brackets — follow the specific manufacturer's instructions here, as the retention mechanism varies by brand.
- Test operation: raise and lower the shade fully several times. Check that the shade hangs plumb and doesn't bind. Open and close the patio door to confirm nothing interferes.
- For panel track blinds on sliding doors: the track header should be installed level above the door. Panels should stack to the side that is opposite the door's opening direction so the door can be opened without moving the panels.
Installing curtain rods and drapes
- Choose rod placement: mount the rod 4 to 6 inches above the door frame and extend it 6 to 12 inches past the frame on each side. This allows the curtain panels to stack completely off the glass when open, keeping the door unobstructed.
- Locate studs or use heavy-duty anchors: a wide curtain rod with heavy thermal-lined drapes over a patio door can exert significant pull on wall anchors. Use toggle bolts or snap toggles in drywall if studs aren't positioned where you need them.
- Install brackets level: use a level across all bracket positions before drilling. A crooked rod is the most common and most visible mistake.
- Hang panels: for a sliding door, use two panels that each stack to one side, or a single panel that stacks to the non-opening side. For a hinged outswing door, make sure the panels can be fully pushed aside so the door can open without catching the fabric.
- Add tiebacks or holdbacks: for sliding doors especially, fabric tiebacks prevent the curtain from swinging into the door track — a simple detail that avoids an annoying problem.
Vertical blinds: a note on sliding patio doors
Vertical blind headrails are installed at the top of the opening, and the vanes stack to one end when open. The key installation issue is headrail length: it should match the full door width, and the stacking side should align with the direction the door opens so the stack and the door don't compete for the same space. Most vertical blind kits come with all necessary hardware for outside-mount installation on standard door frames; just confirm the vane length accounts for the actual drop to the floor or sill, not just the frame height.
Step-by-step: exterior screens, shade sails, and fixed sunshades
Exterior solutions involve working on ladders, drilling into exterior walls (sometimes masonry), and dealing with wind loads, so careful anchoring matters more here than anywhere else. I'll cover the most DIY-accessible options.
Installing a shade sail over a patio
- Plan the attachment points: shade sails need at least 3 anchor points (triangular sail) or 4 (square/rectangular). Attachment points can be existing structures (house wall, fence posts, pergola beams) or new posts you install. Each point must be capable of handling both the weight of the sail and wind uplift — for a typical 12-by-12-foot sail in a moderate wind zone, each anchor point should handle at least 200 to 400 lbs of force. When in doubt, overengineer the anchors.
- Install D-ring wall anchors or posts: for wall-mounted anchors, use 3/8-inch galvanized lag screws into wall studs or into a blocking plate — never into just drywall or siding alone. For new posts, set them in concrete footings at least 24 inches deep (deeper in frost-prone climates).
- Attach tensioning hardware: shade sails work by tension, not weight. Use 316 stainless steel or galvanized turnbuckles and snap hooks at each corner. The sail should be pulled tight enough that it doesn't sag significantly, but over-tensioning can tear the corner reinforcements.
- Position the sail at an angle: a sail installed dead-horizontal collects rainwater and fails quickly. Angle at least one attachment point higher than the others so rain runs off. An angle of 20 to 30 degrees is typical.
- Check clearance over the door: the sail should not sit directly over the door opening in a way that could drip or funnel water into the frame when it rains.
- Seasonal removal: most shade sail fabrics are UV-resistant but not designed for heavy snow loads or sustained high winds. Take them down in late fall if you're in a climate with those conditions.
Installing an exterior roller screen
Exterior roller screens mount in a housing above the door frame, with guide rails on each side. This installation almost always requires drilling into the exterior wall or door frame surround. The housing needs to be perfectly level for the screen to roll and retract evenly. For a masonry exterior, use proper masonry anchors, tapcon screws or expansion anchors, not drywall screws. The guide rails must be plumb and parallel. Before buying, confirm the clearance dimensions: the housing needs to sit flush or slightly proud of the wall without blocking the door's opening sweep, and the rails must not interfere with the door's weatherstripping or frame. Motorized versions add wiring that typically needs to run to a nearby outlet or low-voltage transformer. For a large or motorized exterior screen, professional installation is a reasonable choice, the labor is straightforward but the anchoring into exterior structure is where mistakes cause long-term problems.
Building a simple fixed timber sunshade
A fixed horizontal shade structure, essentially a narrow pergola over the door, is one of the most permanent and effective DIY exterior sun-blocking projects. The principle is simple: a horizontal overhang blocks high summer sun (which comes in at a steep angle) while allowing lower winter sun through. The required overhang depth depends on your latitude and the height of the structure above the door. At 35 degrees latitude, an overhang of about 1 foot per foot of height above the glass sill will block summer noon sun and allow winter noon sun. For a frame with posts bolted to the exterior wall, use structural lag screws (at least 3/8 inch diameter, minimum 3-inch embedment into solid framing) and check local building codes, any permanent attached structure to your house may require a permit. Use pressure-treated lumber for any members close to the ground or in contact with the wall. This kind of project takes a full weekend and typically costs $200 to $700 in materials depending on size and wood choice.
How shading affects your patio door's function, security and warranty
A few things worth knowing before you commit to a solution. First, window film applied to the interior surface of a double-pane insulated glass unit (IGU) can void the glass manufacturer's warranty, check your door's documentation. Some manufacturers explicitly allow it; others don't. If your patio door is still under warranty and you're not sure, contact the manufacturer before applying film. For specific practical concerns, like whether you can put a cat flap in patio doors, see guidance on fitting pet flaps in patio door assemblies before altering seals, frames, or warranties can you put a cat flap in patio doors. Second, any interior treatment that physically attaches to the door itself (some specialized blind systems clip to the door glass) will affect the door's operation, test the door through its full range of motion after installation. For practical tips on preventing doors from slamming shut, see how to stop patio doors slamming shut. If you need pet access, see guidance on can you put a dog flap in a patio door for how cutting or fitting a flap affects the door's seal, security, and operation. Third, window film does not replace or reinforce door glass for security purposes unless you're using a purpose-built security film with proper edge attachment (the IPA system mentioned earlier). A standard solar film makes no meaningful difference to glass breakage resistance. If wind is an issue, see our guide on how to stop patio doors blowing in the wind for practical anchoring and windproofing tips. Finally, if condensation on your patio door is already a concern, something covered separately in resources about stopping condensation on patio doors, be aware that some interior shading solutions can trap cold air between the glass and the shade, potentially worsening condensation on the glass surface in cold weather. If bird strikes are an issue, see our guide on how to stop birds flying into patio doors for effective deterrents and glazing options.
Maintenance and keeping everything working
Window film should not be cleaned with abrasive materials or ammonia-based cleaners, use a soft cloth and mild soap. Avoid cleaning for the first 30 days after application while the film cures. Inspect film edges annually; if you see lifting starting at a corner, press it down with a firm squeegee and a drop of application solution. Bubbles that appear after curing are usually caused by moisture intrusion at a failed edge, this is the most common failure mode and typically requires professional re-application of that section.
For roller shades and blinds, periodically vacuum the fabric with a brush attachment to prevent dust buildup, which can degrade solar fabric over time. Lubricate vertical blind headrail carriers annually with a dry silicone spray, not WD-40, which attracts dust. Check that mounting brackets haven't loosened, especially after any structural settling. For exterior shade sails, inspect the corner reinforcements and turnbuckle connections at the start of each season and re-tension if the sail has sagged. Exterior roller screen guide rails should be cleaned of debris that can cause the screen fabric to bind or tear. For all exterior timber structures, inspect fasteners and lumber for rot or corrosion annually and touch up any exposed metal connections with galvanizing paint.
When to call a professional
Most of the interior solutions in this guide are genuine DIY projects. The exterior work is where judgment matters most. Call a professional if: you're anchoring an awning or exterior screen into masonry or stucco and are not confident in your anchor selection; the awning or shade structure is motorized and requires hardwired electrical work; your door is under manufacturer warranty and you're not certain about film compatibility; or you're installing large, heavy interior shutters on a custom frame. For security film specifically, if break-in protection is a real concern rather than just an incidental benefit, professional installation with proper edge attachment is worth the cost, a DIY-applied security film without perimeter adhesion offers essentially no security benefit.
FAQ
What are the practical interior and exterior methods to block sun from a patio door?
Interior: window films (reflective, ceramic, frosted), roller/cellular/panel shades, vertical blinds, curtains and blackout drapes. Exterior: retractable awnings, fixed overhangs, exterior roller screens/solar screens, shutters, shade sails and pergolas. Choose interior when you want easier DIY installs and preserved exterior appearance; choose exterior when you need higher heat rejection and daytime privacy.
Which shading options work best for reducing heat, glare, UV and for privacy?
Heat reduction: exterior screens, awnings, and exterior shutters are best (they block solar energy before it reaches the glass). Glare reduction: interior roller shades or low‑VLT films and exterior screens. UV protection: most window films and many fabrics block 99%+ UV. Privacy: opaque curtains, frosted film, and exterior shutters provide the best daytime and nighttime privacy; one‑way reflective films can offer daytime privacy only.
How do SHGC, U‑factor and VLT affect my choice of shading?
SHGC (Solar Heat Gain Coefficient) measures how much solar heat enters; lower SHGC helps cooling. U‑factor measures insulation (lower = better for heat retention). VLT (Visible Light Transmittance) controls daylight vs glare. For cooling‑dominated orientations choose treatments or films that lower SHGC while keeping VLT acceptable; spectrally‑selective films can reject NIR heat while keeping higher VLT.
How do I determine the patio door orientation and peak sun exposure?
Use SunCalc.org or NOAA Solar Calculator with your address and the dates/times you experience glare/heat to get solar azimuth and altitude. On‑site: at problem times point a phone compass toward the sun and note the bearing/time. East = morning sun, west = afternoon sun, south = high‑noon (Northern Hemisphere). Use this to pick exterior geometry (awning angle) or screen density.
What measurements and site details should I record before buying materials?
Measure width at top/middle/bottom and use the smallest for inside‑mounts; measure height left/center/right and use the longest. For outside‑mounts measure full coverage area and add 2–3" overlap each side. Also note frame depth, headroom above the door, sill clearance, track obstructions, and whether the door slides, swings or has security hardware that affects mounting.
What are step‑by‑step DIY installation procedures for window film on a patio door?
1) Clean glass thoroughly with detergent and squeegee; remove all residues. 2) Measure and cut film 1/4–1/2" oversize. 3) Spray glass with slip solution (water + a few drops of dish soap). 4) Peel liner and wet adhesive side; position film on glass, aligning edges. 5) Use a hard squeegee to push out solution and bubbles working from center to edges. 6) Trim excess with a sharp utility knife against a straightedge; smooth final edges and allow 24–72 hours to set. Follow manufacturer edge‑retention guidance for warranties.
Next Article
How to Stop Dog From Jumping on Patio Door: DIY Guide
Stop dogs jumping at patio doors: quick safety fixes, step-by-step training, DIY barriers, pet-flap guides, costs & tool