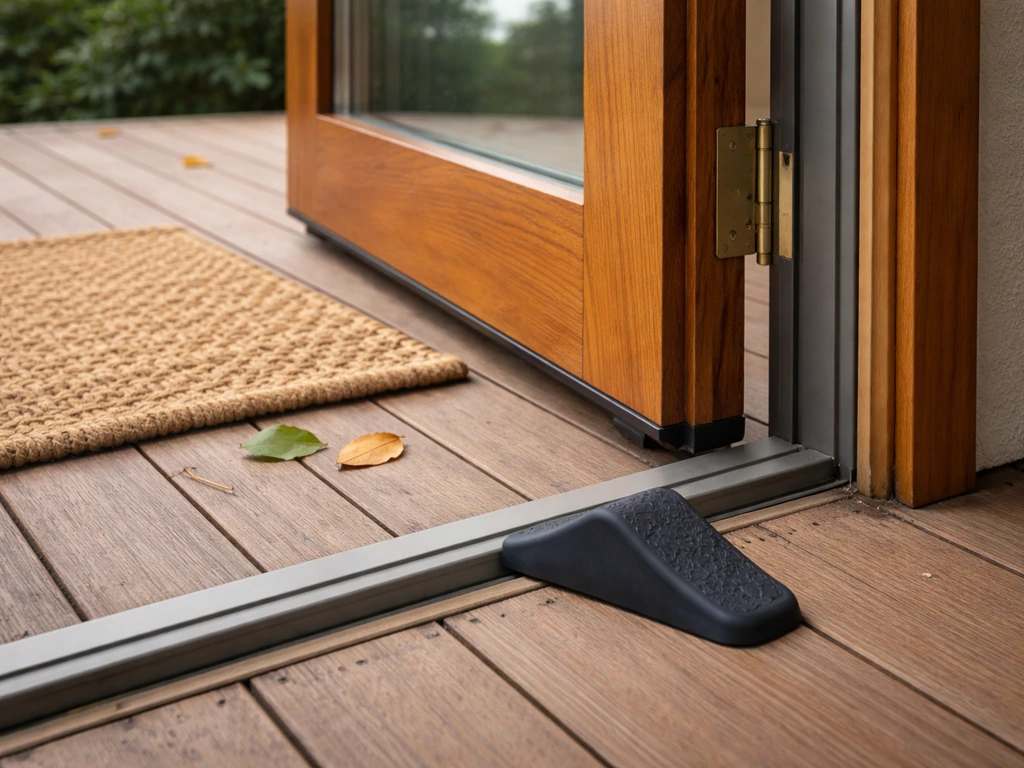
A patio door that's frozen shut is usually caused by water sitting in the track, on the threshold seal, or inside the lock cylinder overnight and then freezing solid. The fix for most cases is controlled warm air from a hair dryer, a shot of commercial lock de-icer into the keyway, and a gentle rocking motion on the sash. Prevention comes down to clearing weep holes before winter, replacing worn weatherstripping, lubricating seals and the track with silicone spray, and adjusting rollers so the door rides level and doesn't trap standing water. This guide walks through every piece of that puzzle: how to unfreeze a door safely right now, what actually causes it to happen, and a full winterization checklist to make sure it doesn't happen again.
How to keep patio door from freezing shut, DIY guide

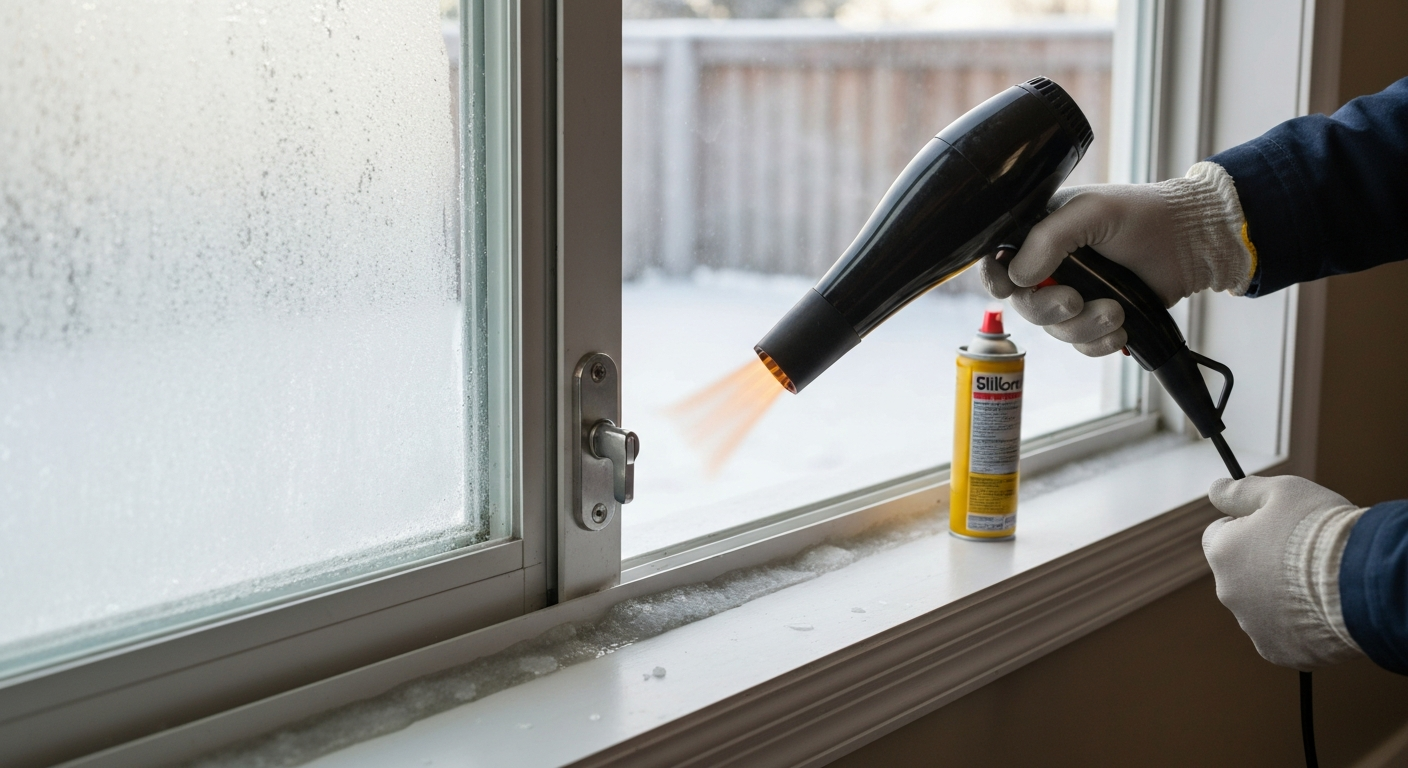
Why patio doors freeze shut (and what this guide covers)
Sliding glass doors and their screen or storm door companions are especially vulnerable to freezing because their design puts water-collection points right where the door has to move. The sill track sits low and catches rain, snowmelt, and condensation. The threshold seal and weatherstripping compress against the frame, and when moisture gets between them and the temperature drops, they bond to the frame like a suction cup. Locks freeze because water vapor finds its way into the cylinder and the latch mechanism. Any one of those failure points, or a combination of them, can leave you tugging at a door that absolutely will not move on a cold morning.
This guide covers sliding glass patio doors, secondary storm or screen doors, frozen lock cylinders, and ice-packed tracks. You'll find an emergency unfreeze sequence first (because that's often why you're here), followed by a clear breakdown of the root causes, a tools and products list, safe de-icer and lubricant recommendations, a step-by-step winterization checklist, and DIY repair procedures for every common failure mode. At the end there's a troubleshooting table and honest guidance on when to stop and call a pro.
Emergency unfreeze: what to do right now
Work through these steps in order. Each one is progressive, so you're applying the gentlest method first and escalating only if needed. Don't skip to prying or pouring hot water, you'll damage seals or crack the glass, which turns a ten-minute problem into a hundred-dollar repair. For step-by-step emergency techniques, see how to unfreeze a patio door.
Frozen lock or keyway
- Spray a commercial aerosol lock de-icer directly into the keyway. Hold the nozzle flush with the keyhole opening and give it a 1-2 second burst. Wait 30 seconds, then insert your key and work it gently back and forth — don't crank it hard. If isopropyl alcohol (90% or higher) is all you have, it works the same way and is less likely to leave residue.
- If the key turns but the latch is still stuck, aim a hair dryer on the low-to-medium heat setting at the latch housing and surrounding frame area. Keep the nozzle at least 4-6 inches away and move it continuously in small circles. Thirty to sixty seconds of this is usually enough to free a frozen latch.
- Try operating the handle again. If it moves but the door still won't slide, the problem has shifted from the lock to the track or the seal — continue below.
Frozen track or threshold seal
- Run the hair dryer (low-medium heat, nozzle 4-6 inches away) along the bottom track seam where the door contacts the threshold. Work slowly from one side to the other. You're trying to melt a thin layer of ice, not heat the whole sill.
- While the area is warm, spray a thin coat of silicone lubricant along the weatherstripping and the track channel. This breaks any remaining adhesion between the seal and the frame.
- Grip the door handle and apply gentle, steady sliding pressure while rocking the door slightly (push slightly inward at the top, outward at the bottom) to break the ice bond at a single contact point. Do not yank or force it.
- Once the door breaks free, slide it a few inches, wipe any visible ice from the track, and spray a thin film of silicone lubricant along the full track length. This prevents it from sticking again while the temperature stays low.
Screen or storm door frozen at the frame
- Apply warm air from the hair dryer along the door's perimeter where the frame meets the door stop, paying particular attention to the bottom corners where water pools.
- Spray silicone lubricant into the gap between the door edge and the frame stop, working it around the perimeter.
- Push and pull the door gently while it's still warm. Storm doors are lighter than patio sliders and usually release quickly once the ice bond at the frame stop breaks.
Stop and call a locksmith if the key binds hard and you feel resistance inside the cylinder, if any plastic or rubber component looks brittle or cracked, or if the de-icer hasn't cleared the keyway after two full applications. Forcing a seized cylinder will shear the key or break the lock housing.
What NOT to do when unfreezing a patio door
A few methods seem like obvious shortcuts but will cause real damage. Skip all of these:
- Boiling or very hot water: Pouring it onto the glass, into the track, or over the frame risks thermal shock to the glass, damage to seals, and the added problem that the hot water drains into cavities and refreezes, making the situation worse.
- Open flame (lighters, propane torches, heat guns on maximum): Direct flame or extreme radiant heat can permanently damage weatherstripping, painted or powder-coated frames, and in rare cases cause thermal breakage of the glass pane. No patio door manufacturer recommends this.
- Prying with a screwdriver or bar: The aluminum or vinyl threshold, the door frame, and the track channel all bend or crack easily under lateral force. Prying also won't solve ice — it just adds a bent track to your problem list.
- Rock salt or sodium chloride ice melt in the track: Salt melts ice but aggressively corrodes aluminum frames, metal hardware, and the rolling components inside the track. Even calcium-chloride blends (which melt at lower temperatures) will accelerate corrosion on exposed metal parts if they're not rinsed off. Salt in the track is a short-term fix that creates long-term hardware damage.
- Petroleum-based multi-use sprays (standard WD-40) on weatherstripping or lock cylinders: Multi-use petroleum sprays can swell and degrade rubber seals over time and leave residues inside lock cylinders that attract grit and eventually gum up the pin stack.
What actually causes a patio door to freeze shut
Understanding the cause points you directly at the right fix. Most frozen patio doors are caused by one or more of these failure modes:
Ice accumulation in the track
The sill track on a sliding door is a channel, and channels collect water. Rain, snowmelt, and even shoe traffic deposit moisture there. If the drainage system isn't working, that water has nowhere to go and freezes in place overnight, locking the roller against the track bottom.
Blocked or dirty weep holes
Weep holes are small drainage ports at the base of the track, usually on the exterior face of the sill. They're designed to drain water that enters the track during rain. Debris (dirt, dead insects, leaf fragments) blocks them within a season or two if they're not cleaned, and standing water is the result. Milgard, Andersen, Pella, and other major manufacturers all list weep hole cleaning as primary maintenance specifically to prevent water from collecting and freezing in the sill. Manufacturers and building‑enclosure guidance identify clogged weep holes, failed pan drainage, or low sill slope as causes of standing water in interior tracks, and they recommend routinely clearing weeps with a soft bottle brush, pipe cleaner, or shop vacuum to prevent that trapped water from freezing in place.
Degraded or hardened weatherstripping
The pile weatherstripping or bulb seal that runs along the door's perimeter compresses against the frame to keep air and water out. Over several winters this material hardens, cracks, or flattens. When it's no longer making consistent contact, water gets behind it, and when temperatures drop, the seal freezes directly to the frame surface. A door with deteriorated weatherstripping is also a cold-air leak.
Misaligned or worn rollers
Sliding door rollers have adjustment screws that set the height of the sash relative to the track. When rollers wear down or the adjustment loosens over time, the bottom of the door can drop low enough to sit in the water that collects at the track bottom. Even a 1-2mm drop in sash height can change a door that drains properly into one that holds a thin sheet of water, and that sheet of water becomes a layer of ice by morning.
Condensation and melt-refreeze cycles
In climates with daytime thaw and overnight freeze, condensation forms on the cold glass, the frame, and the sill. That moisture migrates into the seal-to-frame contact zone, then refreezes when the temperature drops again. Repeated melt-refreeze cycles are often more damaging than a single hard freeze because each cycle pumps a little more water deeper into gaps.
Screen and storm door issues
Secondary storm doors have their own freeze points: the door stop (the flat piece the door closes against), the door sweep at the bottom, and the self-closing mechanism. Water pools at the threshold, the bottom of the frame freezes to the door stop, and the pneumatic closer can seize in extreme cold, preventing the door from pulling open.
Frozen lock internals
Lock cylinders and latch mechanisms are exposed to outdoor air and humidity. The keyway is an open path for moisture-laden air. In cold weather, that moisture condenses inside the cylinder and on the latch bolt, and a temperature drop freezes it solid. Locks without dry lubrication in the cylinder are especially prone to this because residual moisture has nothing to displace it.
Tools and materials you'll need
Gather these before you start any repair or maintenance work. Having everything in reach cuts job time significantly.
Heat tools
- Hair dryer with at least two heat settings (low-medium is all you'll use here)
- Extension cord rated for outdoor use if needed to reach the door
De-icers
- Commercial aerosol lock de-icer (CRC Freeze-Off, Prestone Lock De-Icer, or equivalent)
- Isopropyl alcohol 90% or higher (backup for lock de-icing, also useful for cleaning)
- Calcium-chloride ice melt pellets (for the exterior threshold step or pathway — not for inside the track channel)
Lubricants
- Silicone spray lubricant (WD-40 Specialist Silicone or equivalent) — for tracks, weatherstripping, and door frames
- Dry graphite powder or PTFE dry spray — for lock cylinders only
- PTFE (Teflon) spray — for roller assemblies and hard-plastic track components
Cleaning supplies
- Stiff nylon brush or old toothbrush (track and weep hole cleaning)
- Pipe cleaners or thin bottle brush (clearing weep holes)
- Shop vacuum with narrow crevice tool
- Mild dish soap and warm water in a bucket
- Rags and paper towels
Replacement parts and hand tools
- Replacement weatherstripping matched to your door model (EPDM bulb seal or V-strip, per manufacturer spec)
- Replacement door sweep (bottom sweep for the sliding door, door shoe for storm door)
- Replacement rollers for your door model if they're worn (bring the old ones to the hardware store or order by model number)
- Phillips and flathead screwdrivers (including a long-shank driver for roller adjustment screws at the bottom rail)
- Pry bar or trim tool (for removing interior door stop trim to access storm door hardware — use carefully)
- Tape measure
- Utility knife or scissors (for cutting weatherstrip to length)
- Snap-off razor blade or plastic scraper (for removing old weatherstrip adhesive)
Optional but worthwhile for freeze-prone homes
- Heated entry mat (HeatTrak or equivalent, outdoor-rated, GFCI-protected)
- Self-regulating heated trace cable rated for threshold installation
- Door awning or canopy
De-icers and lubricants: what to use where
Using the wrong product in the wrong place is one of the most common ways homeowners cause follow-on problems. Guidance and product comparisons for de‑icers (aggregated product reviews & chemistry notes): liquid lock de‑icers (Freeze‑Off style solvents) act quickly by lowering freezing point or dissolving ice, while calcium‑chloride blends melt at lower temperatures than sodium‑chloride but increase corrosion risk to aluminum and other metal hardware, balance melt performance versus corrosion risk and rinse frames after salt use. Here's a clear breakdown:
| Location | Recommended product | Avoid |
|---|---|---|
| Lock cylinder / keyway | Aerosol lock de-icer (emergency); dry graphite or PTFE dry spray (prevention) | WD-40 multi-use, any oil-based lubricant — leaves residue that collects grit and gums the pin stack |
| Latch mechanism / handle housing | Lock de-icer (emergency); dry PTFE spray (maintenance) | Petroleum sprays, grease |
| Track channel (metal or vinyl) | Silicone spray or PTFE spray — thin film, wipe excess | Salt, oil-based lubricants, grease, WD-40 multi-use |
| Weatherstripping / rubber and vinyl seals | Silicone spray — protects and repels water without swelling rubber | Petroleum solvents, WD-40 multi-use, mineral spirits — can swell or harden rubber seals |
| Roller assemblies | PTFE dry spray or silicone spray per manufacturer guidance | Heavy oil or grease — attracts grit and clogs rollers |
| Glass surfaces | Nothing needed — wipe dry; never apply any lubricant | Anything — lubricants attract dirt and smear |
| Exterior threshold step / walkway | Calcium-chloride pellets (lower melt point than rock salt); sand for traction | Rock salt directly against aluminum or metal frame — corrodes hardware; salt inside the track channel |
A note on WD-40: the multi-use formula is a water displacer and short-term penetrating oil, not a lubricant. It will free a stuck component temporarily but evaporates quickly, leaves a petroleum residue, and actively damages rubber seals over repeated use. WD-40 Specialist Silicone is a completely different product and is one of the safest choices for patio door components. The two are easy to confuse at the hardware store, check the label.
Seasonal prevention and winterization checklist
Do this once in early fall, ideally before the first freeze. It takes about two to three hours for a typical sliding door, and it genuinely prevents most winter problems. Work through the steps in order, cleaning comes before lubricating, and inspecting comes before buying replacement parts.
- Clean the track thoroughly: Vacuum out loose debris with the shop vacuum and crevice tool, then scrub the full length of the track channel with the nylon brush and a mild soapy water solution. Rinse and dry completely.
- Clear and test weep holes: Locate the weep holes on the exterior face of the sill (they're small slots or holes, usually 2-4 per door). Push a pipe cleaner or thin bottle brush into each one and work it back and forth to clear debris. Then pour a small cup of water into the track and confirm it drains out through the weep holes. If it doesn't drain, keep working the holes until it does.
- Inspect and replace weatherstripping: Run your hand along the full perimeter of the door seal while the door is closed. Any section that's flattened, cracked, hard, or clearly not making contact needs replacing. Note the type and length needed before removing it (EPDM bulb seal, foam tape, V-strip, or pile strip depending on the door).
- Inspect and replace the door sweep: The sweep at the bottom of the sliding door is the first line of defense against water in the track. If it's torn, compressed flat, or missing sections, replace it. Most sweeps attach with screws at each end and slide out of a channel.
- Lubricate the track and seals: Apply a thin film of silicone spray to the full length of the track channel and along the weatherstripping. Wipe off any excess with a rag — a heavy coat attracts dirt.
- Adjust rollers for proper sash height: With the door closed, check whether the bottom rail is sitting at or slightly above track height, not sitting down in the channel. If it's low, adjust the roller height screws (see the DIY repair section below). A correctly adjusted door should slide smoothly with one finger and should not scrape.
- Lubricate the lock cylinder: Apply dry graphite powder or PTFE dry spray into the keyway, insert and remove the key several times to distribute it, then wipe the face of the cylinder.
- Install or inspect a threshold sweep on the storm door: If you have a secondary screen or storm door, verify that its door sweep seals the full width of the threshold. Replace it if it's worn.
- Consider a door awning or canopy: A small awning above the patio door deflects precipitation off the threshold and dramatically reduces the amount of water that reaches the track and seals. This is one of the most cost-effective long-term solutions for homes in heavy-snow or frequent-freeze climates.
- Consider a heated threshold mat: For homes that experience repeated hard freezes at the threshold, a GFCI-protected outdoor heated mat (such as HeatTrak residential mats) installed in front of the door continuously melts frost and ice before it reaches the sill. Use only on a weatherproof grounded outlet with confirmed GFCI protection. For permanent heated cable installations, have a qualified electrician run the wiring.
DIY repair procedures
Each repair below includes an honest time estimate and difficulty level so you can decide upfront whether it fits your Saturday morning or needs more planning.
Cleaning the track and clearing weep holes
Time: 20-30 minutes. Difficulty: Easy.
- Vacuum the track channel end-to-end with the crevice tool.
- Mix a small bucket of warm water with a few drops of dish soap. Scrub the full track with the nylon brush, paying extra attention to the corners and the bottom of the channel where debris packs in.
- Use a pipe cleaner or thin bottle brush in each weep hole on the exterior sill face. Push it fully in, rotate it, and pull it back out.
- Rinse with clean water and confirm drainage by pouring a cup of water into the track center and watching it exit the weep holes within 10-15 seconds.
- Dry the track, then apply a thin film of silicone or PTFE spray.
Adjusting roller height
Time: 15-30 minutes. Difficulty: Easy to moderate (varies by brand).
- Find the roller adjustment holes on the bottom rail of the door — there's usually one near each end. They may be covered by small plastic plugs; pry these out with a flathead screwdriver and keep them safe.
- Insert a long-shank Phillips screwdriver into the adjustment hole at an angle to reach the roller adjustment screw. Turning clockwise typically raises the sash; counterclockwise lowers it. Make a quarter turn at a time.
- After each adjustment, test the door by sliding it and checking the gap at the threshold. The door should move smoothly and the bottom rail should clear the track channel without scraping.
- Adjust both ends until the door is level and slides with minimal resistance. Replace the adjustment hole plugs.
- Lubricate the track and re-test.
Removing and replacing worn rollers
Time: 45-90 minutes. Difficulty: Moderate. This job is straightforward but the sash is heavy (often 50-100+ lbs for a full glass panel), so have a second person available.
- Open the door fully. Lower the roller adjustment screws as far as they'll go to give clearance for removal.
- At the top of the door, look for a removable stop or anti-lift block — this is a plastic or metal piece inside the upper track that prevents the door from being lifted out. Remove its retaining screw and slide it out of the way.
- Tilt the bottom of the door inward slightly while lifting the door up into the upper track channel, then swing the bottom of the door out and lower it. Set it on a padded surface.
- The roller assemblies are at the bottom corners of the sash, set into pockets in the bottom rail. They're typically held in by one or two screws. Remove those screws and pull the roller assembly out.
- Take the old rollers to the hardware store or photograph the model number stamped on the housing to order the exact replacement. Rollers are not universally interchangeable — match the housing size and wheel diameter.
- Install the new rollers, screw them in, re-hang the door (reverse the removal steps), and adjust the roller height as described above.
- Lubricate the track and test operation.
Replacing weatherstripping
Time: 30-60 minutes. Difficulty: Easy.
- Identify the type of weatherstripping: pile strip (fuzzy), foam tape, bulb seal, or V-strip. Bring a cut sample or photo to the hardware store.
- Pull or peel off the old strip. For adhesive-backed foam tape, use a plastic scraper to remove residue and clean the groove or surface with isopropyl alcohol.
- Cut the new strip to length with scissors or a utility knife. For a kerf-mount seal (one that presses into a groove), start at one end and press it in with your thumb, working along the full length.
- For pile strips, press or tap the spline into the groove with a blunt tool.
- Close the door and check the seal is making full contact without the door binding.
Replacing the door sweep
Time: 20-30 minutes. Difficulty: Easy.
- Open the door to access the bottom rail from inside. The sweep typically attaches with two screws at the ends and may slide in a channel.
- Remove the screws and slide the sweep out. Measure the length and note whether it's a screw-slot type, a snap-in type, or a kerf-mount.
- Install the new sweep: for slide-in types, start at one end and feed the fin into the channel, then tighten the retaining screws. For screw-mount types, position and screw in.
- Test with the door closed — the sweep should compress slightly against the threshold without making the door hard to slide.
Realigning the door (addressing a dropped or twisted sash)
Time: 30-45 minutes. Difficulty: Moderate.
- Check if the door is dropping by looking at the gap between the top of the door and the upper track — it should be consistent from end to end. An uneven gap means one roller is lower than the other.
- Use the roller adjustment screws (as described above) to raise the low end until the gap is even across the top.
- Check the side gaps between the door and the frame. If the door is twisted so that it seals on one side but not the other, this is also corrected through differential roller height adjustment.
- If the door leans into or away from the frame after roller adjustment and still doesn't seal properly, the frame itself may be out of square — that's a professional assessment, as correcting frame alignment involves the rough opening.
Servicing or replacing the lock cylinder
Time: 20-45 minutes. Difficulty: Easy to moderate.
- For routine servicing: insert the key and apply dry graphite powder or PTFE dry spray into the keyway. Work the key in and out a dozen times to distribute the lubricant through the pin stack. Wipe the face of the cylinder.
- For a cylinder that still binds after lubrication: the cylinder may need replacing. Most sliding door lock cylinders are retained by a single setscrew on the interior face of the lock housing. Remove that screw, pull the cylinder out, and take it to a locksmith to be re-keyed or matched to a replacement.
- To replace the full lock: remove the two or three screws on the interior face plate, pull the handle and lock assembly off both sides of the door, and install the new hardware in reverse order. Match the replacement to your door brand and handle bore spacing.
- Test the lock fully with the door closed before finishing — confirm the latch bolt extends and retracts smoothly and that the key turns both ways without binding.
Repairing a screen or storm door that freezes shut
Time: 20-40 minutes. Difficulty: Easy.
- Apply silicone spray to the full perimeter of the door stop (the interior surface the door closes against). This is the most common freeze point.
- Check the door sweep condition and replace if worn (same procedure as above).
- If the pneumatic closer seizes in cold weather, apply a silicone or dry PTFE spray to the closer tube and piston rod (accessible through the hole at the end cap). Avoid oil-based lubricants on pneumatic closers.
- If the door consistently freezes at the same corner, check whether water is pooling there — it may indicate a sloped threshold or a gap at the door stop that's allowing water to enter. Seal small gaps with a bead of exterior-grade silicone caulk along the door stop joint.
Troubleshooting: match your symptom to the fix
| Symptom | Most likely cause | First fix | If that doesn't work |
|---|---|---|---|
| Key won't turn at all | Frozen cylinder | Lock de-icer into keyway, wait 30 sec, try key again | Hair dryer on lock housing; if still seized, call a locksmith |
| Key turns but door won't open | Frozen latch bolt or frozen track/seal | Hair dryer on latch area, then warm the track seam and rock the door | Check for ice in track channel; clear and lubricate |
| Door slides but drags heavily | Ice in track bottom or rollers riding low | Hair dryer along track, clear ice, lubricate; check roller height | Adjust roller height; inspect rollers for wear |
| Door sticks at the same spot each winter | Low spot in track collecting water; blocked weep hole at that location | Clear weep holes at that end; check track slope | Adjust roller height at that end; consider heated mat |
| Weatherstripping frozen to frame | Moisture trapped between seal and frame overnight | Hair dryer along seal line, silicone spray on seals | Inspect and replace weatherstripping; seal any water entry gaps |
| Storm door frozen shut (frame bond) | Water pooled at door stop, door sweep failed | Hair dryer on perimeter, silicone spray on door stop | Replace door sweep; caulk door stop gap |
| Track fills with water repeatedly | Blocked weep holes or inadequate drainage | Clear weep holes; confirm water drains in under 15 sec when poured in | Check track slope; consider awning to reduce water entry |
| Door freezes shut every night in cold snaps | Repeated melt-refreeze at threshold | Lubricate seals heavily before nighttime temps drop | Install heated threshold mat; add awning |
When to stop and call a professional
Most of what's described in this guide is genuinely DIY-friendly, but a few situations are worth recognizing as pro territory:
- Bent or warped track channel: If the track itself has buckled, no amount of cleaning or lubrication will fix it. Track replacement typically requires partially dismantling the frame and is a job for a door technician or replacement installer.
- Frame out of square: If roller adjustment and realignment don't produce even gaps on all sides and the door still doesn't seal, the rough opening or frame may have shifted. This is a structural issue beyond normal maintenance.
- Broken or shattered glass panel: Thermal or mechanical stress can crack a pane. Glass replacement on a double-pane insulated unit requires a glazier or door specialist and should never be DIY'd with generic glass.
- Significant frame damage or rot: On wood-framed patio doors, freeze-thaw cycles can cause wood rot. If the door frame itself is soft or visibly deteriorating, the frame needs replacement, not repair.
- Seized lock cylinder that won't release with de-icer: If the key binds so hard that you're afraid of shearing it, stop. A locksmith can drill and replace the cylinder without damaging the lock housing.
- Permanent heated cable or outlet installation: If you're considering a permanent heated trace system for the threshold, the wiring and outlet installation should be done by a licensed electrician to ensure correct GFCI protection and weatherproof connections.
If you're dealing with a door that simply won't stay in its track, swings open on its own, or needs a full hardware overhaul, the related topics on how to close a patio door properly and how to stop a patio door from swinging open cover those specific scenarios in detail. For step‑by‑step fixes and hardware adjustments, see how to stop patio door swinging open. For advice on preventing doors from being blown shut or opened by gusts, see how to keep patio door open in wind. See our guide on how to keep a patio door open for tips on securing a door in the open position and safe hold-open methods. For step-by-step closing and latch-adjustment tips, see our guide on how to close a patio door.
FAQ
What are the immediate, safe steps to unfreeze a patio door that’s stuck shut (sliding glass or storm/screen door)?
Work from least‑aggressive to more involved: 1) Clear snow/ice around the sill and outside track to reduce re‑freezing. 2) Try the lock/keyway first: spray a commercial lock de‑icer or 90%+ isopropyl alcohol into the keyhole, wait 30–60 seconds, then gently try the key. 3) Use warm air (hair dryer on low–medium) directed at the lock, latch, and frozen track seams; keep the nozzle several inches away and move continuously to avoid overheating seals or glass. 4) Spray a silicone or PTFE lubricant sparingly on rubber seals and adhesion points to free glued‑on frost. 5) If the sash is frozen at one spot, warm that area and gently rock the door back and forth while pulling; do not force heavy jerks. 6) If a metal latch or bolt is frozen, warm the surrounding area and use lock de‑icer; stop if the key binds or parts feel brittle and call a locksmith. Avoid open flames and pouring boiling water on glass, seals or locks.
Why do patio doors freeze shut — what are the common causes and failure modes to check?
Common causes: 1) Ice inside the track or threshold from standing water or melt/refreeze. 2) Blocked or clogged weep holes/drain channels so water can’t escape. 3) Damaged, compressed or hardened weatherstripping that admits water and holds it in contact areas. 4) Misaligned or worn rollers that drop the sash into the track and reduce clearance, trapping ice. 5) Condensation or interior moisture that melts then refreezes in the sill. Each failure mode creates standing water or adhesion points that freeze and lock the sash or latch.
What should I do right before winter to prevent patio doors from freezing shut?
Seasonal prevention checklist: 1) Clean tracks and vacuum weep holes; flush with water and clear with a pipe cleaner or bottle brush. 2) Inspect and replace worn weatherstripping, door sweeps and threshold seals (EPDM or silicone recommended). 3) Adjust or replace rollers so the sash rides level with adequate clearance. 4) Lightly lubricate tracks, rollers and seals with silicone or PTFE sprays (not oil) and apply graphite/PTFE to lock cylinders. 5) Install a storm/secondary door or a small awning if exposed to direct melt/runoff. 6) Add a threshold sweep and check sill slope/drainage; repair or re‑route runoff so water leaves the sill. 7) Consider portable heated mats or permanent trace heating in high‑freeze areas (installed per manufacturer and GFCI/professional wiring guidance). Do this annually each fall.
Which lubricants and de‑icers are safe for glass, finishes, seals and lock internals — and what should I avoid?
Safe choices: - Locks: commercial lock de‑icers for emergencies and dry lubricants for maintenance (graphite powder or PTFE/dry spray). - Seals and tracks: silicone spray or PTFE spray (water‑repellent, won’t attract grit). - Tracks and rollers: light silicone or PTFE; avoid thick greases. Avoid: - Open‑flame thawing and pouring boiling water on glass/seals. - Petroleum/oil‑based lubricants (multi‑use WD‑40) inside lock cylinders long‑term — they displace water short‑term but leave residues that attract dirt. - Heavy road salts directly on exposed aluminum without rinsing — chloride salts speed corrosion.
What tools and materials should I buy for winterizing and emergency thawing (shopping list)?
Basic kit: - Commercial lock de‑icer and graphite/ PTFE dry lubricant. - Silicone spray (clear) or PTFE spray for seals and tracks. - Hair dryer (or portable heat gun on low setting, for short controlled use). - Bottle brush, pipe cleaners, cotton swabs for weep holes. - Small flathead and Phillips screwdrivers, hex keys for roller adjustment screws. - Shop vacuum or hand vacuum to clean track debris. - Rubbing alcohol (90%+) for lock emergency use. - Plastic scraper and plastic putty knife for ice removal. - Replacement weatherstripping, door sweep, and roller assembly (model‑specific). - Portable heated snow/ice mat (optional) and GFCI‑protected outdoor outlet or extension. - Safety gloves and eye protection.
Step‑by‑step: how do I clean and clear a frozen track and weep holes without damaging the door?
1) Remove loose snow/ice with a plastic scraper; don’t use metal tools on tracks or glass. 2) Vacuum the track to remove grit and debris. 3) Locate and clear weep holes using a pipe cleaner, bottle brush or compressed air from the outside so water can drain. 4) Apply warm air (hair dryer) to melt remaining ice slowly; collect melt water with towels and direct it away. 5) Wipe dry and spray a thin film of silicone or PTFE lubricant on the track and seals. 6) Test door operation and adjust rollers if needed. Avoid hot water or flame; work gradually to prevent refreeze in cavities.
How to Keep Patio Door Open in Wind Safely
Step-by-step ways to hold a patio door open in wind safely, fix rattling, and adjust tracks, rollers, and locks.